The School of Traditional Skills brings together experts in homemaking, homesteading, gardening, and real food topics. September 12-15 you have the chance to attend an amazing and FREE Summit featuring the following speakers:
Joel Salatin on Reclaiming Pasture
Justin Rhodes on Raising Pastured Chickens
Melissa K Norris on Garden Season Extension
Paul Gautschi on his Back to Eden Garden method
Carolyn Thomas on Pressure Canning (Yay!!!)
Sally Fallon on Traditional Bone Broths (Who doesn’t have Nourishing Traditions on their shelf yet?)
Lisa Bass on Vegetable Fermentation
Anne of All Trades on Milk Goats
Brandon Sheard on Traditional Salt Curing of Pork
Brian Lowell on Raised Bed Gardens
Maureen Diaz on Sour Dough Bread (I love my sourdough you know!)
Harvey Ussery on Homestead Egg Laying Chickens
If any of these topics peaks your interest check it out! Live sessions will be available for replay so you won’t have to worry about missing out on your favorite topic.
Note: This post contains affiliate links from School of Traditional Skills, Homesteading Family, and Amazon.
If you’re a woman and you’ve had a baby, you may find that you have trouble with varicose veins. The tendency toward varicose veins is hereditary. My grandmother had them, my mom had them, and I’ve always struggled with them. Typically they’ve not bothered me outside of pregnancy but every once in a while they flare up. Standing or sitting for long periods of time can aggravate them and make them painful. What to do?
Well, I’ve found some different strategies and techniques over the years that have helped. One of the most basic is to elevate your legs above hip level. But if they are really bad, that might not be enough. Maybe one of the following strategies will help you. Pay attention to the contraindications to the herbs listed below if you are pregnant or breastfeeding.
Note: Nothing suggested below is intended to be a substitute for professional medical advice. Always seek the advice of your physician or other qualified health provider with any questions regarding the best treatment options if you suffer from varicose veins.
Always do a skin test on a small area before applying any of these remedies to the skin to test for any allergic reactions or irritation.
1. Diluted Cypress Essential Oil. I’ve used this with good success for years. Cypress increases circulation to a particular area of the body. I dilute about 15-20 drops of cypress essential oil into 2 ounces of carrier oil. Do your research as to the dilution ratio you should use. I like the Education page at Hopewell Essential Oils for this information. Create an account and log in to access this information. When applying oils, always apply and massage from the affected area up towards the heart. Do not apply below the vein you are trying to treat as you want the blood in the vein to be able to move back up towards the heart and not pool backwards in the vein which could cause a clot. Avoid Cypress if you have any allergies to any of the plants in the Cedar or Juniper plant families.
2. Diluted Helichrysum Essential Oil. Always dilute any essential oil in a carrier oil (I like olive oil). Apply to the varicose veins in the same way described for Cypress above. Helichrysum is expensive, so Cypress is a very effective and affordable alternative.
3. Avoid hot, apply cool. Heat can worsen varicose veins. Avoid hot baths. Instead take cool baths or use cool compresses. Use ice packs for 20 minutes a day on the affected areas.
4. Witch Hazel. This extract is an astringent and helps tone tissues. It can help strengthen and tone the walls of the vein so that they are more likely to hold their shape and not weaken causing the blood to pool in painful pockets.
5. Infused Witch Hazel Liniment or Herbal Poultice or paste. Make your own liniment by infusing witch hazel with herbs that improve circulation to make it even more effective. Or make a poultice or paste of dried herbs to apply directly to the skin. Liniments and poultices are for external use only.
Choose from some of the herbs below to make an herbal paste or use them to infuse into your witch hazel. You can choose a single herb or a medley of them based on what you have on hand. Instructions for using herbs in paste form are given below. Be sure that you do your research for contraindications for any medical conditions that you may have.
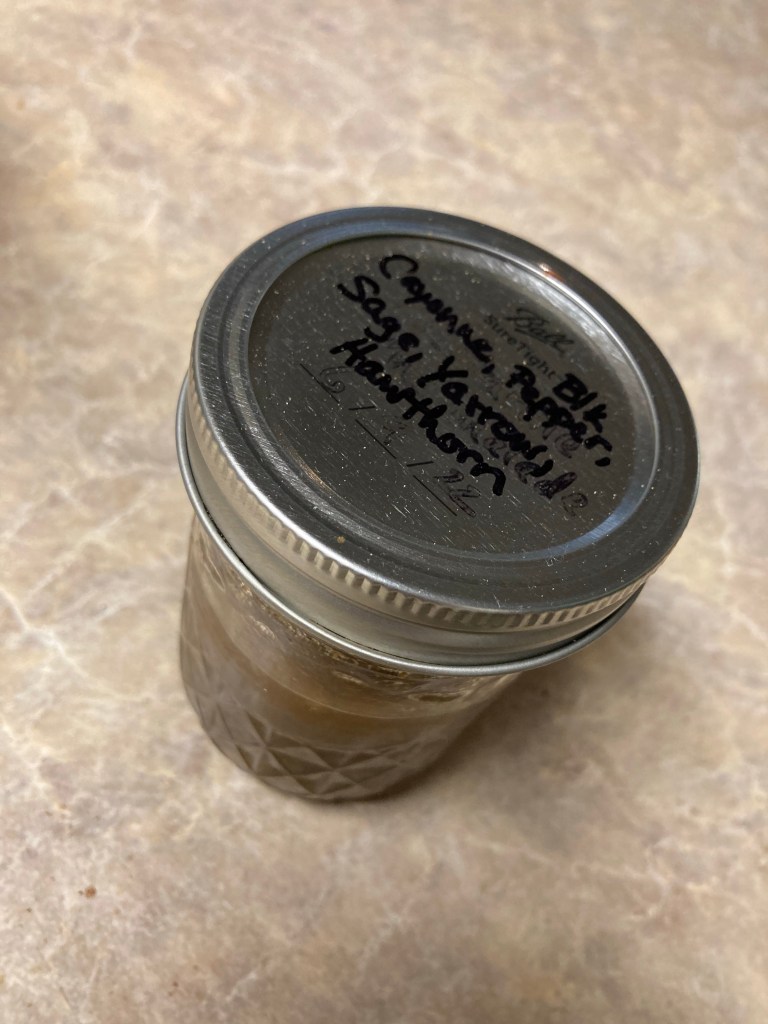
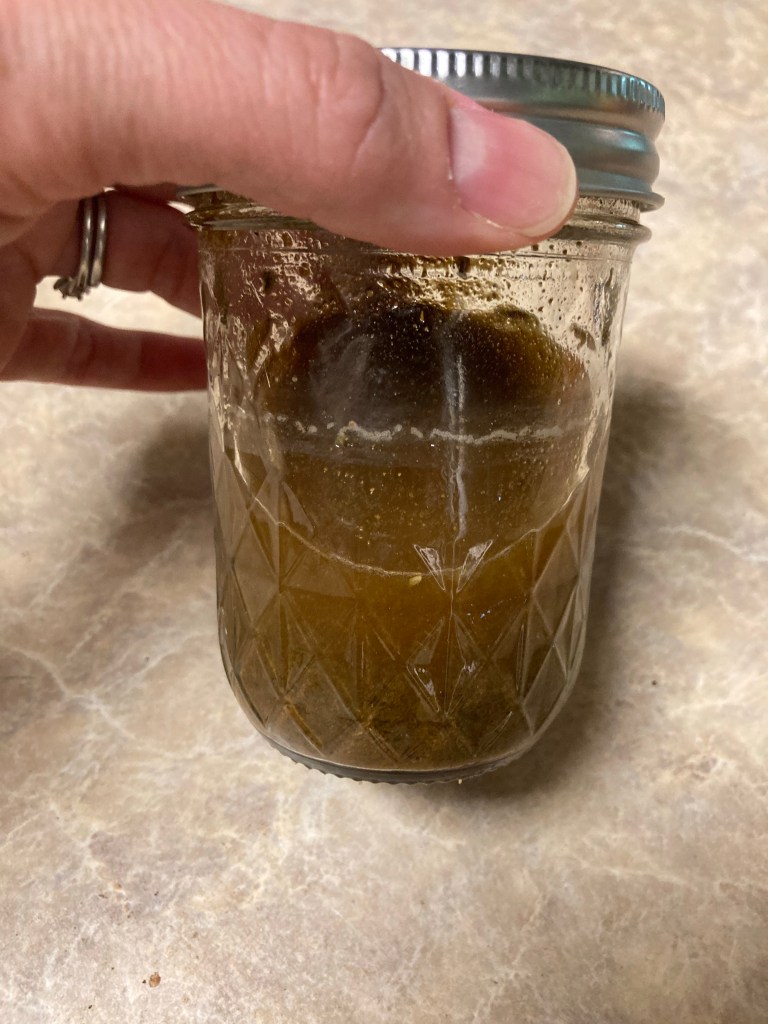
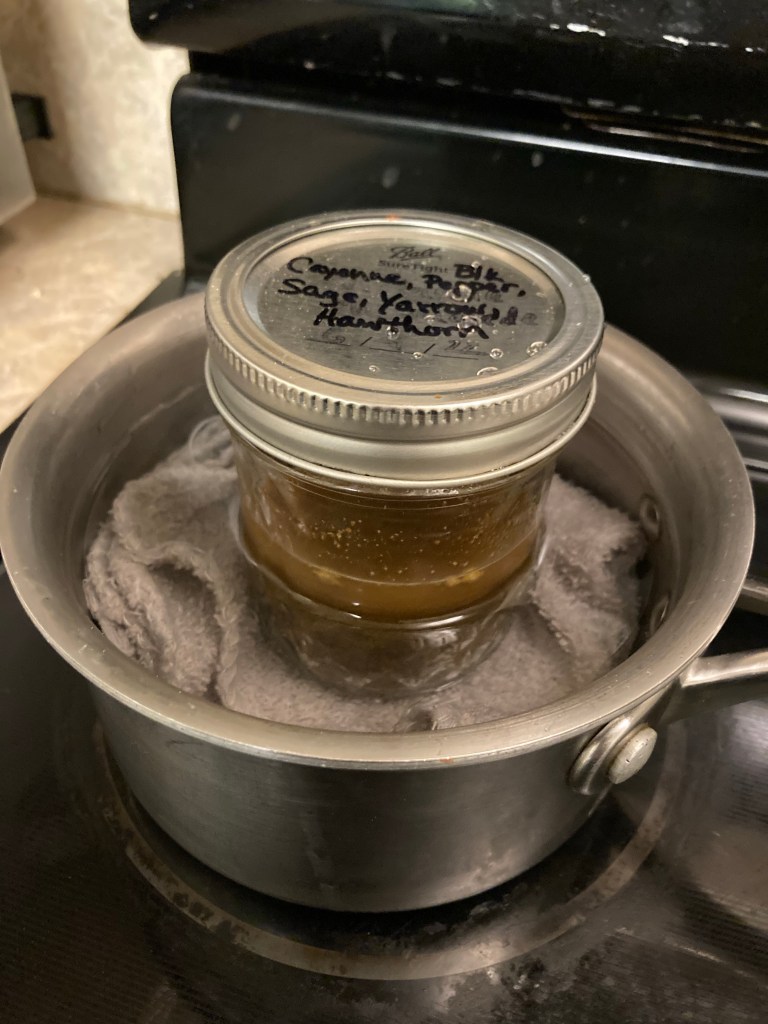
Powdered cayenne, black pepper, and sage, with dried hawthorn and yarrow, infused into witch Hazel using the quick stovetop method described below.
Cayenne Pepper – Cayenne increases circulation. You can make a paste with it by adding a little water, apply it to small area of the affected vein (do a skin test first to check for irritation and cayenne can cause redness due to the heat it brings to the skin), and cover the area with a band aid or gauze bandage.
Turmeric – This herb is an anti-inflammatory. Just like cayenne, a paste can be made from turmeric and applied to the skin. Be careful though. Turmeric stains EVERYTHING yellow and it won’t come out. It will stain your skin, clothes, and bedding. Be sure to cover the area well to avoid ruining your clothes or other cloth covered surfaces.
Black Pepper – Increases circulation like cayenne pepper. Infused into witch hazel or blend and apply as a paste directly to the skin.
Sage – This plant is part of the mint family and acts as an astringent toning the veins. Infuse into which hazel or use powdered sage as a paste. Caution: Do not use or use minimally if you are breastfeeding as it can dry up your milk supply.
Hawthorn – Use hawthorn berries and flower as an infusion. Hawthorn is considered a cardiovascular tonic. It opens blood vessels and improved circulation. Can also be used as a tea.
Yarrow – This herb in the Aster/Sunflower family supports circulation and heals and tones tissues. Infuse into witch hazelor drink as a tea. Caution: Do not use yarrow in large amounts during pregnancy. Avoid if you have any seasonal allergies to ragweed or any other plants in the sunflower family.
Two ways to make an Infused Witch Hazel Liniment:
A. Slow Countertop Method: If you are making this remedy for future use and you have the time, place your powdered or dried herbs into a jar. Fill the jar 1/3 full with plant material and 2/3 with witch hazel. Leave about 1 inch of headspace at the top. The herbs will expand as they absorb the liquid. Shake daily for 2-3 weeks. Strain into a clean jar using a coffee filter or cheesecloth. Should be shelf stable for a long time if all the plant material is strained well.
B. Quick Stove-Top Method: When you need relief right away, fill the jar with plant material as described above and place the jar on top of a small washcloth in a small sauce pan filled with water. Turn on the heat and let the water come to a simmer. Once you see bubbles, turn off the heat and let the jar sit until cool. Strain off the herbs into a clean jar using a coffee filter or cheesecloth. Apply as described below.
Applying the Liniment:
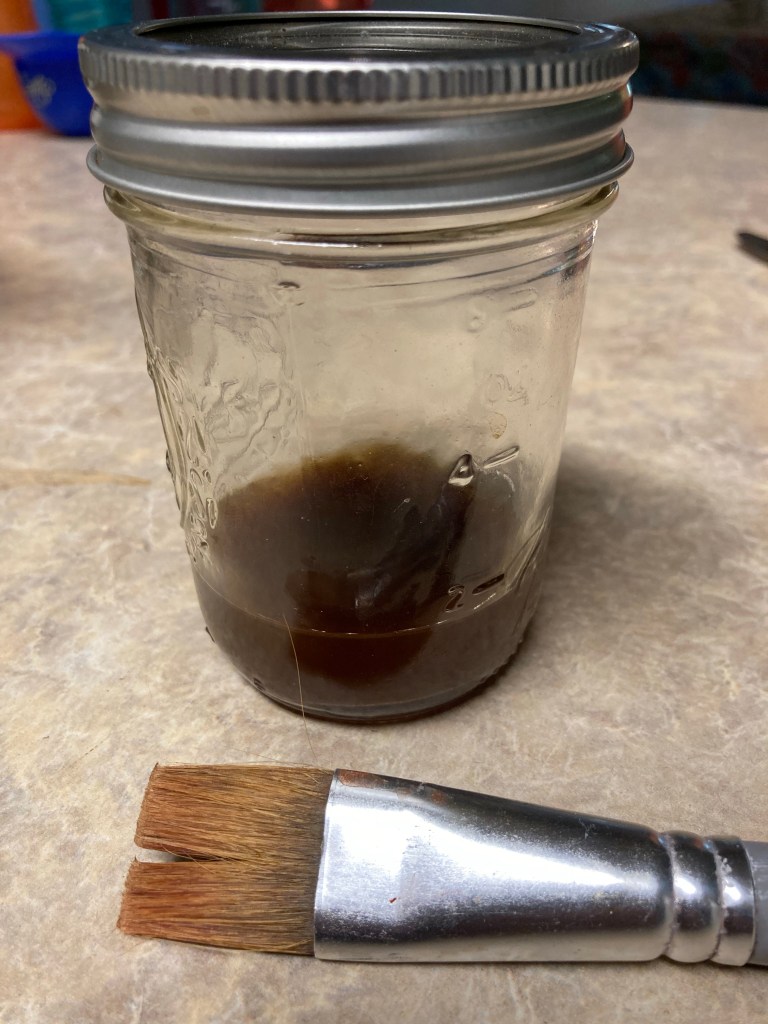
To apply the liniment, brush onto the skin using a wide, clean, dry paint brush, makeup brush, or even pastry brush. Let it dry and apply several more layers. This is called a soft cast. Cover with a gauze bandage or cotton cloth to avoid it rubbing off on your clothing or furniture. Leave on overnight or longer to allow it to soak into the skin, reapplying as needed. Be aware that cayenne or turmeric can stain the skin and clothes.
Infused Witch Hazel Liniment, strained and ready to apply to the skin. For external use.
After a long summer road trip, the herb infused witch hazel gave me overnight relief from a painful varicose vein in my leg that was aggravated from long hours sitting in the car.
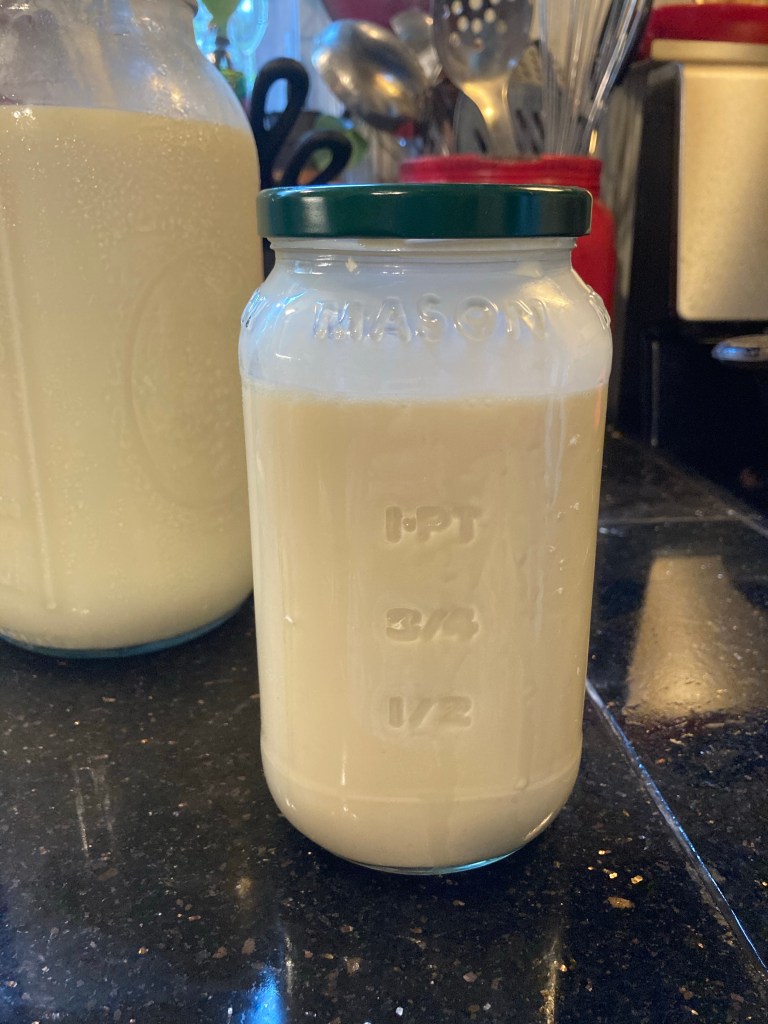
My wheat sourdough starter (half all purpose and half whole wheat), my delicious fermented cranberry lemon honey, my gluten-free sourdough starter, and my homemade wild sour cream.
My family and I hit the road this summer for a 3,000 mile road trip to visit family, and these little guys came along for the ride.
I packed them carefully in my electric cooler and at each place we stay I’ve been able to bake bread for my family, cranberry lemon scones for the aunts, uncles, and cousins, GF bread for my SIL, and most importantly, I can keep my clabber culture going so that I can make cheese once we get home. It needs to be fed weekly and would have certainly died while we were away if I had left it at home.
Ferments can behave differently during the summer. Changes in temperature, humidity, barometric pressure, elevation, all affect how your cultures perform and you need to know them well enough to adjust your technique accordingly. At the lake where we are at a higher elevation than at home in New York, my sourdough and yeast breads rise faster, and my clabber takes longer to culture because of the cooler temperatures. Each ferment has a personality. You have to get to know it and adjust how you use it accordingly. For example, I have to watch the rise on my breads much more closely and reduce the amount of yeast that I use. I have to allow more time for my clabber to set up for fresh homemade sour cream.
I plan to start some new cheeses when I get home. And you’ll probably see some new fermented vegetables on my counter once I get back to my garden.
What’s bubbling in your kitchen this summer?
Need some ideas for what to ferment first? Or do ferments intimidate you and you don’t know where to start? Homesteading Family has some great courses to get your creative juices flowing and things bubbling in your kitchen. Check out their courses on The Art of Homemade Breadwhich includes sourdough, Fearless Fermenting, and Practical Homemade Dairy (affiliate links).
I have a wild clabber culture that I have kept going this last year with one batch of raw milk that my in-laws were able to bring me. I make a little batch of wild sour cream with it every week. If we don’t eat the sour cream, I use it up in baking to keep the culture going. I even travelled with my culture while we were away this summer to try and keep it alive since it needs to be cultured weekly.
My summer goal is to use this wild culture to make hard cheese for my son. If I had a regular source for raw milk, this would be easy. But I don’t. So my aim is to use store bought milk and my wild culture to achieve a cheese that my son can eat since store bought cultured dairy products and cheese brother him. Yet he does well on raw milk and my wild clabber culture.
We’ve done without cheese for so long, I’m really hoping that I can develop a successful recipe using my wild culture and store milk so that we can add back in some of our favorite family recipes. Let’s face it, pizza and enchiladas just aren’t the same without cheese.
So stay tuned as I post my progress. And I’m the meantime, if you’d like to delve into the world of homemade dairy, check out Homesteading Family’sHomemade Dairy Masterclass (affiliate link). It’s how I’ve learned and you definitely don’t have to have a milk animal to make all the recipes in the class. Everything I’ve made so far – butter, dairy creamer, sour cream, wild buttermilk, feta, ricotta, hard cheese, have been made all using store bought milk. And there are so many recipes that I haven’t tried yet. It’s definitely chock full of content.
And if you see this post before July 27, 2022, be sure to register for a free Practical Homemade Dairy Webinar (affiliate link) if you want to get your feet wet and see if the Masterclass is right for you.
I’m excited to make some cheese! Who wants to join me?
Mix the above adding flour gradually until the texture of the dough is like a thick cream cheese frosting.
Prepare Topping/Filling:
Combine…
1/2 cup flour
6 tbsp cold butter
1/3 cup brown sugar
1.5 tsp cinnamon
Use a pastry cutter or your fingers to combine the butter, flour, sugar, and cinnamon until the mixture is crumbly or the butter is pea size.
Loosely mix 1/3 of the amount of your filling into your batter. Reserve the rest.
Prepare your pans:
Grease your pan(s) and fill halfway with batter. Sprinkle 1/3 more of the prepared topping/filling on top of the batter. Fill with more batter until the pan(s) are 2/3 full. Sprinkle the remaining 1/3 of the topping on the top and use your fingers to poke some down into the batter like you would if denting focaccia bread.
Rise:
Cover with a lid or a damp tea towel. Let the bread rise for 1-4 hours until 1/2 inch from the top of the pan.
Bake:
Bake covered if you have a lidded pan or baking dish for 20 minutes at 400 degrees, and 20-30 minutes more uncovered at 350 until the internal temp measures 190 degrees.
Cool and enjoy.
Makes 1 large 5×13” Pullman style loaf, or two 9×5” loaf pan loaves.
The Art of Homemade Bread will teach you all you need to know if you want to learn more about making healthy bread at home.
Did you know that you can set your kombucha up for a second ferment to add flavor and fizz?
I just poured up a new batch tonight into these flip top bottles and added blood oranges. I let it sit for 2-3 more days until the orange is infused and it becomes this beautiful pink color. It will also become fuzzy and carbonate which can be quite refreshing.
If you decide to try a second ferment, use glass bottles with flip top lids or plastic bottles. Don’t use a glass container with tight fitting lids as it will continue to ferment and build up pressure and jars have been know to break from the pressure build up. It’s a good idea to burp your container once or twice a day.
What flavor will you try? Some of my favorites are….
Blackberry Lime – add fresh or frozen berries and lime slices or zest.
Blueberry Lemon – add fresh or frozen blueberries and lemon slices or zest.
Raspberry – add fresh or frozen raspberries.
Strawberry Basil – add fresh or frozen strawberries and fresh basil.
Mango – add fresh or frozen mango. (Watch out! The sugars in this one cause it to ferment fast.)
Orange – add fresh orange slices with the rind. I like blood oranges, as you can see.
CranberryGinger – add fresh or dried cranberries and grated ginger root.
Or come up with your own combo. Use what you have or whatever yummy flavors strike your fancy.
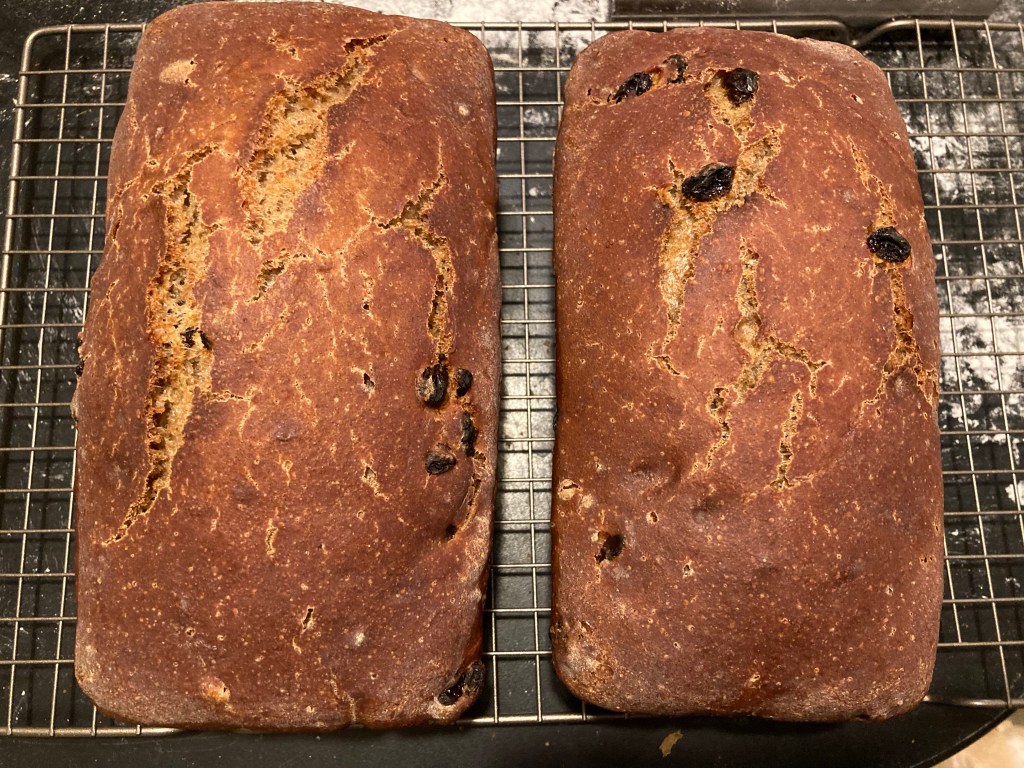
Forgive the misshapen loaf. One spot stuck and a bit a surgery had to be performed in order to remove it from the pan. Thankfully that doesn’t affect the taste. 😊
Banana Blueberry Batter Bread:
3 cups sourdough starter (fed or unfed)
1 1/2 tsp salt
1 tsp vanilla
1/4 cup oil
1/3 cup heavy cream
1 cup water
1/2 cup honey
1/2 cup sugar
3 very ripe, mashed bananas.
Mix all of the above together and then add…
2 cups all purpose flour
1 1/2 tsp baking soda
1 tbsp cinnamon
2 cups fresh or frozen blueberries
1-3 cups whole wheat or whole grain spelt flour. Add 1/2 cup at a time until the batter is about the texture of softened cream cheese.
Pour into greased loaf pans.
Cover and let it rise for about an hour or until it almost reaches the top of the pan.
Bake at 400 degrees for 50-60 minutes. Internal temp should register 190 degrees.
Remove from pans immediately and place on cooling rack to cool. Makes 2 loaves.
Enjoy!
And if you want to learn more, The Art of Homemade Bread will teach you all you need to know about making healthy bread at home.
This is another yummy way to use up extra sourdough starter. For other flavors search for “batter bread” in the search box here on the blog. It should be at the top of the sidebar on the right if you are reading on a computer, or if you are mobile it should be all the way at all the bottom under the comments.
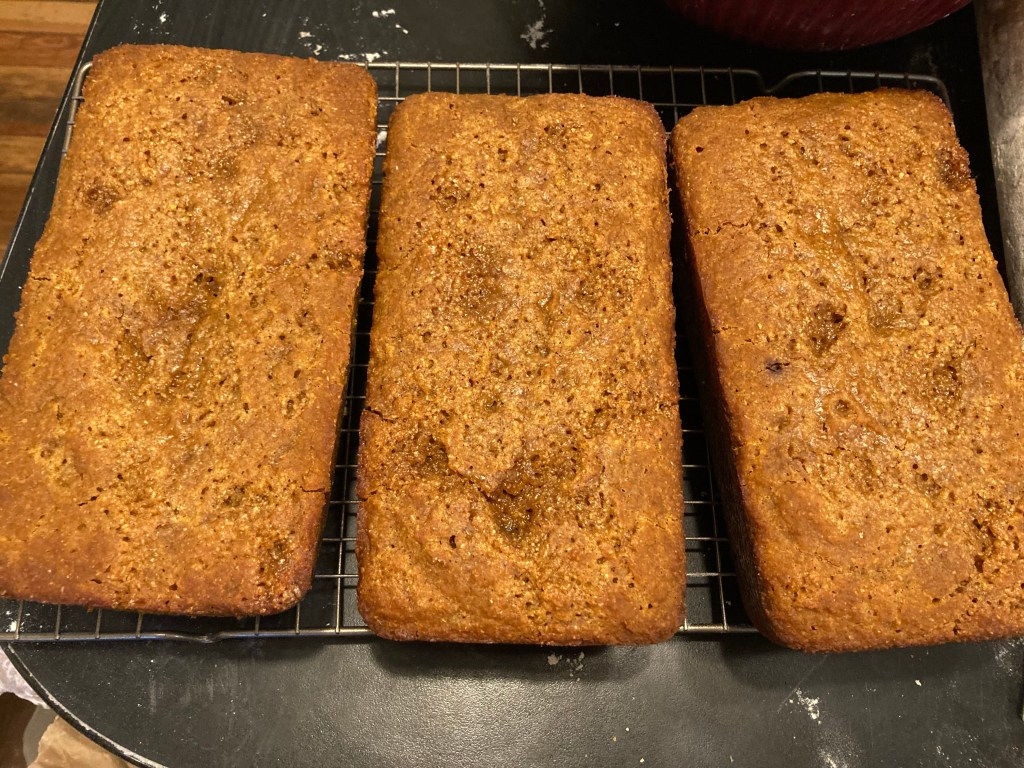
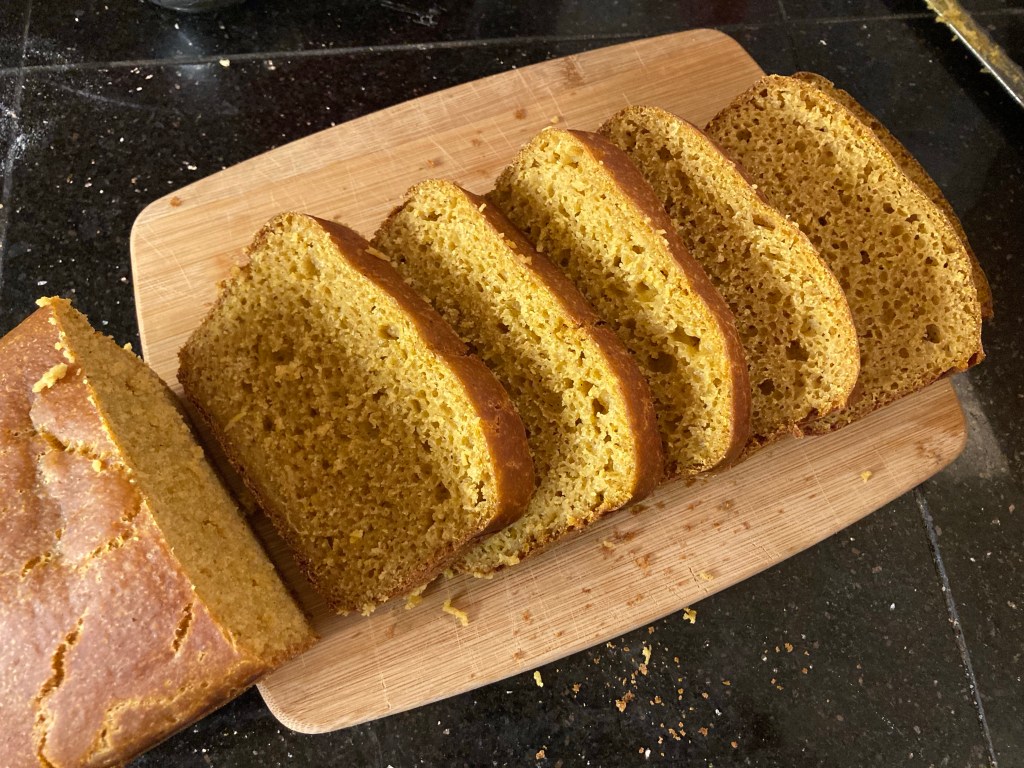
Pumpkin Spice Batter Bread:
2 cups sourdough starter
1/3 cup oil
3/4 cups honey
3 eggs
1/2 cup milk or water
1 tsp salt
1/2 tsp nutmeg
1 tsp vanilla
1 – 16 oz can of pumpkin (or 2 cups of pumpkin purée)
Mix the above ingredients until well combined.
Add…
1 1/2 tsp baking soda
All purpose or whole wheat flour 1/2 cup at a time until the mixture resembles a very thick pancake batter that is about the texture of softened cream cheese or buttercream icing.
Pour into 2 greased loaf pans or a large greased casserole. Let it rise in a warm place for 1-2 hours.
Bake 400 degrees for 45-50 minutes, until a tester comes out clean or the internal temp reaches 190 degrees.
And if you want to learn more, the Art of Homemade Bread will teach you all you need to know about making healthy bread at home.