
 My Herb Box
Susanna was related to Maggie Lane by marriage. Everyone knew her as the local herbalist and midwife. If you were sick or having a baby everyone called upon her before they called the doctor. She kept a small shed outside her house that was full floor to ceiling with dried herbs. I wish I had her knowledge, experience and stores of herbs. As it is I content myself with what I know from books and my “shed” is a wooden suitcase in the corner stuffed with plastic bags full of herbs.I have found good ways to use them in my home. I use herbs in cooking, cleaning and to improve our health. Some of my uses and recipes are below.
If you are looking for a basic herb course to help you get started on your home herbalism journey, Homesteading Family’s Herbal Medicine Cabinet course is a great starting point. It will help you learn how to make safe, effective, herbal remedies for your family.
Herb Shed Pages:
My Herb Recipes:
Tummy Drops: soothes the tummy and digestive tract, helps with constipation, sleep aid. This is a glycerine tincture. 2 tbl. catnip, 2 tbl. lemon balm, 2 tbl. milk thistle, 1 tbl. lavender, 1 tbl. fennel.
Cough Syrup: This is not a cough suppressant. It helps calm coughing spasm while making the cough productive and strengthening the immune system against infection. While this recipe is my own, the idea was taken from Rosemary Gladstar’s Herbal Recipes for Vibrant Health. Recipe: 1/2 tsp. fresh grated ginger, 2 tsp. lemon juice, 2 tsp. catnip, 1 tsp. lemon balm, 1 tsp. licorice root, 1 tsp. fennel, 1 tsp. slippery elm, 1 tsp. cinnamon, orange peel, 10 cloves (whole), 1 clove of garlic coarsely chopped. Simmer the mixture above in 4 cups of water until reduced by half. Stir in 1/2 cup honey. Add one drop of peppermint oil as a preservative and relaxant, and bottle. Will keep in the refridgerator 1-2 months. Note: If this mixture is too strong for small children, dilute 1-2 tsp. in 6-8 oz. of catnip tea.
Rubbing Oil: I have used this on scratches, cuts, scrapes, any dry rash, and eczema.
Recipe: 1 oz. olive oil, 2 tsp. almond oil (optional), 4 drops lavender essential oil, 2-3 drops clove oil. (Note: clove oil is very potent. If using this on an infant or child, test on yourself first to be sure that it isn’t too strong.)
Throat Soother: Use the recipe for the rubbing oil above and add 2 drops of tea tree oil. This is useful for sore throats and swolen glands due to colds and flu. External use only.
Sleepy Drops & Headache Drops:
This is a glycerine tincture. 1/4 cup catnip, 1 tbl. lavender.
Essential Oils Air Freshener:
Add 2 drops of clove oil and 2 drops of orange oil (or you oil of choice) to 2 oz. of distilled water. Bottle in a sprayer. Shake before use.
Diaper Spray: This combination is good to clean and soothe a messy bottom.
Combine 1 tbl. of olive oil (or jojoba oil) two drops of tea tree oil, two drops of lavender oil. Put in a 2 oz. spray bottle and fill with witch hazel.
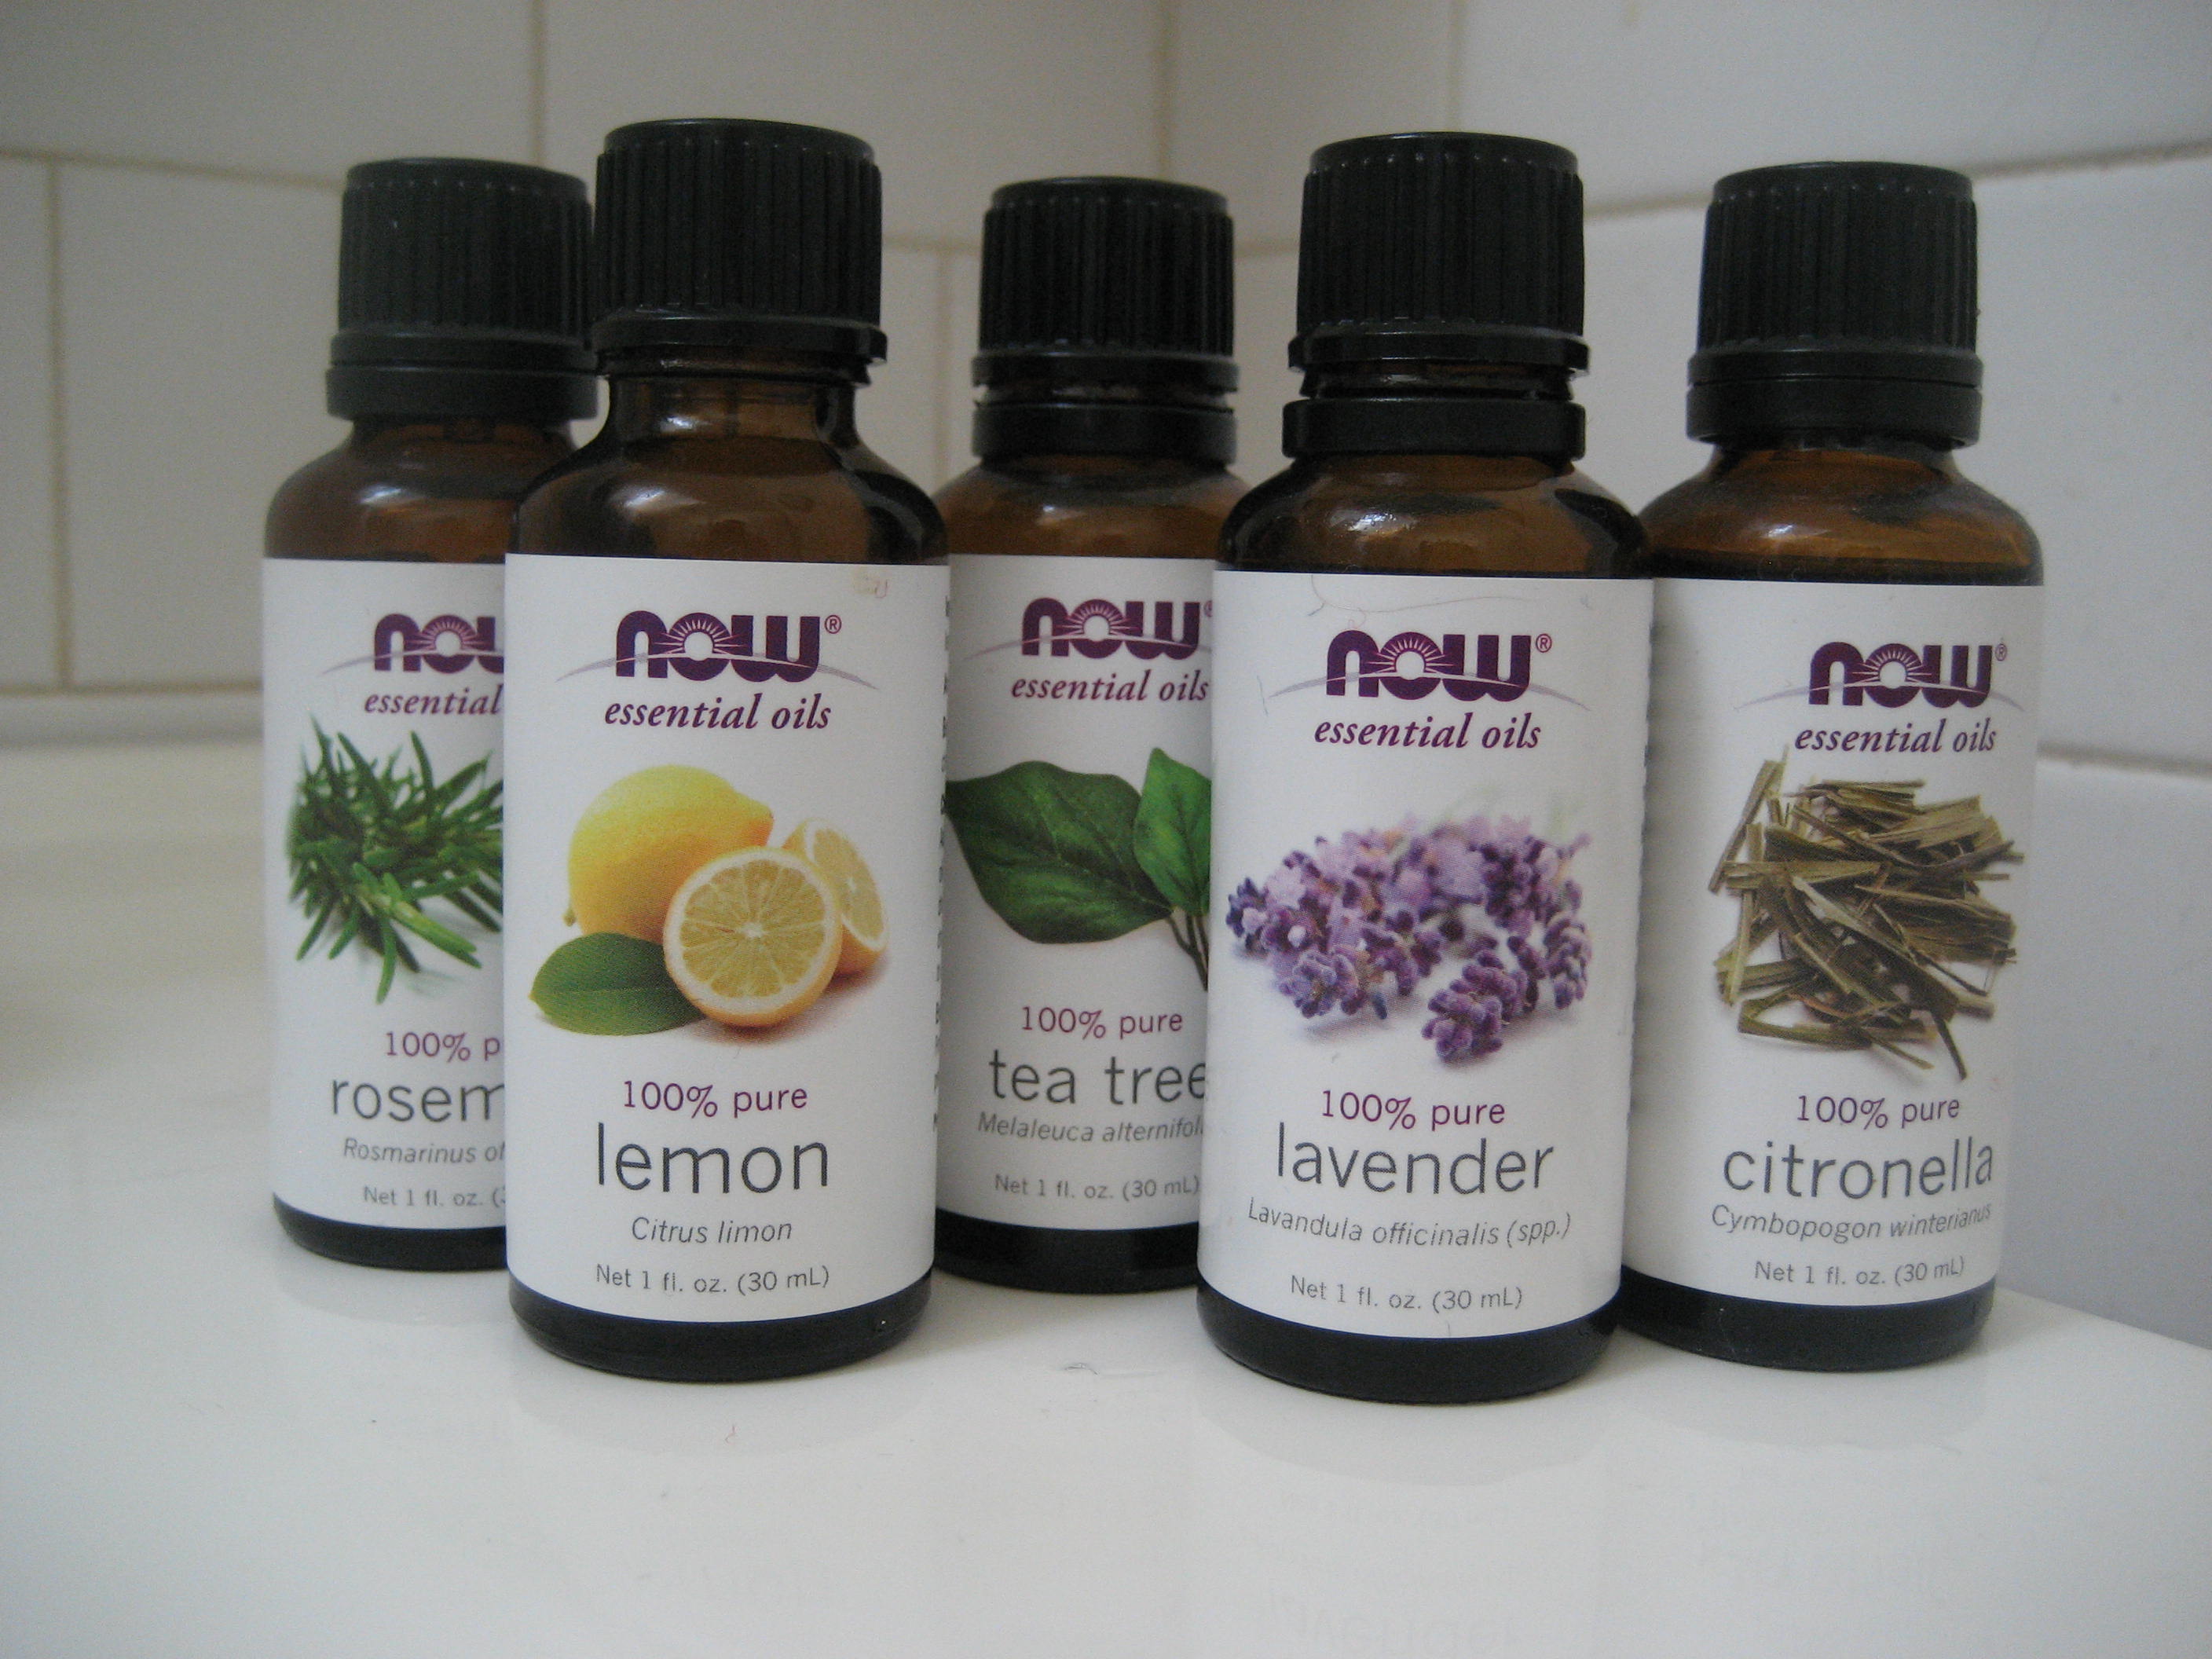 Insect Repellent: My boy reacts severely to mosquito bites. Unfortunately he reacts just as severely to chemical bug sprays. Here’s how I make my own. It smells great and is super easy. Fill a 2 oz. spray bottle (travel size from the drug store) with olive oil. Add the following essential oils: 6 drops citronella, 5 drops of tea tree, 4 drops of lavender, 4 drops of lemon, and 3 drops of rosemary. That’s it! Proportions aren’t set in stone though. If you don’t have one of the oils then add a few extra drops of one of the others on the list.
Ear Drops:
For ear infections combine 2 drops of tea tree oil in 2 tbls. of olive oil. Put the combined oil mixture in a small heat proof bowl. Place this bowl in a larger heat proof bowl and pour boiling water into the large bowl until it is 1-2 inches from the top of the small bowl (be careful not to splash the hot water in the bowl with the oil). Let the oil warm until it is body temperature. You can test it on your wrist as you would test a bottle of milk to be sure that it is not too hot or too cold. You can also put a drop in your own ear to be sure that it is a comfortable temperature. The temperature is important as if it is too hot it will be painful and if the oil is cold, it will cause the ear muscle to contract which will be painful as well. Lay your child on his side and using a dropper put drops of oil in the ear canal until it is filled. Then gently massage around the ear opening, behind the ear and neck area. This will help be sure that the oil reaches all the way into the ear canal and the massage will help drain any fluid that may have built up in the ear drum. Put a cotton ball over the ear and let the child lay on his other side until all the oil drains. I usually do this twice daily until the ear is feeling better. Usually this only takes 2-3 treatments. If your child doesn’t like getting water in their ear, he may not like this either but it works very well. If you don’t have tea tree oil on hand you can also coarsely chop 2-3 cloves of garlic and cover them with olive oil letting them soak for 2-3 hours or overnight. Warm this oil as treat as described above. Continue to massage behind the ear and down the front of the neck until they are well (see description for throat soother above for more massage details).
If your child needs some additional relief the warmth of a homemade rice/popcorn bag will help. I made mine with rice and buckwheat hulls. Heat in the microwave for a 20-30 seconds for a small to medium size bag. Test to be sure it’s not too hot. You can also add a drop each of eucalyptus oil and lavender oil to the bag if you want. Have your child lay the affected ear on the bag or hold it over it. The lavender will be soothing and the eucalyptus will help further with healing. This is an especially useful too if they wake in the middle of the night and can’t go back to sleep. The warmth and oils are soothing and often it will be enough to help them get to sleep again.
Natural Homemade Sunscreen:
Many of us slather oursleves with sunscreen during the summer without a second thought. Well, I gave its use a lot of thought over the two sleepless weeks that we had last summer after my son reacted to the sunscreen that we put on him. I don’t know what ingredient it is that he reacted to, but I know that I wasn’t willing to try it again to out. From that point on I was on a quest to make my own with ingredients that I felt were safe for him, and without spending a lot of money. Here are the results….
 First, let’s start with the quick and easy version.
Quick and Easy Sunblock: Mix equal parts desitin with your favorite lotion. Desitin is 40% zinc oxide. So, with this ratio you should end up with a sunscreen that is 30 spf. I haven’t tried this myself as I make our lotions so I can control the ingredients (see my recipe below) but in theory it should work and it would be safer than most store bought sunscreens.
Quick and Easy Sunscreen – waterproof version: Thanks to my friend for suggesting the idea of adding some liquid lanolin (like that used for lanolizing wool diaper covers) to the desitin/lotion mix above for making a quick and easy waterproof version of the sunscreen. 🙂 Thanks Kasey! You’d probably need to use a double boiler method to mix this one.
Now, for the more complicated, but customizable sunscreen recipe.
Though there are a quite a few ingredients, this isn’t hard to make. Most of all it’s fairly inexpensive. And the best thing about is that you can tailor it to fit your needs. If you don’t have a particular ingredient or are allergic to something that I used, substitute something else. The key is the ratio of zinc oxide ointment to other ingredients. If that is stable, then you should have an end product that is about 20% zinc oxide based (approximately 30 spf). This recipe makes approximately 2 cups of sunscreen (probably about 12 oz in weight). And technically, this is a sunblock since the zinc oxide mineral actually blocks the sun rather than reflecting the rays through chemical reactions like most sunscreens.
 List of ingredients that I used: coconut oil, herbs of choice (optional), cocoa butter, shea butter, lanolin, almond/olive oil, beeswax, essential oils (option), vitamin e oil (optional), desitin, and aloe gel.
This is what I did. Feel free to alter it to suit your own needs.
If you want to use herbs, then the first step is to make an herbal infused oil. I infused 1/2 cup coconut oil with green tea, lavender and lemon balm. I chose these because they are anti-inflammatory and benefit the skin. Use the herbs of your choice or omit this step and just use plain coconut oil. (Don’t substitue olive oil here… you need an oil that is solid at room temperature.)
Making an herbal infused oil is fairly simple. (If you don’t plan to do this skip down to the next paragraph). Fill a glass jar with your oil and herbs of your choice. Use a 1:4 ratio of dried herbs to oil. Put the lid on and place in a sauce pan or stock pot. Place the jar inside the pot sitting on a folded washcloth (you don’t want the jar to be touching the bottom of the pan directly.) Fill the pot with water so that the water level comes just above the level of oil/herbs in the jar. Bring to a low boil. Turn off the heat, cover the pot and let it sit for one hour. Strain off the herbs while still warm using chessecloth, tea strainer or old t-shirt. Now move on to the next step.
Using a double boiler (I put a medium size pyrex bowl on top of a sauce pan that contained about two inches of water in the bottom) add the herbal infused coconut oil (or plain coconut oil) and heat until it is melted. Next add 2 tbl. of cocoa butter, 2 tbl. shea butter and 2 tbl of lanolin (this makes it water proof), 2-4 tbl. of almond (or olive oil) to the hot oil mixture. When these ingredients are all melted and combined add 2 tbl. beeswax. When the beeswax has melted now is the time add a few drops of your favorite essential oils (lavender, sweet orange oil, etc. but do not use bergamot, lemon, lime, grapefruit, angelica root, or lovage root as these are photosensitive and will cause sunburn) and vitamin e oil (good for the skin and acts as a preservative). So far we have made a lotion. Now to make it a sunscreen.
You have two choices at this point. 1) You can add zinc oxide which is a powdered mineral. You can buy it in bulk online. 2) Or if you’re like me and don’t want to spend the money on a bag of zinc oxide you can grab a tube of desitin which is 40% zinc oxide. Many of you have this around your house anyway or can get it inexpensively. So as long as you don’t mind the smell of desitin, stir in 3 tbl. of desitin once you have your lotion base ready.( You would use less if you decided to use zinc oxide powder – maybe 1 tbl. though I haven’t done this.) When this is combined add 1/3 cup aloe gel and stir until combined. I suggest doing all the mixing in the double broiler bowl. It can be a messy process if you are transferring in between containers. Store in a glass jar or resuse a salve or lotion container with a screw top lid. I like to buy the little plastic 1 oz. jars with screw top lids in the travel section at Walmart to put mine in for travel. I keep a little jar in my diaper bag so that I always have some if I need it.
 This should last about a year (or more if refrigerated when not in use). And it works really well. We just returned from a week at our family’s lake house where my daughter spent most of every day swimming or playing in the sand at the side of the lake. Not one sun burn. And we only applied it once per day. It’s economical too. $1 per oz. or less compared to $5 per oz. for Badger Baby brand. It spreads smoothly and cleanly and doesn’t look white on your skin (though I can’t compare the results on this for dark skinned people). If you try it, let me know what you think.
Have a happy summer!
(Notes: If your end product ends up being too thick after cooling, then add more aloe gel. If it’s too thin, then reheat in your double boiler and add more beeswax.)
 Infected Bites and Cuts:
What do you do when your little one gets a bite or a cut and it swells up, gets red, hard, and hot? This indicates an infection. The best remedy I have found is to apply a hot herbal tea bag. The moist heat of the tea bag acts as a poultice and draws out the infection. The best tea bag to use are these Melaleuca Herbal Tea bags. Unfortunately, there are no resellers of this product. They are only available from the manufacturer. So, in lieu of these, use the most basic (fewest ingredients) herbal tea that you have on hand. Good examples would be chamomile (healing, good for the skin), green tea (anti-inflammatory), etc. In a pinch you could even use a black tea bag. Or if you have other dried herbs on hand (plantain, comfrey, yarrow, etc.) make a poultice out of these using a strip of old t-shirt, a tea towel, or cheesecloth. Apply the tea bag or herbal preparation when it is just cool enough not the burn the skin (test it as you would a bottle of milk by touching it to your wrist). Apply to the affected area and leave on until it cools. Note: in the presence of infection you should only use your herbs, tea bag, our poultice for a single use. Use fresh herbs and cloths with each application.
Making Glycerine Tinctures:
The following two recipes (Well Drops and Cough & Cold Drops) are glycerine tinctures. Herbal tinctures can be made with alcohol, vinegar or vegetable glycerine. The latter is recommended for children due to the absence of alcohol and the taste. Glycerine is slightly sweet and tastes better than vinegar. 🙂 Glycerine tinctures can be made with any herbs. Fill a scalded glass jar with equal parts food grade Vegetable Glycerine and water. Add in a 1:4 herb to water ratio with the dried herbs of your choice. (For example: if using 1 cup of liquid, add 1/4 cup of dried herbs.) Put the lid on the jar and place on a cloth in your crock pot. Fill the crock pot with water and cook uncovered on low for 3 days adding more water as needed. When 3 days have passed, strain the herbs with a cheesecloth, bottle and label.
 Well Drops:
I give these to my kids on a regular basis. They all love them. I take them too. I think they are delicious. All the ingredients are food, so it’s safe to give it to them every day. Garlic is the best antibiotic, nettle is so nutritious, and elderberries are great for general immune support. I give them extra if we are going anywhere that I feel that they might encounter extra germs. And at the first sign of anything, I increase their dosage to help them fight off whatever they’ve been exposed to. I credit these to keeping us cold free for the past year.
Daily Dosage Guidelines: I give my big kids 2 spoonfuls per day, pre-schoolers 1 spoonful per day, toddlers 1 dropperful per day, babies over 6 months 1-2 drops per day. These are just guidelines however. I increase or decrease the amounts depending on the child’s size, health, tolerance for these ingredients, and sickness level. Please do your own research to determine the amount you should give your children.)
 To make these drops, take a 26oz. or larger glass jar and lid and scald with boiling water.
In the jar add 1/4 cup dried elderberries, 1/4 cup nettle leaf, 2 tbl. chopped ginger, 6-8 cloves of garlic halved, and 3 cinnamon sticks.
Pour in 1 cup of Vegetable Glycerine and 1 cup of water. Put the lid on and shake gently to mix the dry ingredients in the liquid. Place the jar on a folded washcloth in the crock pot (do not place directly on the glass). Fill the crock pot with water and cook on low for 3 days adding water as it evaporates.
After it has cooked for 3 days. Strain the herbs using a cheesecloth or tea towel. Pour some boiling water over the herb mixture to extract any of the remaining juices. Rinse the jar with hot water and pour the strained liquid back into the jar. Label. Store in the fridge. Should last a year or more.
 Cough and Cold Drops:
I begin giving my son these drops at the first sign of a sniffle or cough. He gets coughs easily and they stick with him for a while. He gets well much more quickly when he takes these. Elderberries taste good and support the immune system, mullien is great for helping congestion, and wild cherry bark is good for coughs.
Into a large, scalded jar place 1/2 cup elderberries, 1/4 cup mullien, and 2 tbl. wild cherry bark. Pour in 1 cup Vegetable Glycerine and 1 cup water. Shake. Place the closed jar on a washcloth in the crockpot. Fill the crockpot with water around the jar and cook for 3 days adding more water as it evaporates. Strain the herbs out with a cheesecloth. Rebottle the liquid, label and store in the fridge for one year or more.
(Note: These should only be used for times of sickness and not on a daily basis as wild cherry bark is not always suitable for long term use.)
“Tiny Oil”
Now, before I divulge this recipe, first I must tell you the story behind it. I made this blend up when my older two were babies after I started making my own diaper spray. It contains, tea tree, lavender and clove oil. It has antibiotic, antifungal, antiviral and antibacterial properties. So, I’d rub little on whenever anyone had a cut, scrape, or bite. When they would come to me for comfort, I’d say, “Do you want a tiny bit of oil?” And so my oldest started calling it “tiny oil.” The name stuck. We still use it to fix all the ouchies (real or perceived) and everyone asks for tiny oil. It goes everywhere in the backpack with us and there is always a bottle handy. A tiny bit of oil can go a long way.
1 travel sized spray bottle
1 ounce of olive oil (or oil of your choice)
5 drops lavender
4 drops tea tree
3 drops clove oil
Shake before use and spray on. You can also spray a little on a bandaid if needed. It’s great to have at the playground when they fall and scrape their knee. Just wash the dirt off and rub this on. And I’ve also used this as teething oil. Test it on yourself first to be sure it is not too strong, but tea tree and clove are both analgesic and can help with pain if you rub it on the gums.
G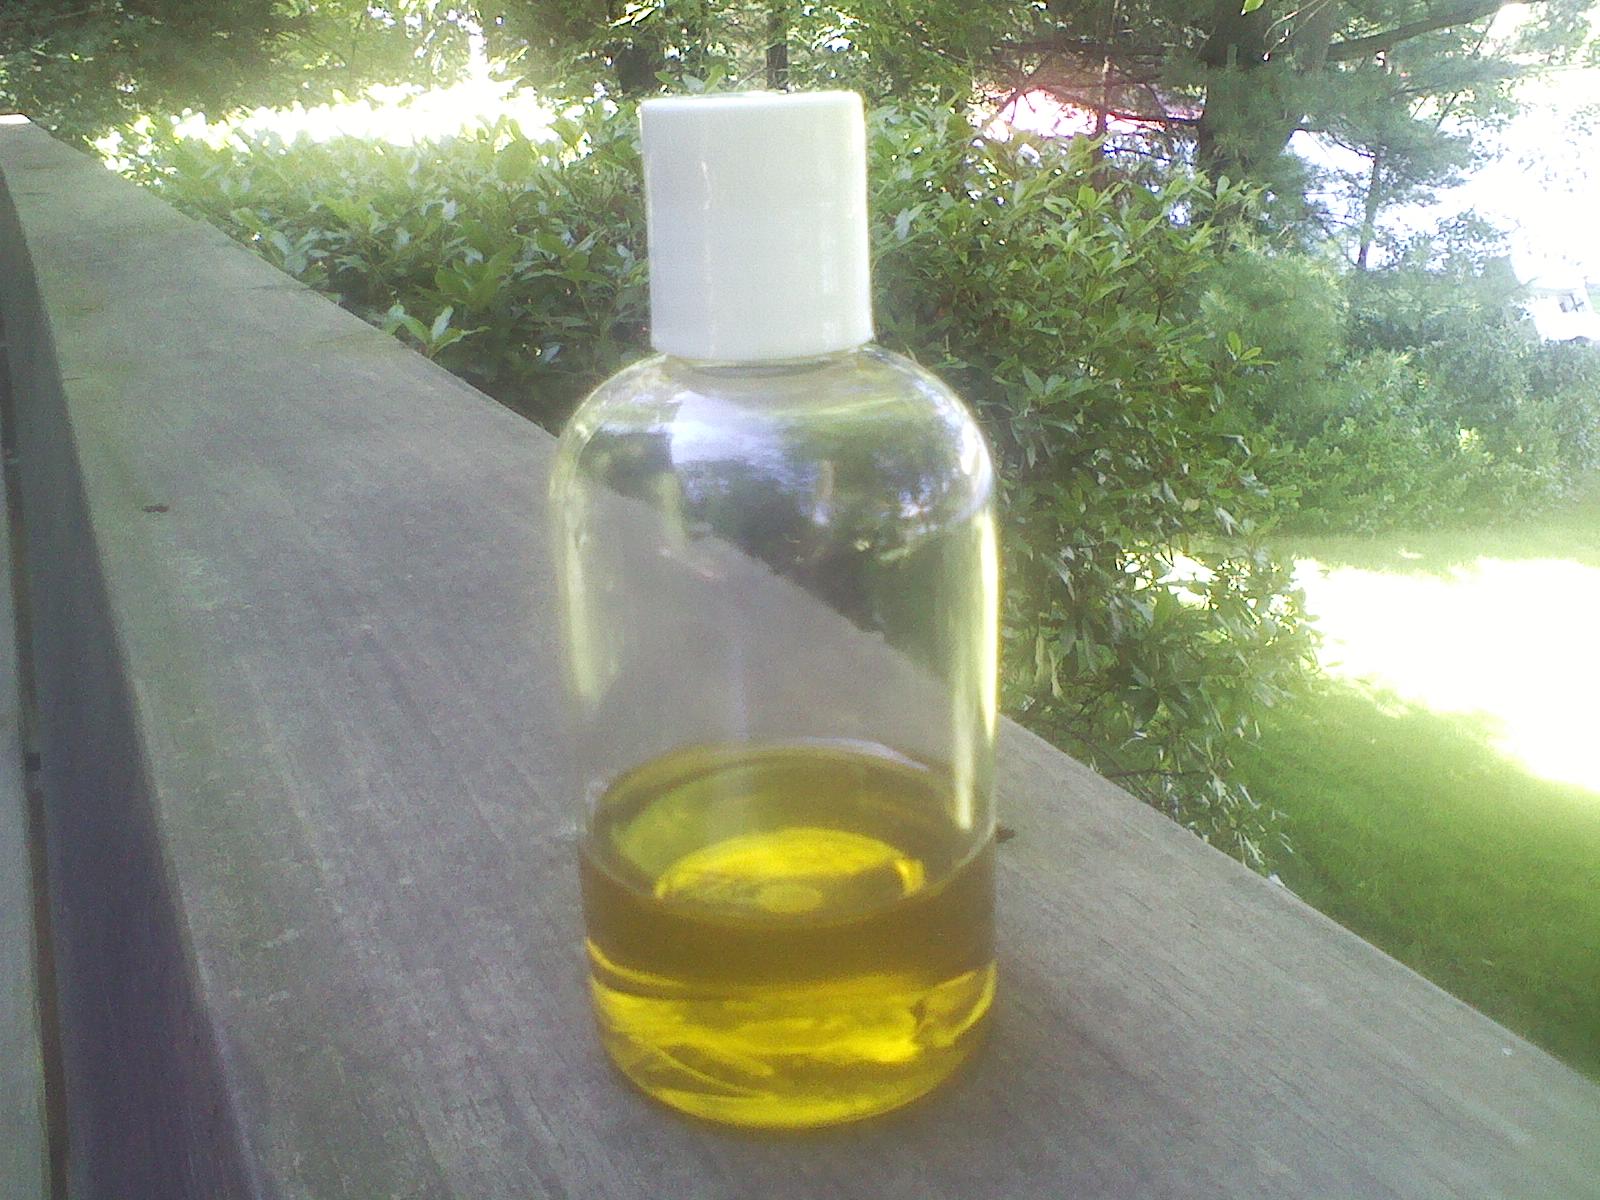 arlic Oil:
Peel and coarsely chop your garlic cloves. Put the chopped cloves in a glass jar and fill with olive oil (or oil of your choice) until the garlic cloves are covered. Put the lid on the jar and place the jar on a washcloth in a sauce pan or stock pot. Add water to the pan (pouring the water around the closed jar) until the water comes at least half way up the jar or until it reaches the same level as the oil. Turn the heat on. Once the water begins to simmer turn the heat off, and immediately strain the oil into a clean, dry jar using a mesh strainer. Note: Be sure to watch the garlic carefully as the goal here is not the cook the garlic. If the oil gets too hot the garlic will burn. You simply want to heat the oil enough so that the volatile oils from the garlic are infused into the carrier oil. Once the oil has been strained, cover the jar with a paper towel or coffee filter and secure with a rubber band. Let this sit for 2-3 days in a cool, dark place to allow any moisture to evaporate out. This will increase the shelf life of the oil. If the moisture fully evaporates, this oil will last a long time if kept cool and dark. Caution: This oil is for topical use only. It should not be consumed or used inside the ear. Oil made with fresh garlic contains a risk for botulism. While this is unlikely here as the garlic is strained out immediately so there no time for the botulism spores to grow, but because garlic is a low acid plant, caution should be taken and it should only be used externally.
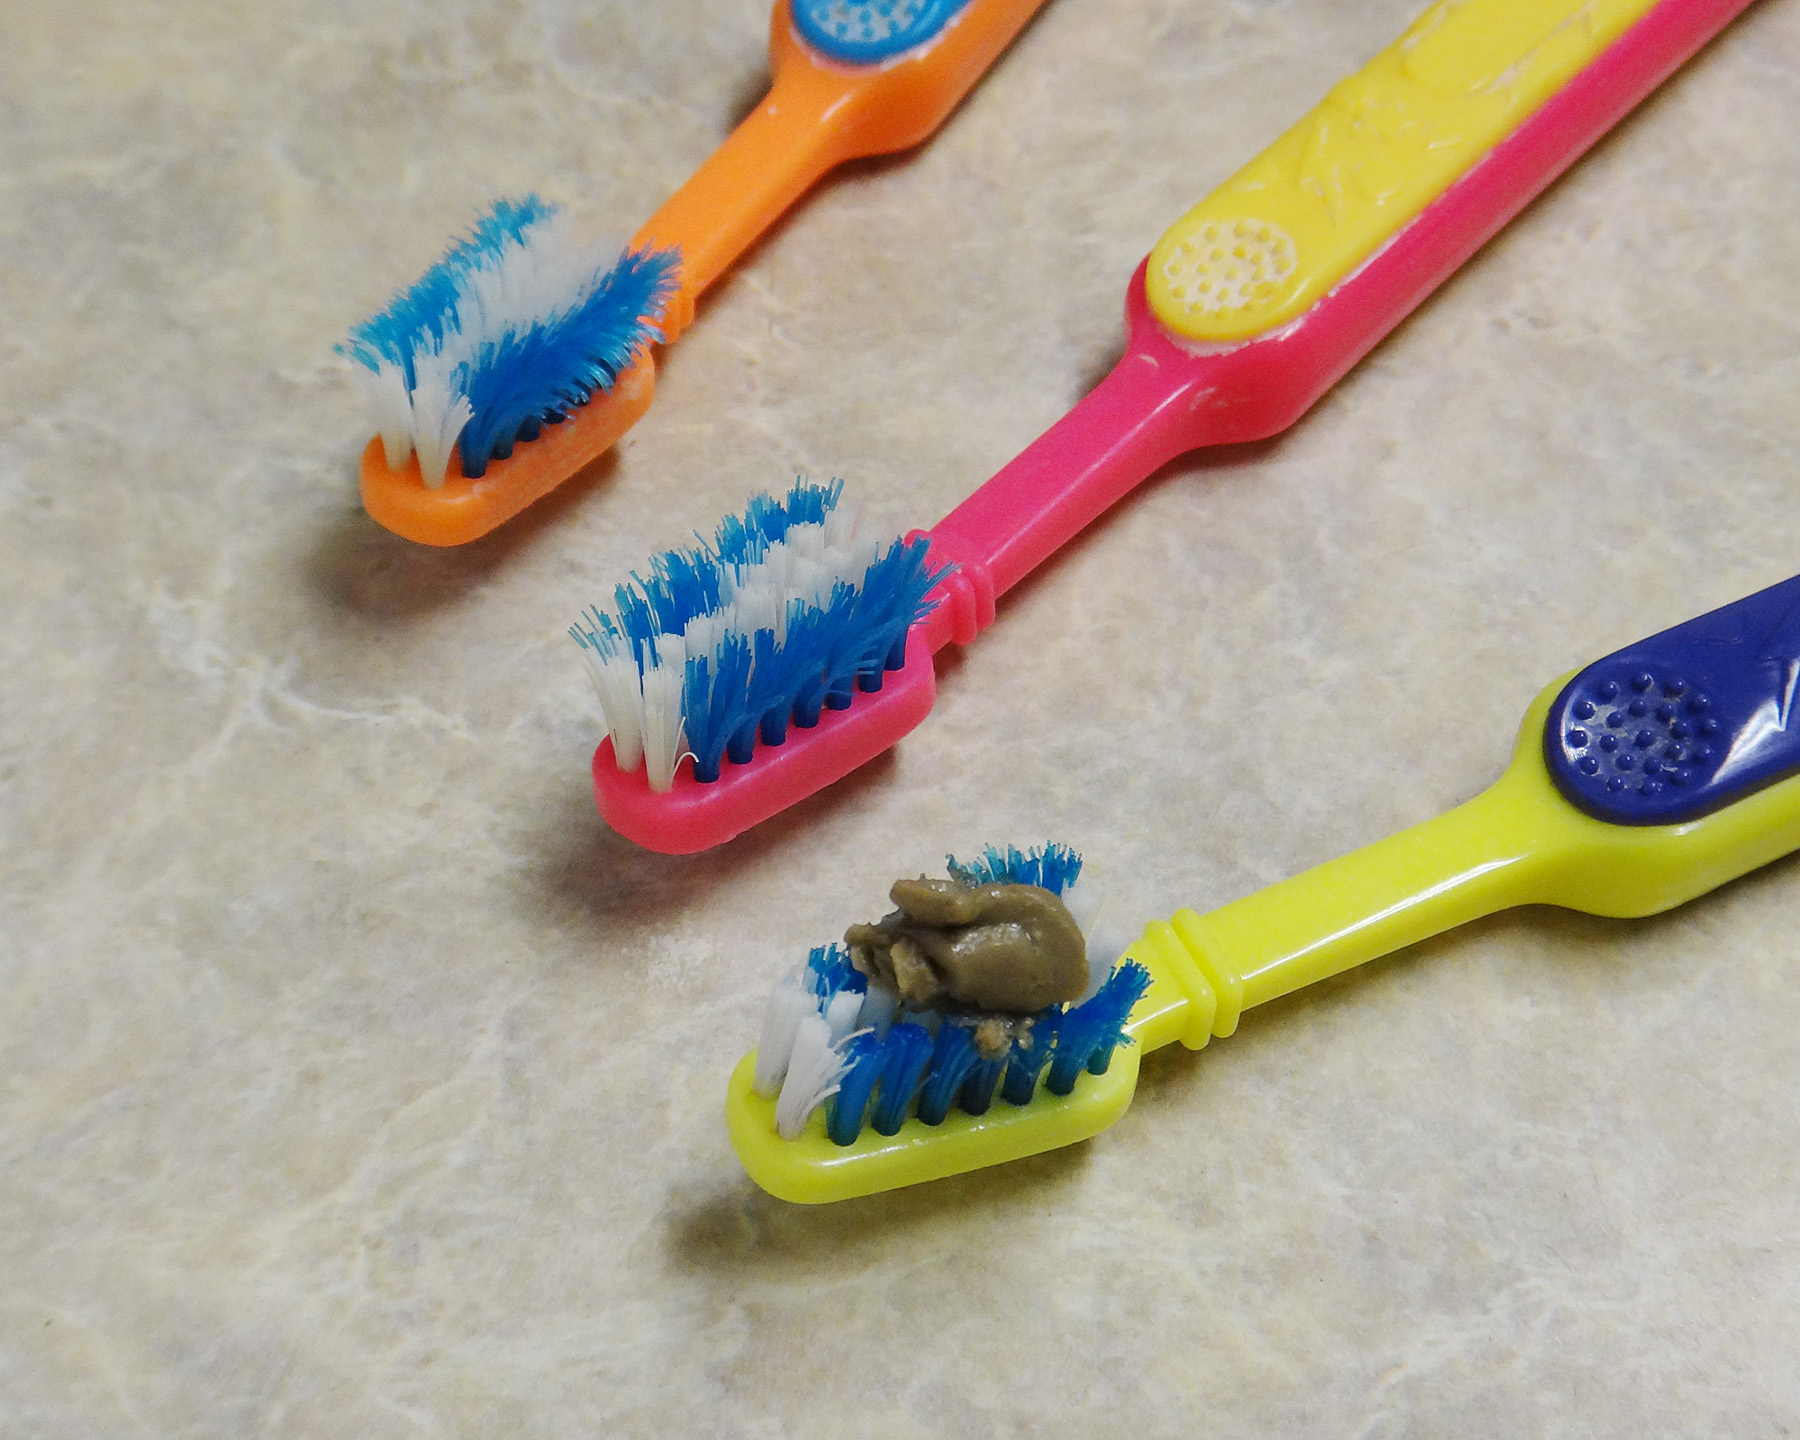 Candy Cane Toothpaste:
My son reacts to glycerine which is a main ingredient in most toothpastes. So, once again my quest to make my own. I’ve tried different online recipes but they either contain ingredients that we couldn’t use due to sensitivity (like coconut oil) or the taste was such that my kids wouldn’t use it. So, one night when the last bit of the toothpaste that they were using was all gone, I had an inspiration. Here it is. Make a very strong tea (start with 2 cups of water) with peppermint leaf (for taste and disinfecting purposes – 1/2 cup) and bit of stevia leaf (to sweeten – doesn’t take much – 1 tsp. or less). Strain and reduce to about 1/2 cup or maybe a little more. Mix your tea into bentonite clay with a popsicle stick (do not use metal utensils) until desired texture is acheived. Store in glass jar and apply to toothbrush with a popsicle stick. This toothpaste should ideally be rinsed and spit out. Since bentonite clay absorbs the toxins and bacteria from your mouth it would be best not to swallow it. However, bentonite clay is safe to ingest so if you have little ones who don’t spit out their toothpaste it’s safe for them if they swallow it. So, the next day after I had my inspiration I told my kids that I was going to make them toothpaste that tasted like candy canes. They got all excited and we’ve been using our “Candy Cane” toothpaste every since. If your kids aren’t fans of mint, experiment with other flavors. I think I might try a chai flavor for myself with cinnamon, clove, ginger and cardamon and see how that works. If you try a new flavor let me know if you find one that you like.
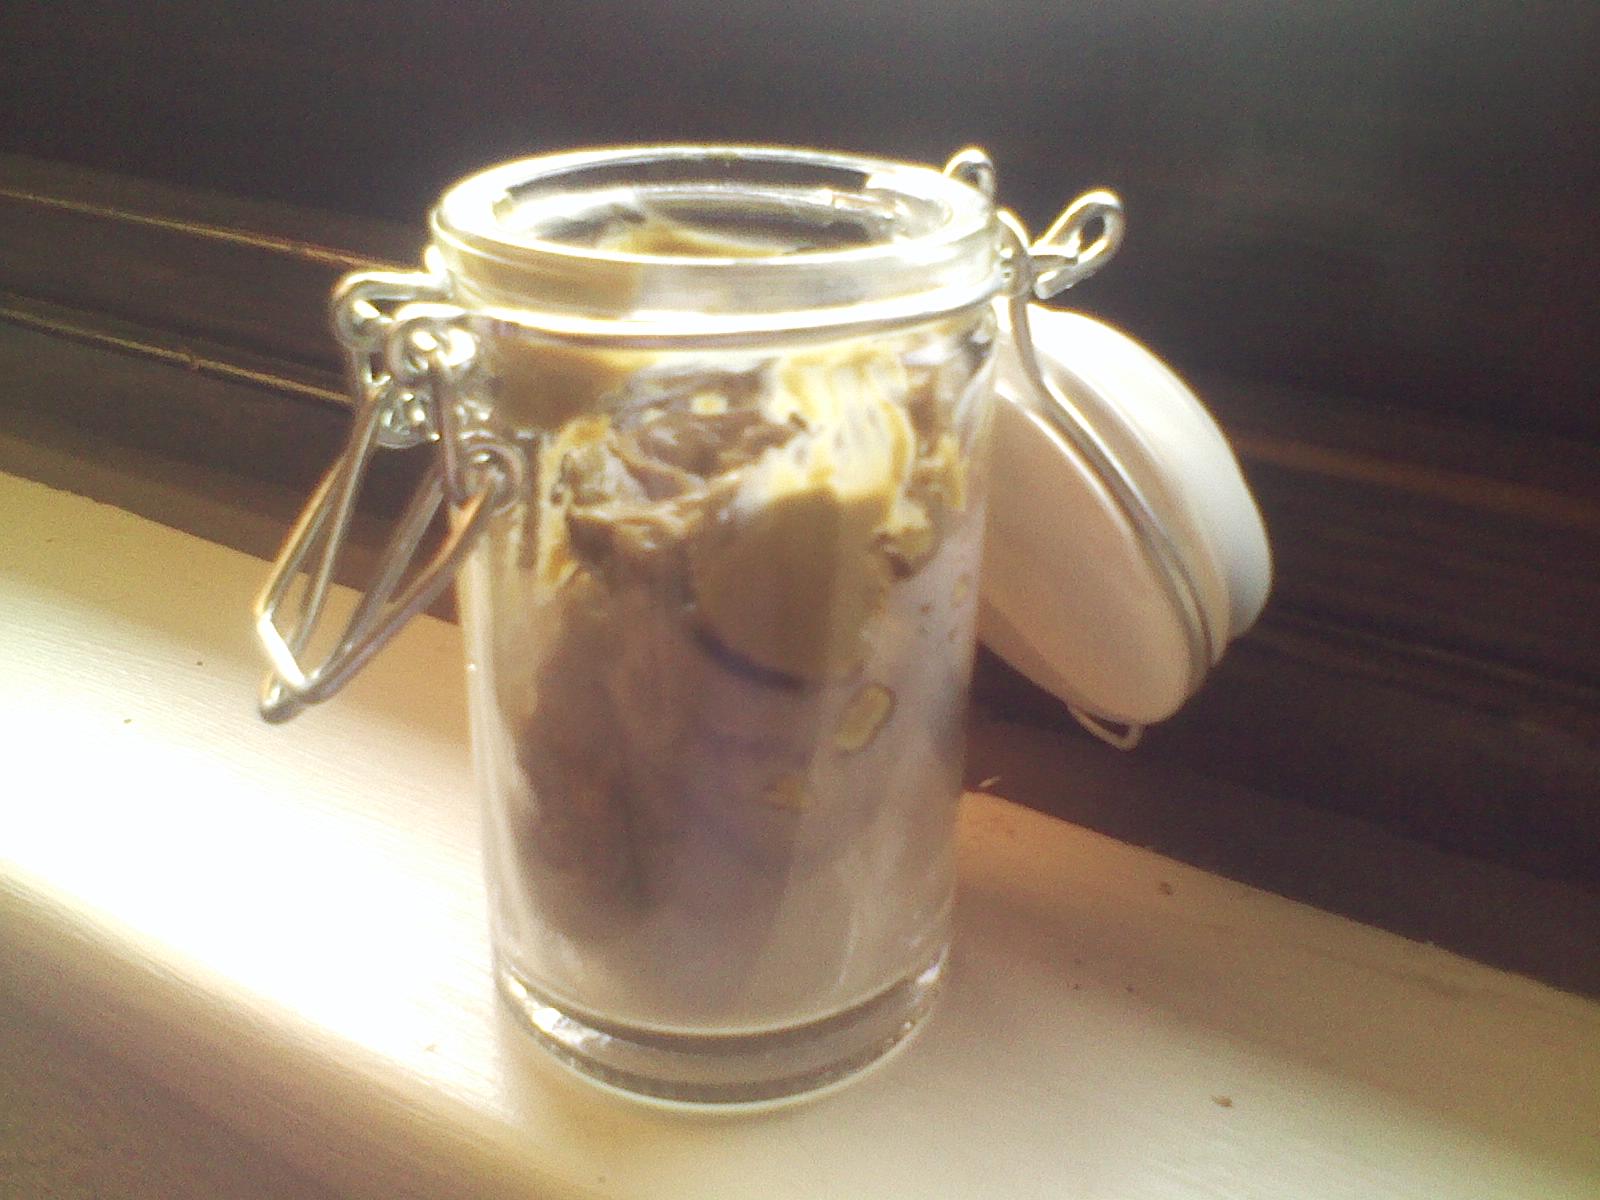 Note: I’m experimenting with finding out the shelf life of this recipe. My first batch lasted several months. Then I had a batch that went bad quickly. But, I messed that batch up. We were traveling and I put it in a plastic squeeze bottle because I didn’t have any glass containers that were small enough. I knew that storing bentonite clay in plastic was a no-no, but I tried it anyway because I didn’t have anything else that would make it through the security lines at the airport. Bentonite clay will absorb the toxins from the plastic so don’t do that. I’ll let you know how my latest batch lasts. I might try adding a bit of vitamin E oil to the next batch to see if that helps act as a preservative. I’ll update once I have more info.
But, I did find these nifty little bottles to store it in. I got mine at Hobby Lobby while traveling. They are small and glass which is just perfect for bentonite clay and my small bathroom medicine cabinet. You don’t have to buy anything though. I’ve also re-used glass pimento and olive jars too. They work just fine.
Other toothpaste flavors to try:
Mint Berry Toothpaste
Chocolate Spice Toothpaste
Chocolate Spice Tooth Powder
Other Articles and Recipes:
How to make herbal syrups.
Essential Oils Quick-reference Chart
Make Your Own Delicious Herb and Tea Blends
Mineral and Herb Deodorant Spray
Herbal Infused Vinegar
 Helpful Resources:
Prescription for Herbal Healing, by Phyllis A. Balch
Rosemary Gladstar’s Herbal Recipes, by Rosemary Gladstar
Nutritional Herbology, by Mark Pedersen
Homesteading Family’s Herbal Medicine Cabinet is a great course for beginners to get started in making safe, effective, herbal remedies for your family.

Pingback: Keep those bites away with homemade bug spray. « Maggie Lane
I love your bug spray, healthy and natural! What amount of each essential oil do you use? A dash of each?
Hi Erica. I added the amounts. Sorry, I was in a hurry when I first posted it. Glad you like it. 🙂
With the insect repellent, how much of the different oils do you use? One drop each, two drops? Please be more specific. Thanks for the help. Gail
Pingback: Homemade Zinc Oxide Sunscreen – with ingredients that you already have « Maggie Lane
Pingback: Best remedy for infected bites and cuts? A tea bag…. « Maggie Lane
Pingback: Keep your family healthy this winter – herbal drops your kid will love! « Maggie Lane
Thanks for the winter cold recipes. Will have to get some of these made and on hand.
Trying your ear drops tonight. Sad I have to try it (its for Alice) but thankful for the resource! Thanks Rachel!
Oh sad for Alice. Hope it helps. It’s always helped my kids. It should clear up. Do it once or twice a day until it isn’t bothering her anymore.