I’ve been mixing this up a lot lately. Three friends have had babies in the last few weeks. I didn’t discover herbal sitz baths for postpartum use until my second child. This is one of my favorite remedies. It makes a great gift for a new mom. It really helps speed and facilitate postpartum healing. Be sure to bathe the baby too. This mix will help disinfect and heal the baby’s cord stump.
All of these herbs are helpful in some way. Opinions may vary, but I think the most important to postpartum healing are shepherd’s purse, yarrow and red raspberry. But, if you don’t have one of the herbs below, that’s okay. They are all beneficial in some way. Just omit the ones you are missing and substitute more of one of the others in the list. Keep in mind though that lavender, yarrow and shepherd’s purse are fairly potent and should not be used in excess. Use the others as the base herbs and add lavender, yarrow and shepherd’s purse in moderation. A little of those goes a long way. Also, chamomile and yarrow should be avoided if you have an allergy to sunflower, safflower or dandelion.
4 parts Red Raspberry Leaf
2 parts Plantain
2 parts Comfrey
2 parts Calendula
2 parts Shepherd’s Purse
1 part Lavender
1 part Yarrow
1 part Chamomile
1/2 -1 tsp. Sea Salt
To use, steep one cup of the herb mix in four cups of water to make a strong tea. Strain the herbs an add the tea to your bath water. You can also add this to your peri-bottle and apply after you go to the bathroom to disinfect and heal.
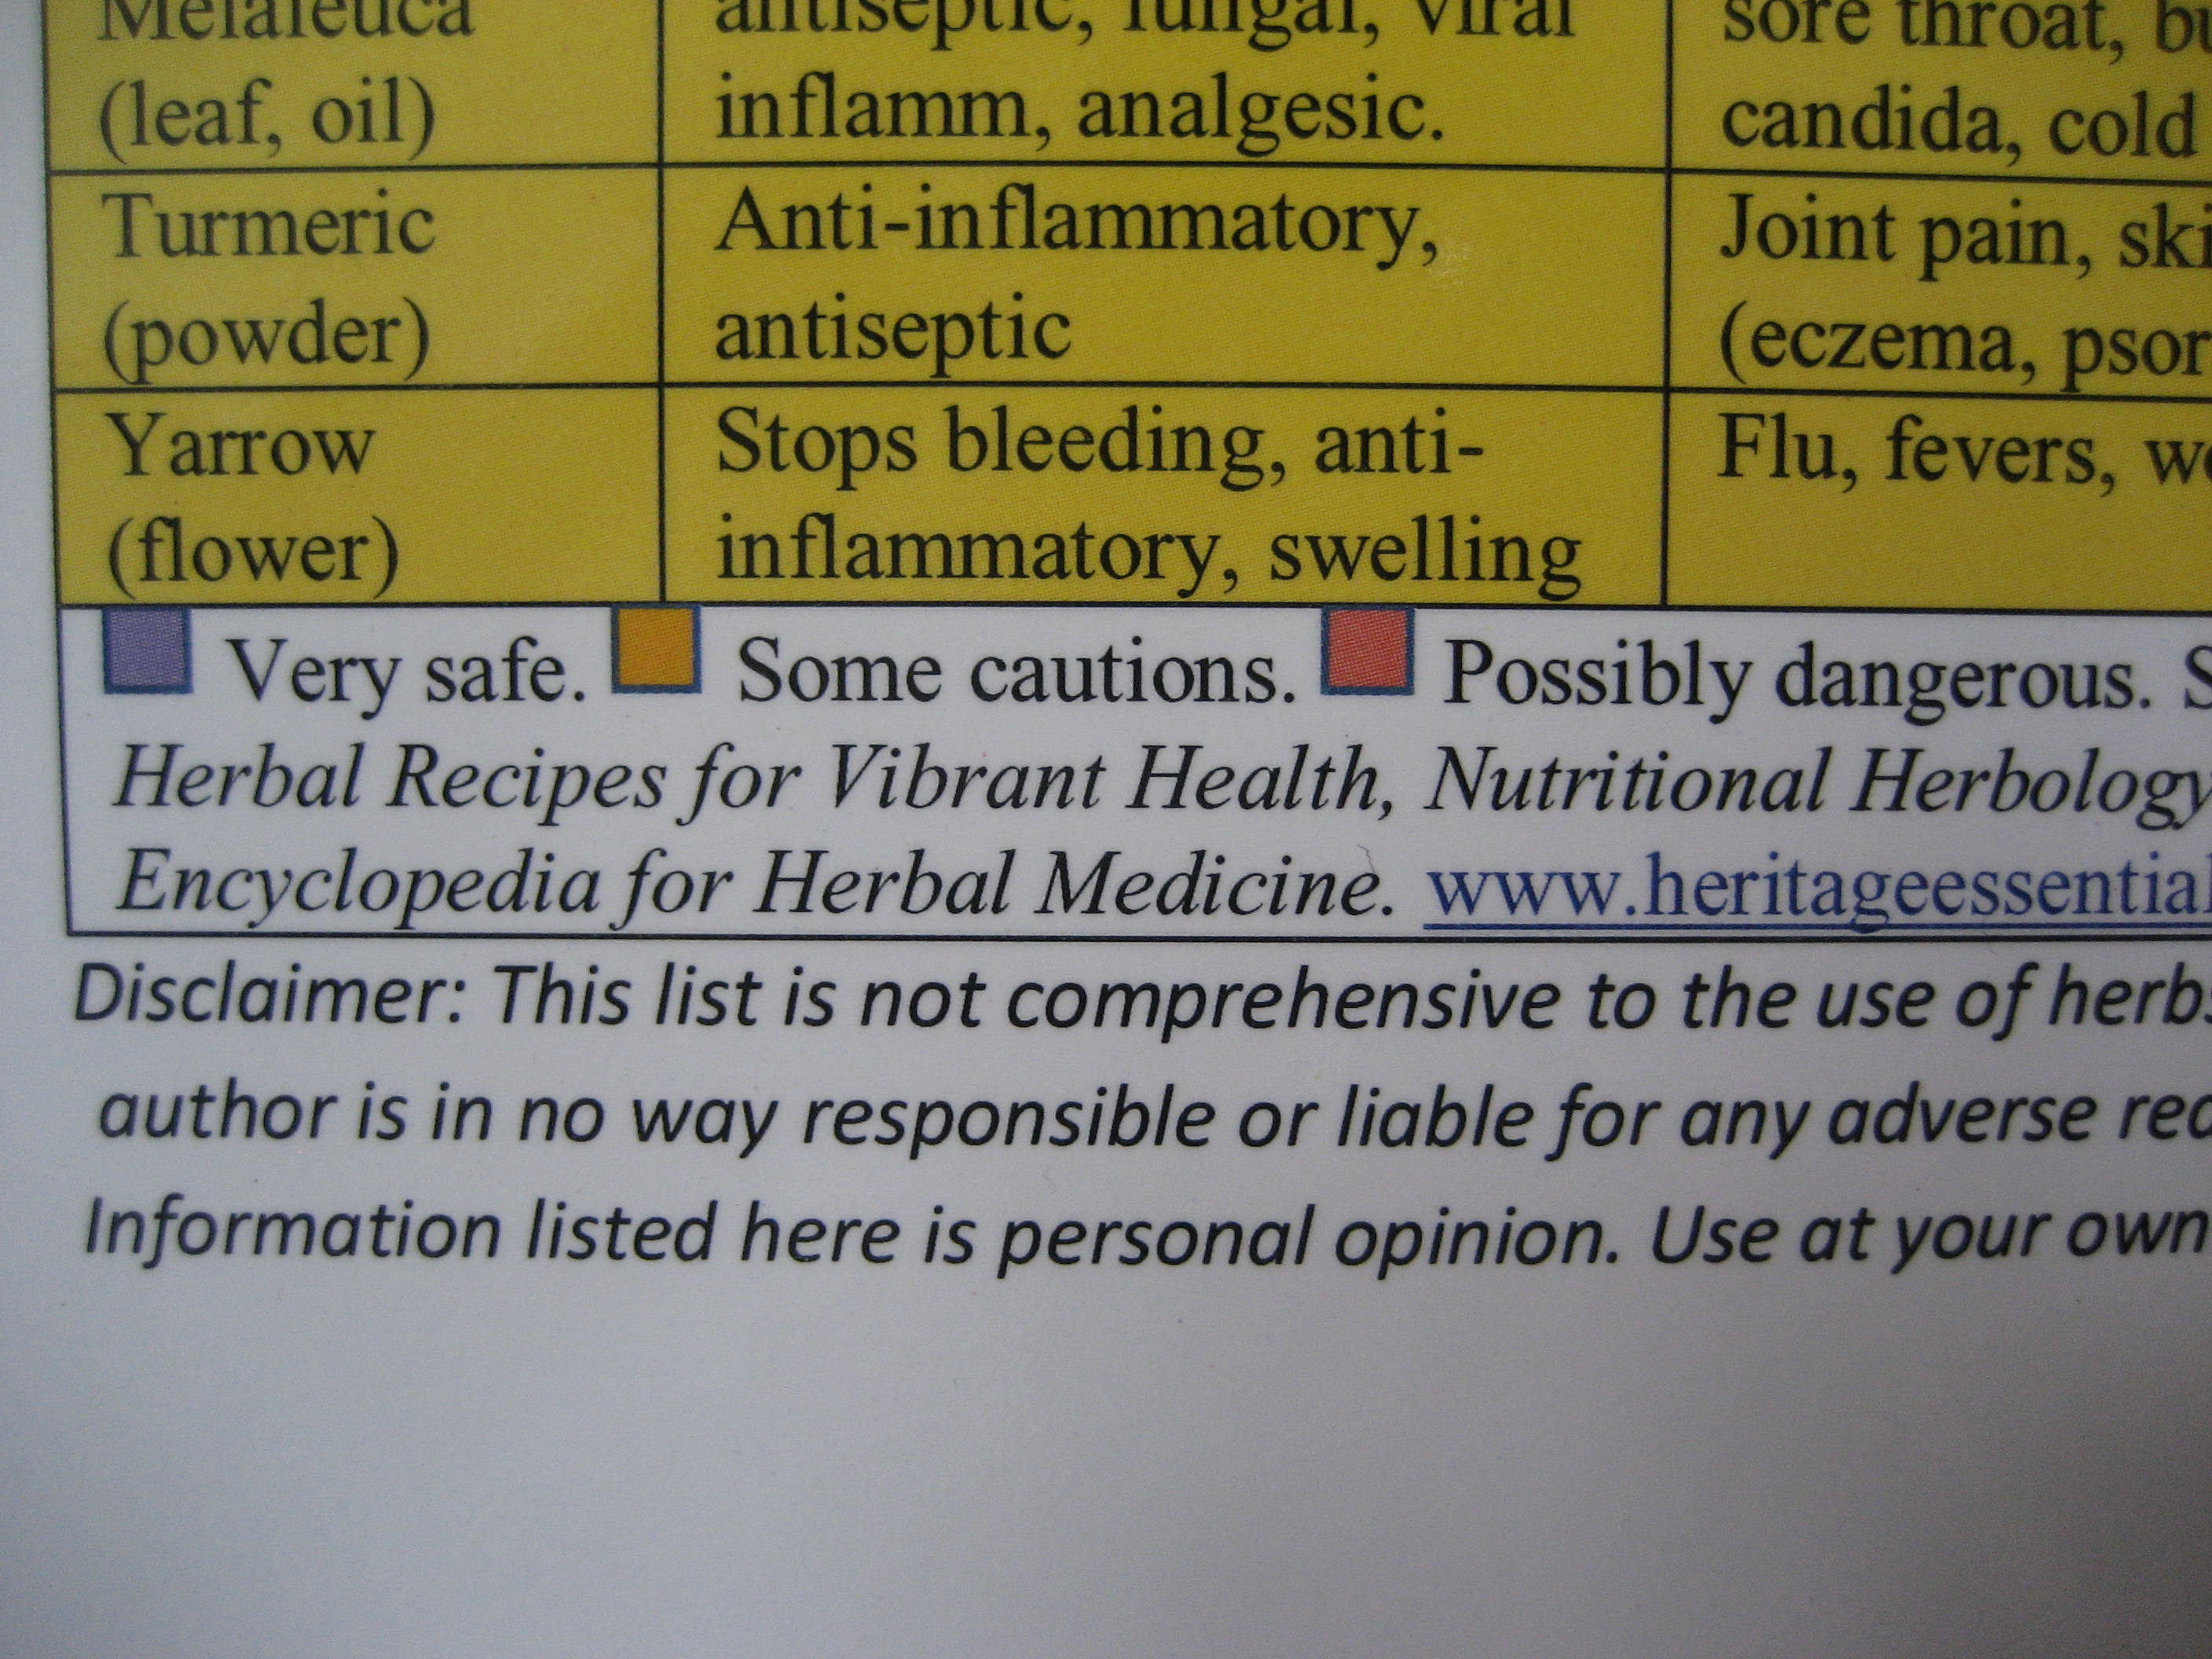
Last spring I created this chart for a class I was teaching on herbal first aid. The chart covers commonly used herbs and essential oils and their properties and gives suggested remedies for common first aid situations and illnesses. This laminated chart is two-sided. The front side is color coded based on the safety of the herb or oil and covers 17 herbs/oils. The back side of the chart is covers 66 ailments and conditions listing the herbs/oils that are good for them. Cautions are listed on the front of the chart.
The chart measures approximately 7 x 4 inches. It is printed on heavy cover stock and laminated so that you can take it with you so that you’ll know what to do when you are out and about or travelling away from home. If you find it helpful be sure to comment here and let me know.
Back side of the chart.
Color-coded by safety level.
Disclaimer: By purchasing this chart, you take full responsibility for any outcomes based on it’s use and release the author from any liability either real or perceived. The author makes no claims as to expected results and takes no responsibility for either positive or negative results. This chart should be considered to be personal opinion and is based on personal research and should be taken as such. It should be used with common sense, your own personal research and should not be considered medical advice. See full Disclosures/Disclaimers here. By requesting to purchases this chart you release the author from any liability and agree to all the terms and conditions in the Disclaimer linked above.
Herb and Oil Quick Reference Chart
Laminated quick reference chart. Great for your first aid kit.
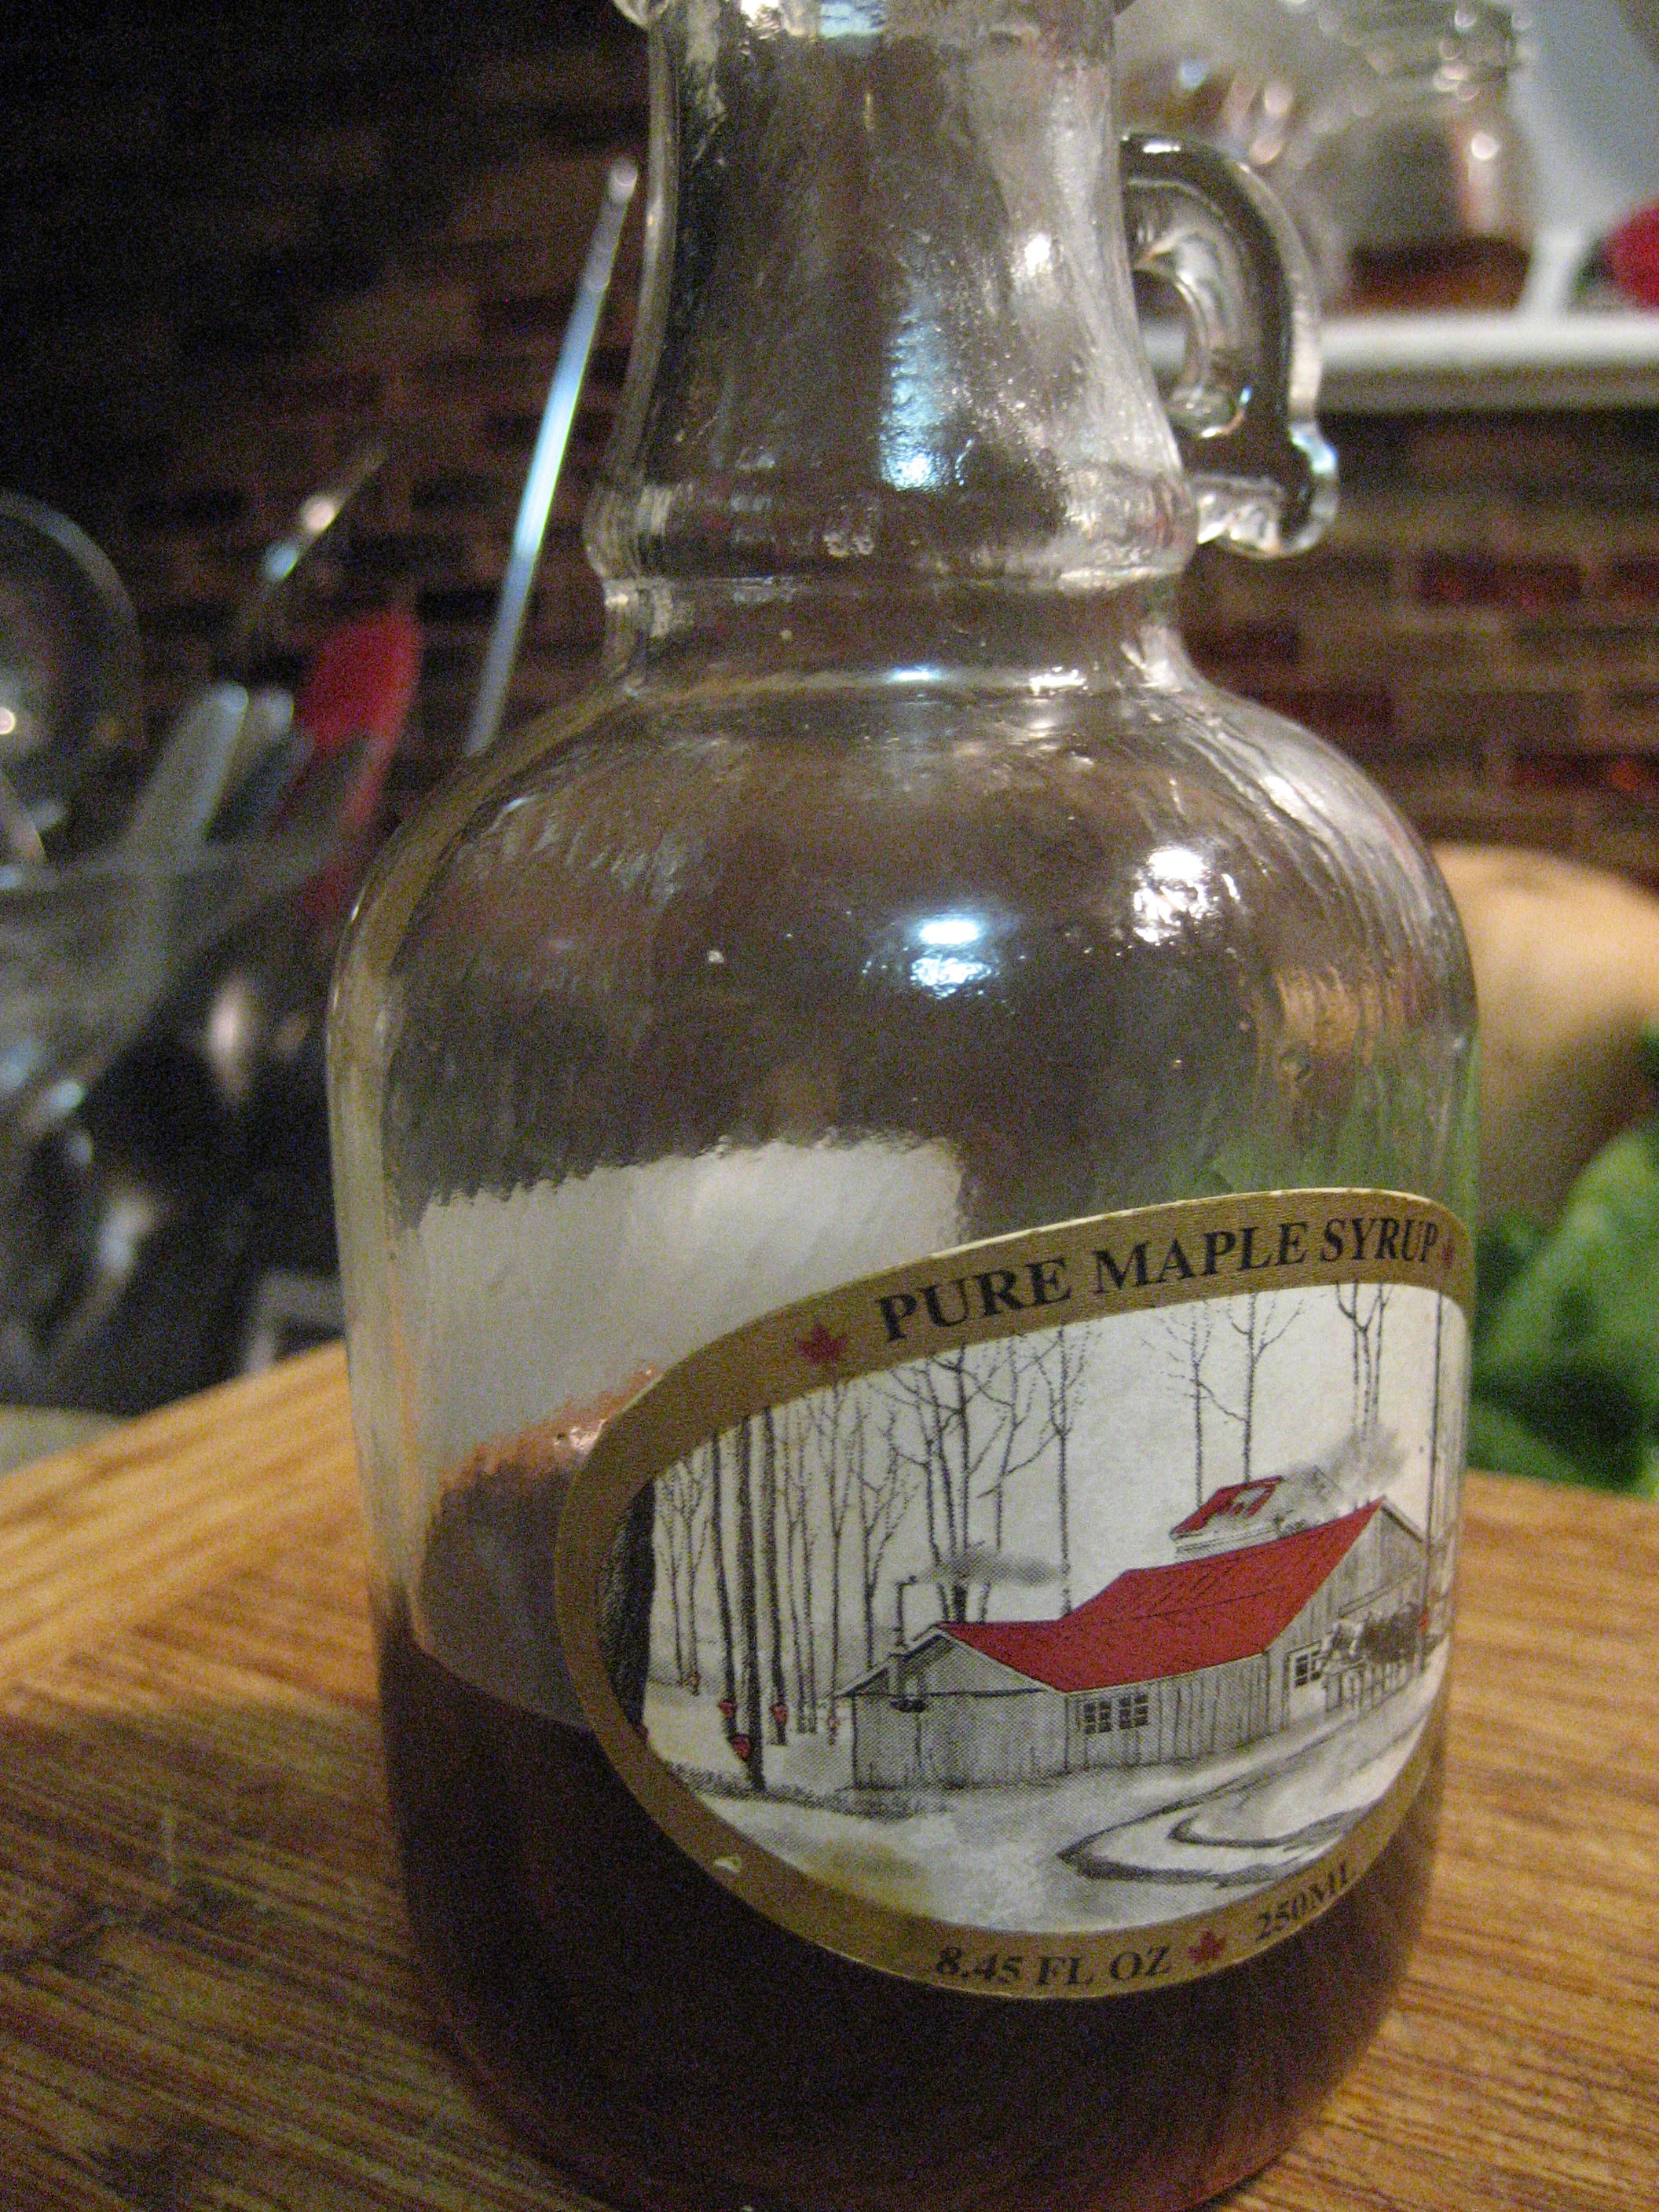
I used a little maple syrup that I’ve saved for years to store my Missouri Maple Syrup.
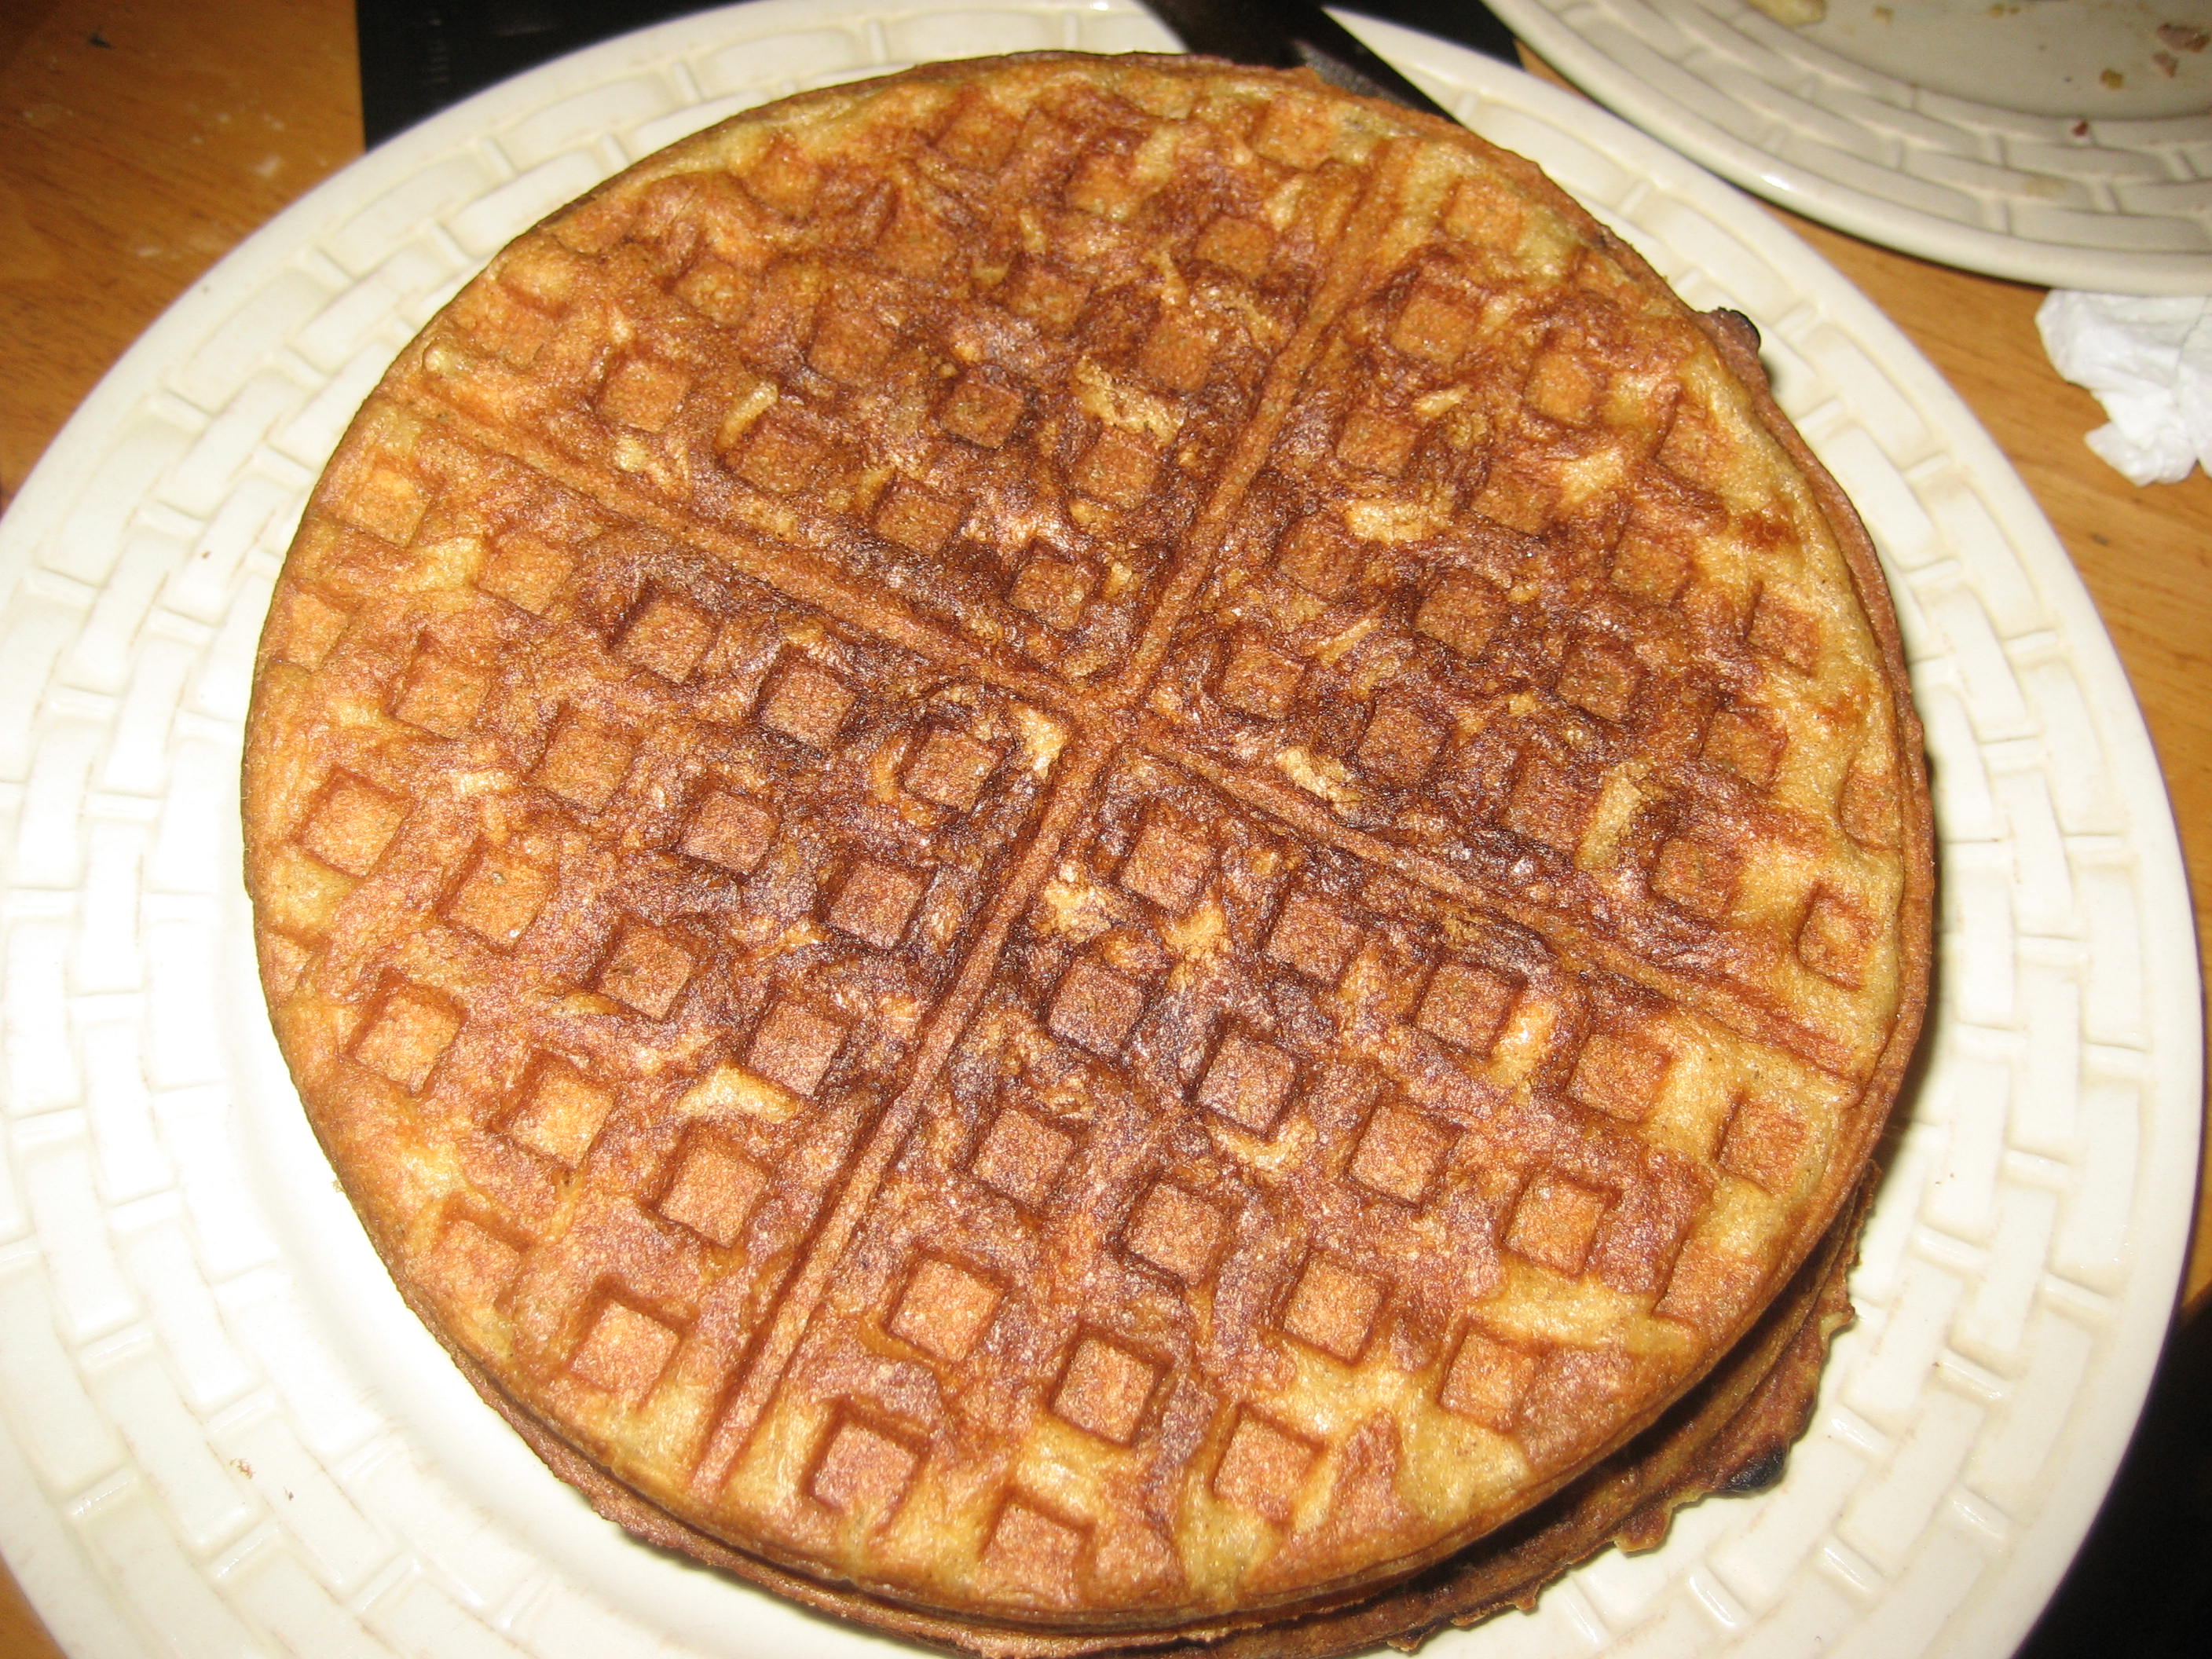
My great-grandmother Maggie lived on a farm in Missouri. I don’t know whether or not she had maple syrup. However, I know that she was frugal and creative in a pinch. Tonight was one of those nights for me. I had decided to make breakfast for dinner – eggs, sausage and waffles. Yum! One problem. I realized that we were out of maple syrup.
What to do? Do I turn the three burners off that were currently in the middle of cooking everything ,dress the kids and walk to the store for more? Then the moment of inspiration hit! I’ll make my own. I remembered my mom doing this in a pinch when we were little.
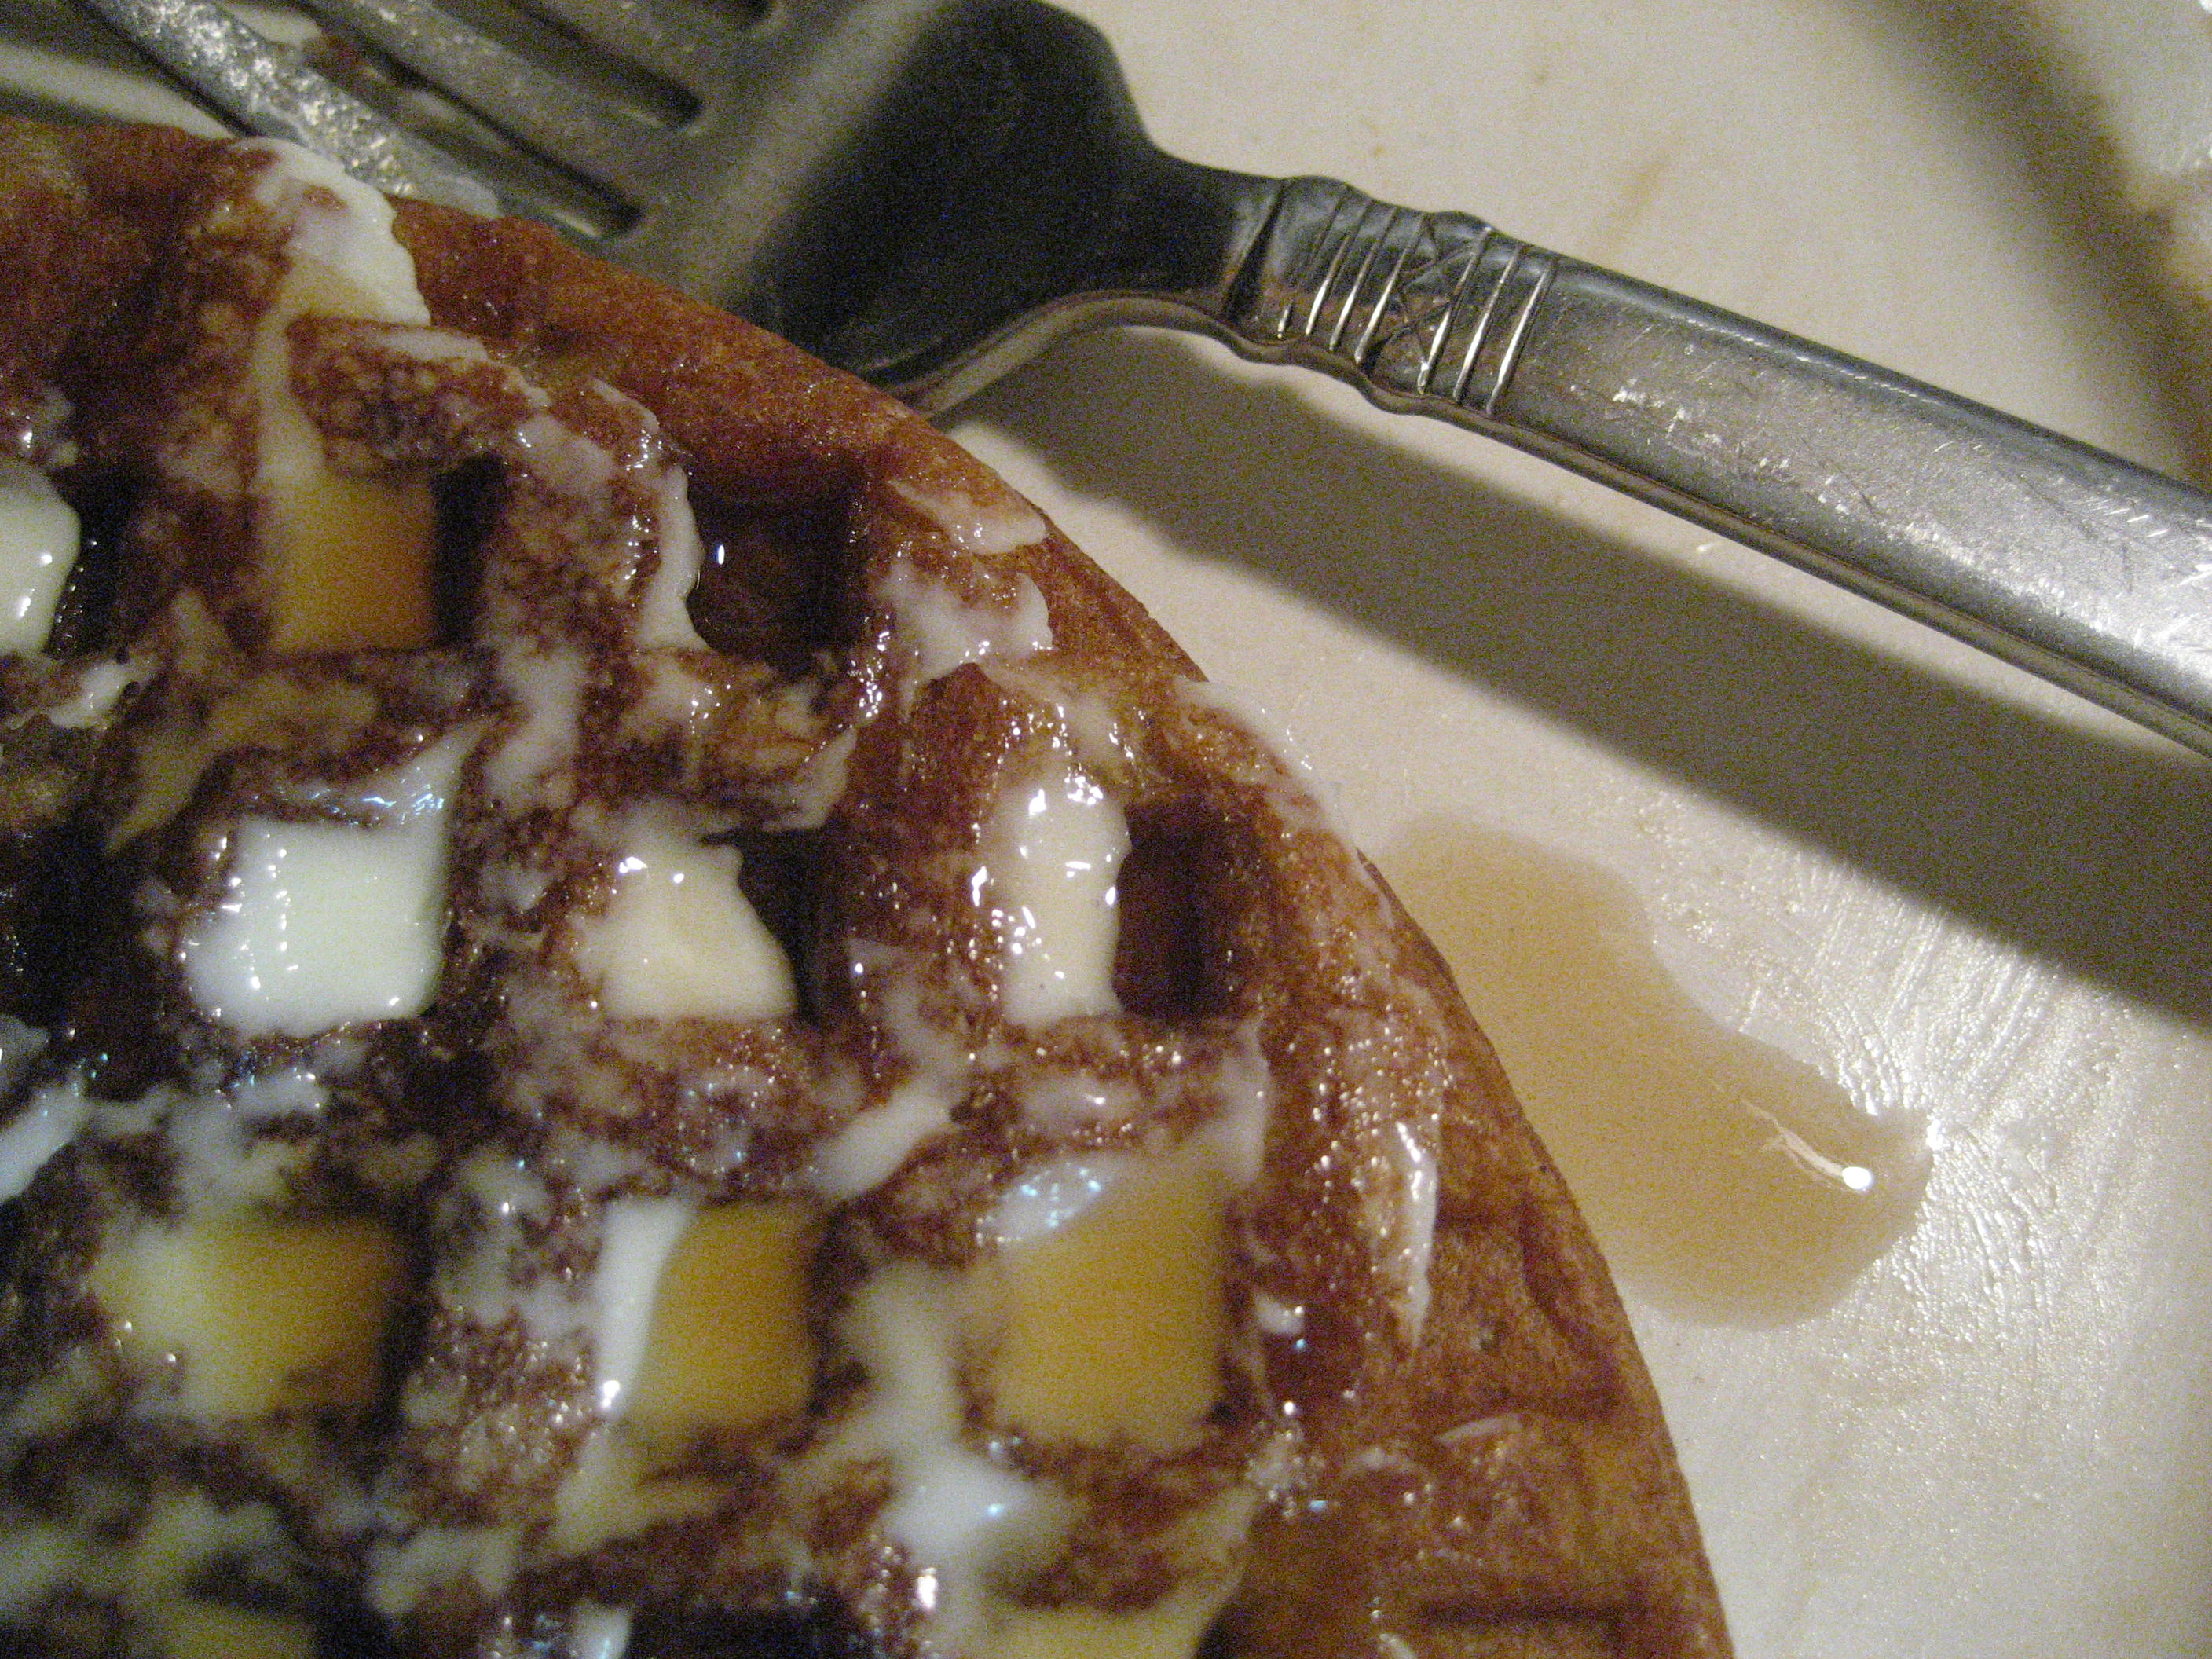
So, here’s how to make your own maple syrup substitute. The taste and texture is actually very similar to the real thing. Everyone in my family loved it and wouldn’t have even realized that it wasn’t maple syrup if I hadn’t told them.
Over dinner (breakfast actually) we decided that such an invention should should be named after Maggie and my husband called it “Missouri Maple Syrup” in honor of her. I think the name has stuck. Here’s how you make your own maple syrup – or something pretty close.
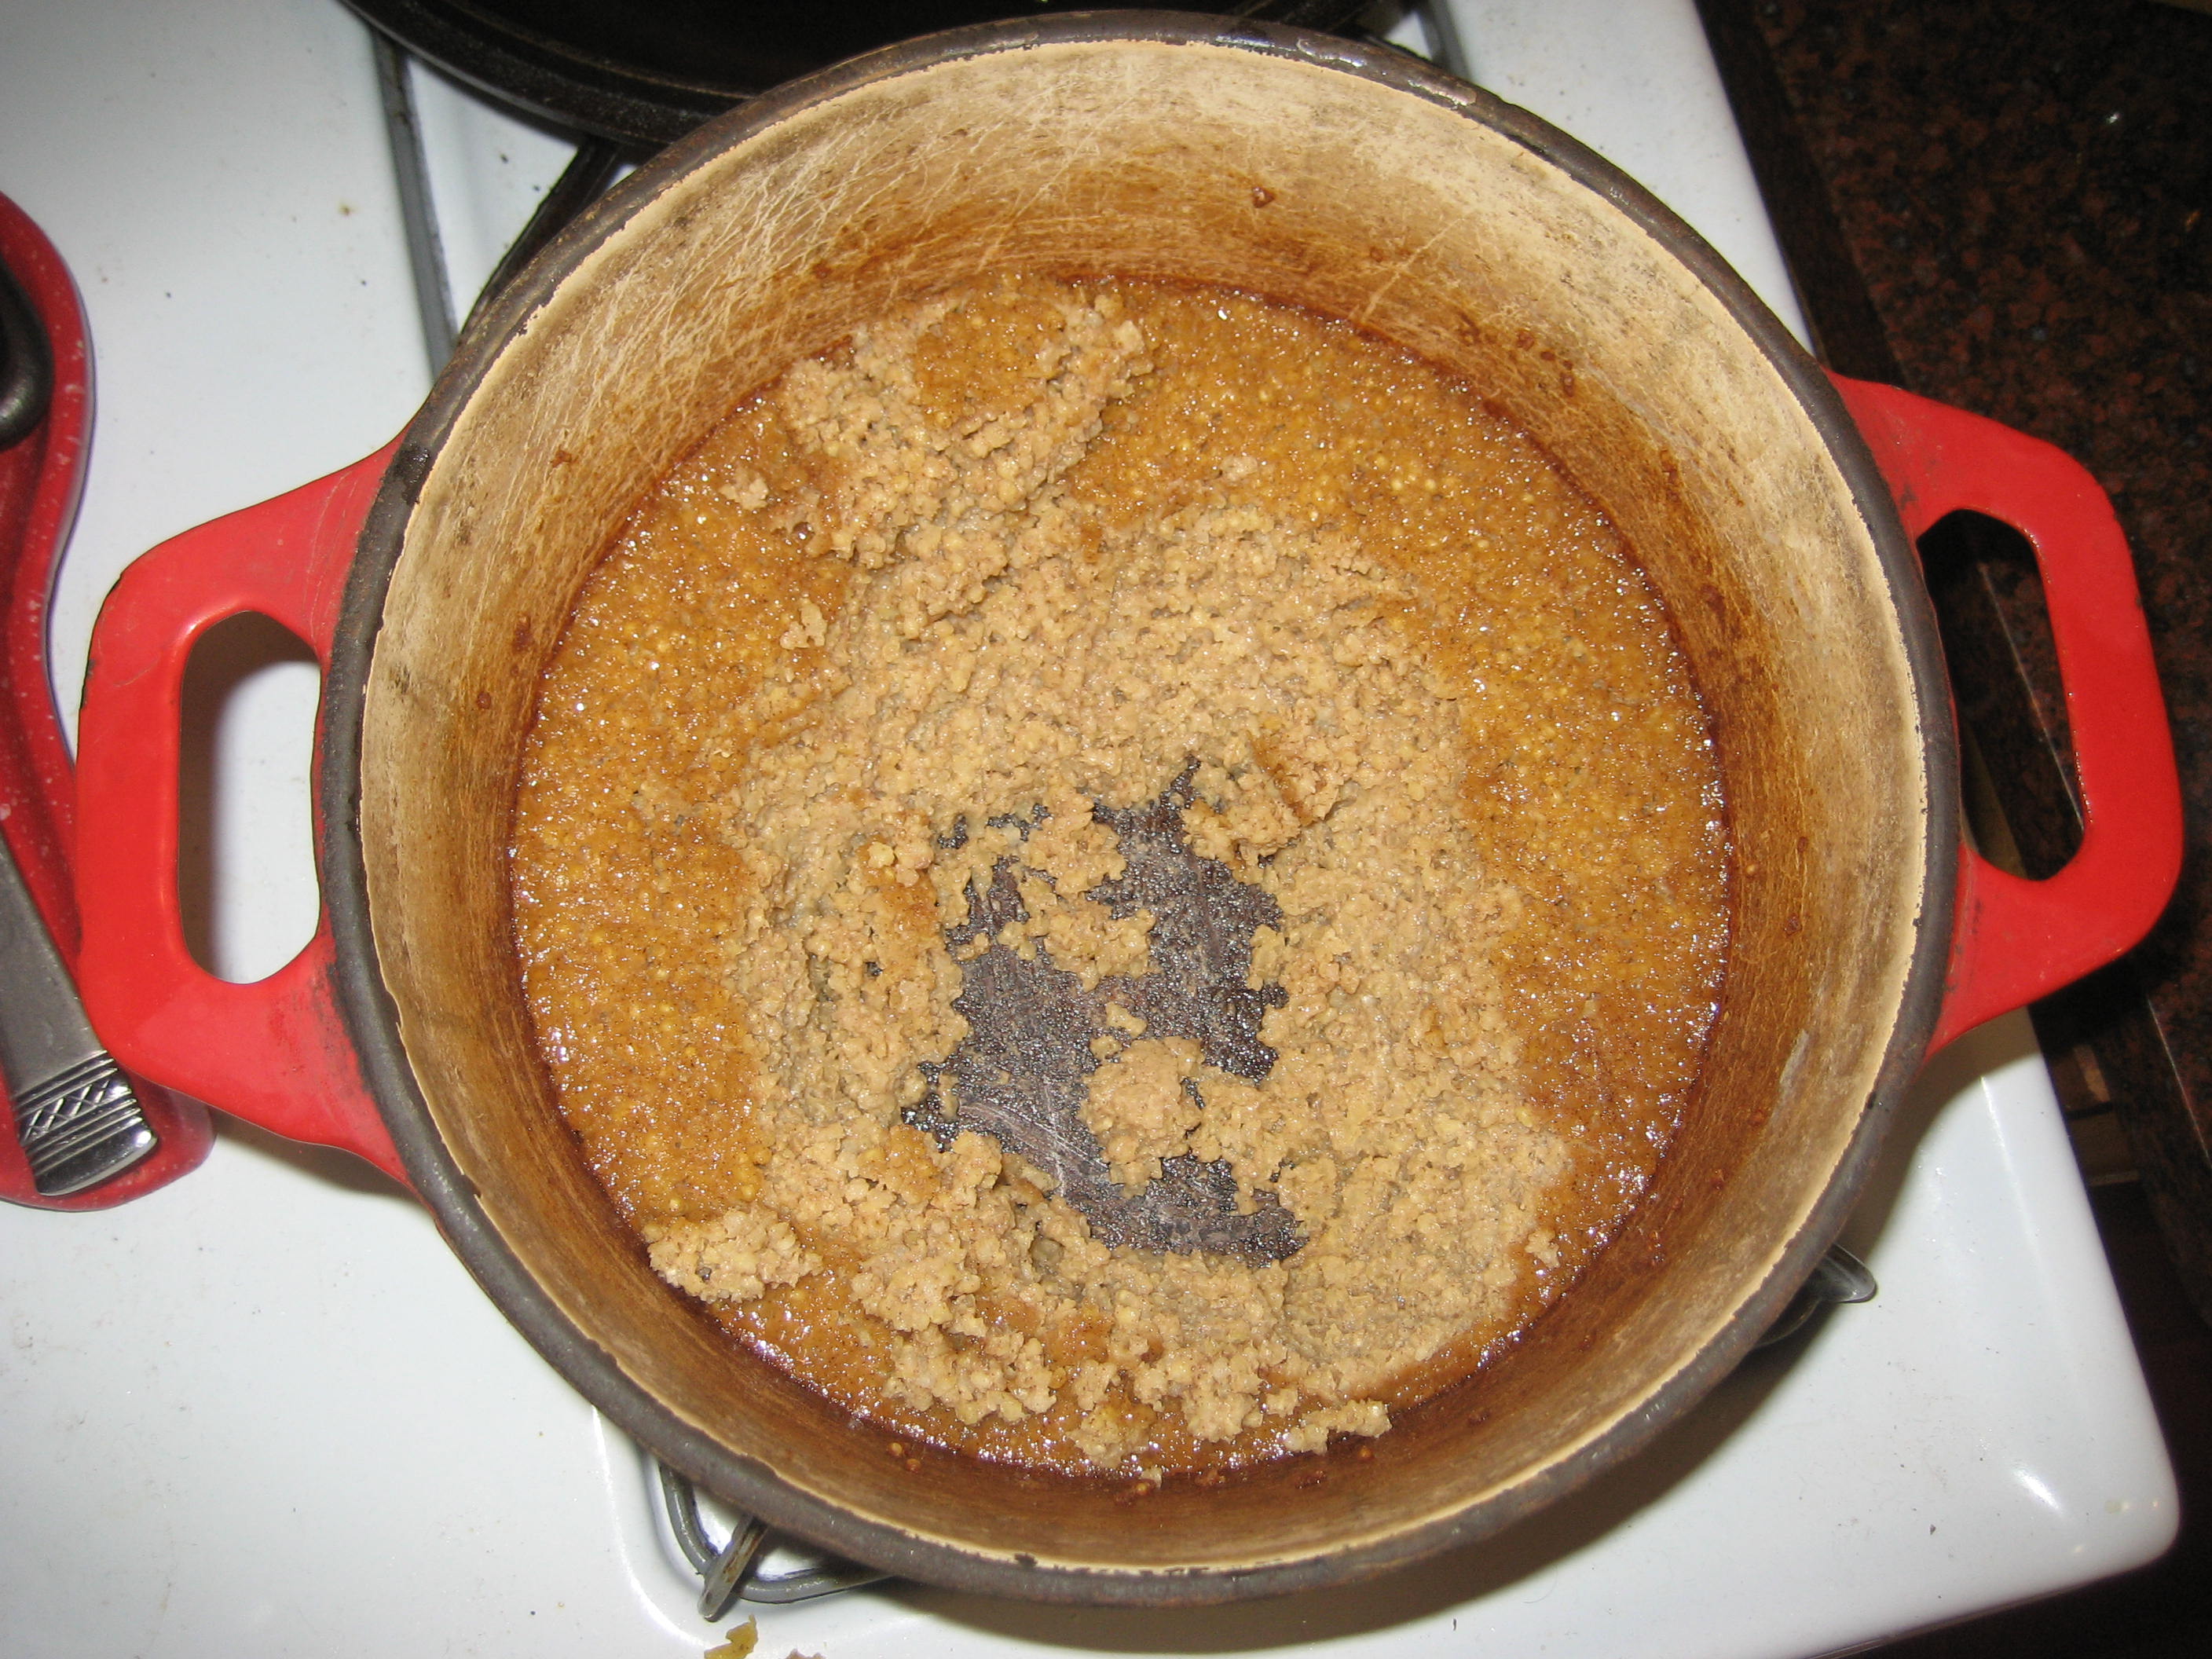
Missouri Maple Syrup: Mix equal parts dark brown sugar and water in a saucepan. I made a small batch using about 1/4 cup brown sugar (learn how to make your own brown sugar here) and 1/4 water. Heat to a simmer. While it’s heating, mix 1 tbl. corn starch and 2 tbl. cold water. When the brown sugar mixture is simmering, gradually pour in the cornstarch mixture and stir until slightly thickened to the consistency of real maple syrup. If you find the syrup too thick add a touch more water. If you can’t use cornstarch, then mix 1 tbl. of flour with a mild tasting oil. Blend well to make a thick paste and add to the mixture on the stove, stirring until thickened.
Everyone loved this so much I may start making big batches of it and storing it in the fridge. When money is tight it’s certainly cheaper than buying real maple syrup. That’s a luxury – an expensive one!
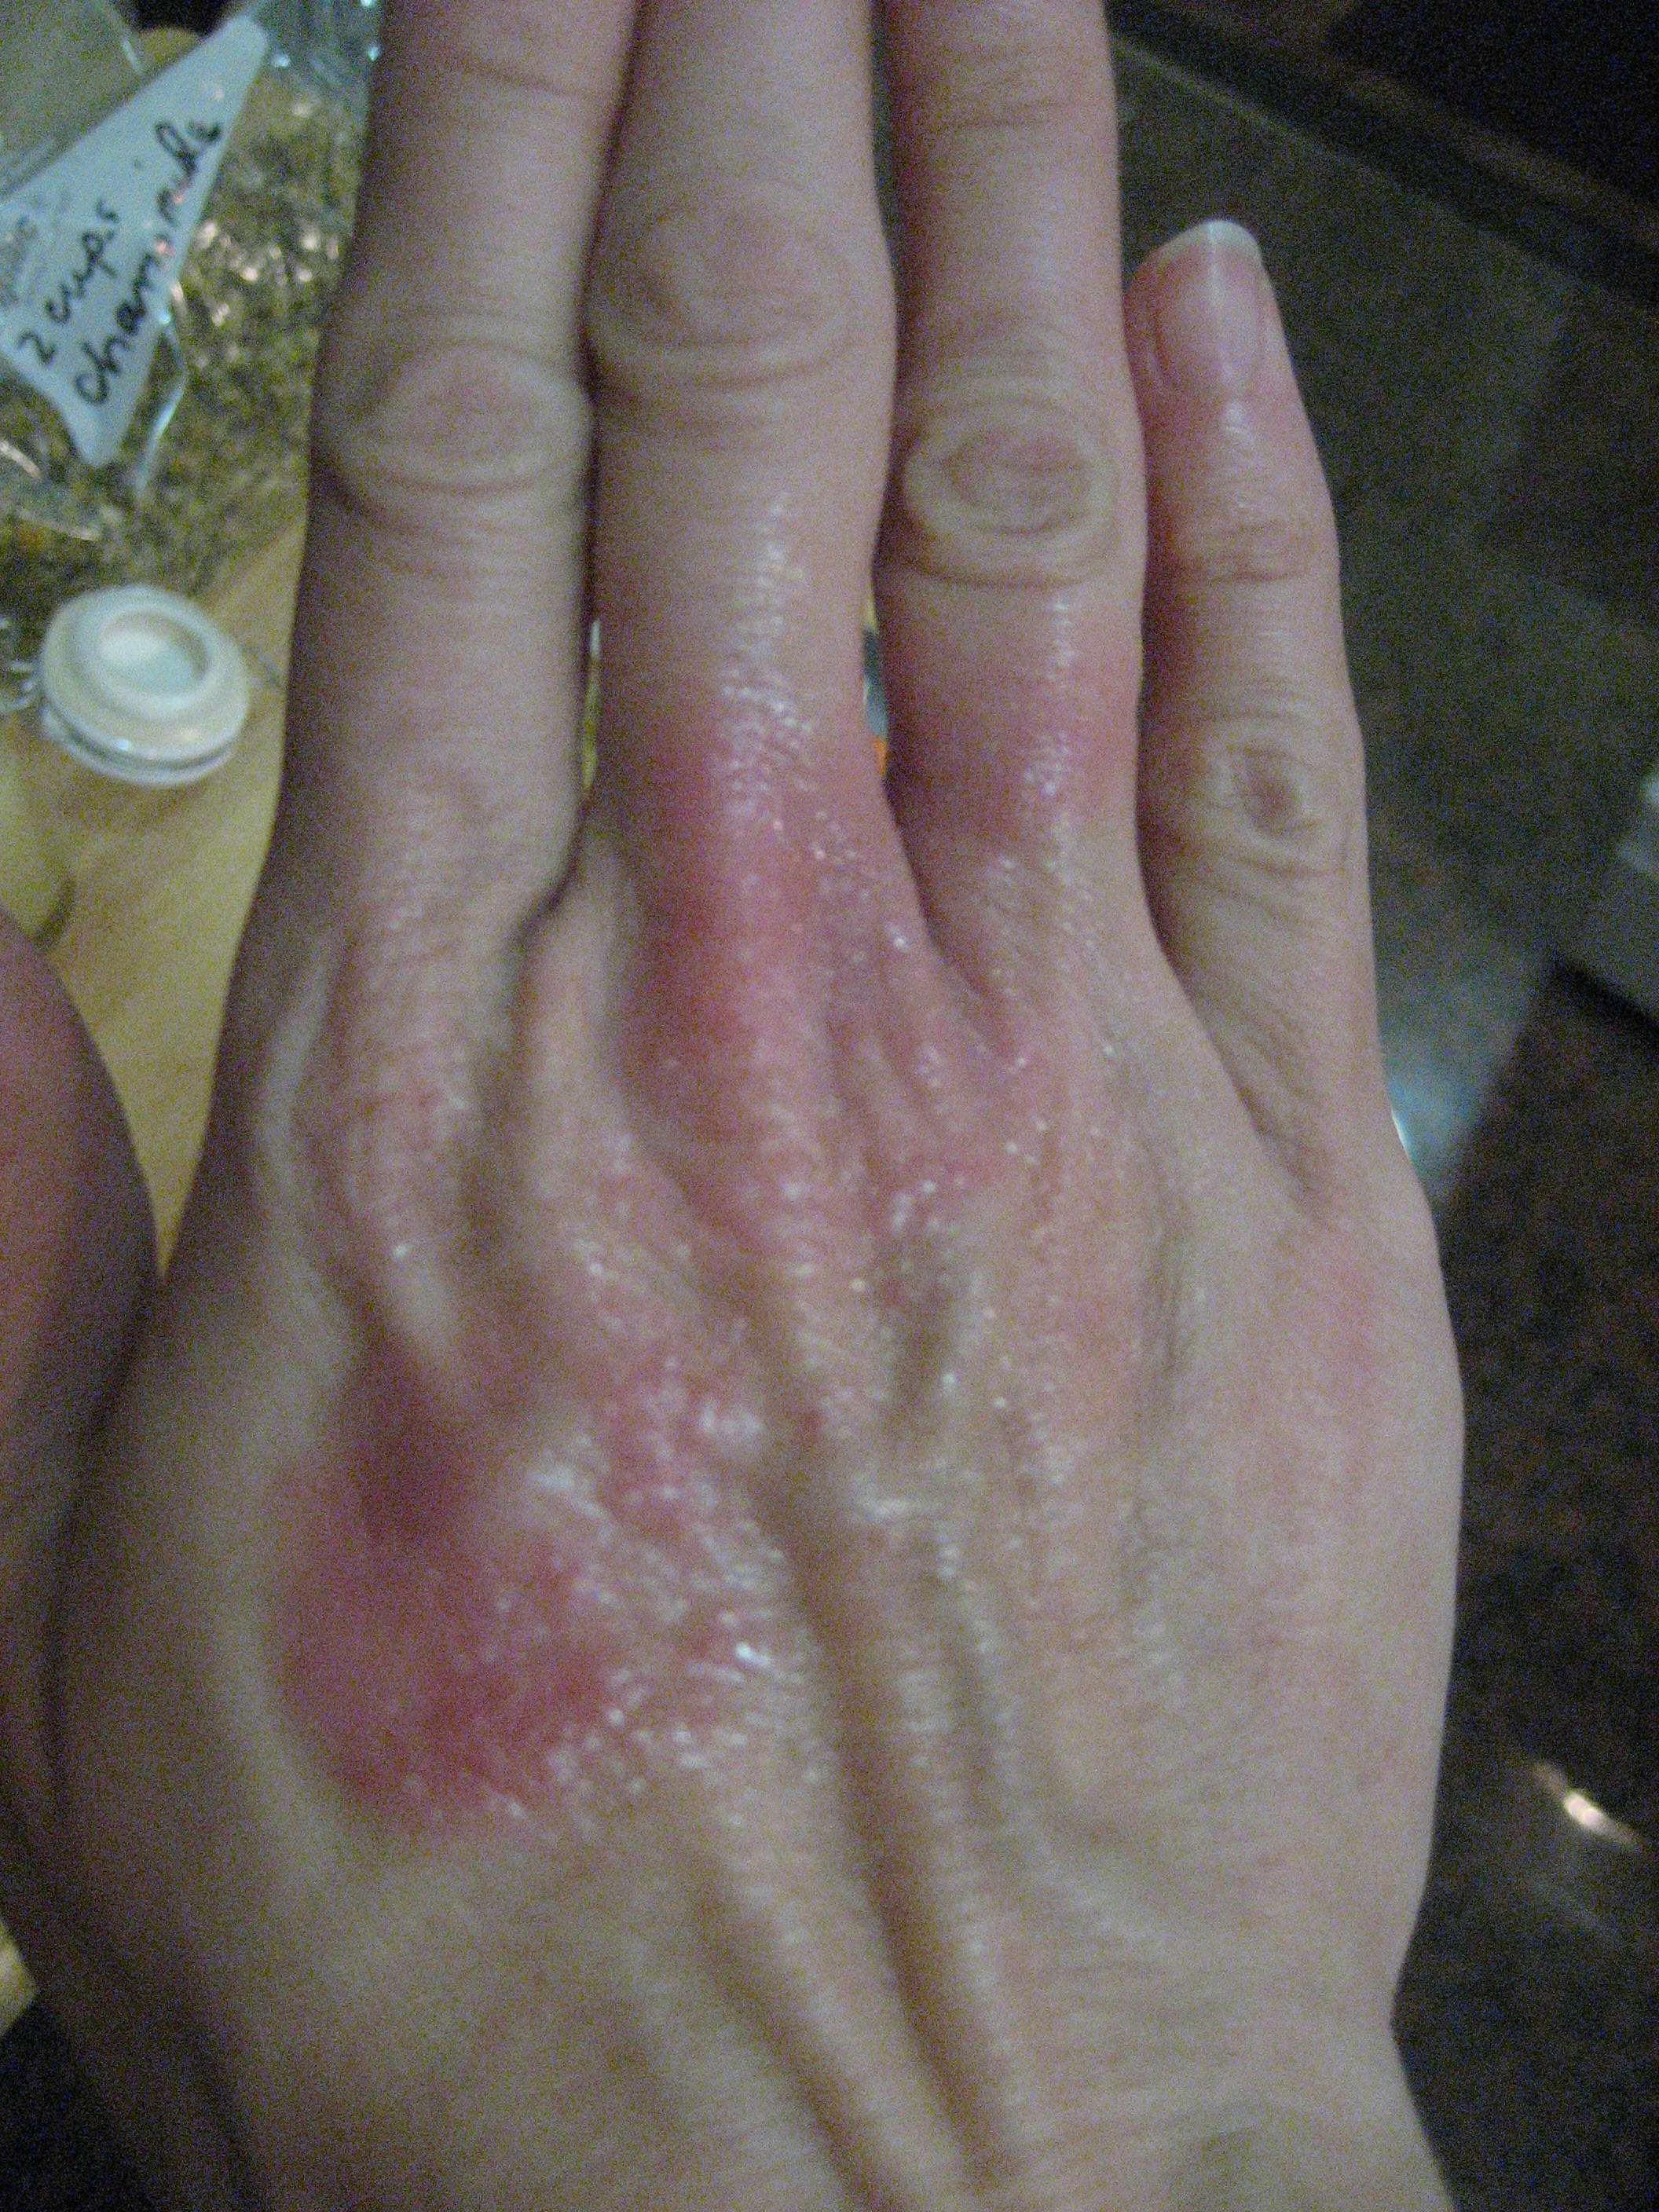
I have some pretty bad eczema that flares up during times of stress. It’s been a problem on and off for the past year. If didn’t know it was eczema at first. Actually, I thought based on my symptoms that I might have an auto-immune disease. I had coin shaped red patches that flared up on my legs, arms and hands. I struggled and struggled for a long time to find a remedy that would help it and found nothing. That’s when I broke down and finally went to the dermatologist. They identified it as “numular eczema” and gave me a prescription for a low-level steroid cream to use when it flares up. I used it initially to get a handle on it as it was getting out of control and the spots were spreading to new places. Since then I’ve tried to only use it during particularly bad flare ups but I’ve still been at a loss to find a remedy that actually helps it besides the steroid cream the doctor gave me. Most natural remedies I’ve tried have actually inflamed it and made it worse. Particularly oils. Any type of oil or oil based remedy makes it worse and not better. This is particularly true of essential oils but also of very basic oils like olive oil, almond oil, coconut oil, etc.
In the past year I’ve tried pretty much everything you can think of to help improve this eczema from topical remedies to diet changes to traditional medicine. My particular form of eczema is stressed based. I admit – it’s been a stressful year. So, my eczema comes and goes and waves but since this ailment began it has never completely disappeared. It’s gotten better for periods of time and then worse again. I eliminated various foods (sugar, caffeine, etc.) to see if that made a difference. It didn’t. In fact, the doctor told me that this particular form is not related to diet like many forms of eczema is, but instead is the body’s direct response to stress.
While it was relieving that my condition was only eczema, it was not particularly encouraging that it was related to stress since I can’t exactly eliminate that from my life. Life is life right? It’s stressful sometimes and you can’t always remove those stressors. I also suspect that my flare ups are related to hormone fluctuations. Also I thing that I can minimally control. So, I kept trying things and I think I’ve finally landed on a couple of things that are causing my eczema to actually heal and improve.
As I started researching further I looked specifically for herbs that have steroid-like actions and properties. I found three. Then I started experimenting with a medium that I could use to apply these herbs that wouldn’t aggravate my eczema. I found two. Here are my solutions that seem to be helping my eczema.
1. Powdered Herbal Paste: yarrow flower powder, lavender flower powder, turmeric powder, bentonite clay. Yarrow is a very powerful healing herb. Lavender has anti-histamine and healing properties. Turmeric has strong anti-inflammatory properties. Bentonite clay is cleansing and toning to the skin. Mix all the powdered herbs and the clay. Store the combined powder in a glass jar. When ready to apply, remove a small amount of powder and mix with a small amount of water in a glass container to make a medium textured paste (not watery, but not like mud). Apply with a popcsicle stick to affected areas of eczema and leave until it dries. Gently remove with a washcloth and warm water. If this paste feels too drying to your skin, remove the bentonite clay and make a paste with just the powdered herbs. This paste can calm a flare up that is dry and scaly. Note: Turmeric stains clothing yellow so avoid getting the paste on your clothes.
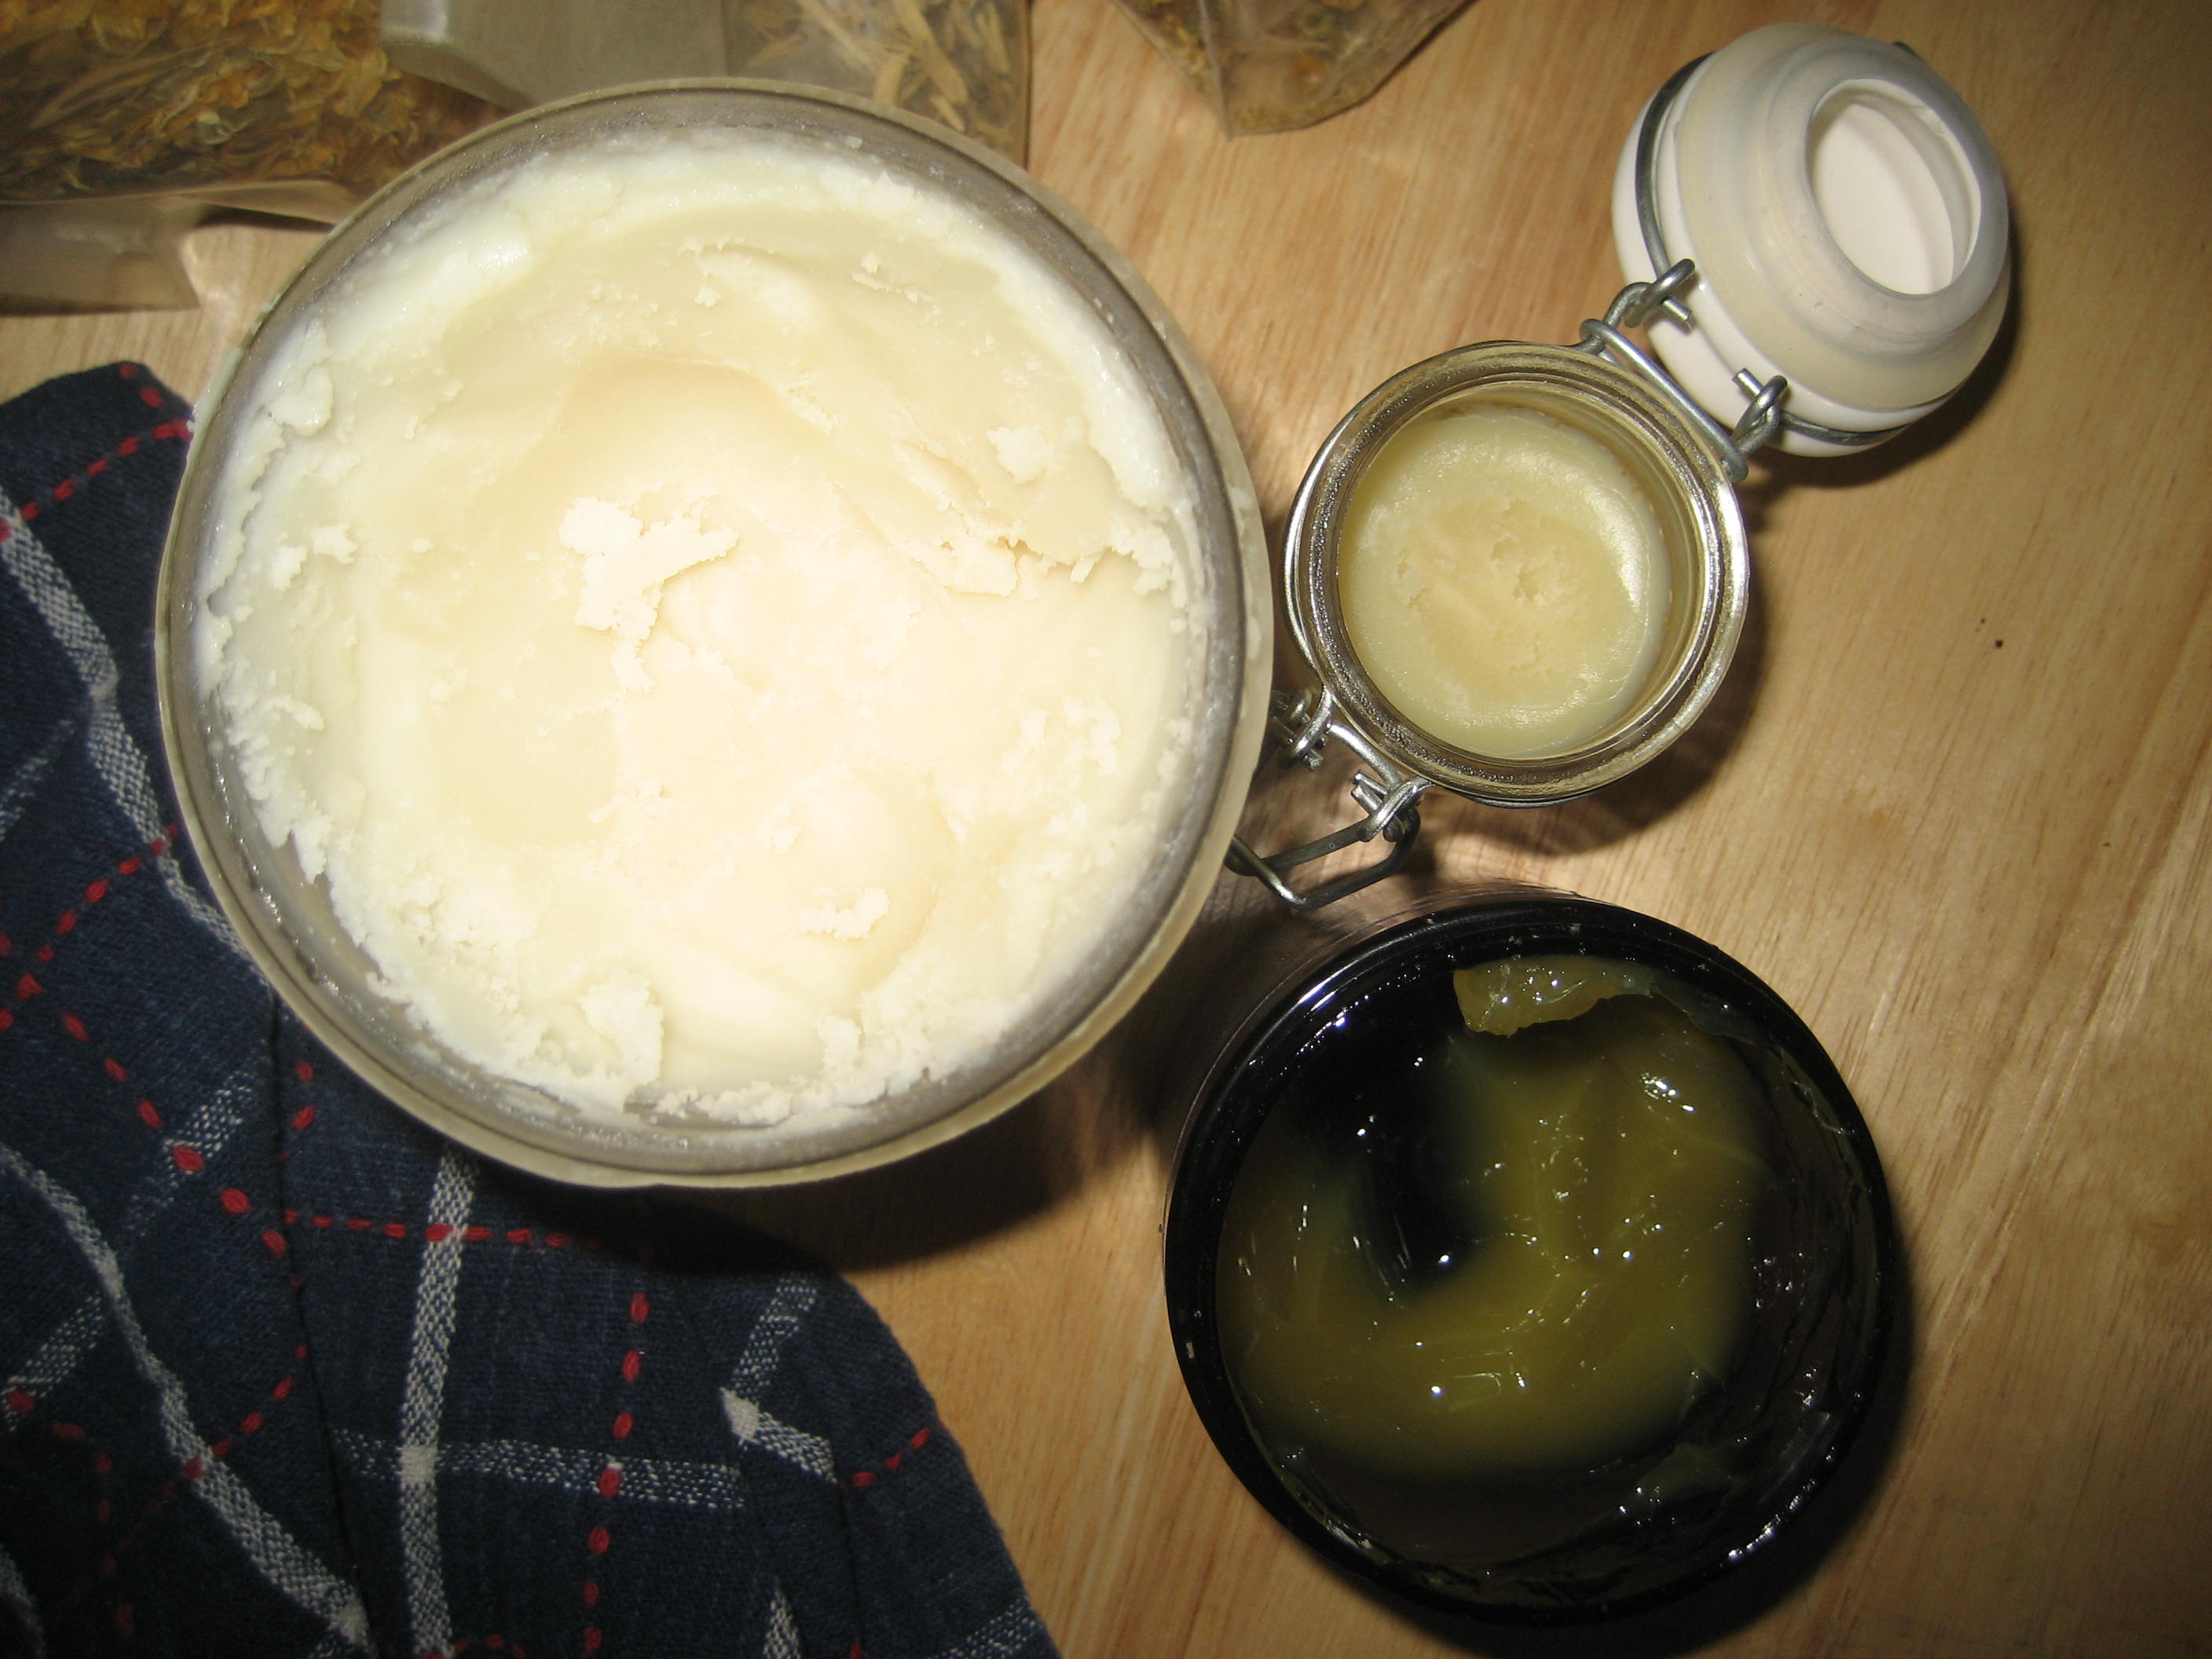
2. Natural “Hydrocortizone” Cream: I know, I know…. Combining the words “hydrocortizone” and “natural” in the same sentence is an oxymoron right? Well, here we will combine the three herbs that have naturally occurring “steroid-like” properties with the two mediums that did not aggravate my eczema – tallow and lanolin. Tallow is the rendered fat of beef. It is a fat that is solid at room temperature and has historically been used for skin ailments. I had heard and read that it was good for eczema but had never had an occasion to try it. Well, I finally was able to get my hands on some grass-fed soup bones and I made some. I was pleased to see that it did not aggravate my eczema like all the other oils and fats did. However, alone it did not particularly improve it either. I also found that lanolin was not aggravating. I saw some improvement from applying lanolin overnight on the worst spots and putting a cotton glove on my hand so that the lanolin didn’t rub off while I slept. I was always better in the morning but then would flare up during the day from washing my hands, heat from cooking ,washing dishes, etc. So, for this remedy a combination of lanolin and tallow will be the medium in which we are going to infuse the steroid-like herbs. Those are chamomile, licorice root and calendula flowers. To make this cream, put your lanolin, tallow, chamomile, calendula and licorice root in a jar and loosely cover with the lid. Use 1 part lanolin to 3 parts tallow. For the herbs use a 1:2 ration of dried herbs to fat/lanolin. Set the jar in a sauce pan on top of a washcloth and fill with about 2-3 inches of water. Simmer until the tallow and lanolin have melted. Swirl the herbs around in the jar to cover them all. The herbs should be fully immersed in the tallow/lanolin mixture. If they aren’t add some more tallow and lanolin. When everything is melted, simmer for about 5 minutes more. Turn off the heat. You how have infused the herbal properties of the chamomile, calendula and licorice root into the tallow and lanolin. Strain immediately while hot through a wire mesh strainer into a glass storage container. For convenience, I also poured some into some old, empty lip balm tubes so that I can easily take this with me when we are out. I find that environmental factors make my flare ups worse. We took the subway the other day and something down there made the eczema on my hand flare up from being almost completely clear to a red, itchy mess. So I plan to apply this all day even when we aren’t at home. Allergy Note: If you have allergies to ragweed, dandelion, sunflower or safflower you may want to omit chamomile as it is in the same family.
tallow and lanolin melting and herbs infusing
tallow, lanolin and my little jar of eczema salve
I hope these remedies help your eczema stay clear. It’s making mine better already.
Disclaimer: This is not medical advice. Use at your own risk. Author takes no responsibility for the results of using these remedies. Read full Disclaimer here.
Note: Some links in this post are affiliate links.
Just saw this recipe for Spicy Lemonade posted by the Bulk Herb Store. It sounds good for any illness. I came down with a cold yesterday and may try this tonight. Except, I’m out of lemons. I’m a Texan after all so I do have limes on hand. I think I’ll use those and turn mine into Spicy Limeade. 🙂 Stay well everyone!
Spicy Lemonade or Limeade: 2 fresh garlic cloves, crushed
1 tablespoon freshly grated ginger root
Juice of 3 freshly squeezed lemons (or limes)
Organic Honey to taste
Small pinch Cayenne Pepper
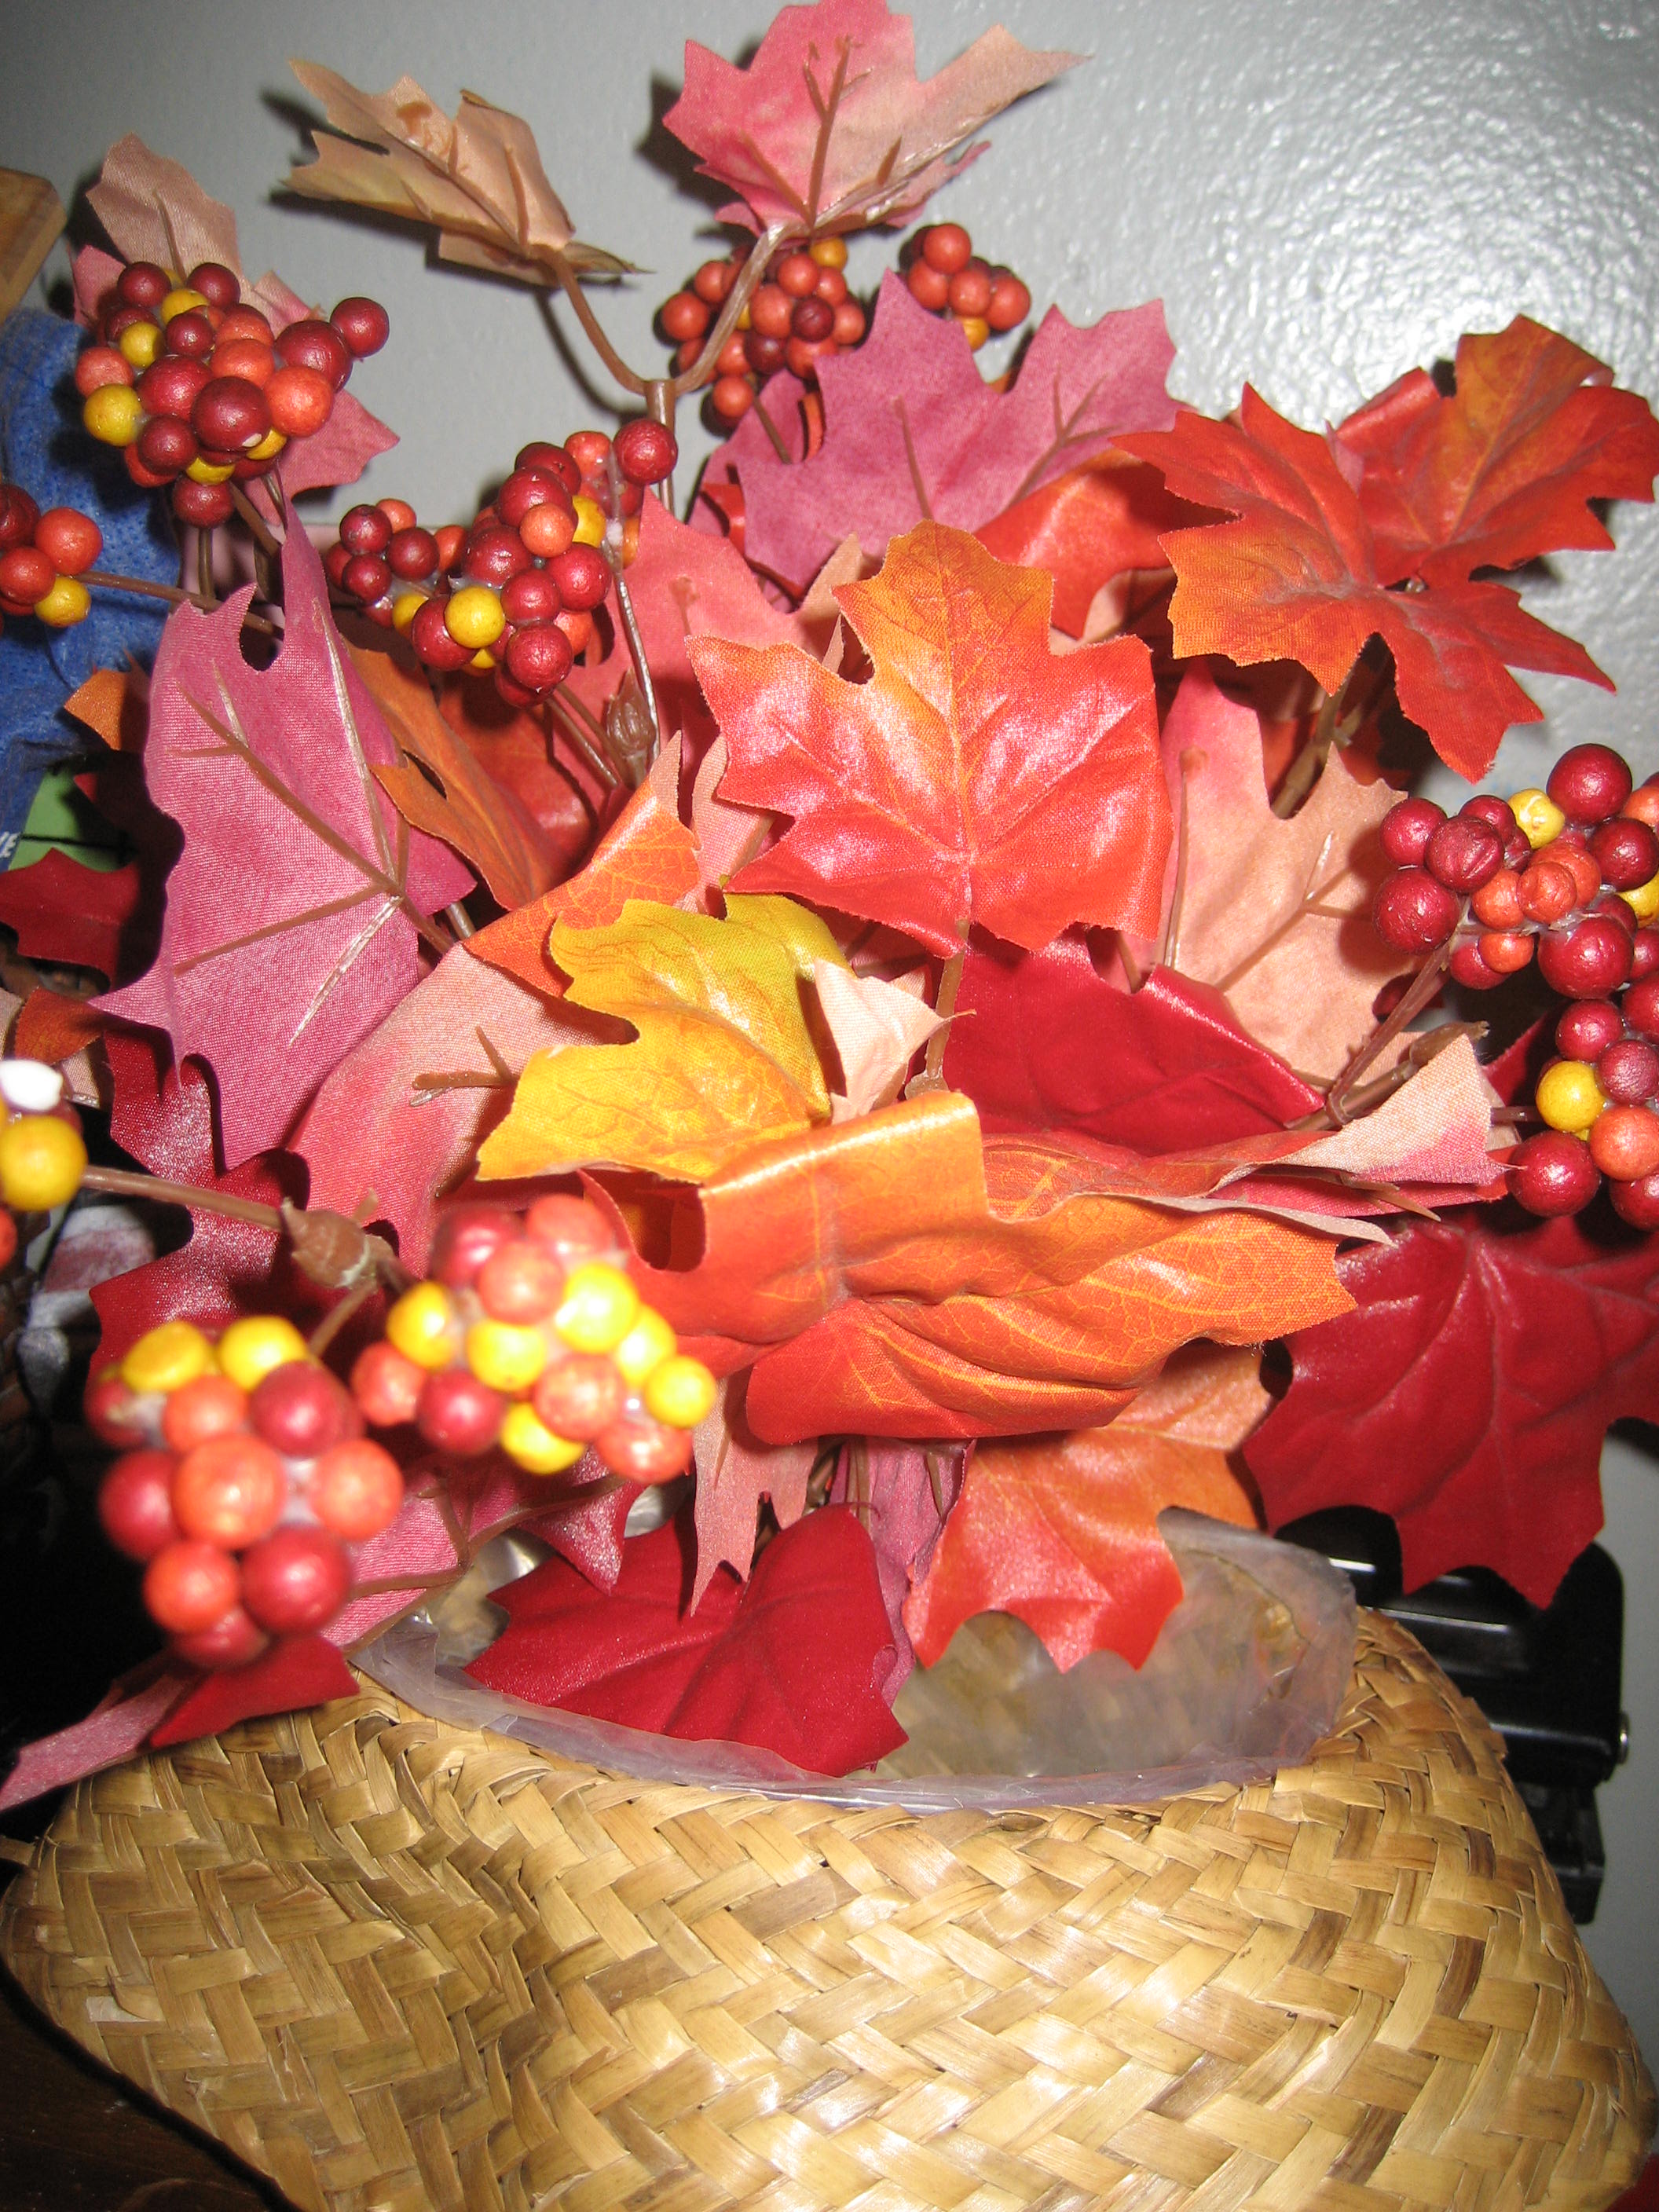
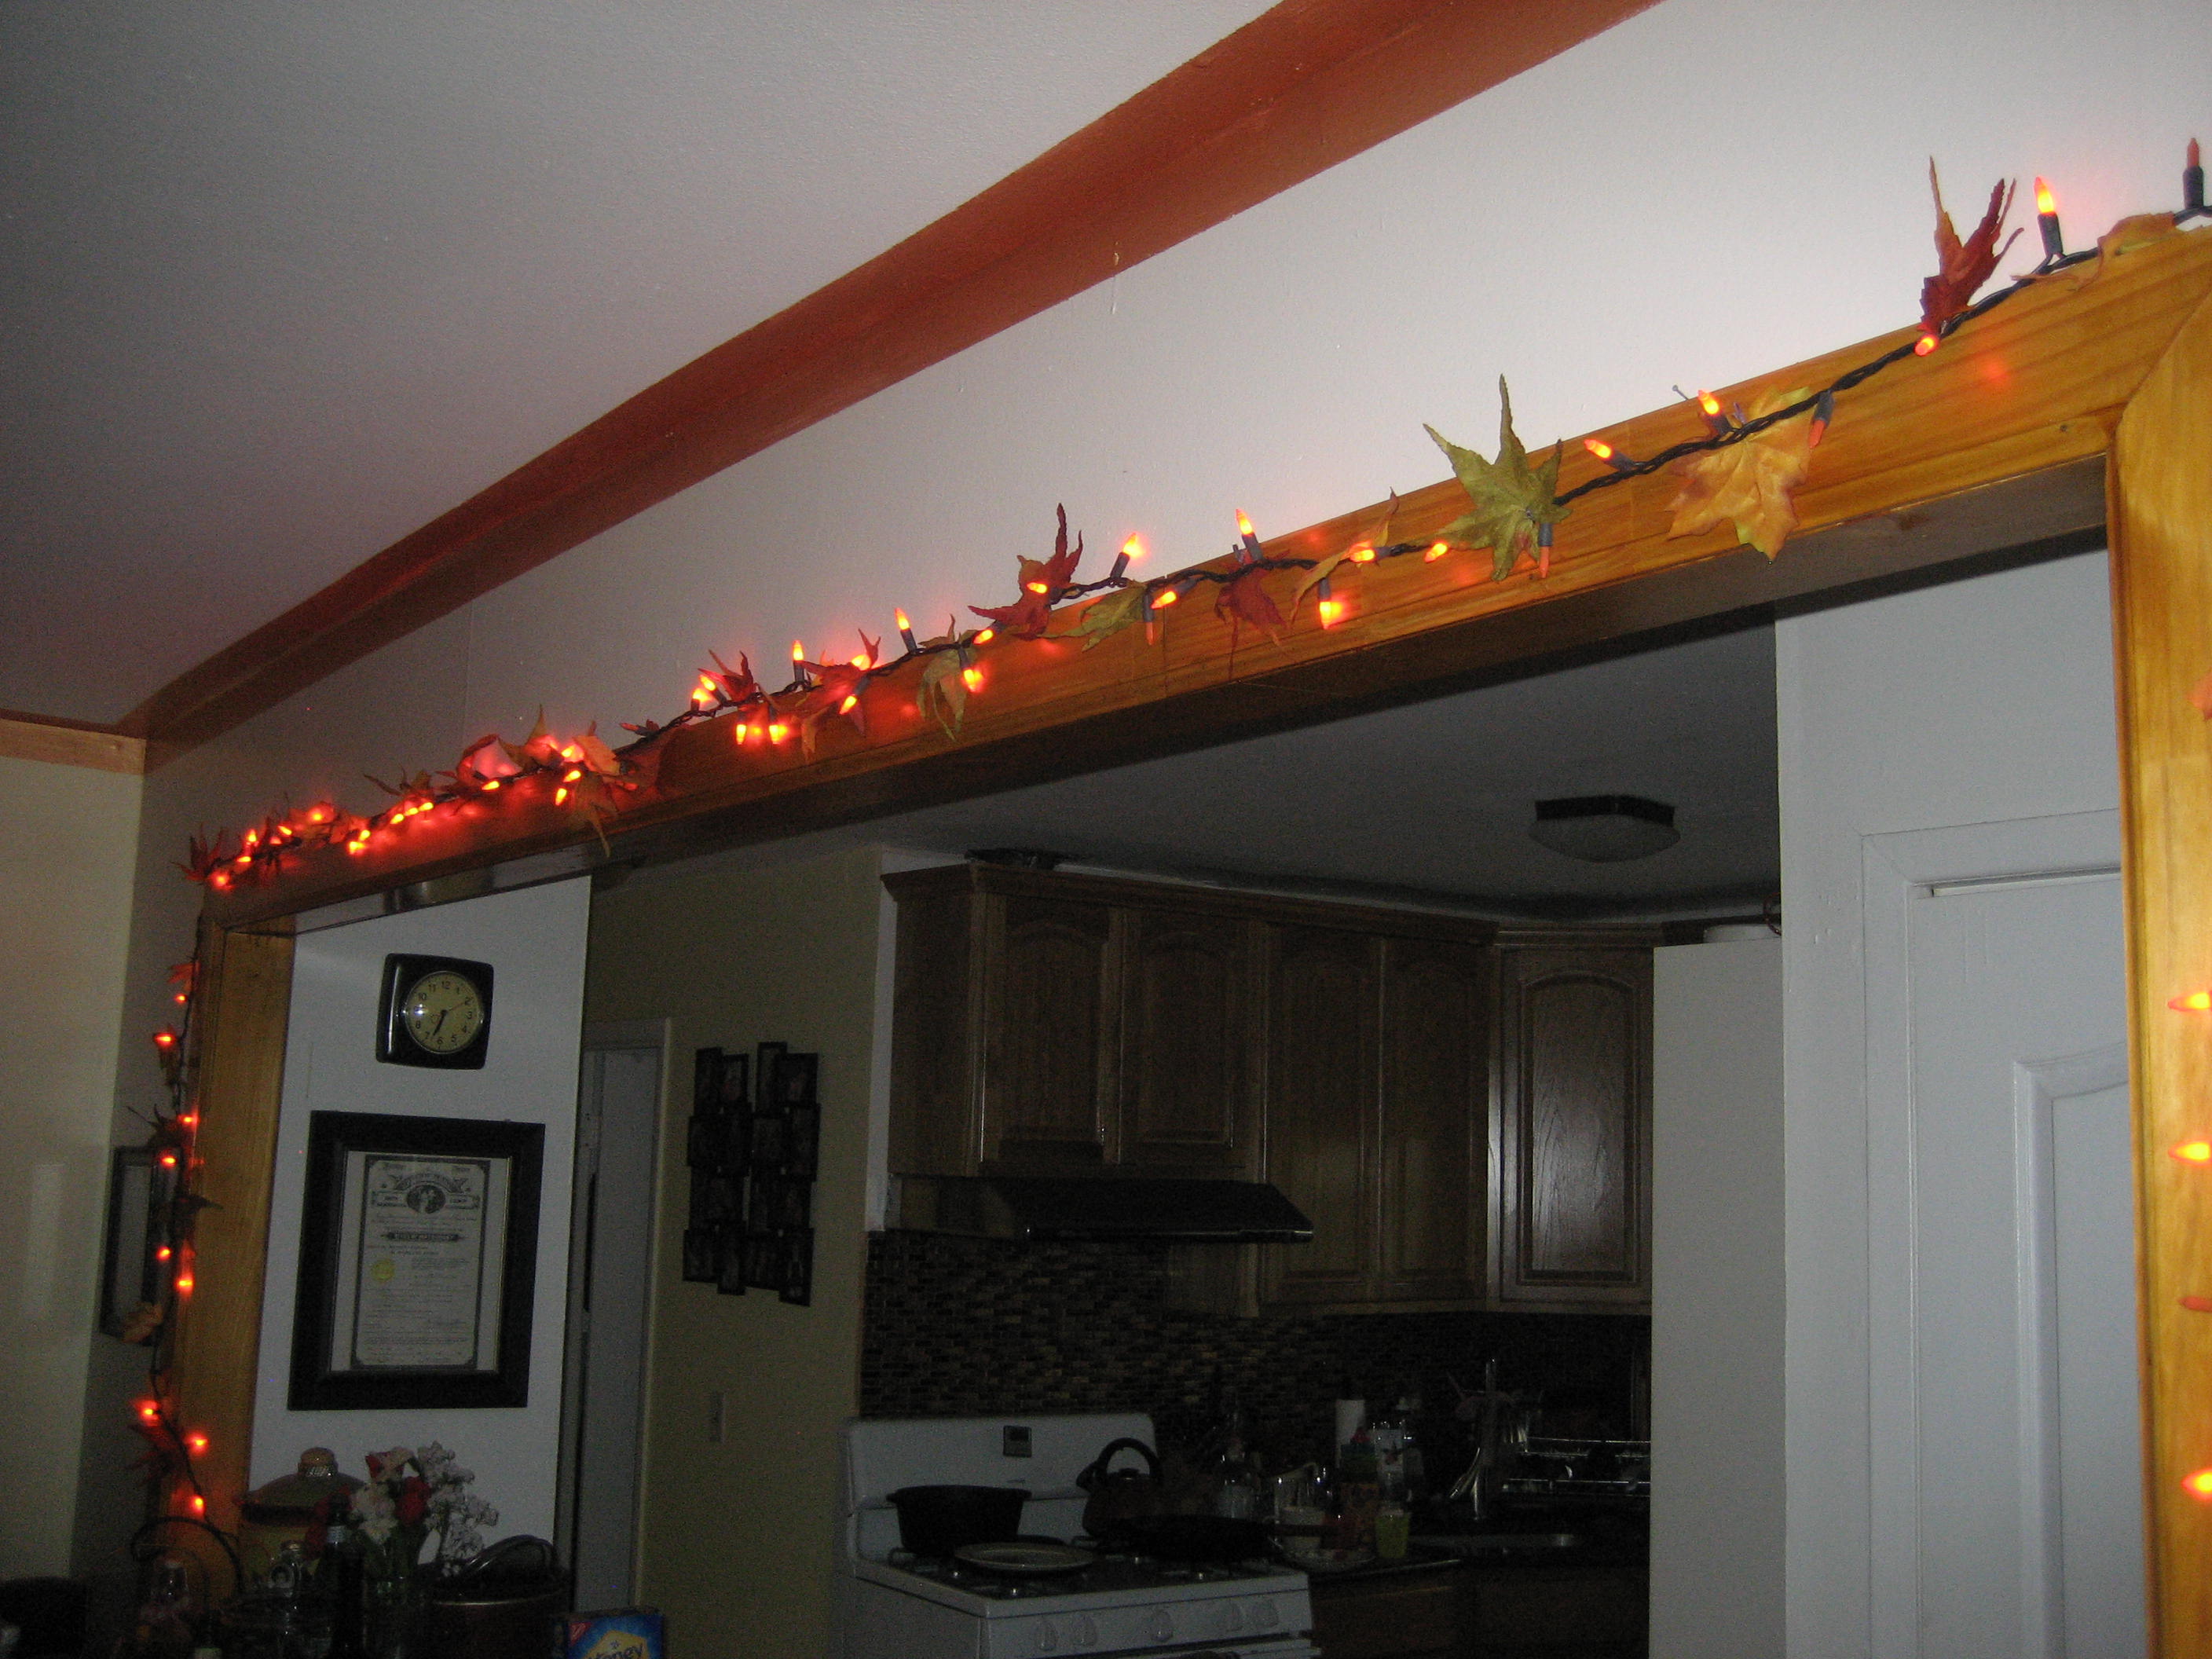
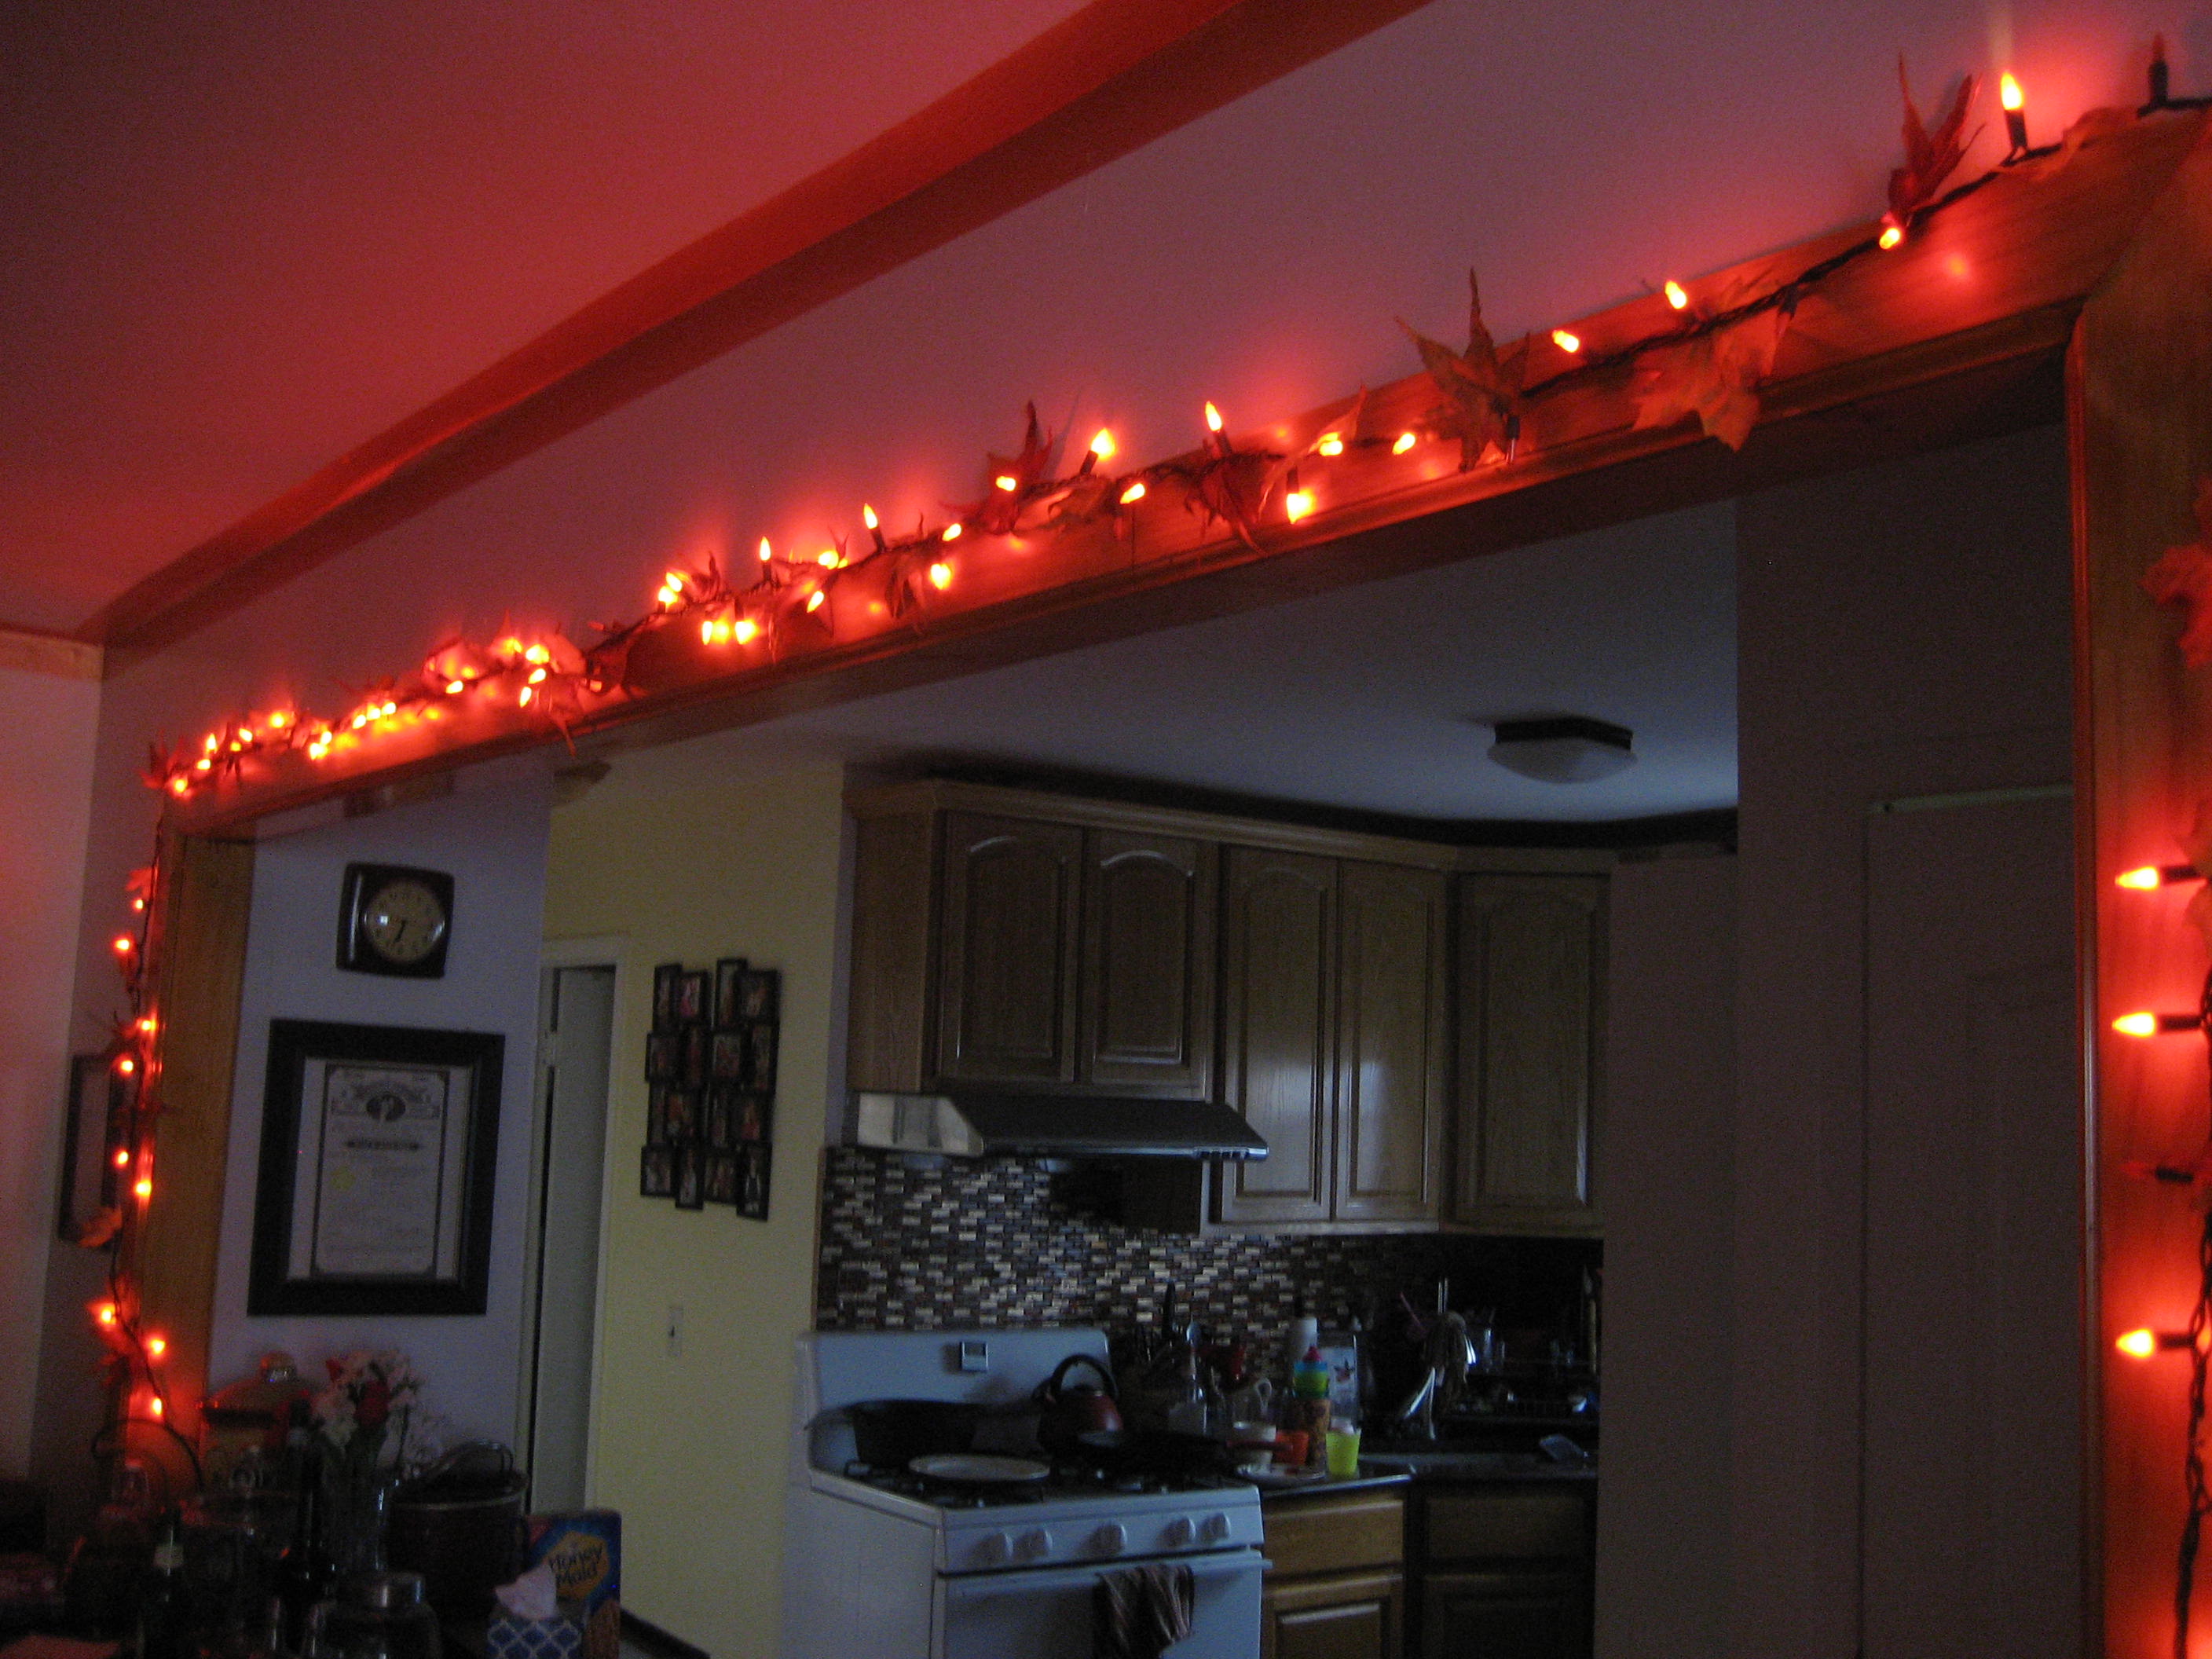
Fall is probably my favorite time to decorate for. I’m not sure why. I just love all the orange, red, and yellow. The pumpkins, leaves and scarecrows are quaint and I get excited as summer winds down and I can anticipate the crispness in the air that brings on fall. Here’s how we decorated for fall this year. It changes every year. I put some decorations in one place one year and in new place another year. I try to buy one new item on clearance at the end of every season so that we add to or decoration stash little by little.
Our fall twinkle lights. Made with orange halloween lights with paper leaves twisty tied on.
Window decals.
Pretty candle holders.
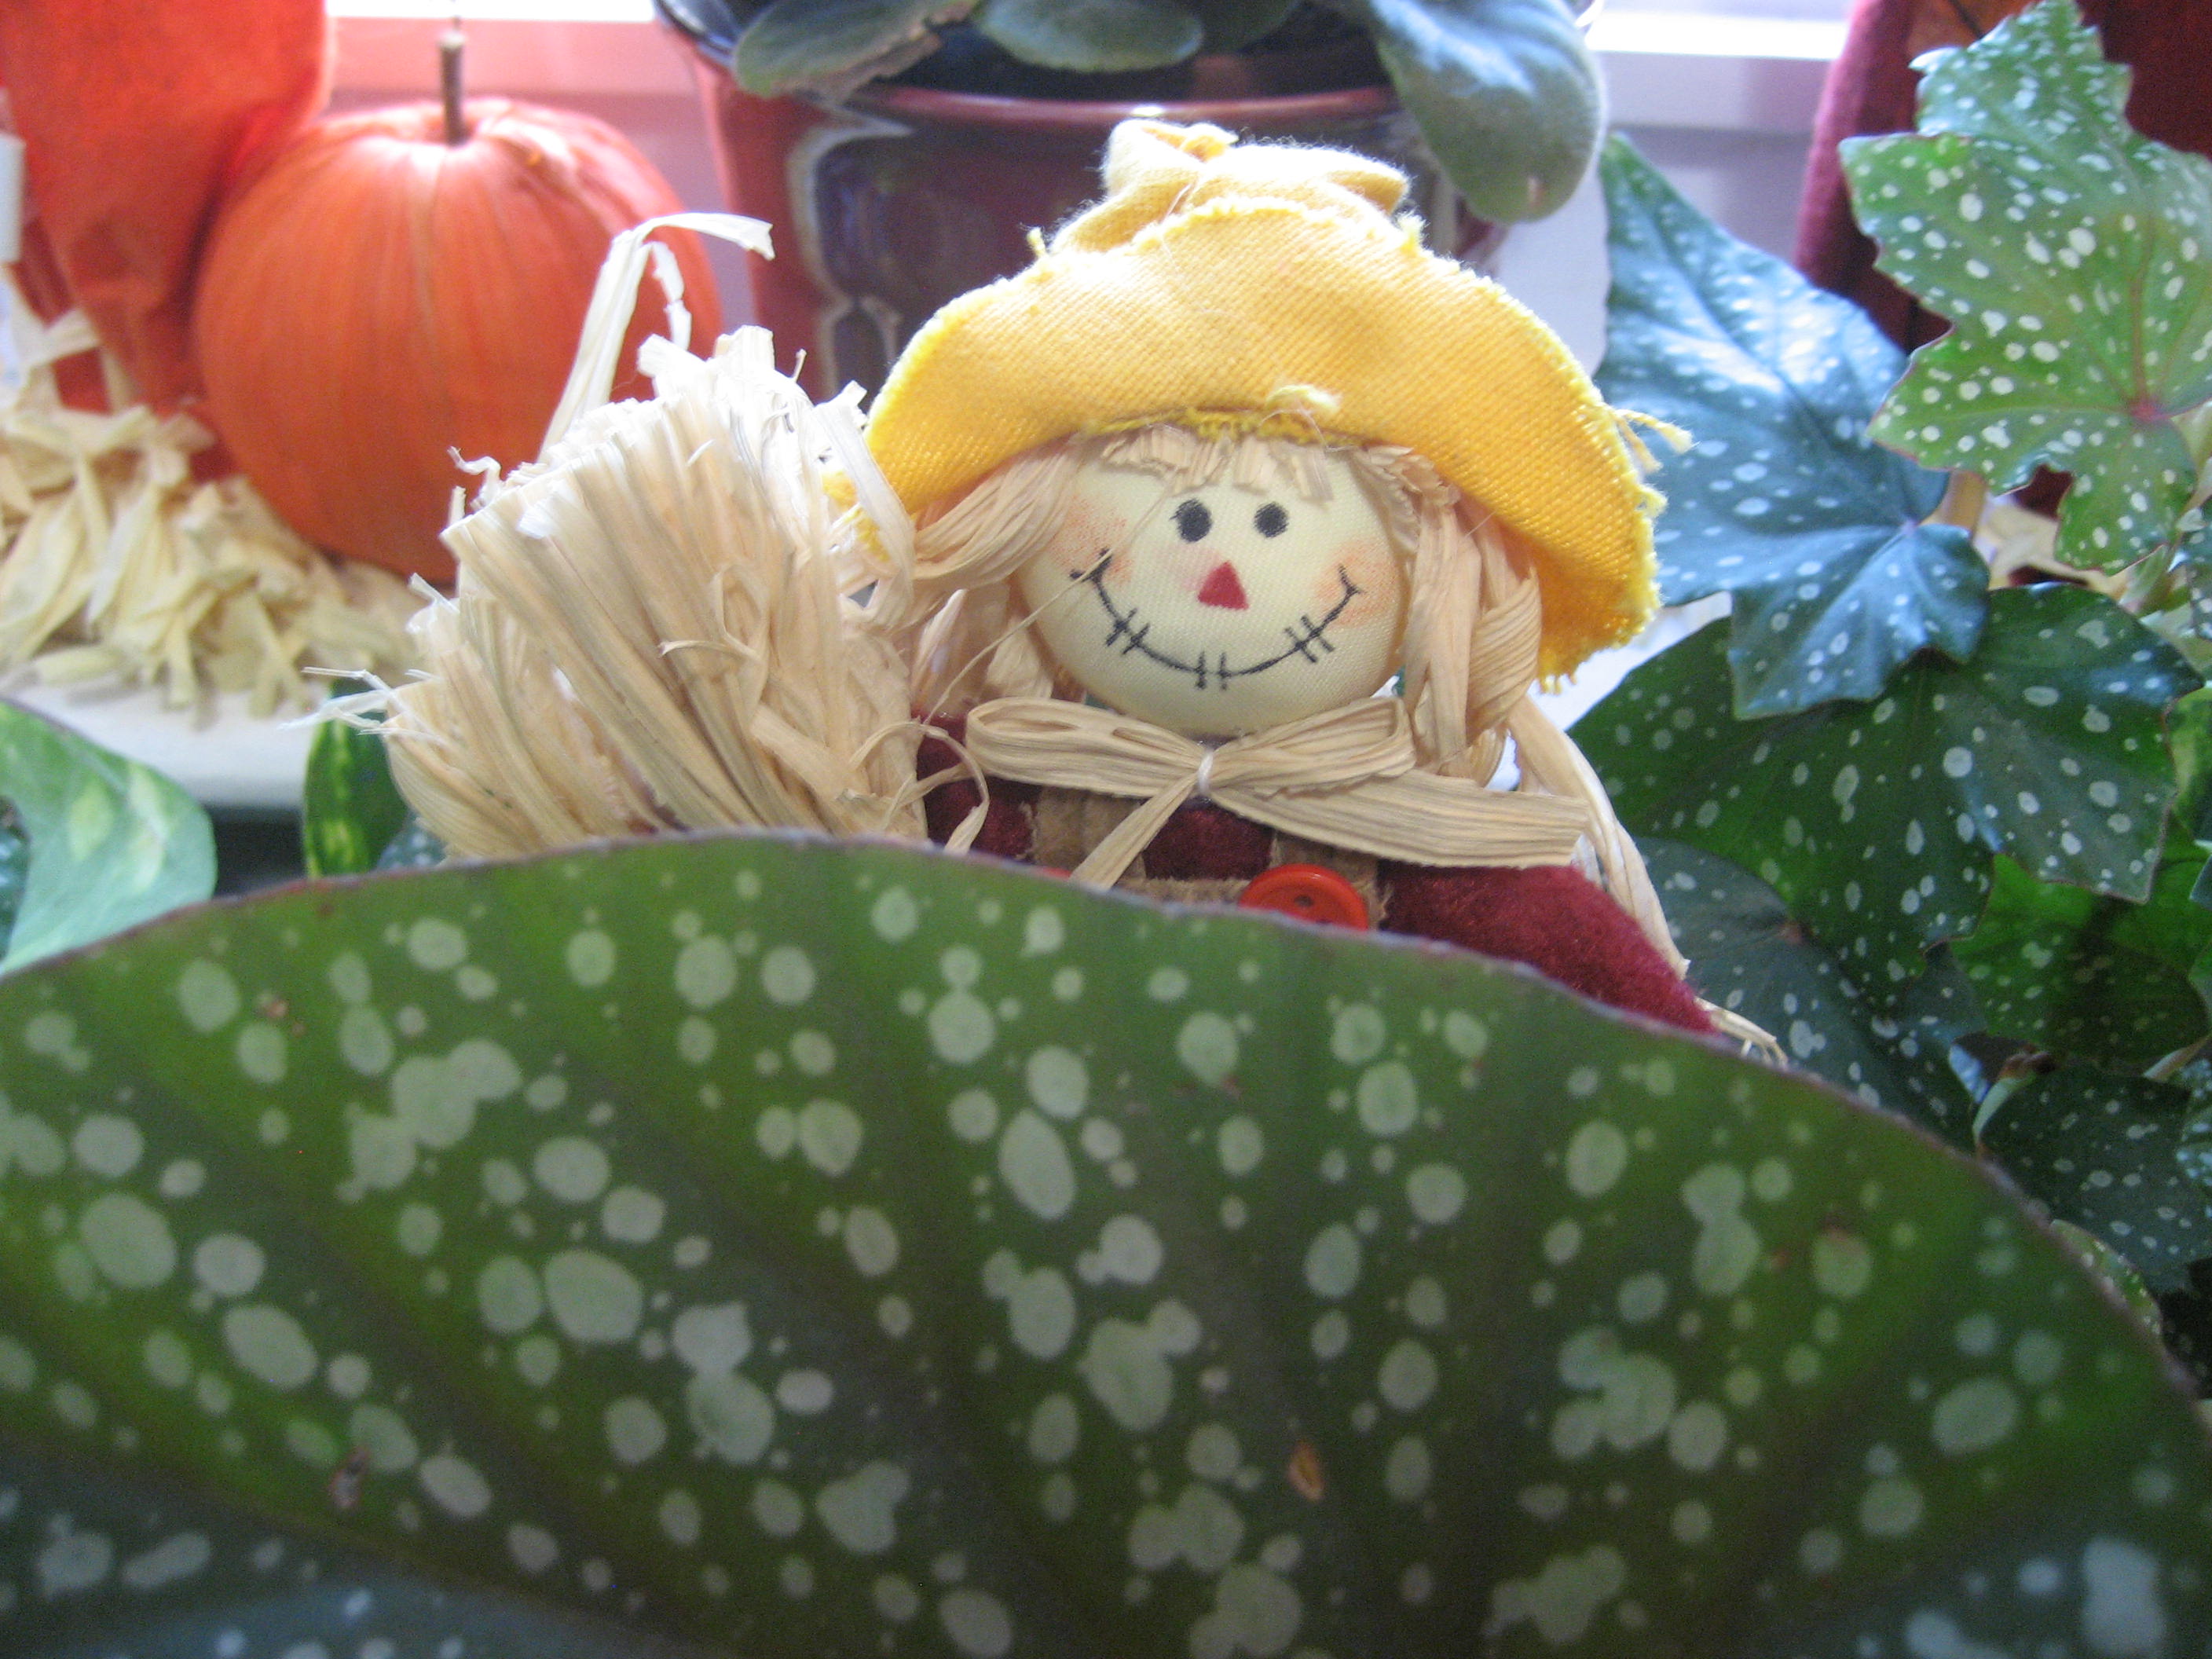
Cute scarecrows.
More cute scarecrows…
Our newest window scarecrow.
Isn’t this little face cute peeking over my plant leaves?
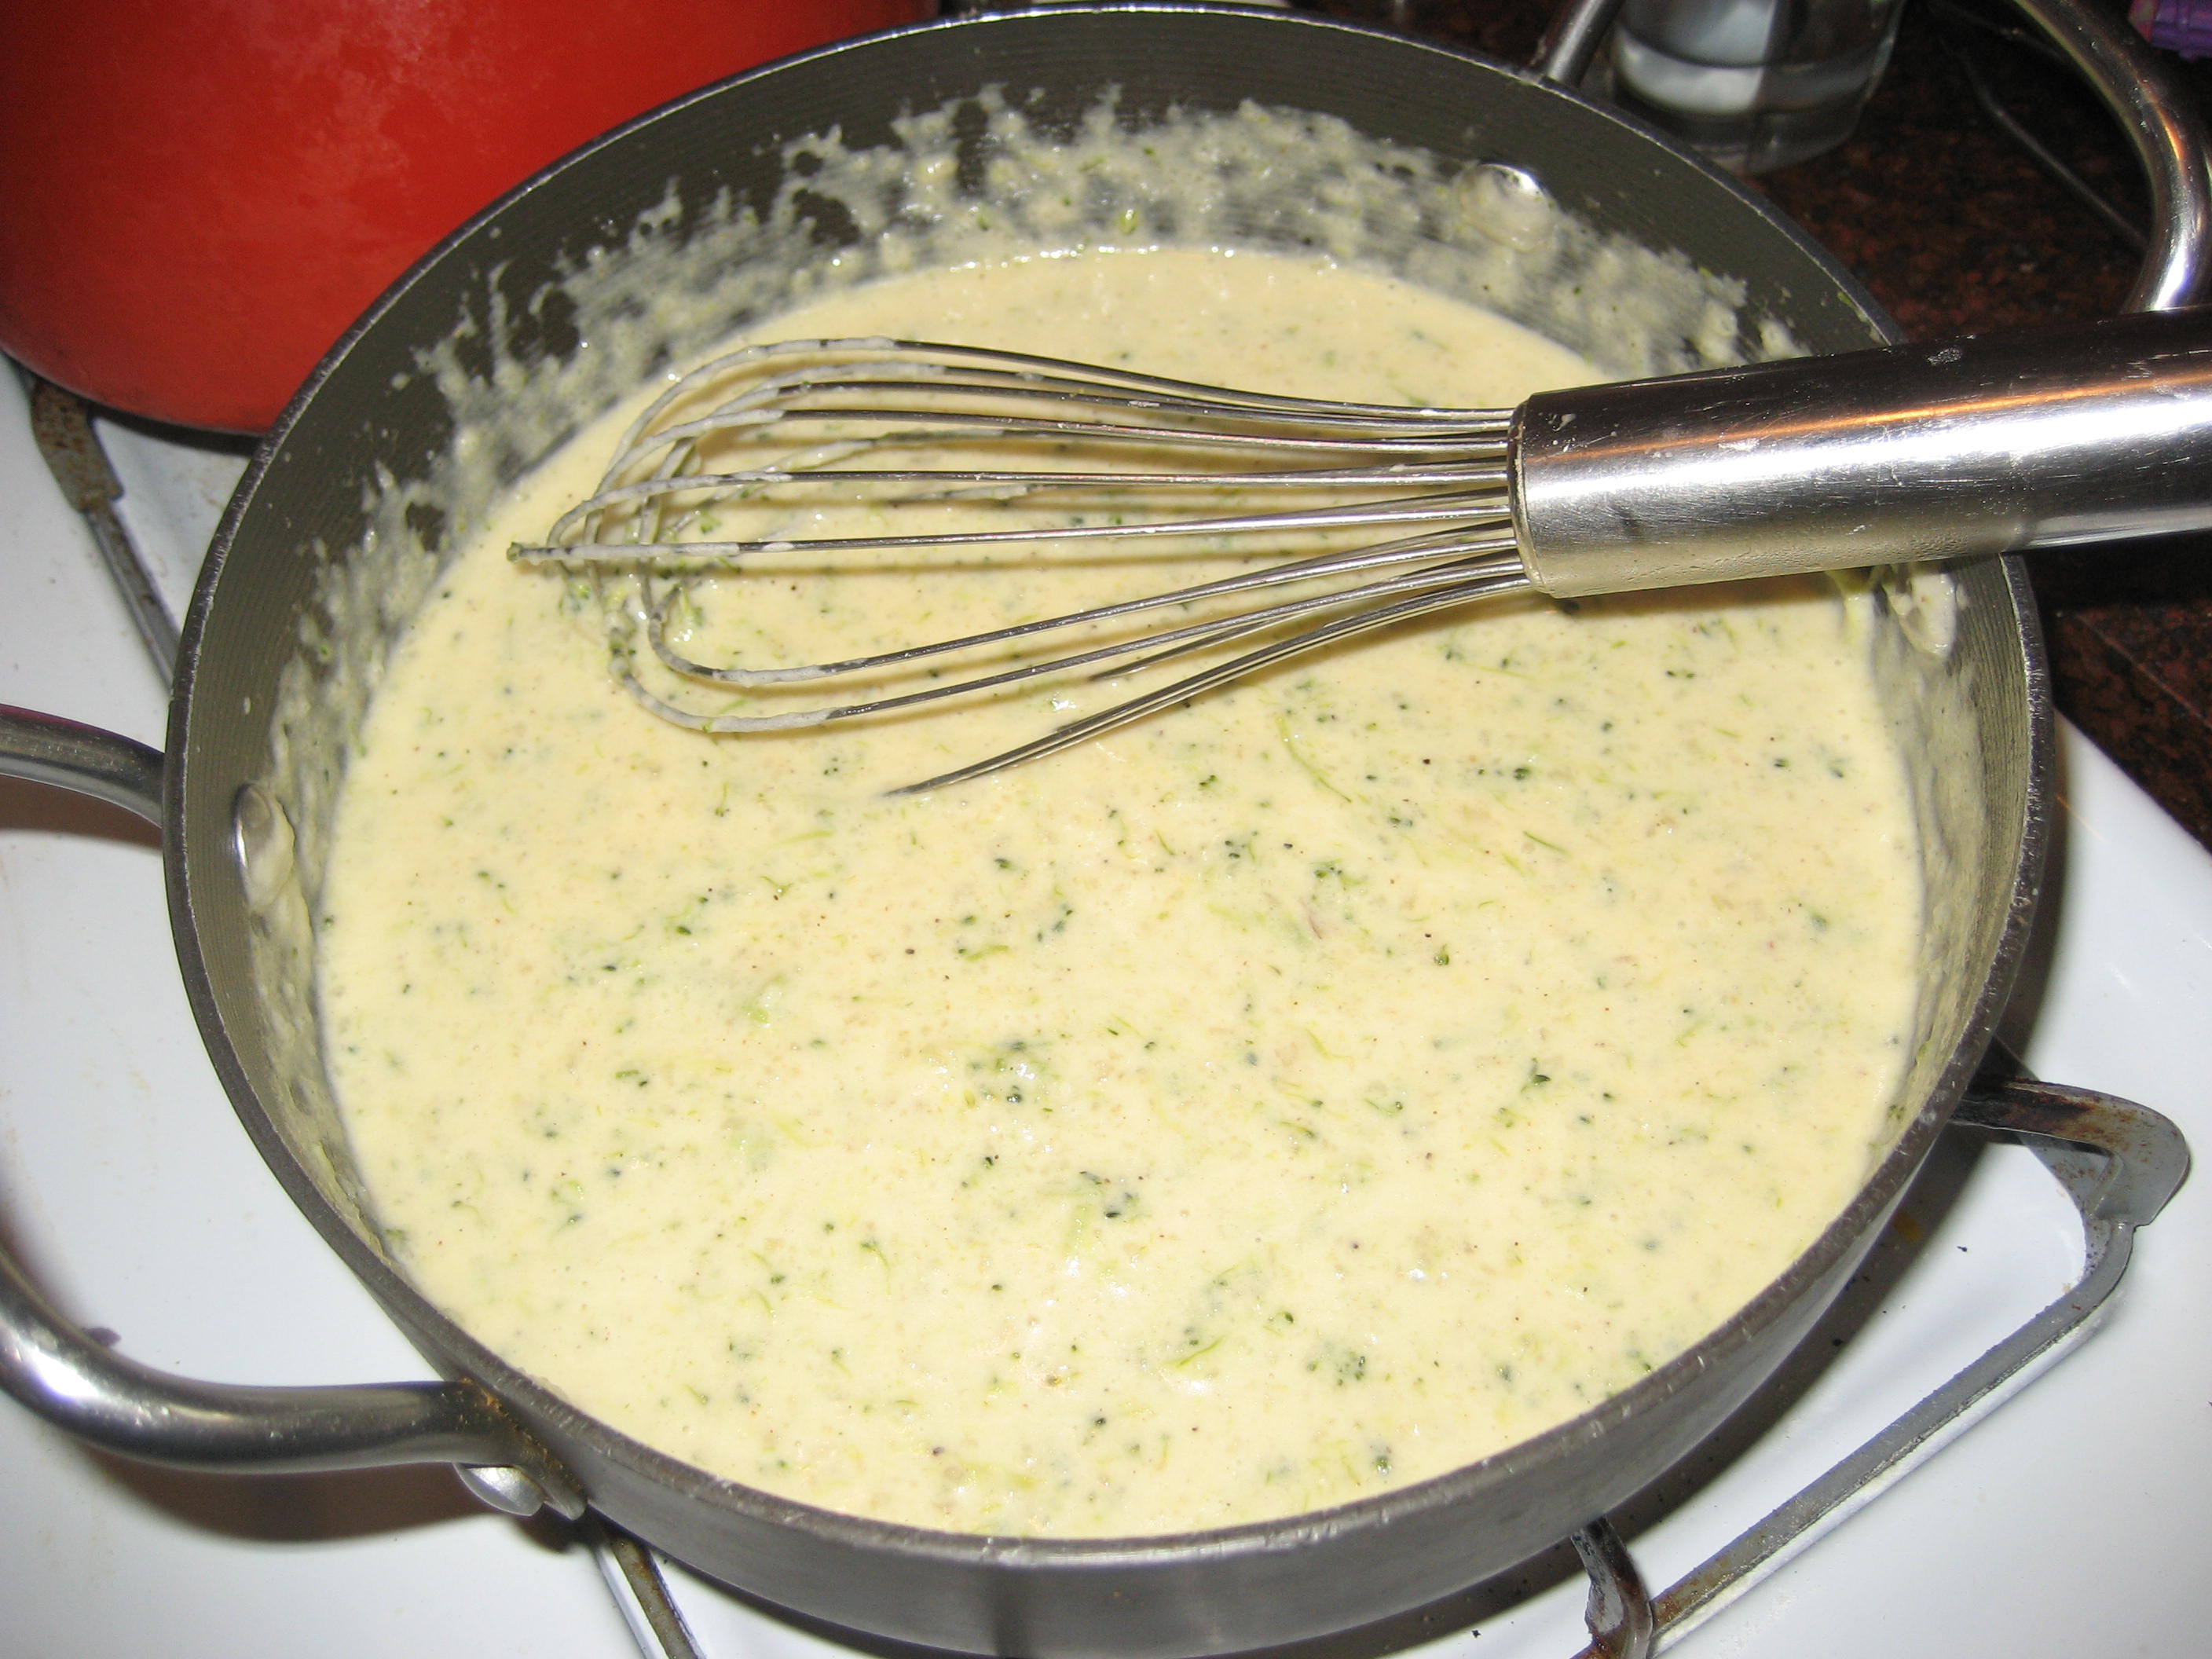
I invented this soup while trying to use up a variety of leftovers from my fridge for lunch one day. It turned out pretty good. So, save your leftovers and throw it all in. Here’s what I had to toss in:
baked potatoes, peeled and mashed
milk or cream until a thick soupy texture is reached
salt and pepper to taste
pat of butter
4-5 homemade chicken broth cubes
shredded cheese
cooked broccoli
Put everything in the pot cold and stir and mash until everything is dissolved and melted. Yum!
Other things that might be good in this soup are carrots, bacon or ham. Just be sure you are using leftovers or already cooked food. Uncooked veggies probably won’t cook through enough.
Here’s the books we’re using this year organized by grade level. The list includes suggested books for Pre-K up through Second Grade. If you’d like to see a list organized by subject, you can visit the Bookcase in the School House.
Note: The links below are Amazon Affiliate links. See Disclosure here.
If you have an older child and need suggestions for what to use with them consider these….
Curriculum:The Well-Trained Mindby Susan Wise-Bauer, Veritas Press Math: Saxon Math, choose the appropriate grade level Phonograms/Spelling: Writing Road to Reading or Spelling Power Reading/Literature: choose readers or classic literature based on their reading/grade level from the public library. The Book Tree is a good resource if you need suggestions based on grade level or want to know what grade level a book is at. It reviews quality literature and gives a synopsis of each book.| History: The Story of the World series. Choose the one based on the age/grade of your child. Or Beautiful Feet has many good resources for a literature based approach to history. Science: Apologia Science offers rigorous science programs for elementary, middle school and high school. Note: this is a creation based science curriculum. Geography: The Noah Plan History and Geography Curriculum Guide Art:Drawing With Children
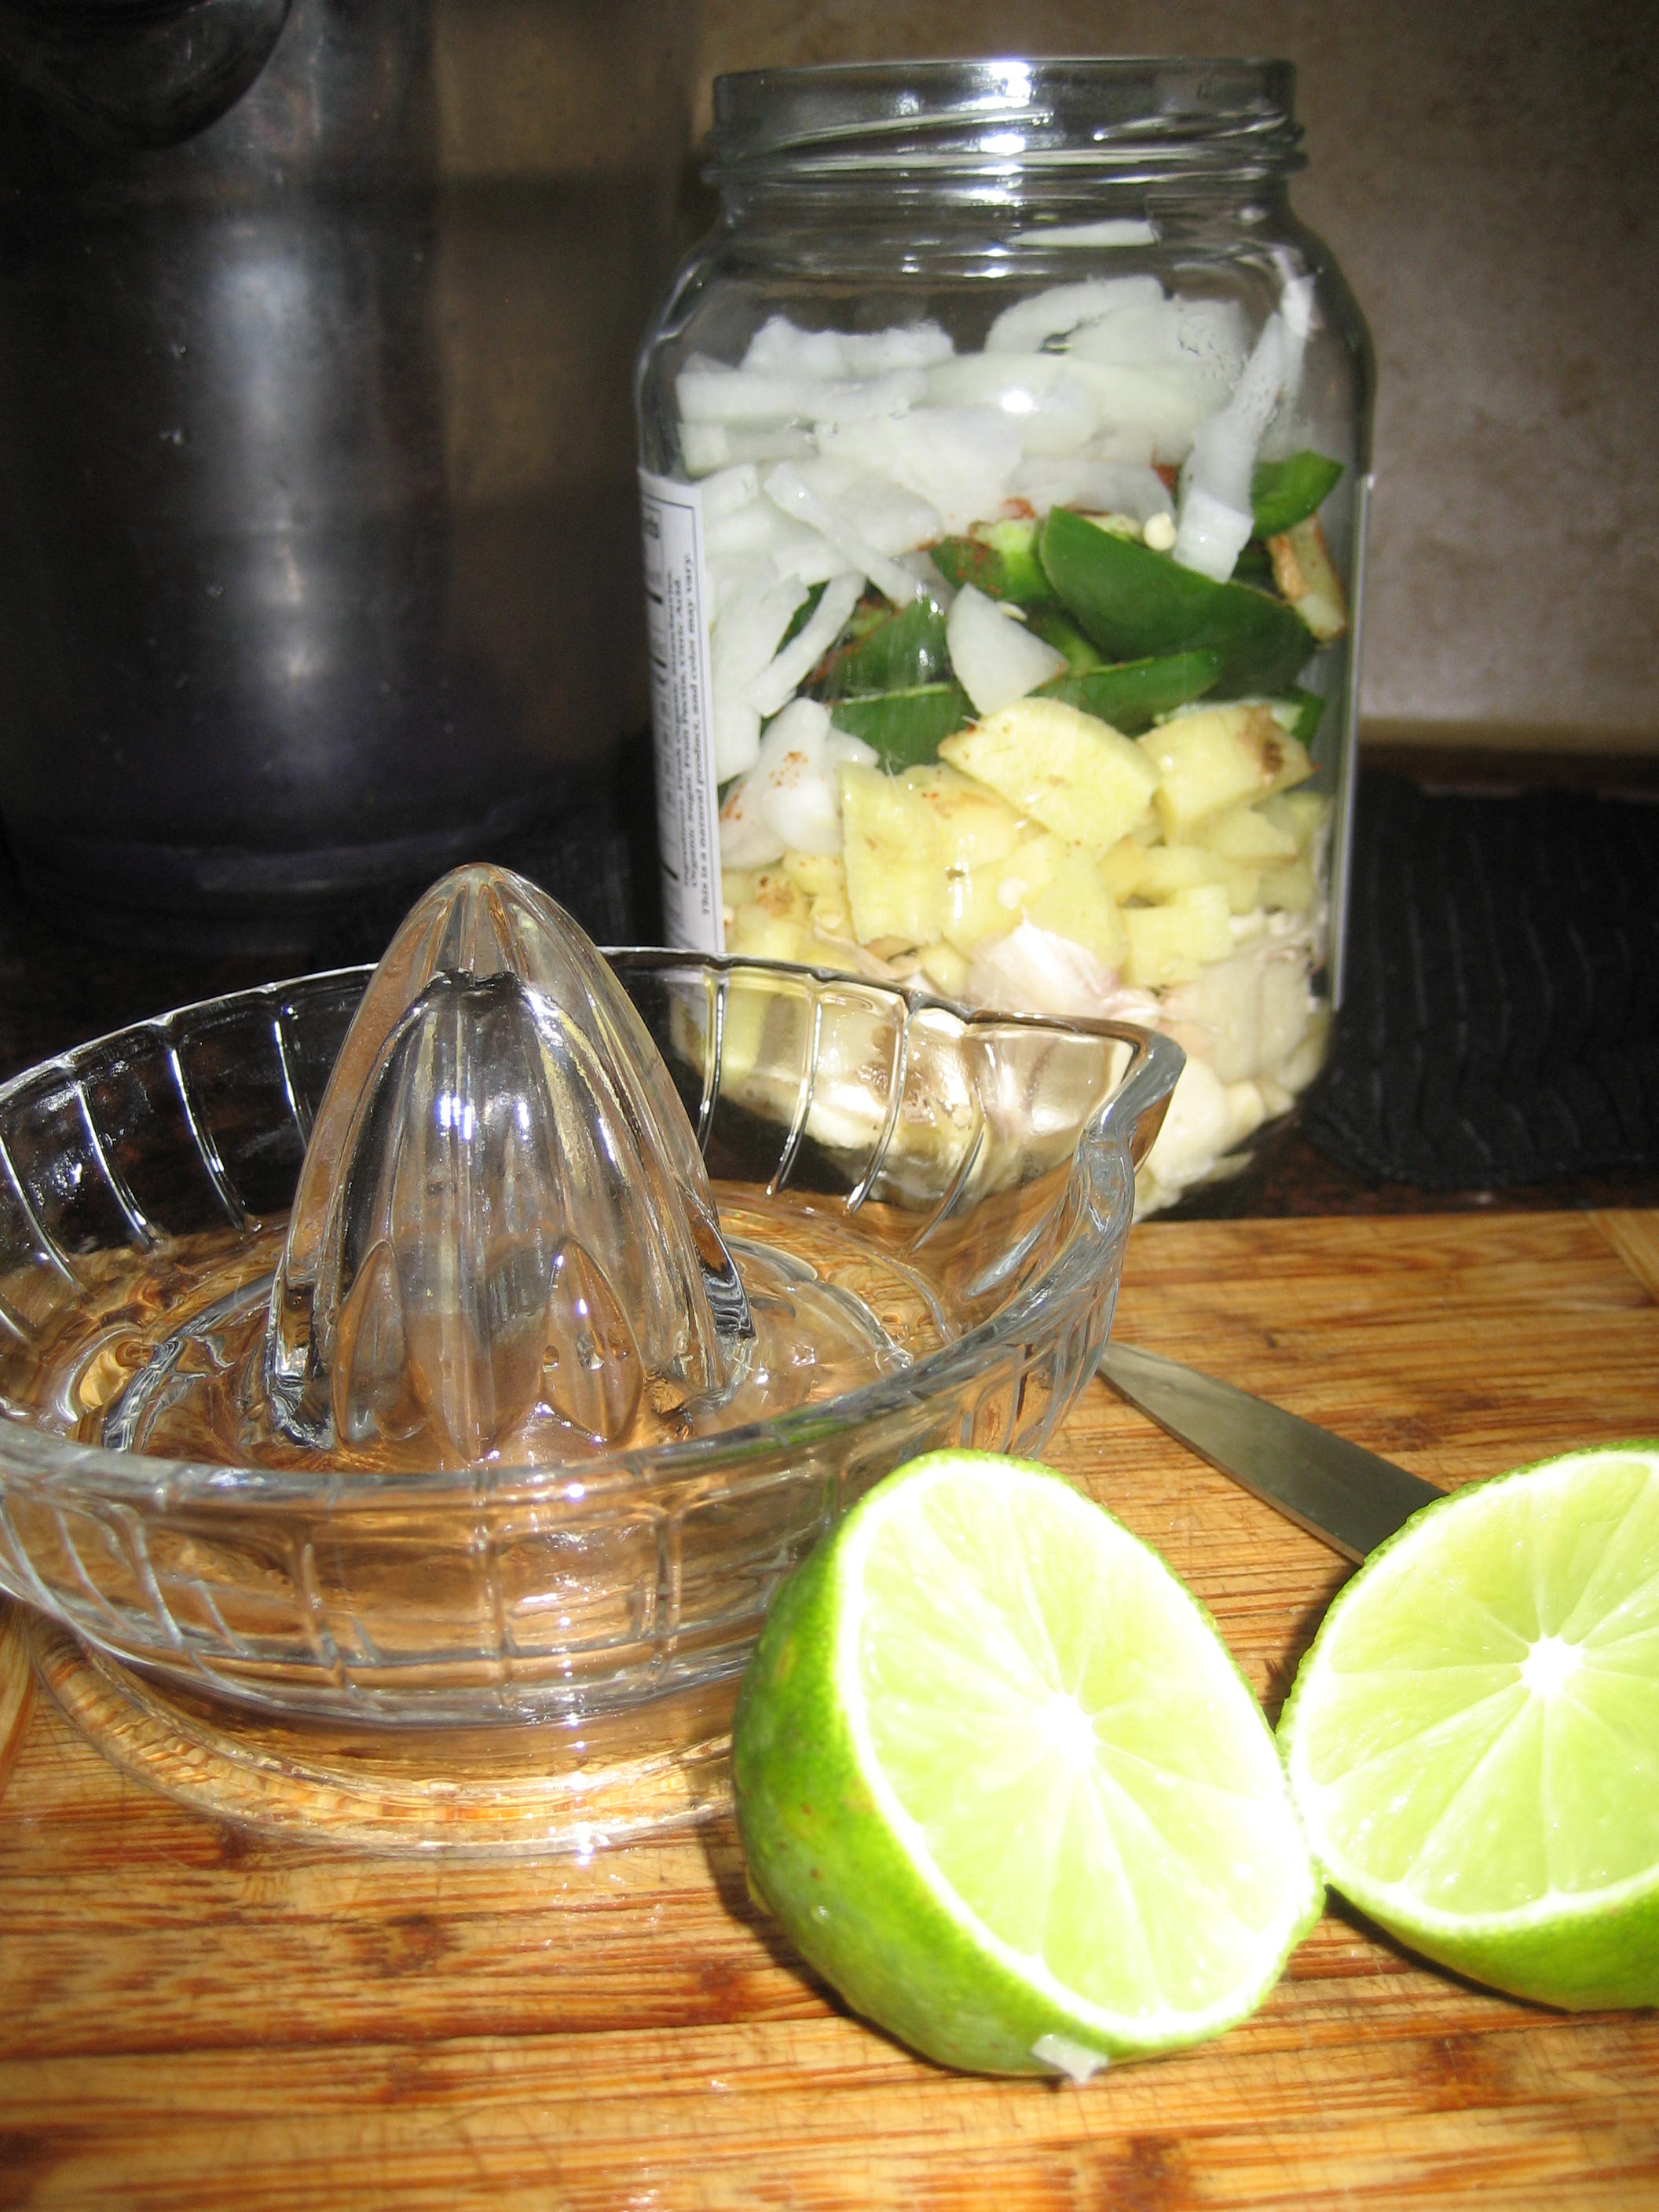
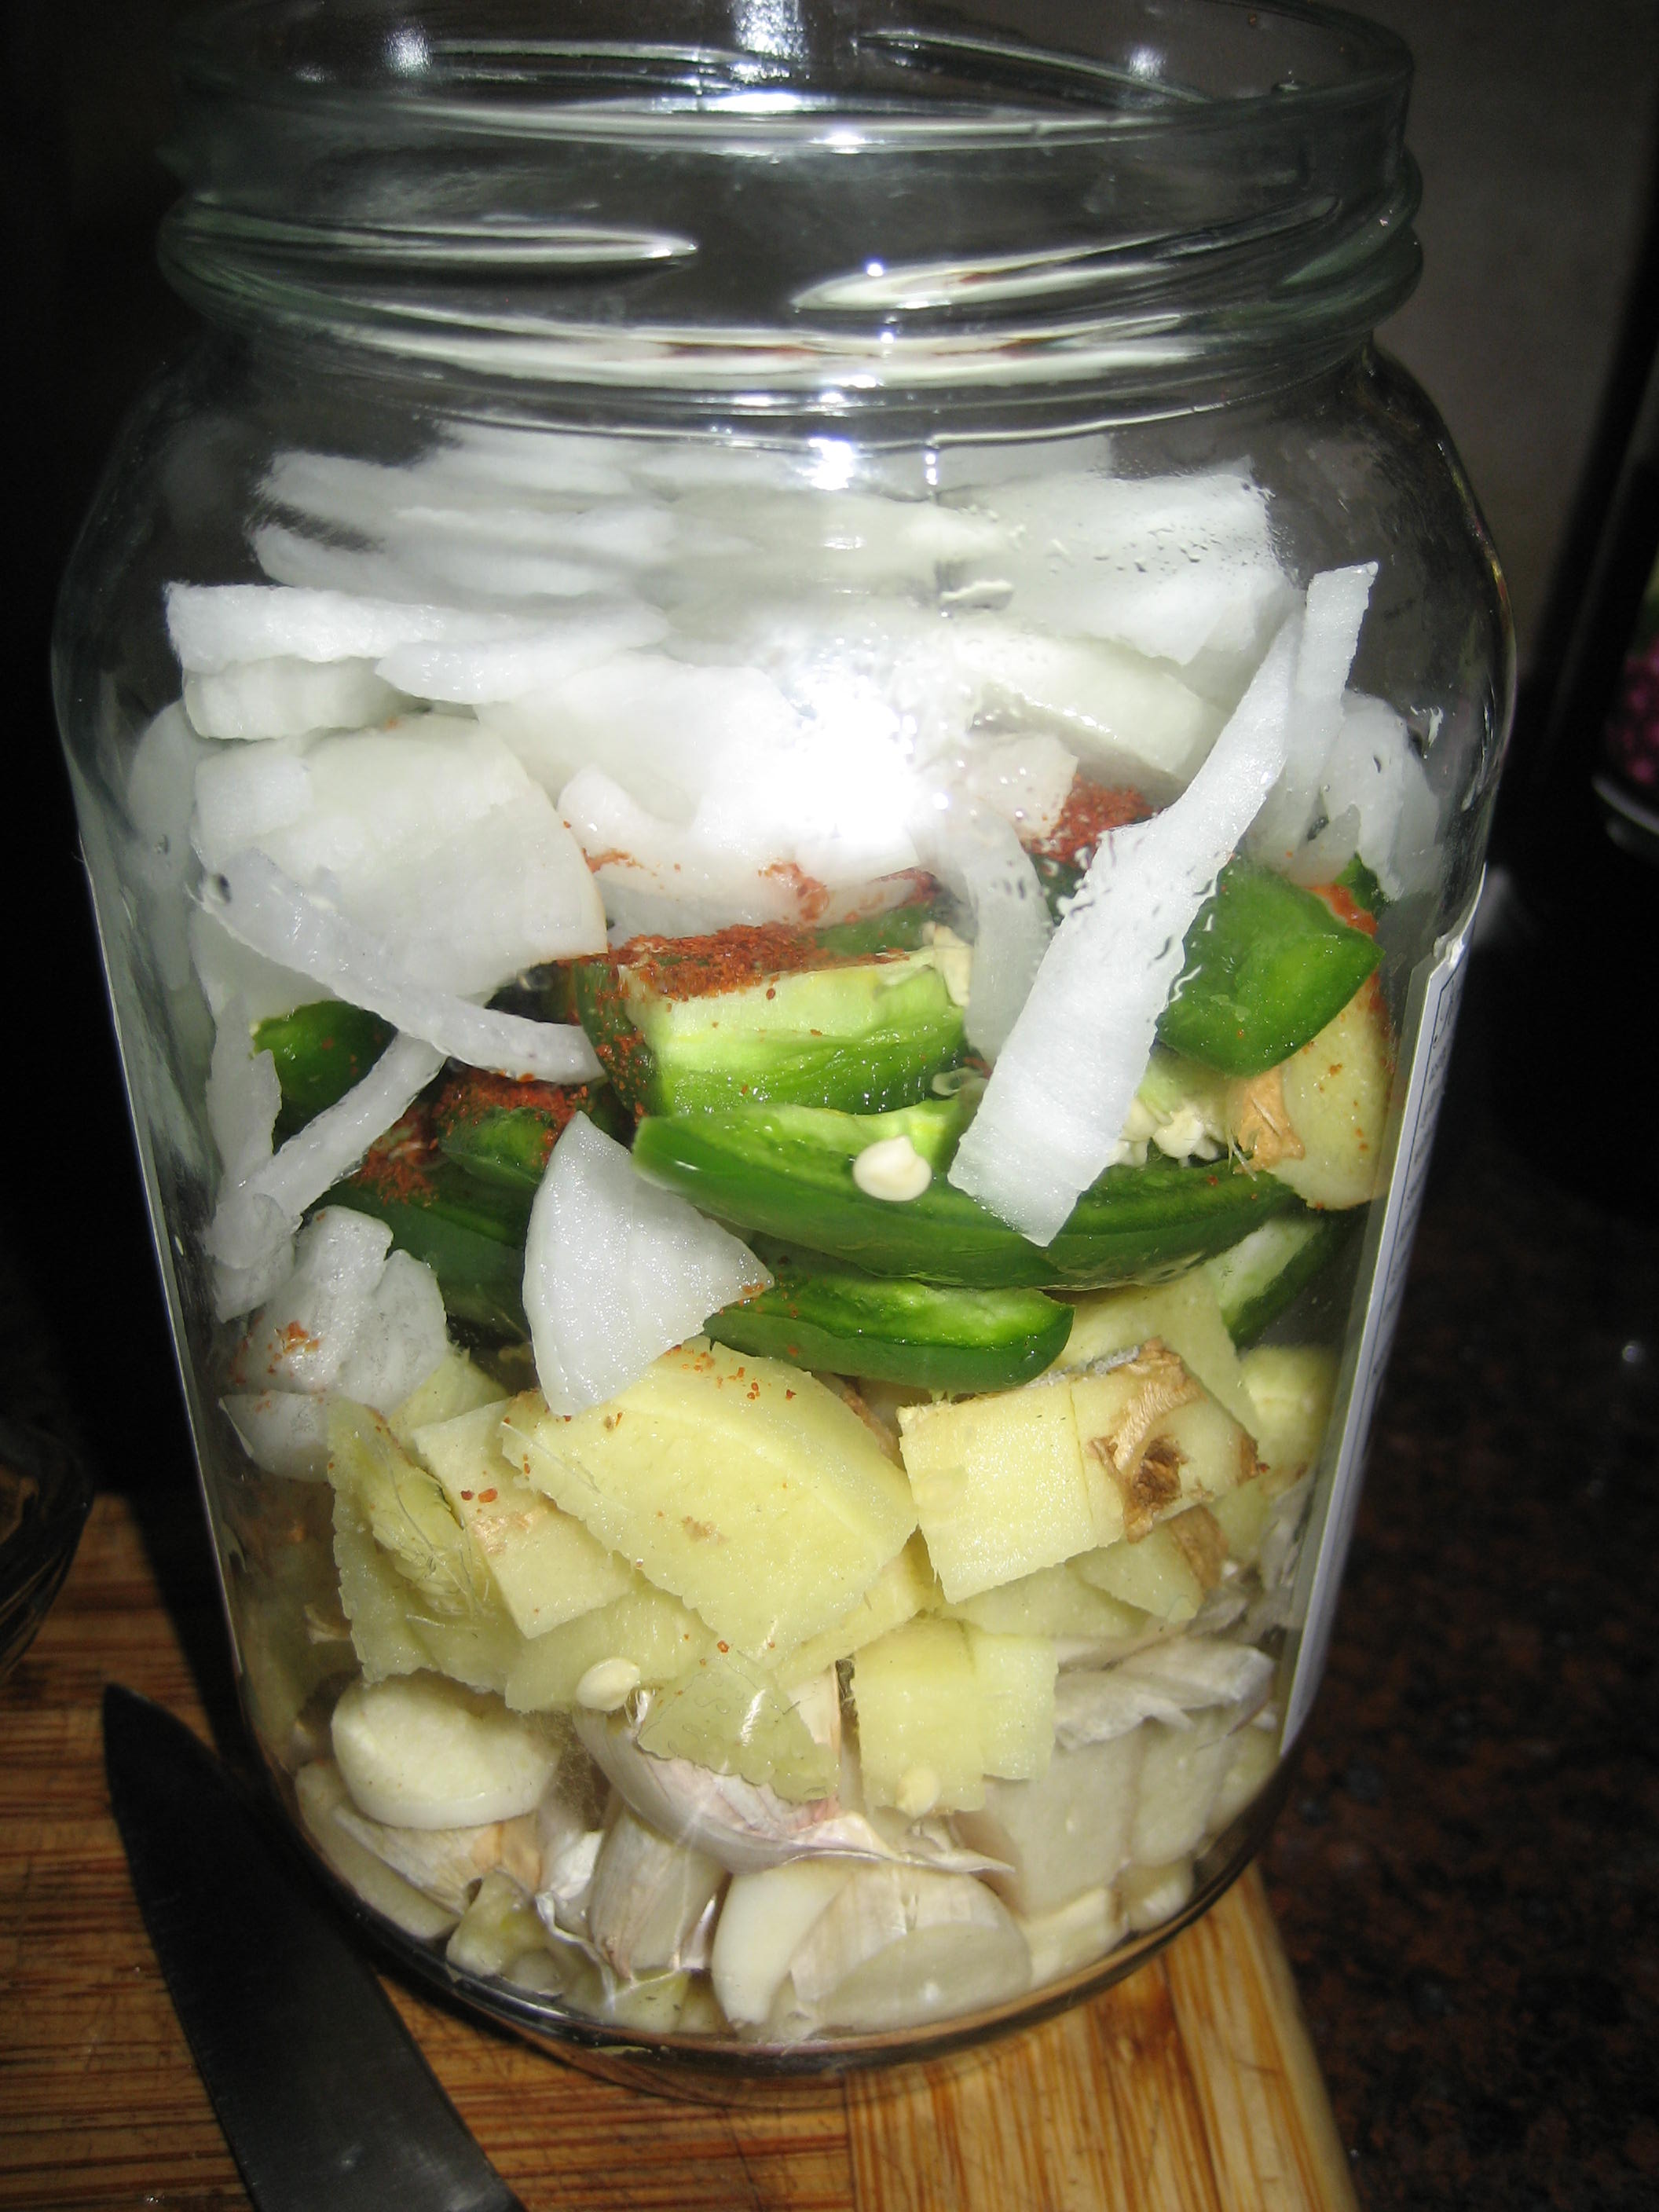
I ran across this Fire Cider recipe from Mommypotamus this week. I decided immediately that I wanted to make it mostly because I was curious as to how spicy it would be. So, sick kids got me to thinking about it again. I decided to make while all my sick ones were napping yesterday afternoon. I couldn’t find all the ingredients (like turmeric root) and some (like horseradish) are ones that I’m not a big fan of. So, I changed it up a little and made my Fire Cider – Texas style with flavors and ingredients that I love from my native Texas. And I promise, it will be just as spicy and beneficial towards fighting off the bugs and viruses as the original. Here’s what I did.
Start with quart size jar and throw everything in.
Texas Fire Cider:
2 heads of garlic, coarsely chopped (I left the skins on they are a good source of quercetin)
2 tbl. ginger root, peeled and chopped
3 jalepenos, quartered
1/2 cup white onion, sliced
3 limes, juiced along with some zest
1 tsp. black peppercorns
dash or two of cayenne pepper or crushed red pepper (I used some of both – I know, crazy right?)
Fill the jar and cover with raw apple cider vinegar (Bragg Apple Cider Vinegar is good – don’t use the grocery store brand) covering everything. You may want to use a fermenting weight if your items float to keep everything below the liquid. This will prevent spoilage. Put a lid on. If the lid is not plastic you can put some wax paper under the lid before you put it on to prevent the vinegar from coroding the lid. Let it sit for 2-4 weeks. Strain and drink as shots or dilute in water.
I’ll let you know how spicy mine is. Are you brave enough to try it?
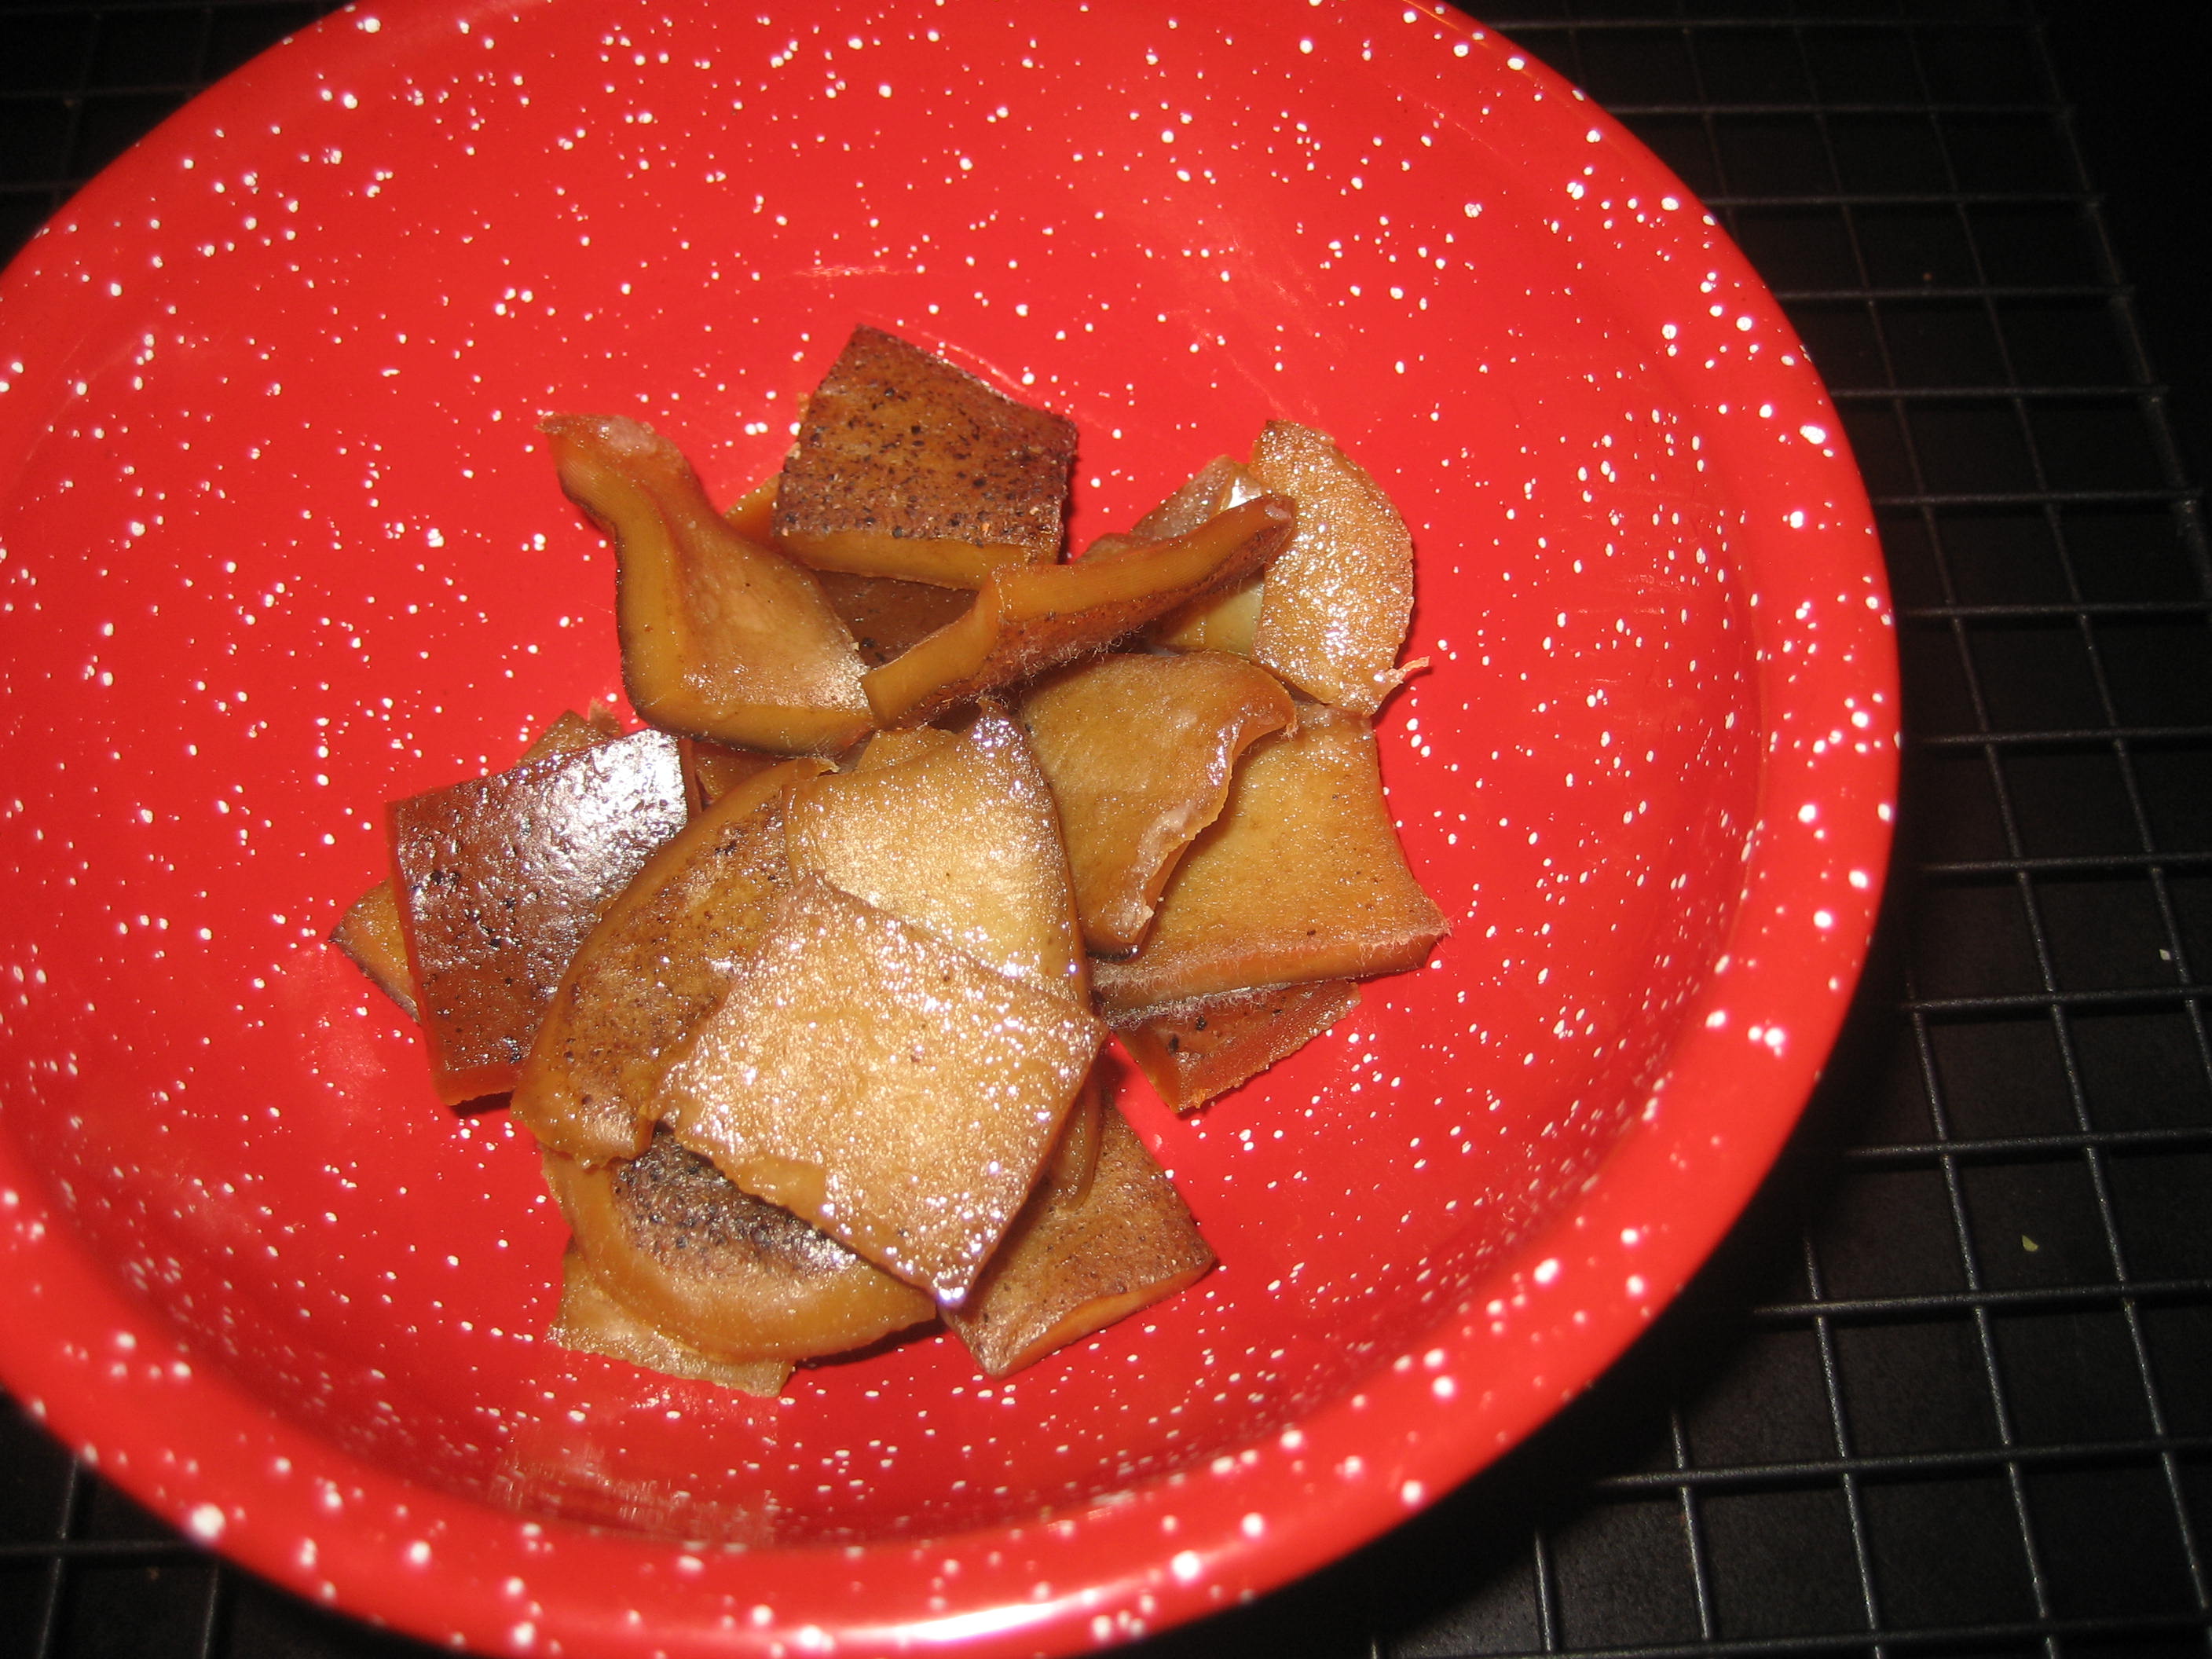
Homemade bullion cubes after they have dried. I store mine in the fridge until I need them.
I’m so thankful for these homemade bullion cubes today (click here for directions on how to make your own). As I type, I have instant homemade chicken soup simmering on the stove for my sick toddler. Not only does it taste delicious, but her sick tummy will get all the benefits of homemade chicken broth with all it’s vitamins, minerals.
These homemade chicken broth cubes are worth their weight in gold when family members are sick. They are so convenient to have on hand when you are dealing with the stress of illness. I just throw some of these cubes in some cold water along with whatever noodles or rice I have on hand and simmer until the starch is done. Use about 4 1-inch size cubes per cup of broth. It’s easy, delicious, nutritious and healing. Stay well!

 I’ve been mixing this up a lot lately. Three friends have had babies in the last few weeks. I didn’t discover herbal sitz baths for postpartum use until my second child. This is one of my favorite remedies. It makes a great gift for a new mom. It really helps speed and facilitate postpartum healing. Be sure to bathe the baby too. This mix will help disinfect and heal the baby’s cord stump.
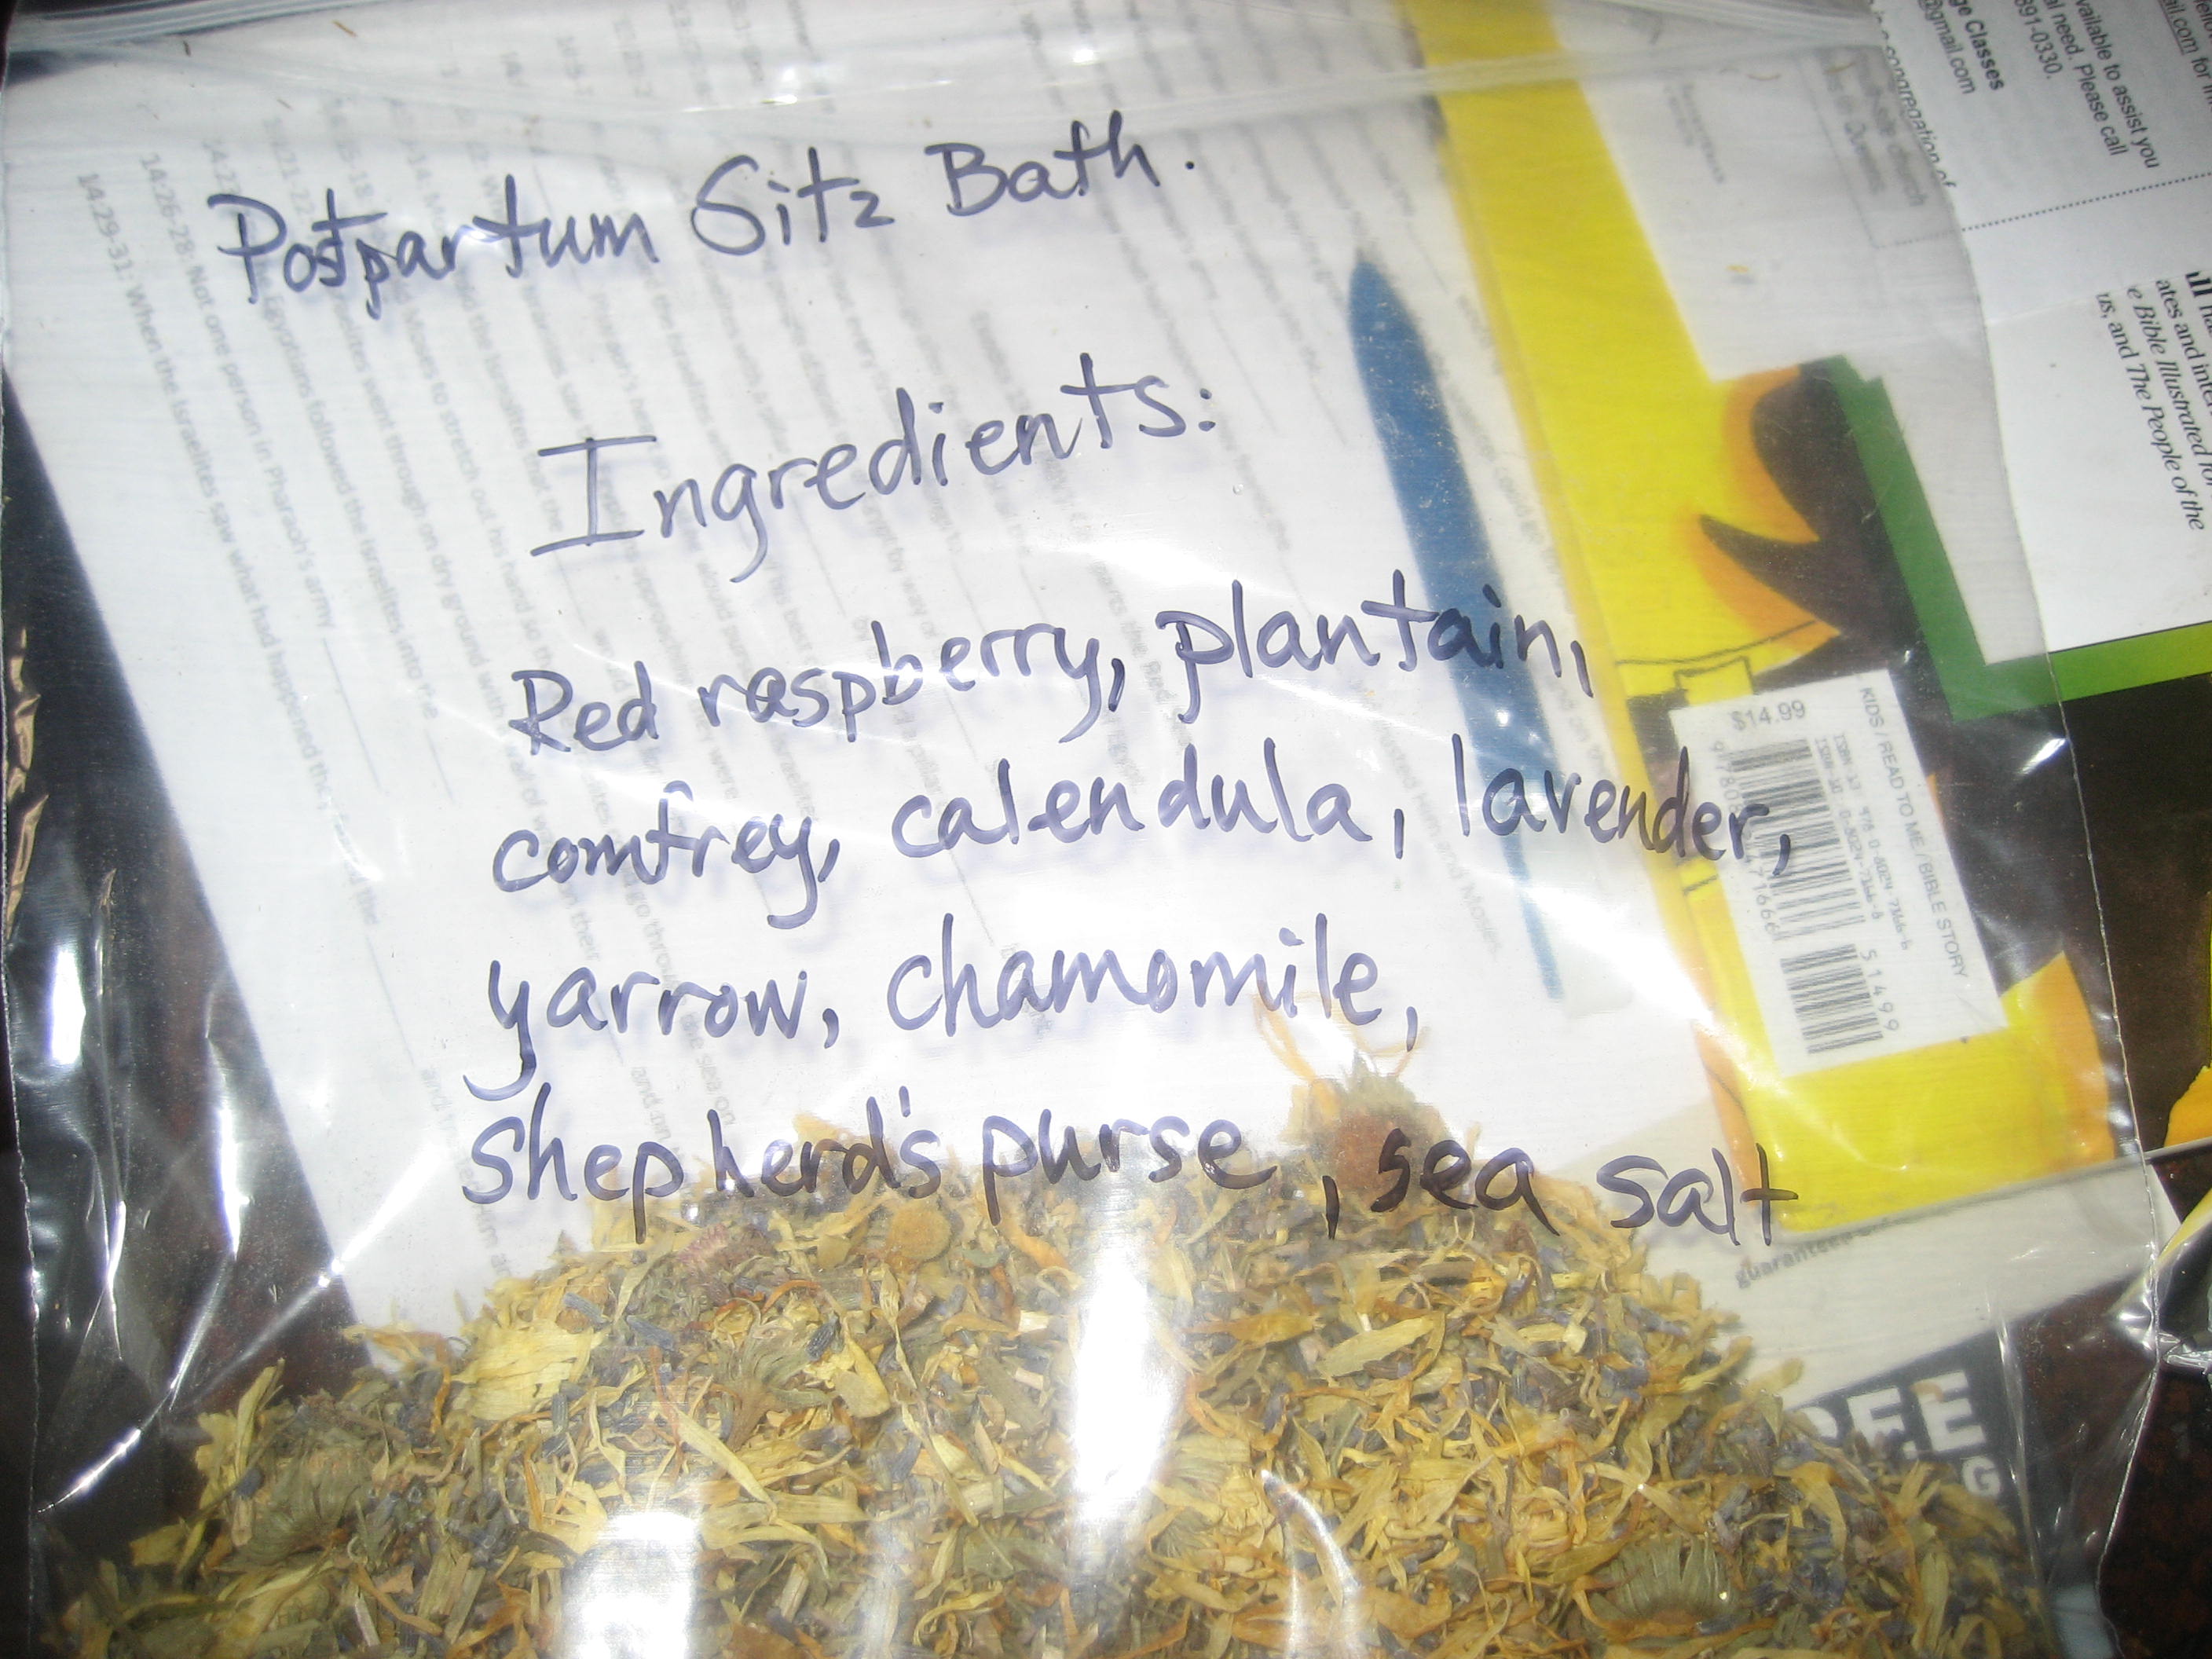 All bagged up ready to pass along to a friend.