How to keep happy houseplants

I’ve always had houseplants. But I’m pleased to say that I now have houseplants that are happy. I’ve never had good light for them any of the places we’ve lived. So I’m thankful that I have plenty of windows with good light.

Scroll through the photos below to see what make some of my current favorites happy.

My Tulips and Muscari started popping up in January so I brought them in for some winter blooms.
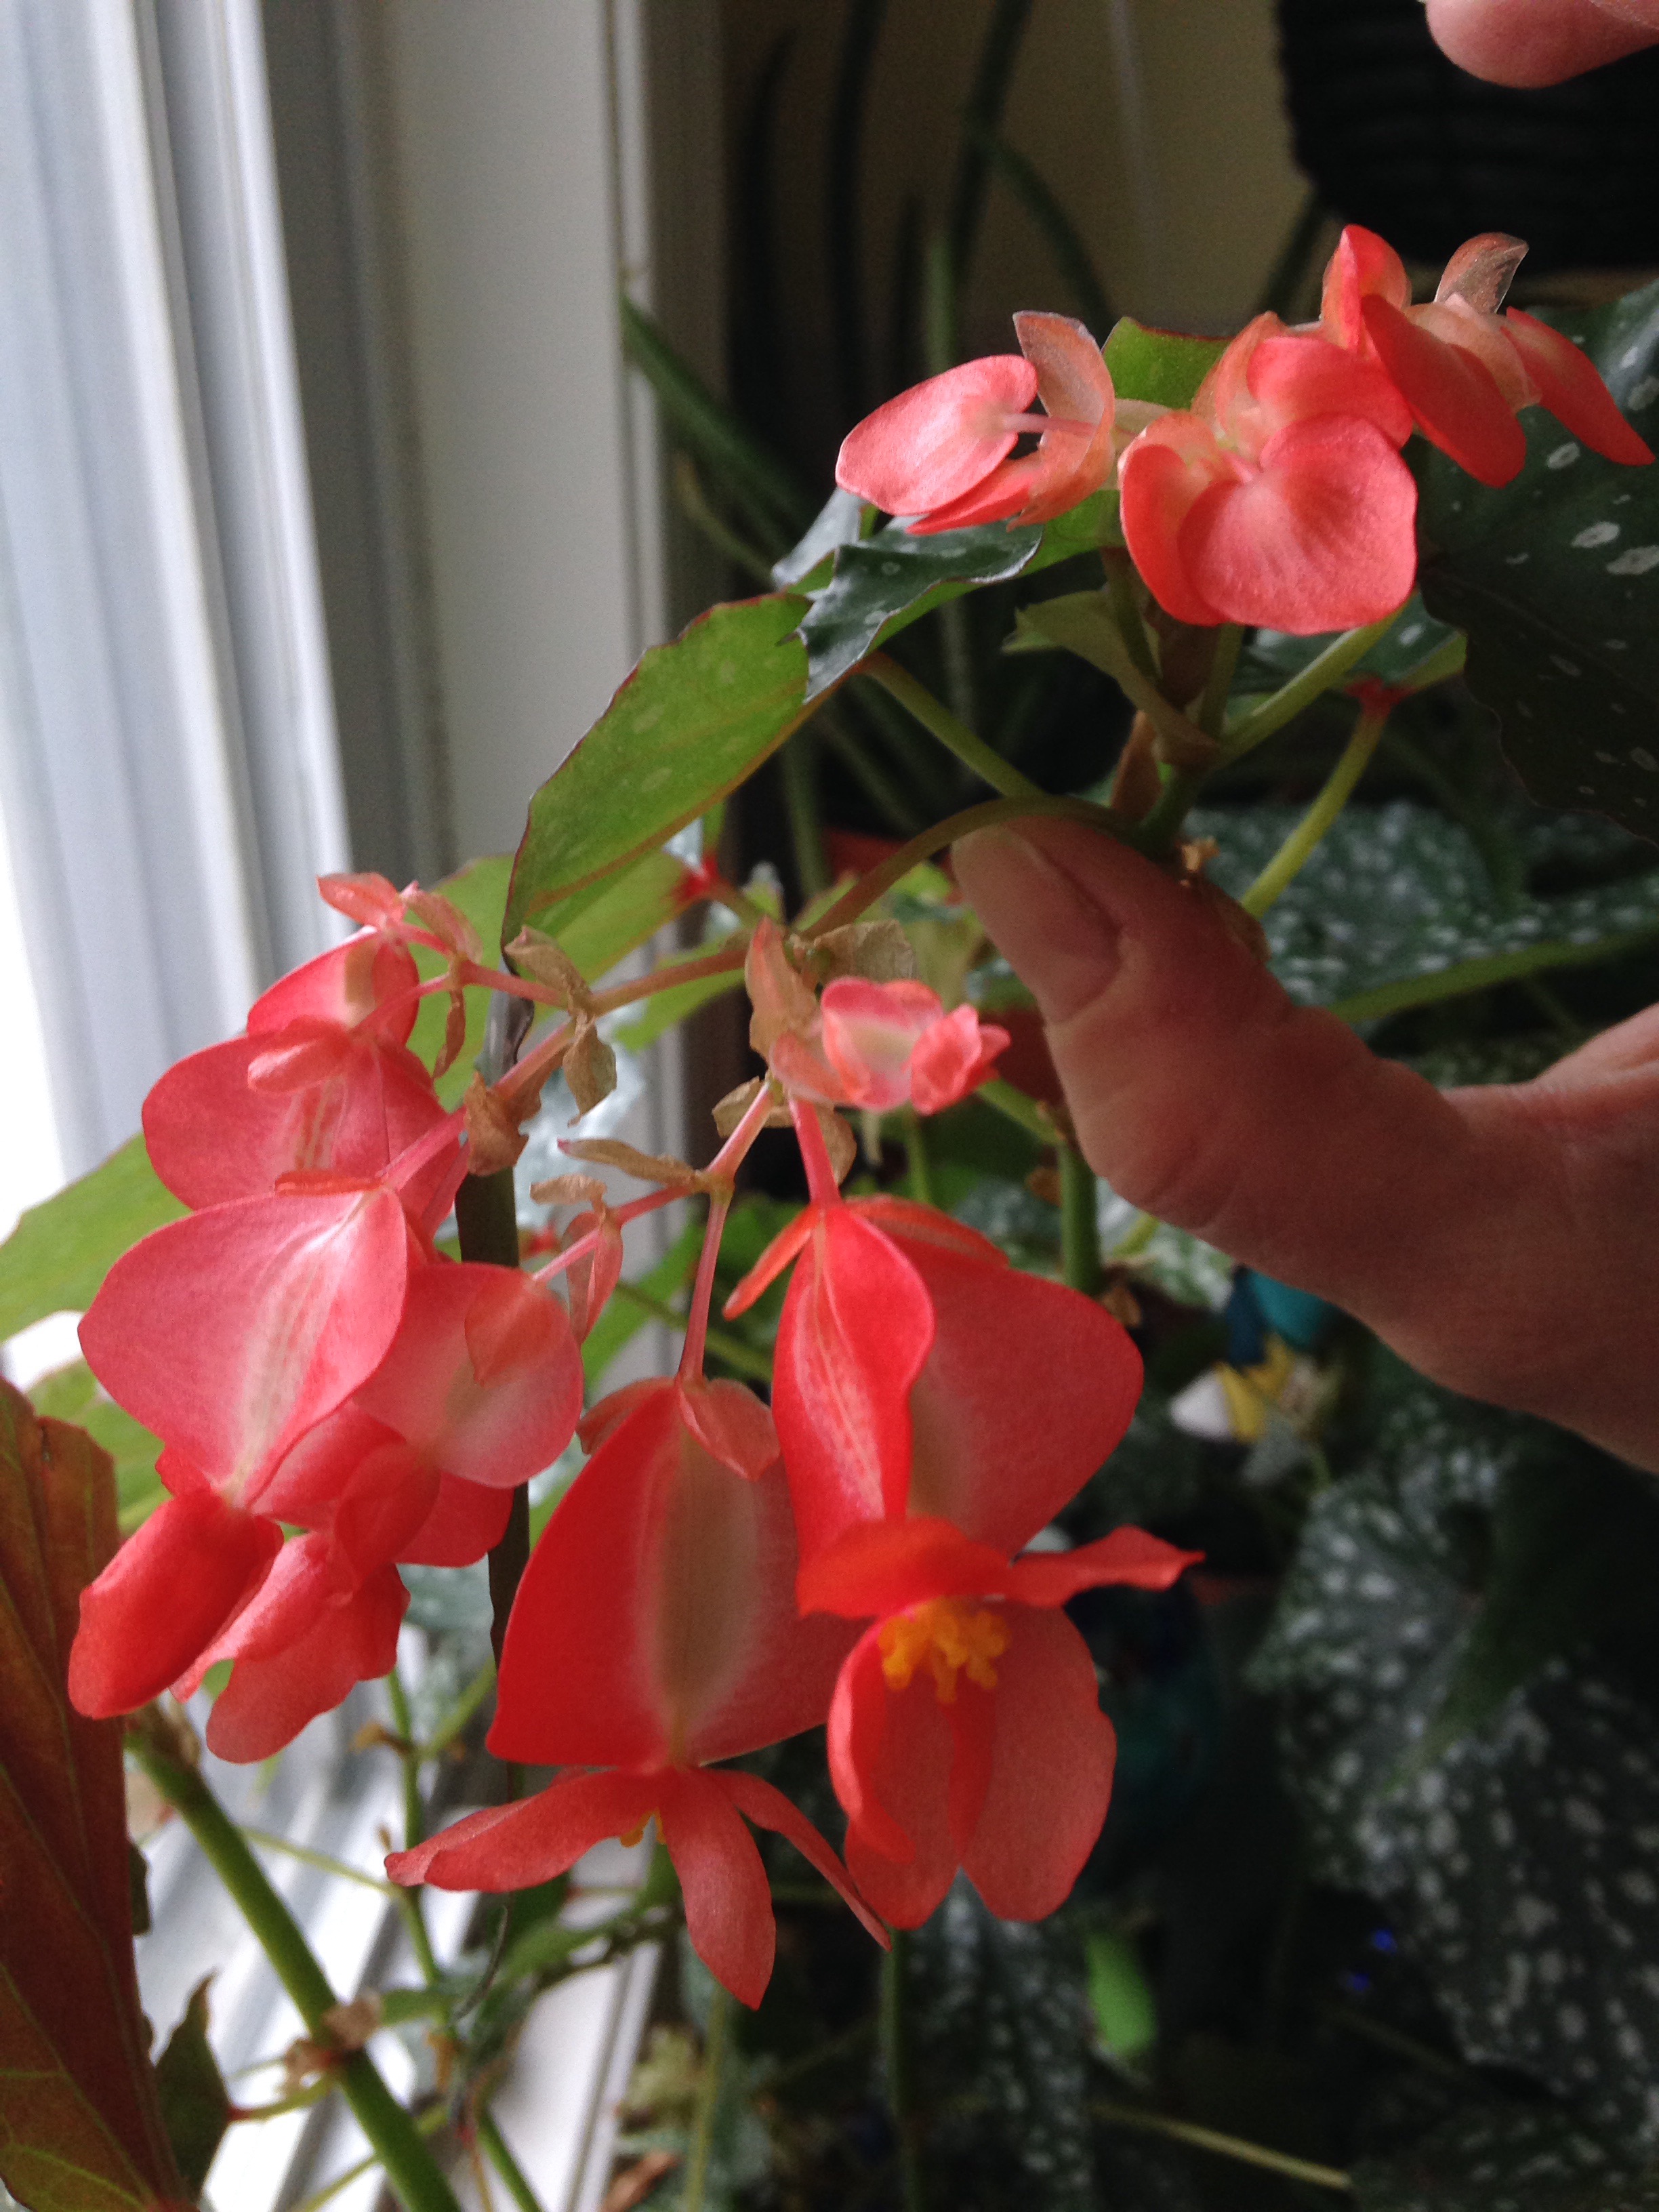
This was my Grandmother’s Angel Wing Begonia. I’ve had it for at least 12 years and it’s never bloomed once. Imagine my excitement when it bloomed this year. I’m so glad that it’s happy in this east window with the early morning light.

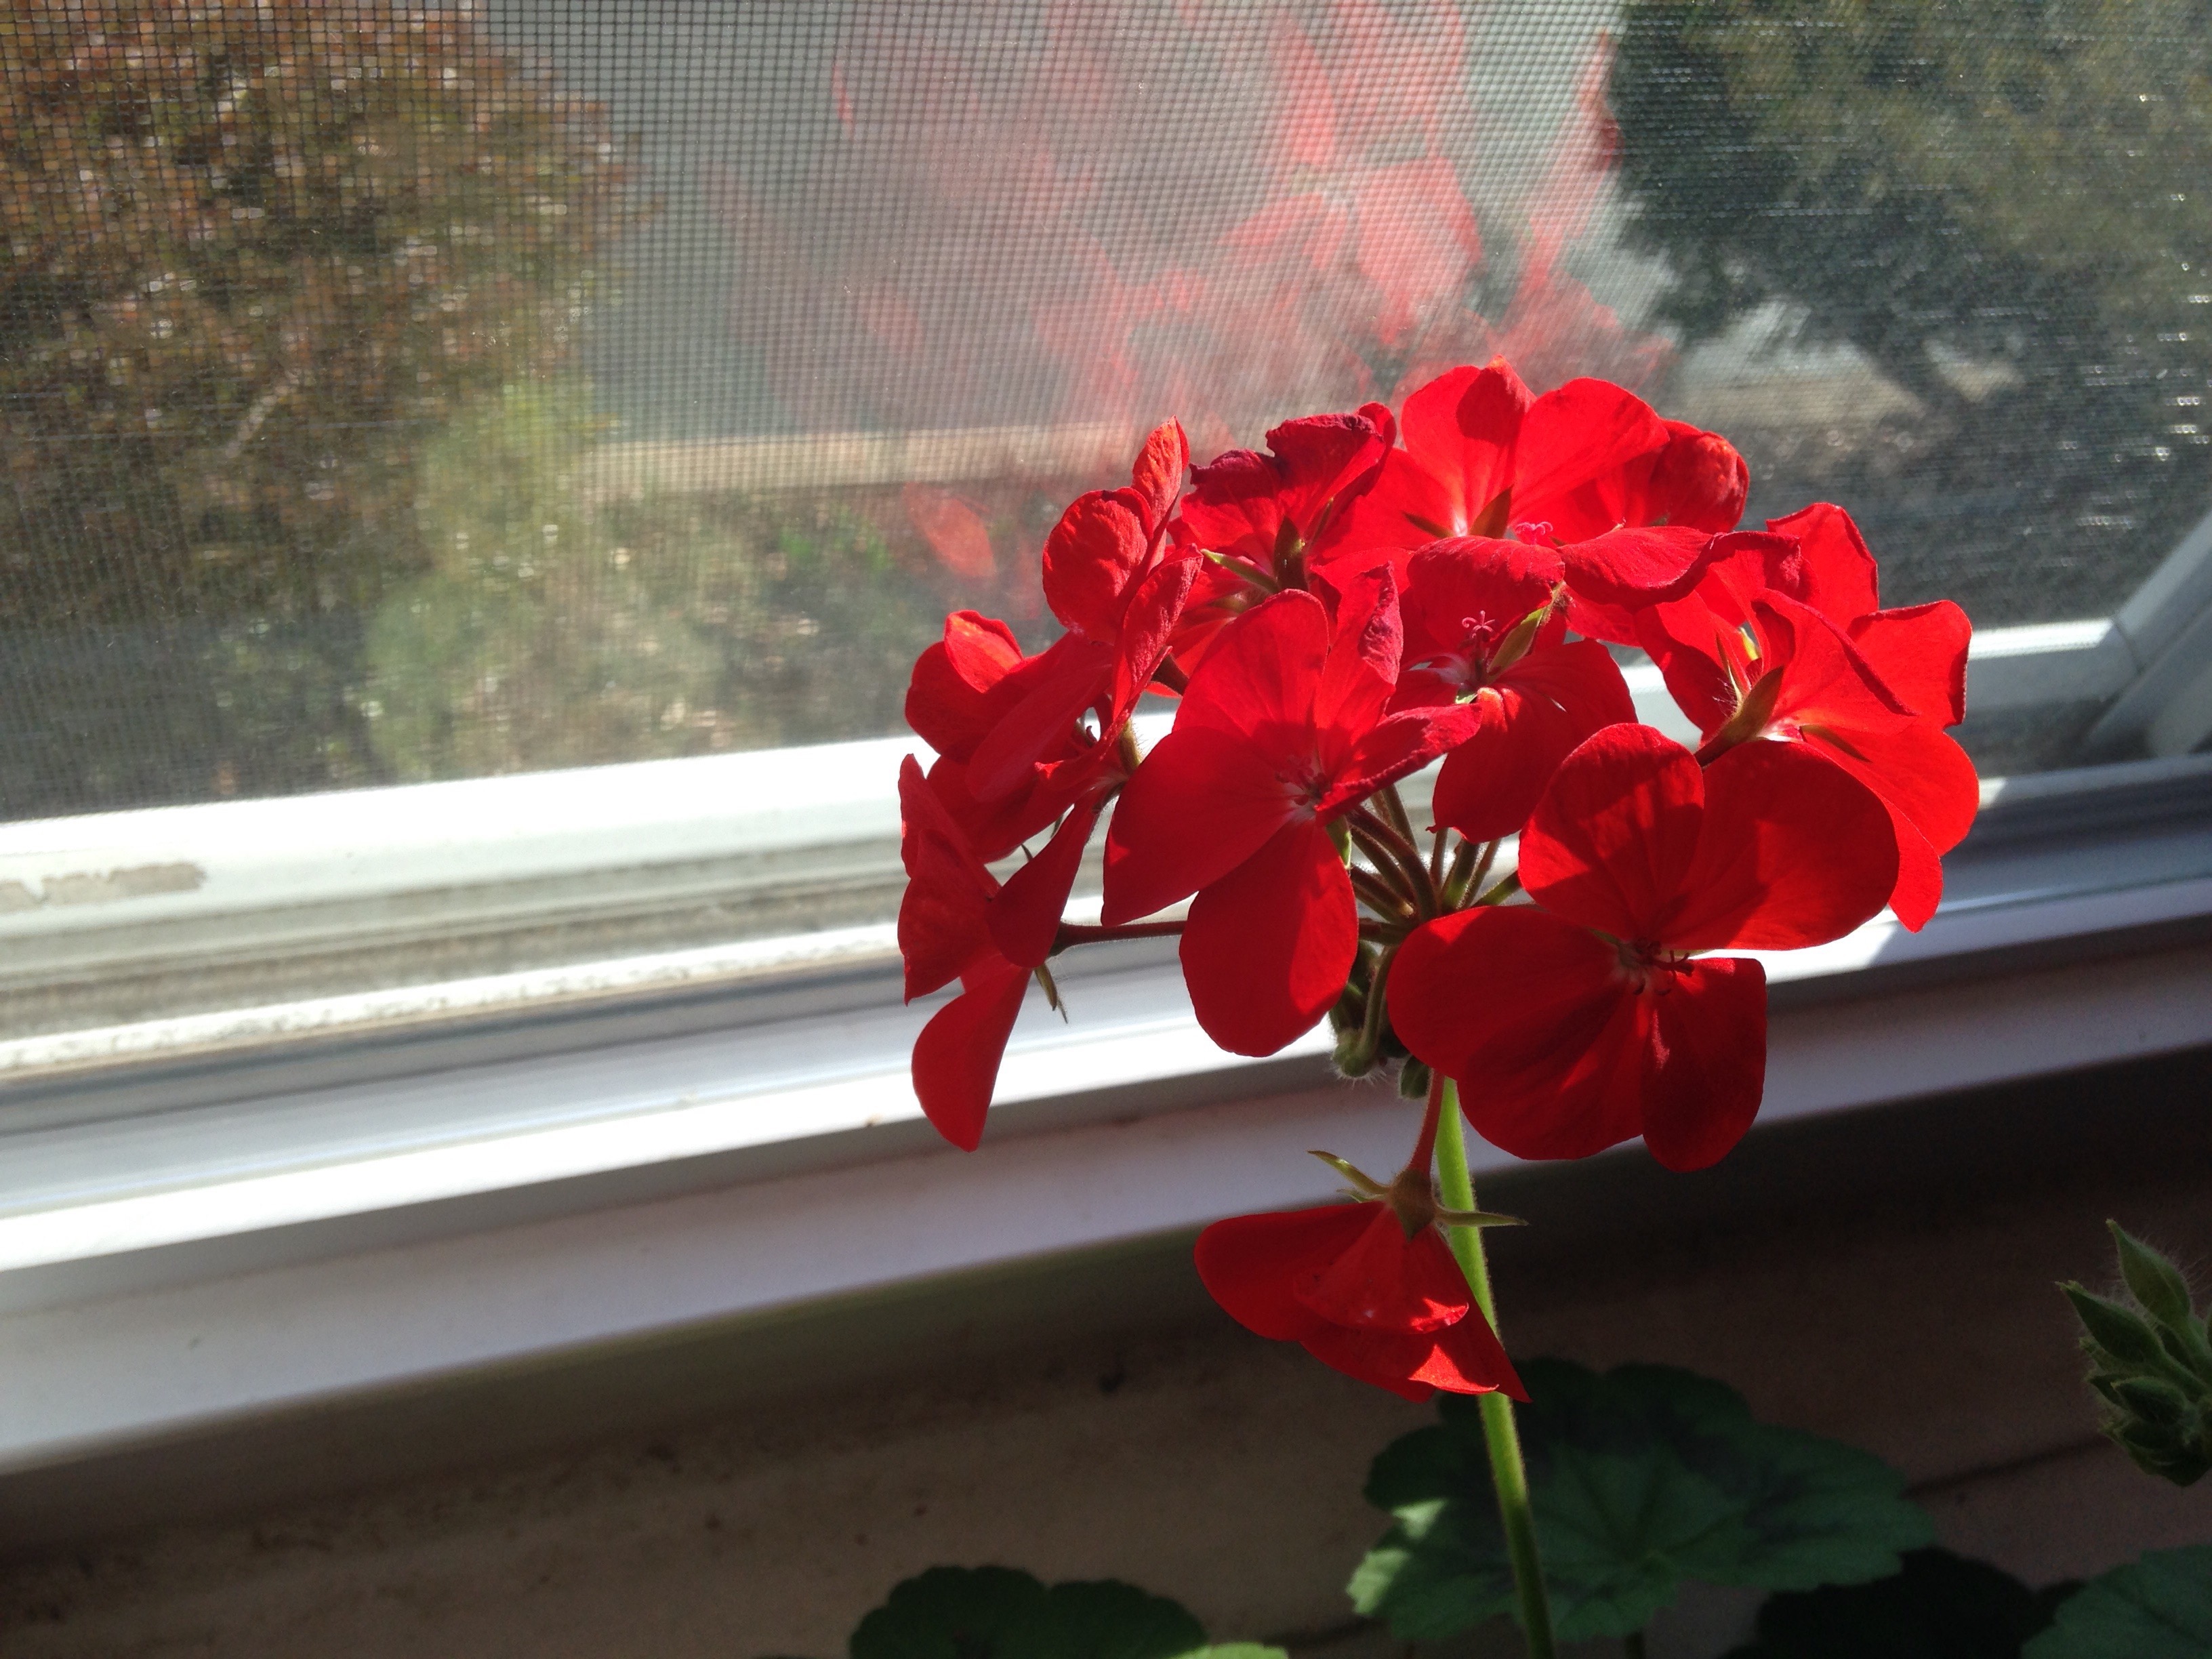
These are my beautiful geraniums that I brought in for the winter. Their blooms are so cheerful. I’m wintering the rest in the chilly attic until it’s warm enough to put them back outside.
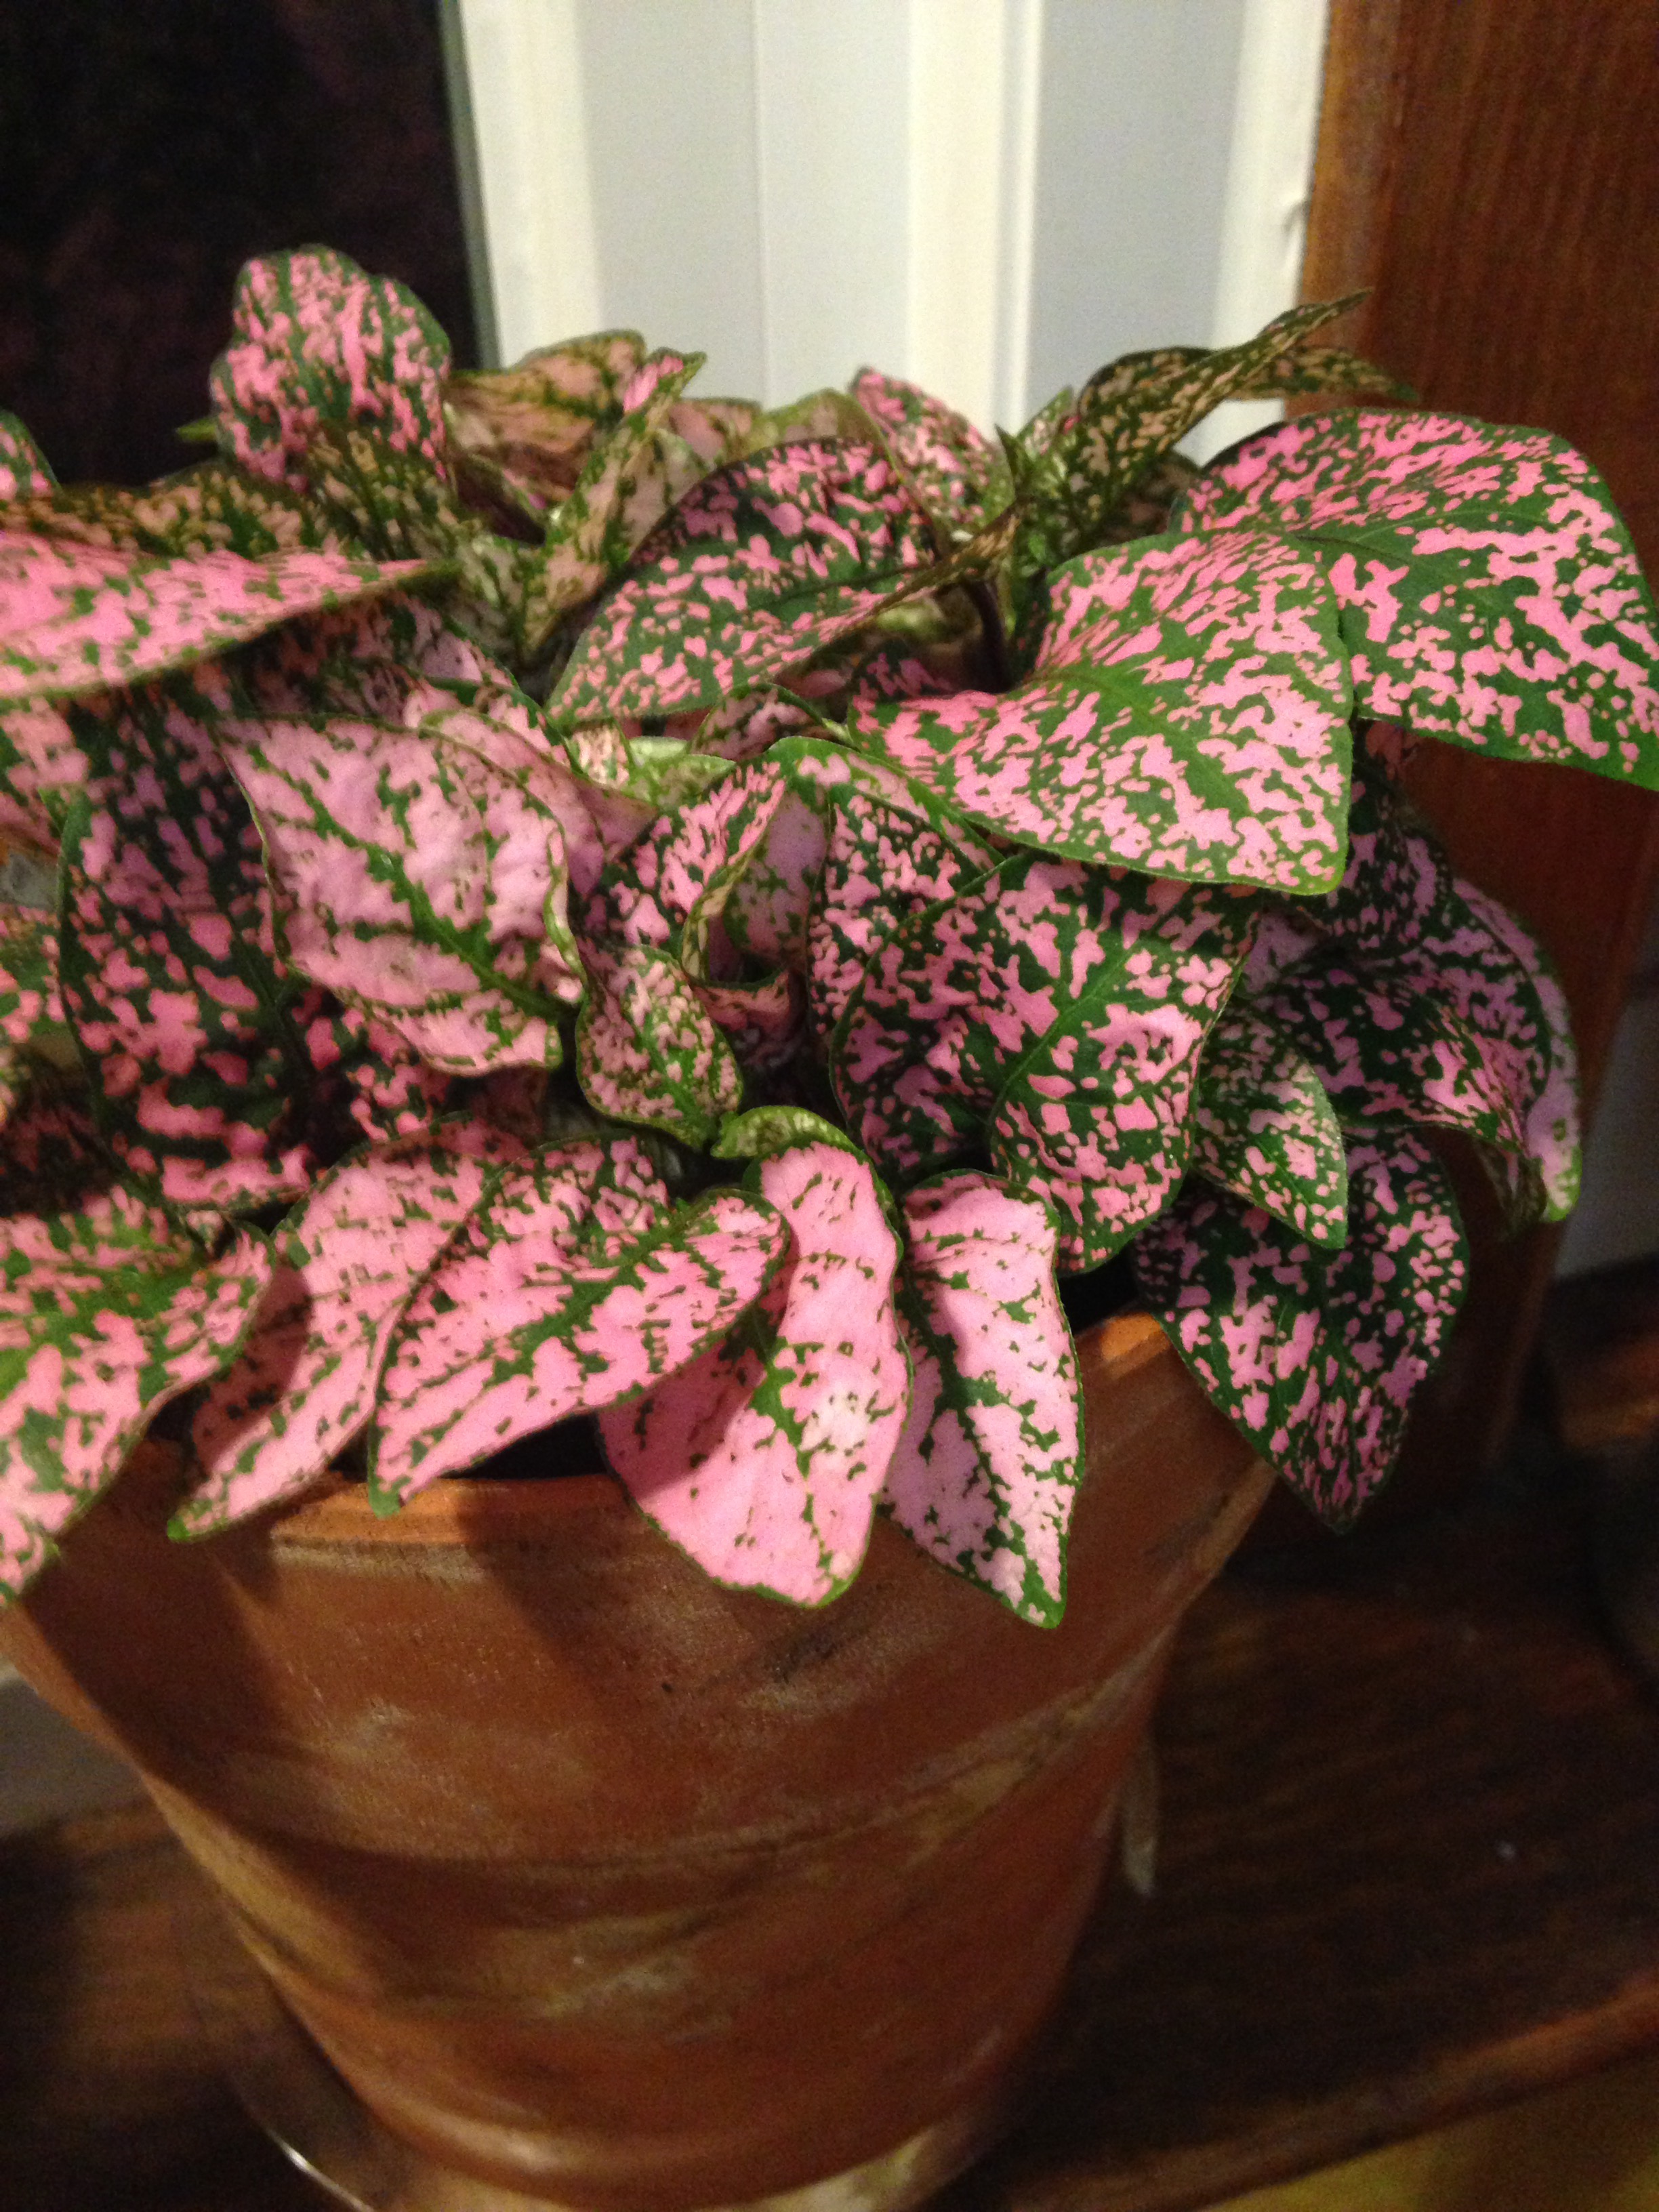
This is one of my newest plants. I love the variegated foliage. I need to learn more about it. I can’t wait to get to know it better.
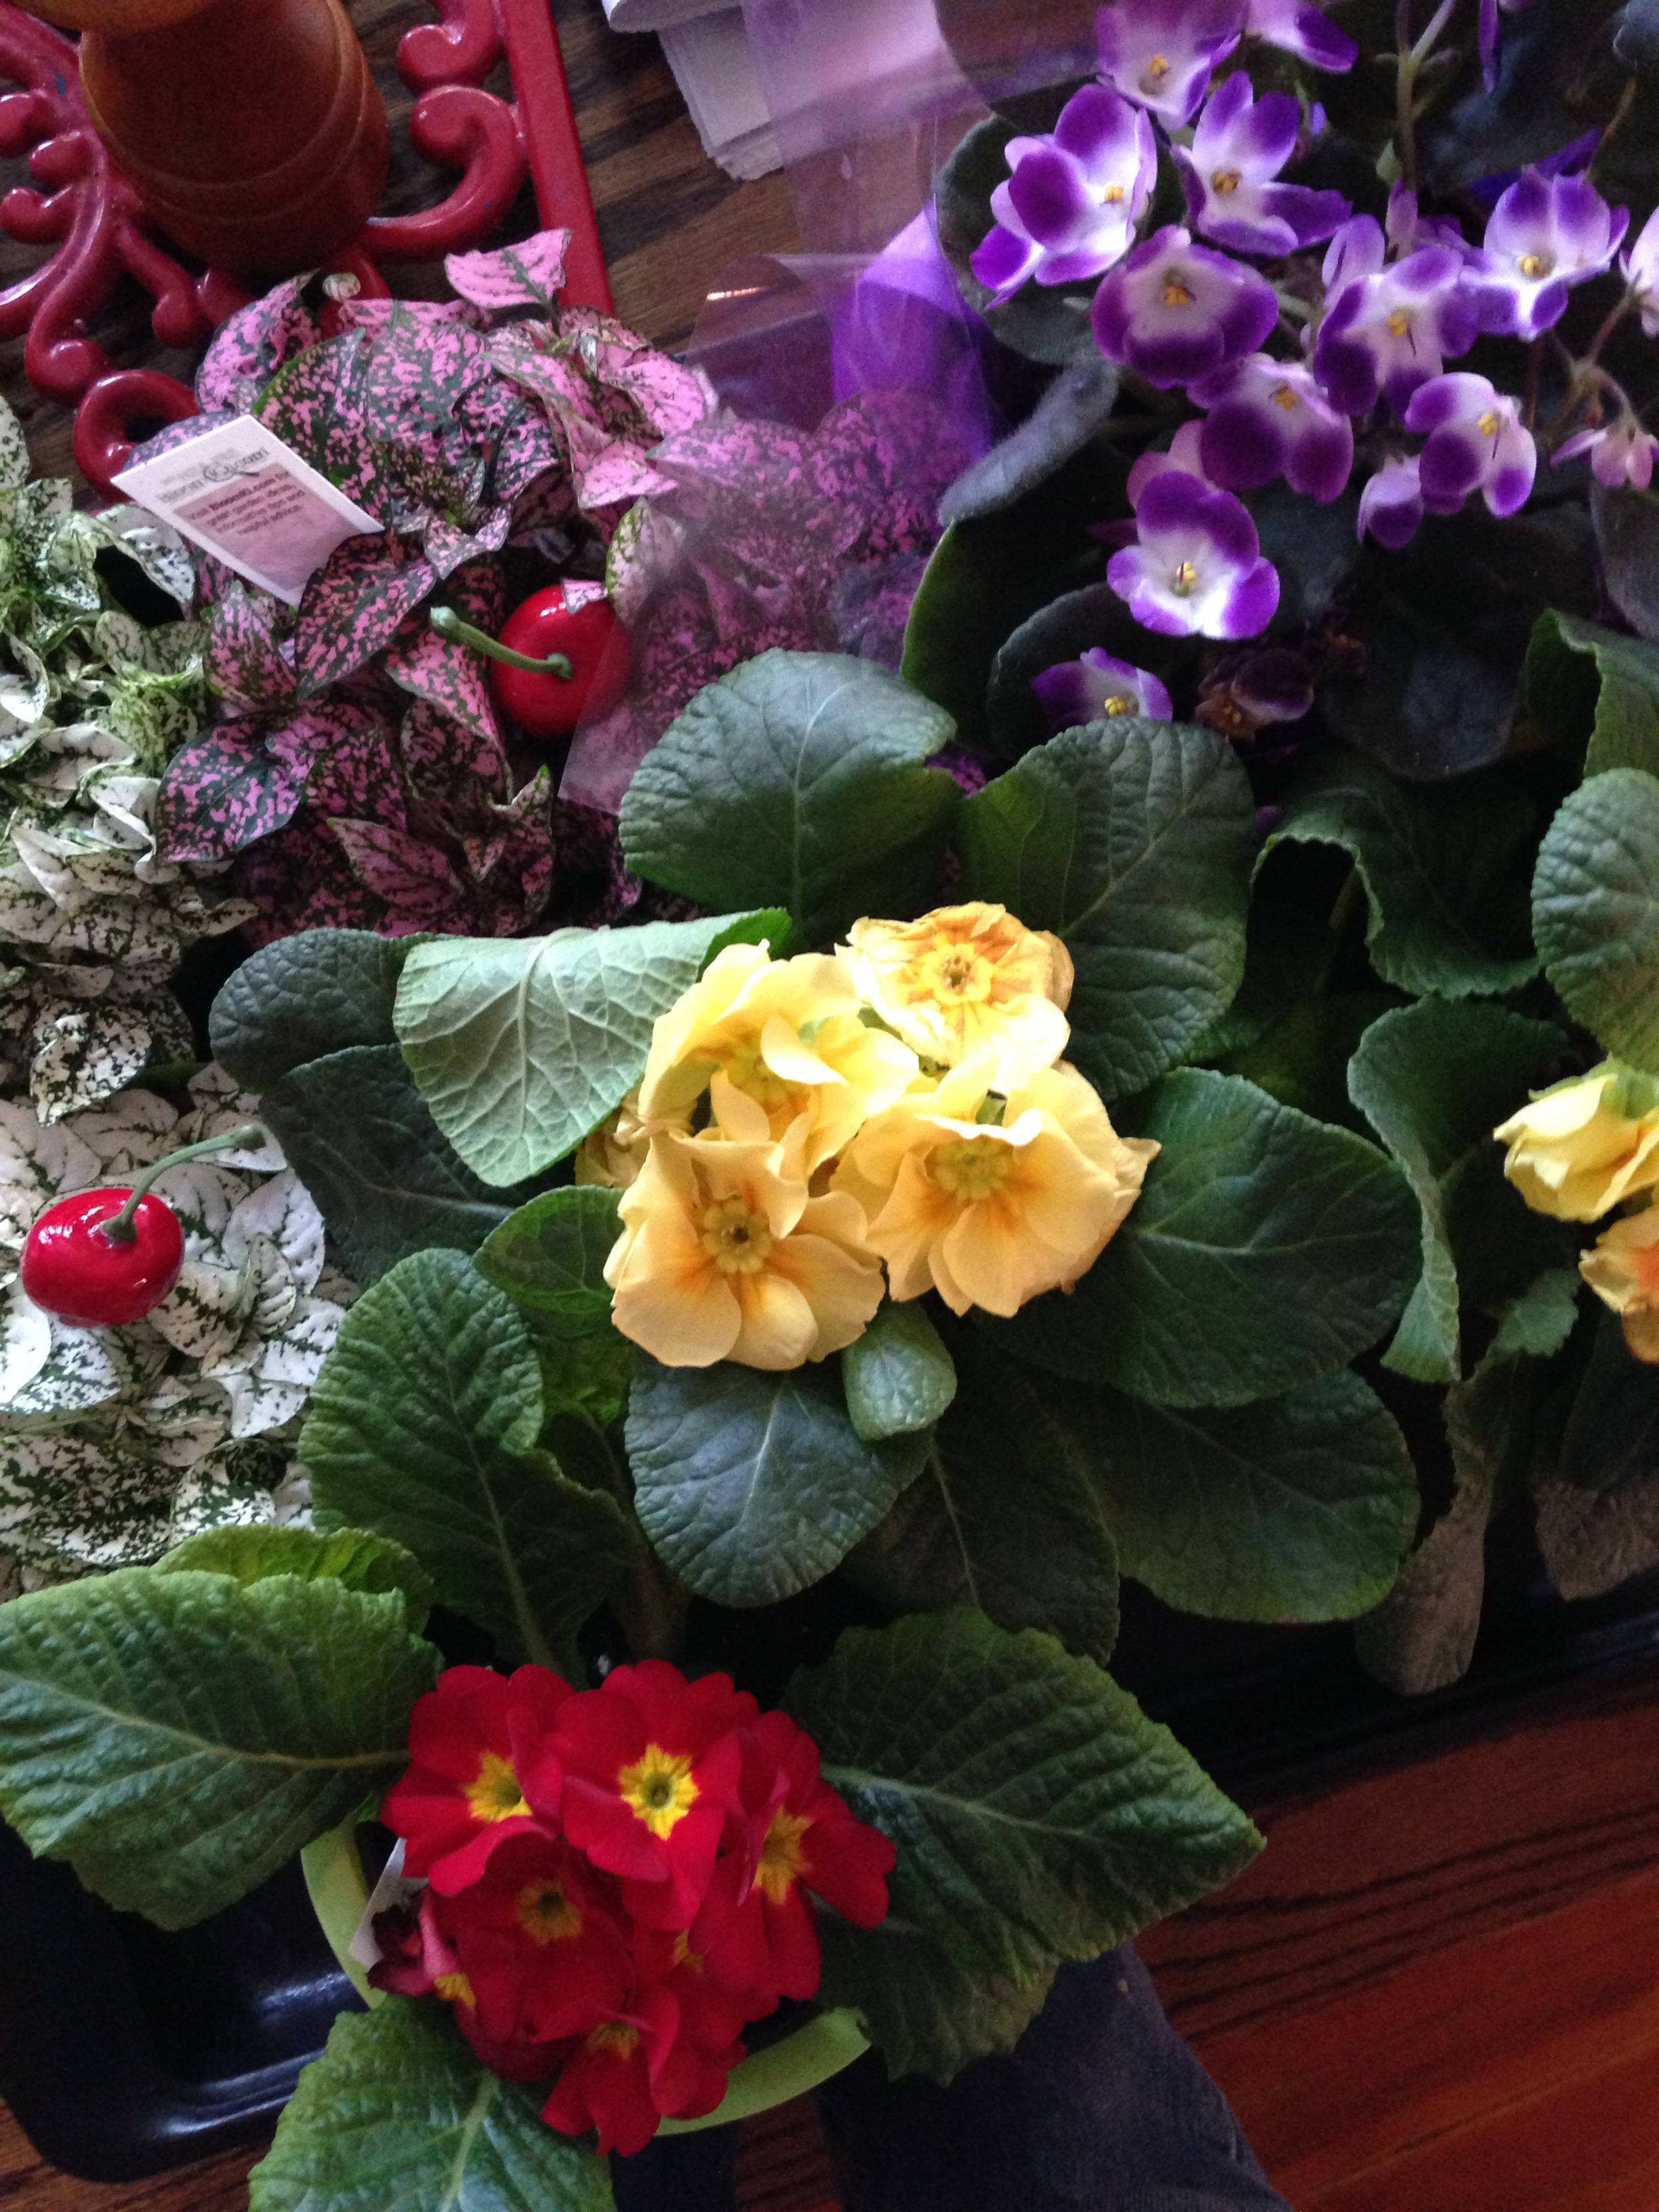
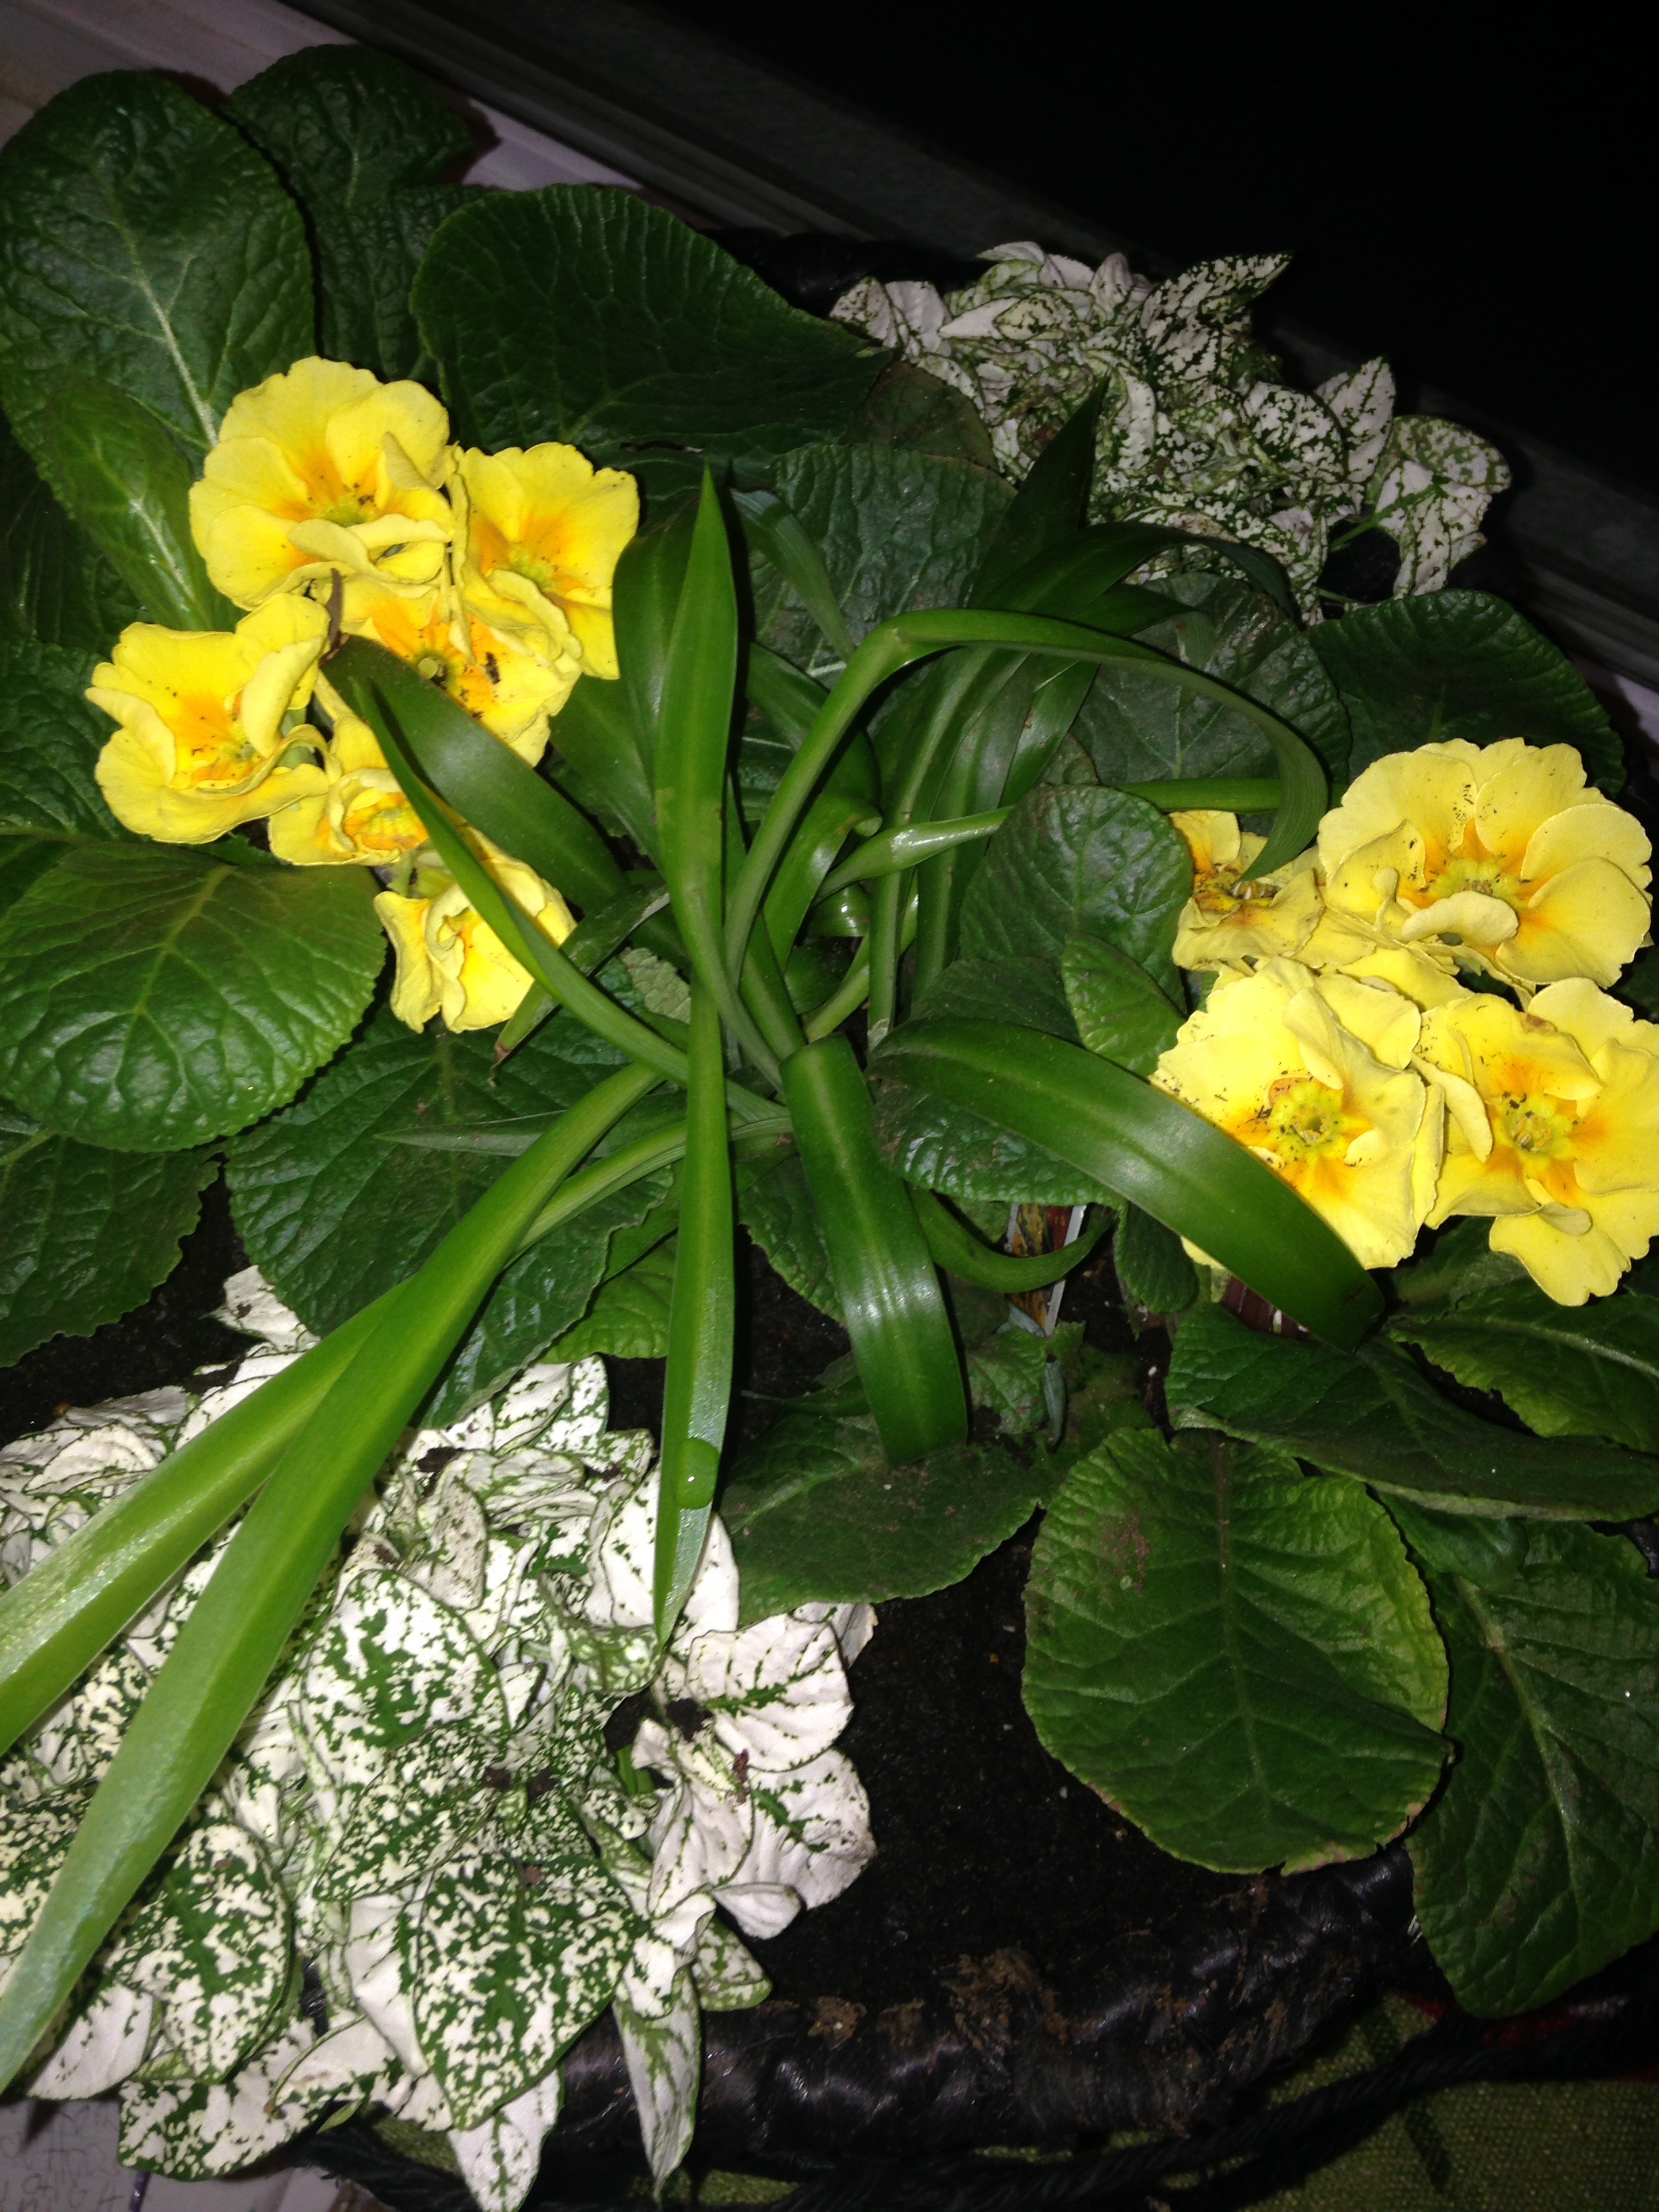
I love these primroses paired with the variegated leaves. I added my baby spider plants in the center for vertical interest. I think this basket turned out so cute. I can’t wait to put it outside when it gets warmer and see how it does.
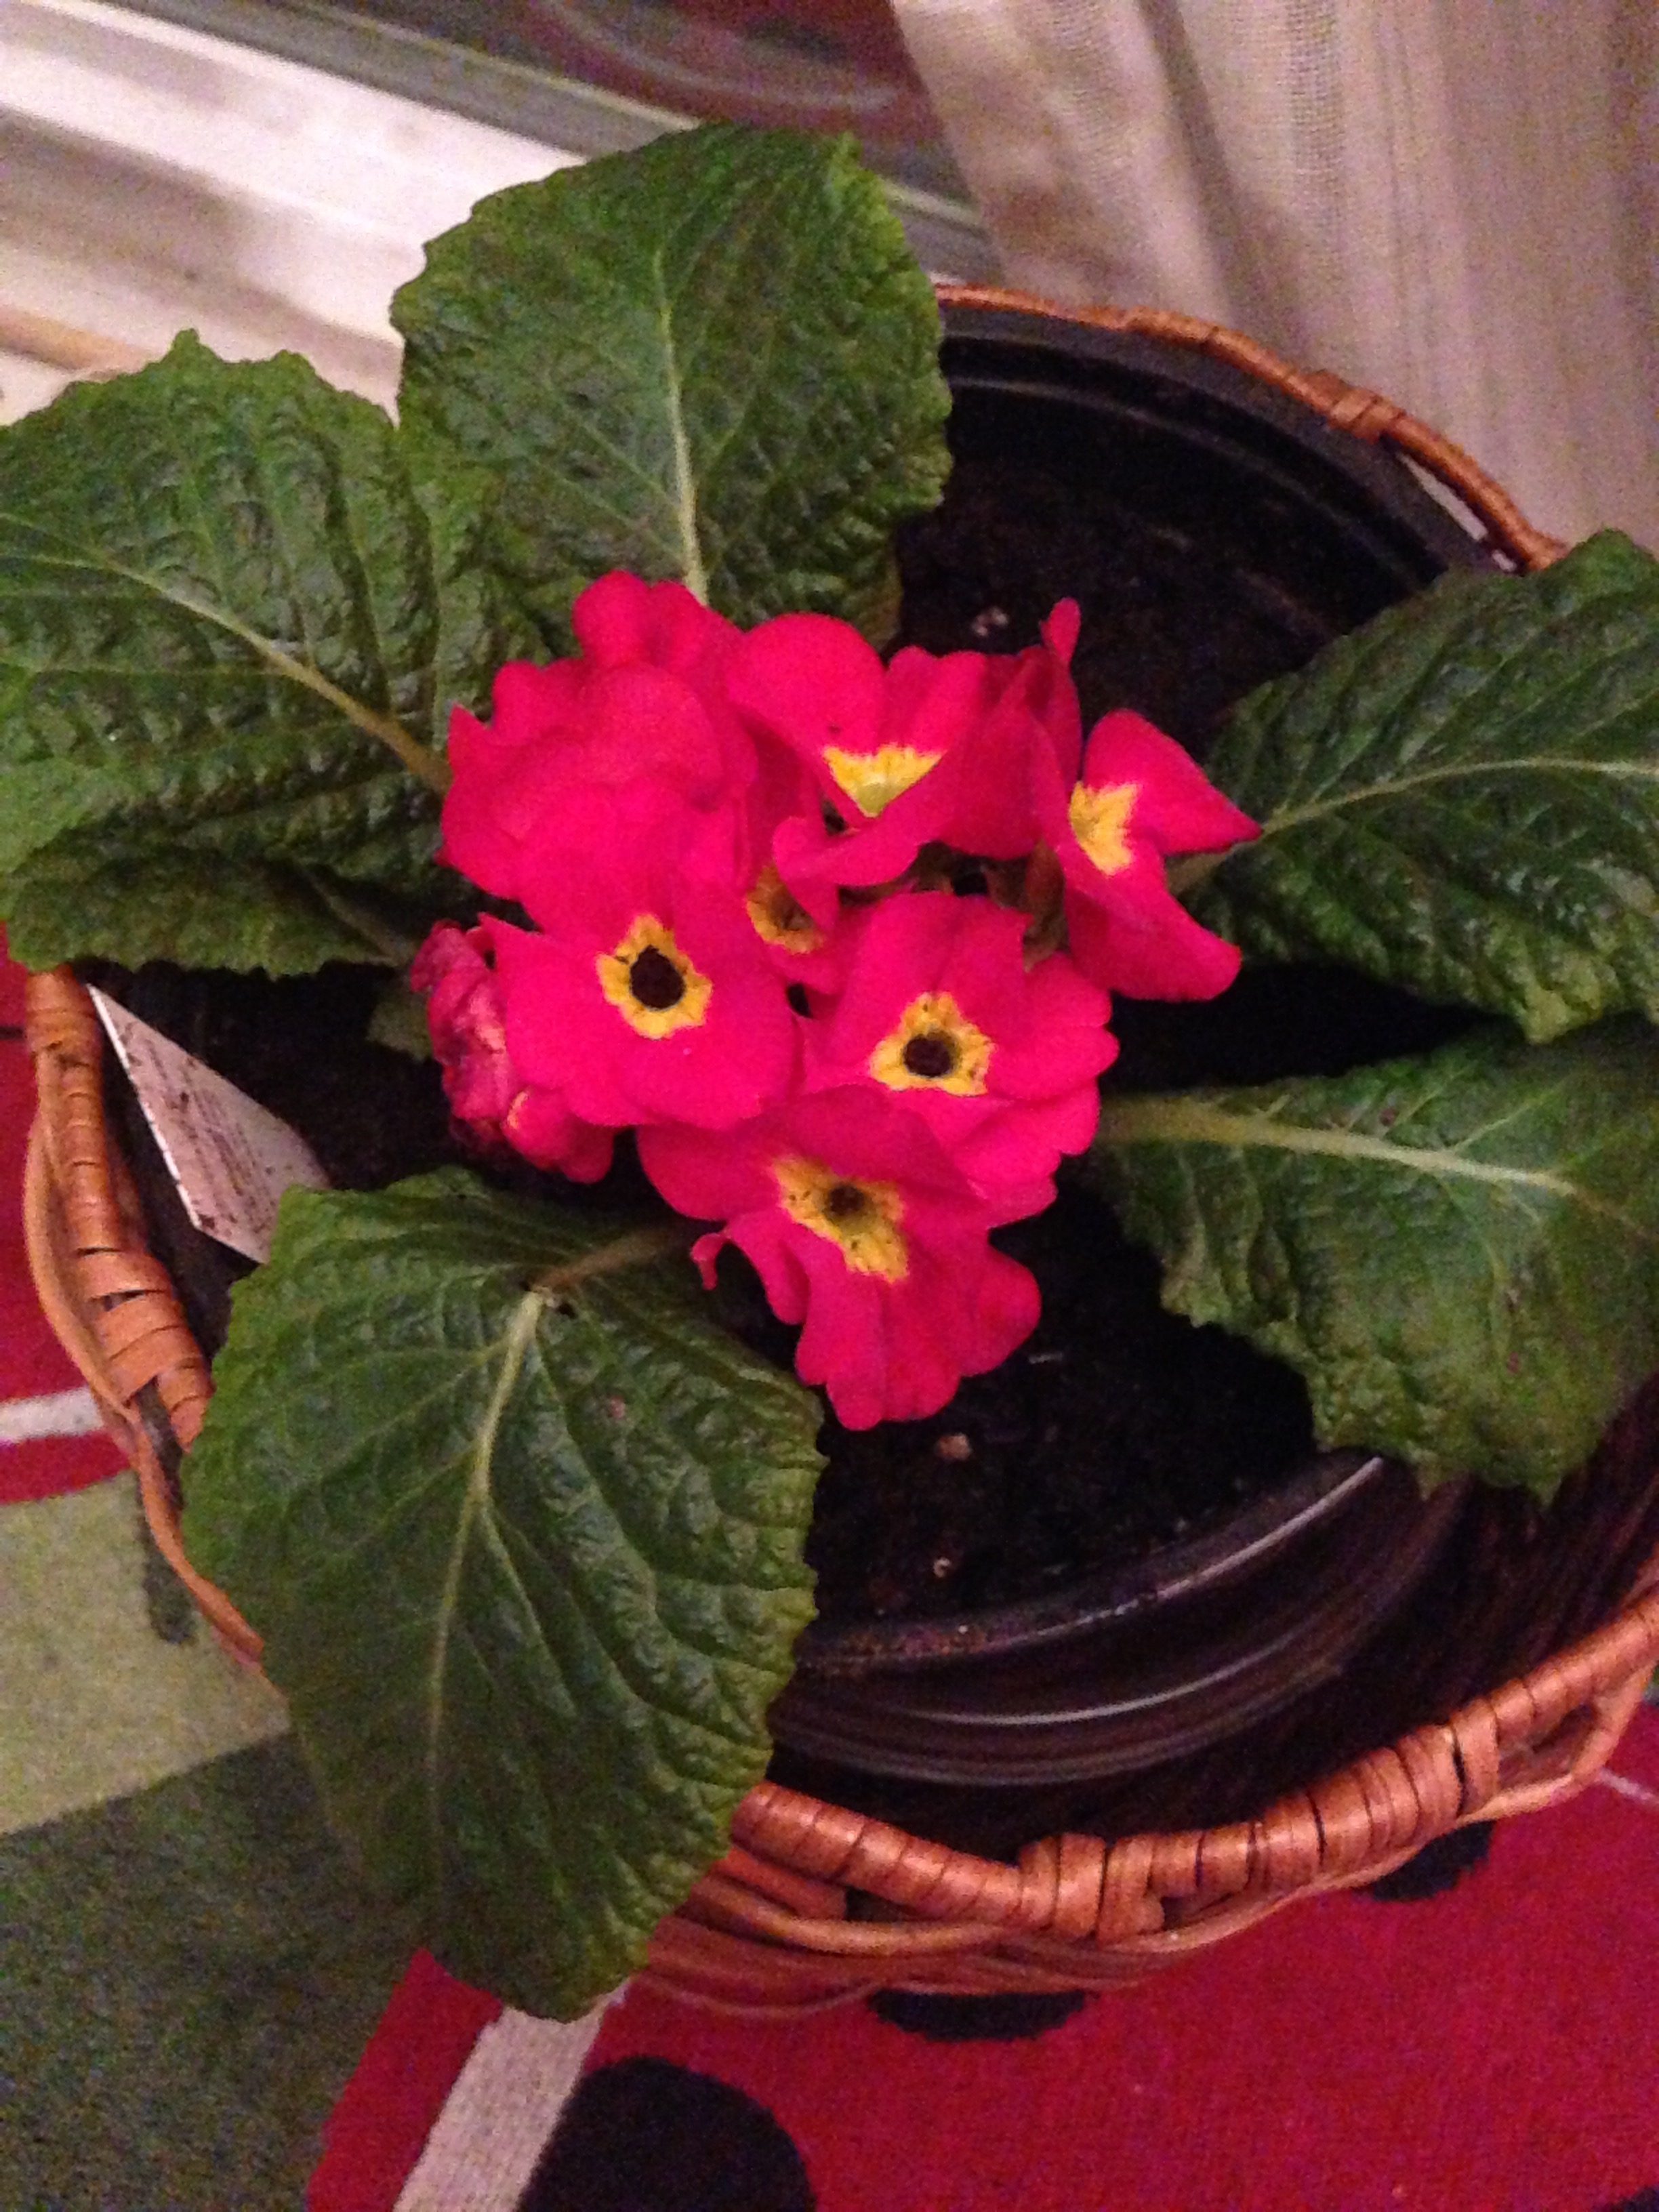
Pretty primroses. I tried these last year and they all died. I think I waited too long to set them out. Hoping for better results this year.

These are my orchids. My sister gave me most of these. I’ve found they like this shaded south facing window best.
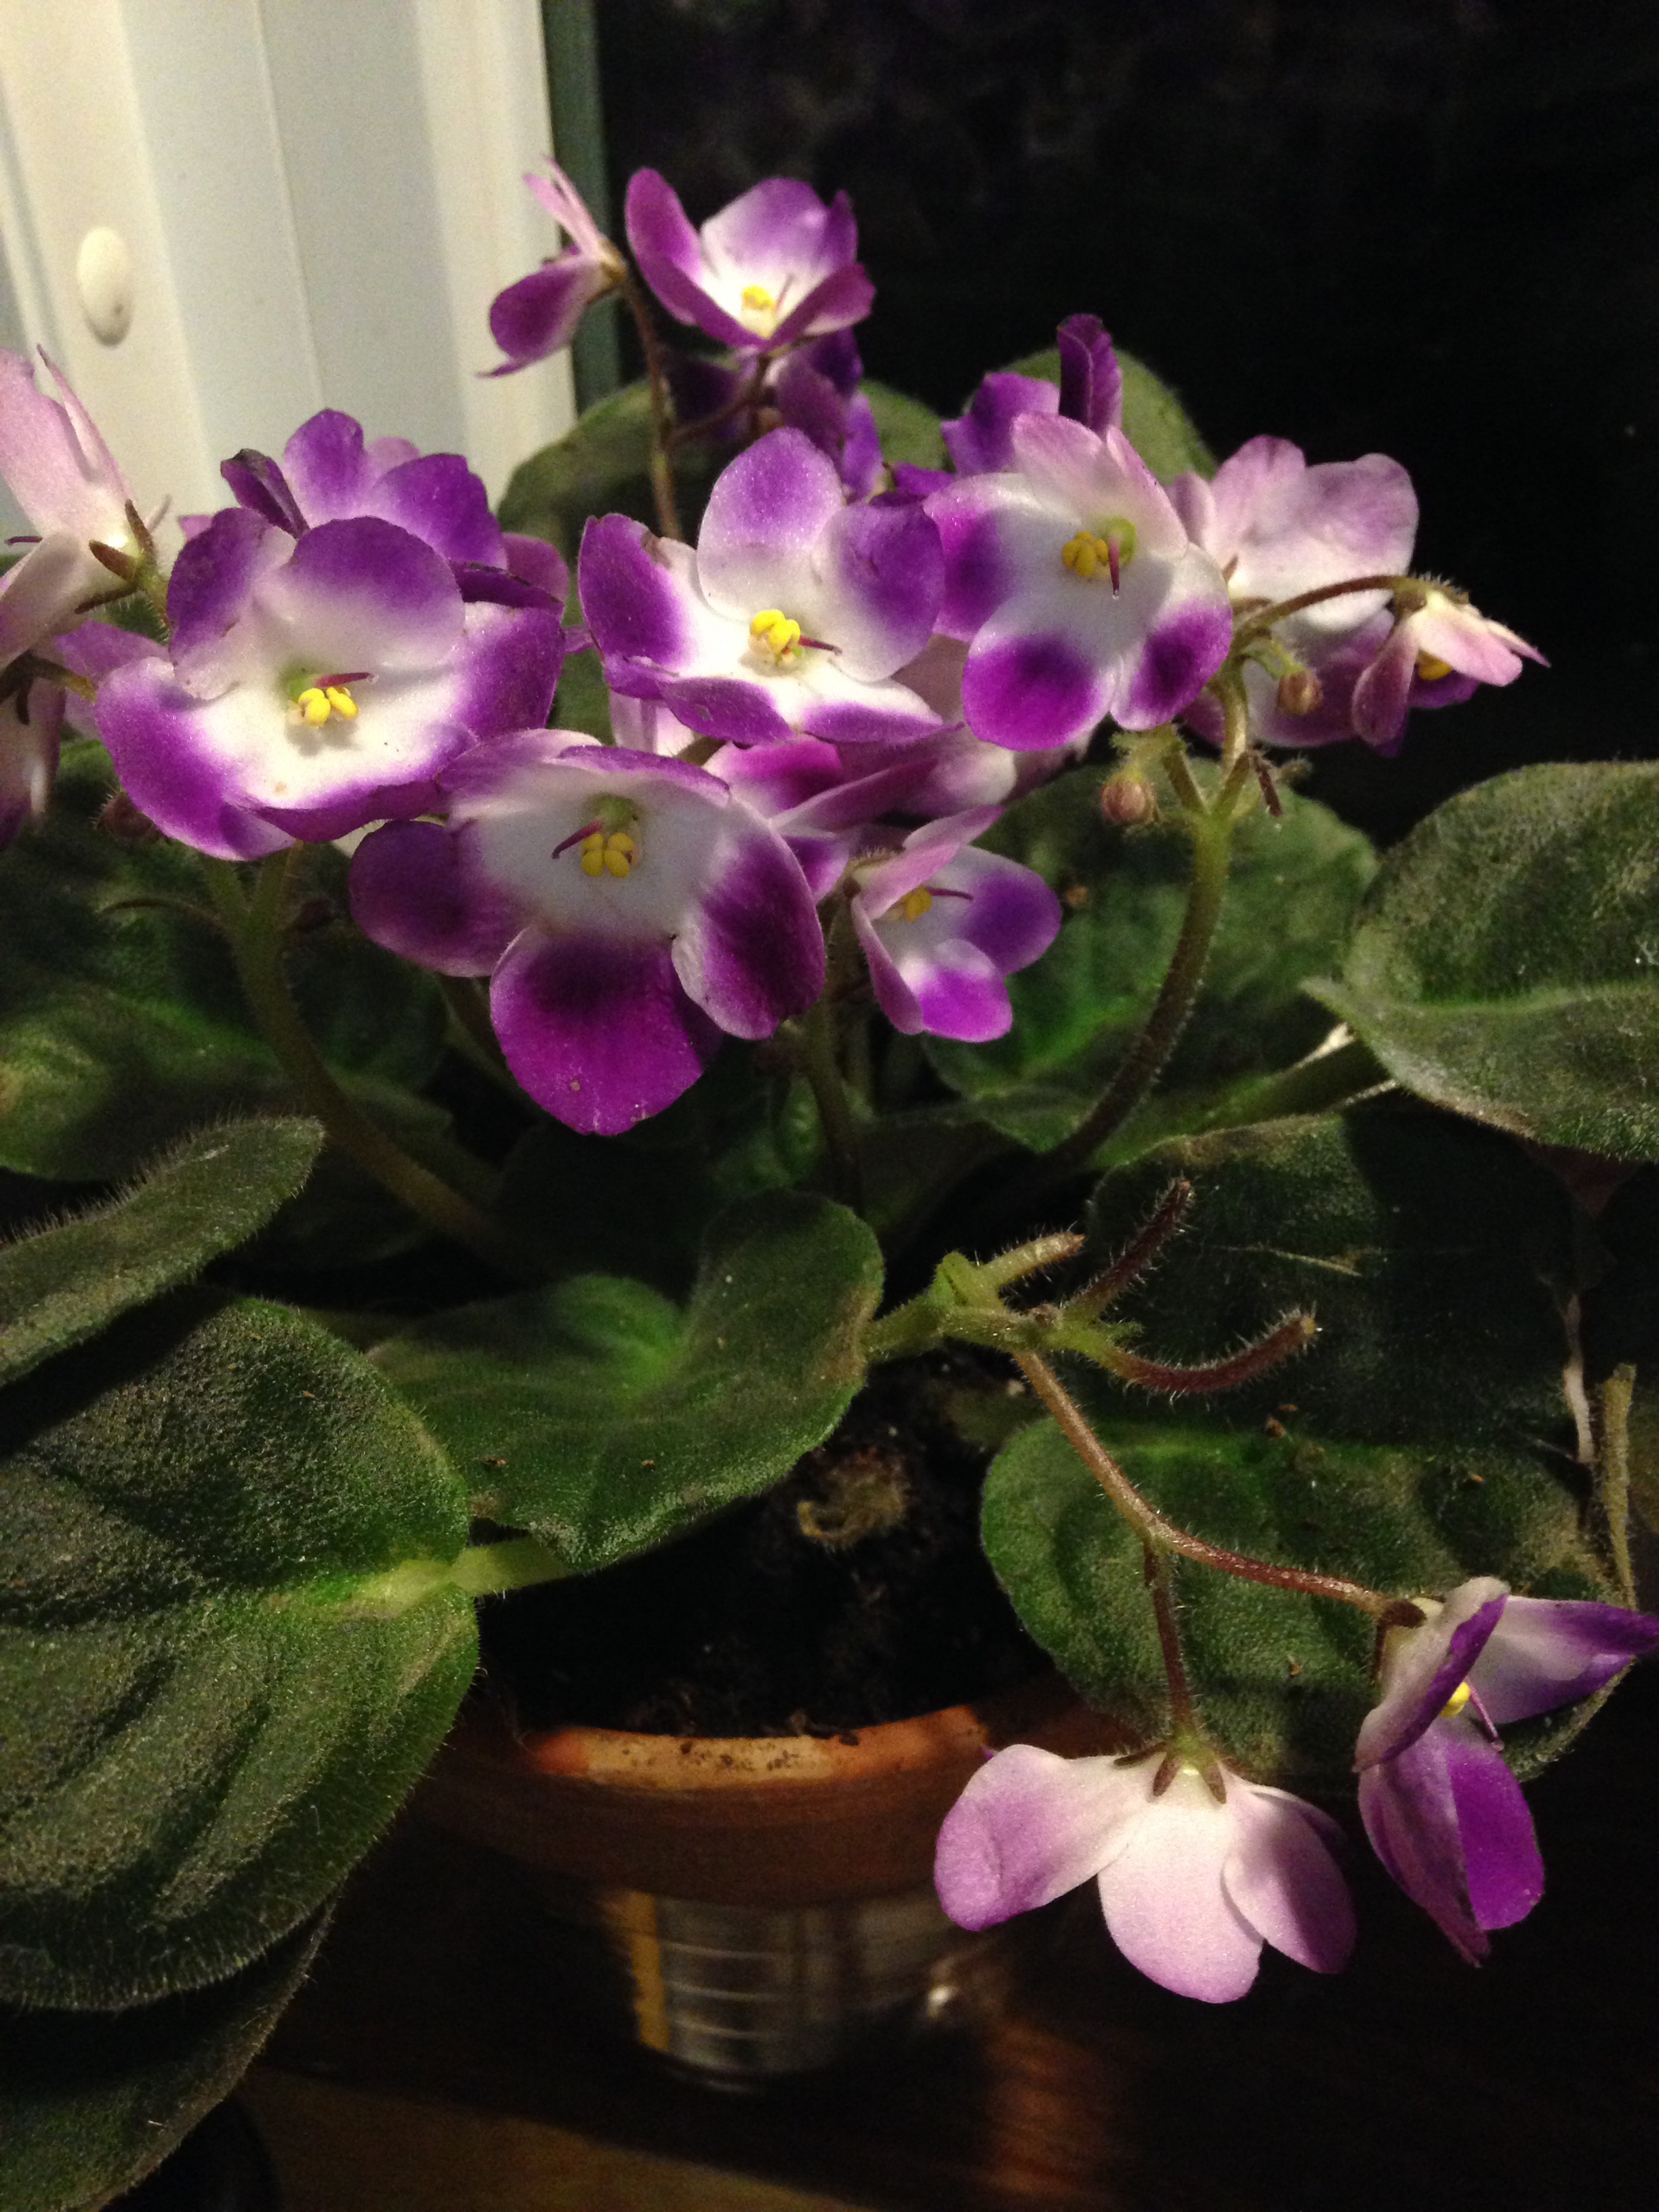
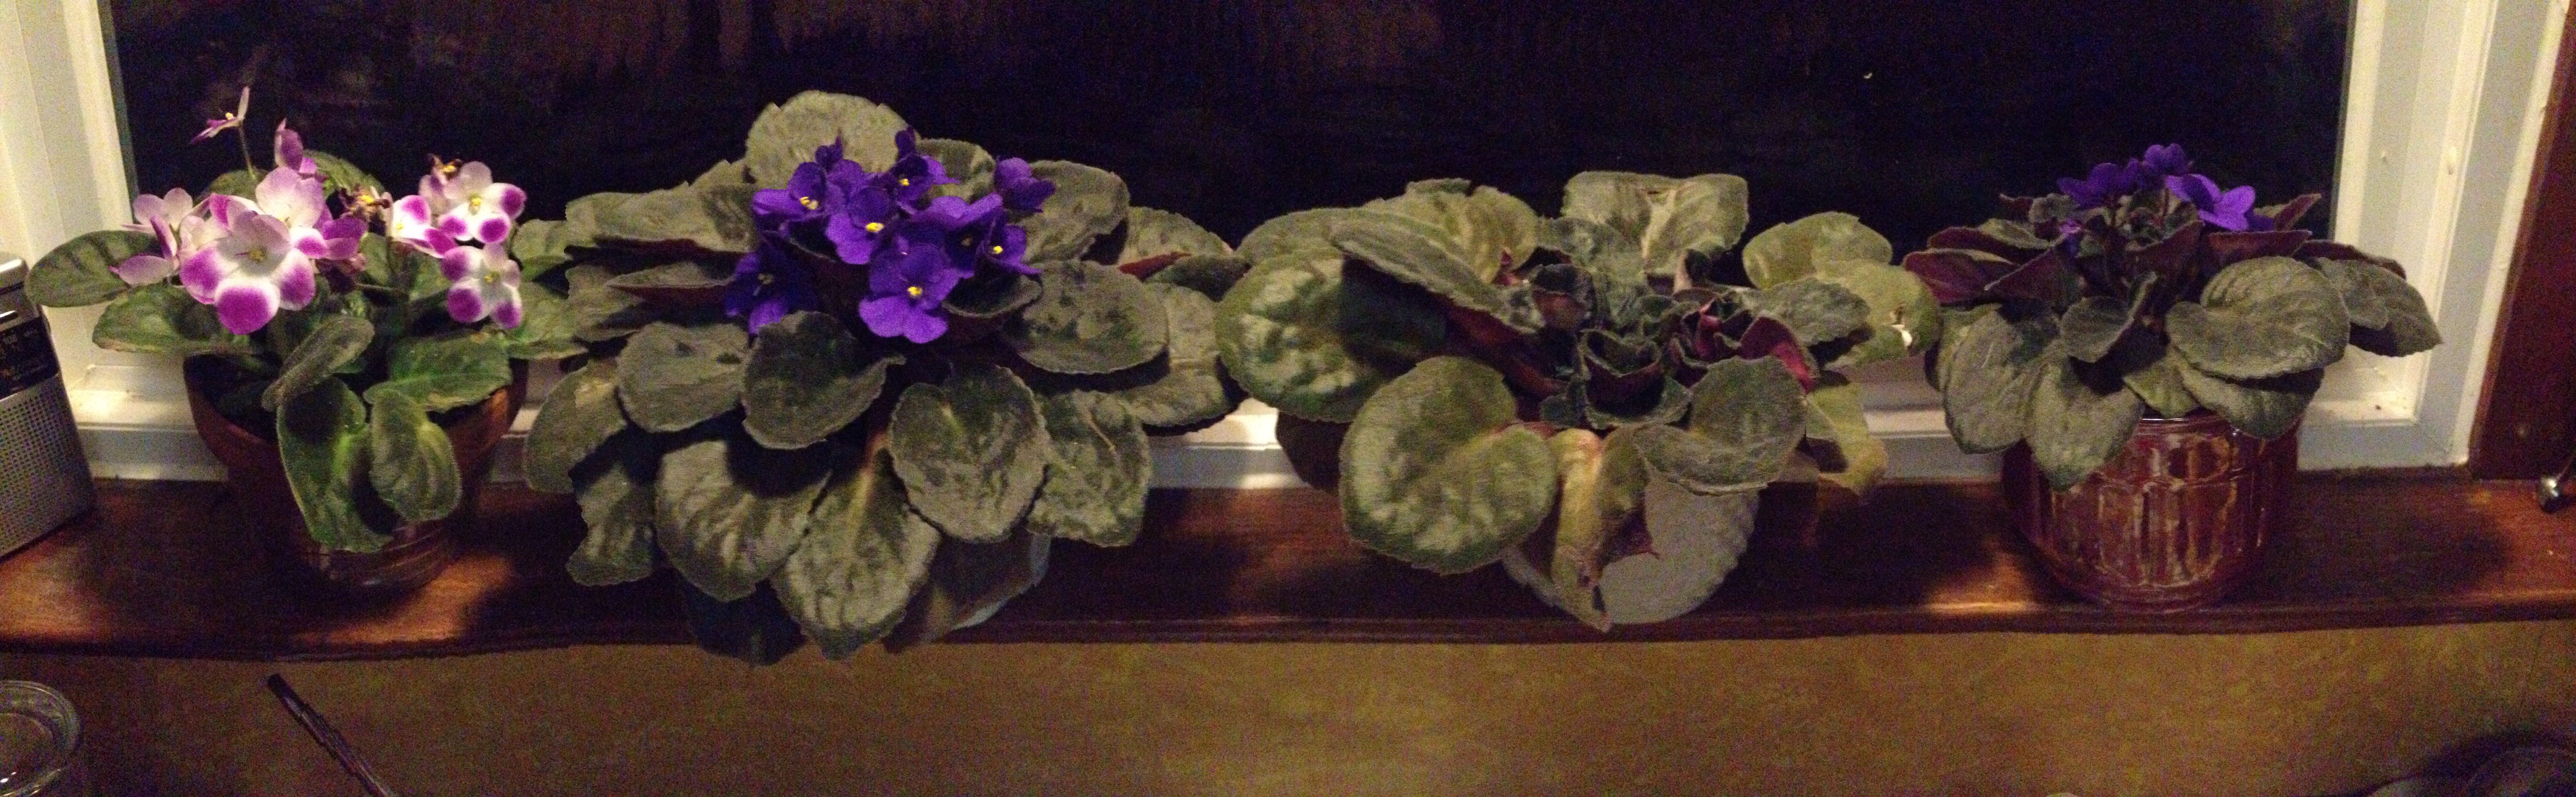
My violets. My grandmother gave me my first violet. These are my favorite plants and the easiest ones to care for. All they want is steady diffused light and not to have wet roots. Mine are blooming happily in this north facing window. I’m so glad they love this spot. They are so nice to look at in my kitchen window while I’m doing dishes.
Such beautiful blooms.

Happy Easter – Handmade Easter Baskets for Everyone!

I made my oldest two crocheted Easter baskets six years ago when they were ages two and three. I finally got around to catching up to the other two. The little girls got some crocheted Easter baskets this year. We had lots of fun hunting eggs, spending the day with family and celebrating the joy of Easter.

I didn’t use a pattern. Just grabbed some scraps of yarn and started crocheting in a round adding stitches every other round. Once the base is as big as you want, just keep going without adding any more stitches and the sides will start to form. Crochet the handle with some rows of single crochets or a chain.

HAPPY EASTER!

The big kids’ Easter baskets

The little girls’ baskets

Bagel French Toast

I was looking to make something special for breakfast the last snow day. I raided the freezer and pulled out a package of cranberry bagels. What could I make ahead with those? Hmmm. Baked French Toast it is.

Butter a casserole dish and line it with bagels. I broke mine open and scattered them about.

Mix up some French Toast batter. For a whole package of bagels you’ll need about 3 cups of milk, 6-8 eggs, 1 tsp of vanilla, 2 tsp cinnamon and 1/2 tsp nutmeg. Mix it up. Pour it over the bagels. Cover and refrigerate overnight. Add some cream or milk in the morning if most of the liquid is absorbed and bake at 350 for about 35 minutes or until the mixture is set. Drizzle with syrup and enjoy.


(The other casserole pictured here is French Toast for my allergy kid who can’t have the regular stuff.)

Sewing curtains

I finally got around to making curtains for two of our bedrooms after 1.5 years of living here. 

I made a border and tie backs for our son’s room.


I made two curtain panels for our bedroom and repurposed some old curtains from a previous apartment for the center panel. 


It’s to finally get some of these things done. It’s starting to feel like home. 🙂

The Little Laminator that could….


I don’t usually share products that I like, but last week I posted about all the flash cards that we use in our homeschool. Well, I’ve laminated most of them and this little AmazonBasics laminator was the best $20 I’ve ever spent. So far I’ve used almost 300 laminating sheets to laminate between two and four flash cards per sheet. Best thing I ever did. Not only will these survive through school days with four children, but if they manage to survive through to the last kid they will still be useable for someone else as well after we’re done with them.

Rubbish to Riches: Adventures in Composting

Rubbish to Riches: Adventures in Composting

I’m embarking on a new adventure this week. I set up my first compost bin. Living in a condo and then NYC apartments, I’ve never really had the space. Now, I still don’t have much space which is why I haven’t set one up sooner. When I think of composting, I think of the huge open compost pile my parents had in Texas or people using huge industrial sized garbage cans to store their compos. Then it hit me this week – why couldn’t I use a storage tub? I googled it and found several posts of people who had done that very thing. I had an empty tub in the basement. So, I set it up this morning in about an hour.

First, I drilled holes in the bottom and all around my tub.

Next I covered the bottom with some shredded newspaper and then added all the dried out dirt from my old flower pots. I poured in a couple of cups of water and then stirred my scraps – broccoli stems, old cilantro, coffee grounds, tea leaves, banana peels, dryer fuzz and dried leaves. You want to keep it moist but not wet. If too welt it will rot and stink. If too dry nothing will decompose. I hope I can keep the right balance.

I found this nice 1-gallon, stainless steel compost bin to keep in my kitchen. I’ve looked at them before and never wanted to put out the money. This one was $11 on Amazon so I figured it was worth the risk. It had a charcoal filter in the lid to keep the smells in for when I can’t get my scraps outside right away.


I set the compost bin on the shady side of the house just outside the kitchen door. I figure I’ll be more likely to keep my indoor bin emptied regularly with it nearby. I set it up on bricks to help with air circulation and I put a tray under it to catch any liquid and use as “compost tea” on my plants.


The fact that all these things that I would normally throw out will hopefully result in rich, fertile soil is amazing to me. I’m excited! Let the adventure begin.

Banana Blueberry Muffins

Saturday has become my baking day. I’ve been making the standard muffin recipe in my King Arthur Flour cookbook but I decided to change it up this week and the results were delicious.

Only two words are needed to sdescribe these muffins – Banana Blueberry! Mmmm.

This recipe makes about 12 muffins.

1 cup all-purpose flour

1 cup whole wheat flour

1/2 cup sugar

1/2 tsp salt

1 tbl baking powder

2 cups blueberries

Mix dry ingredients.

In a separate bowl mix the following:

2 eggs

3/4 cups milk

1/4 cup oil

2 frozen bananas, thawed and mashed

Stir all the wet ingredients until well mixed. Add the wet to the dry stirring for about 20-30 seconds. The less you stir the less dense your muffins will be. 

Pour into muffin cups. I like to use reusable silicone cups which I spray with a little bit of olive oil. Bake at 400 for 20-22 minutes. 

I also made this same recipe with chocolate chips instead of blueberries and it was equally delicious. 

Flash Card Friday!!

I’m starting a new routine for our homeschool. Friday is usually our day for quizzes and reviewing what we’ve done over the week. I realized the other day that we have flash cards for almost every subject, so to make it a little more fun we’re going to start reviewing on Fridays with our flash cards. And we’re calling it Flash Card Friday. 

Here are our favorite flash cards:

Veritas Press Art History Flash Cards


Veritas Press History Cards

American History Flash Cards (These may be out of print.)


Veritas Press Bible Flash Cards

Classical Conversations Science Cards


Math in a Flash Cards


Abeka Concepts Math Flash Cards


Spalding Phonics


Animals of all Kinds Cards (for the little ones)


Animal Pocket Flash Cards (for the bigger ones)


Music for Little Mozarts Piano Flash Cards


Note: None of the above links are affiliate links.

Itching for Spring

I saw these plants at the grocery store. They were on sale, and I felt sorry for them, so home they came. I got my spring fix planting them last weekend planting them in a big planter. They are waiting patiently in front of my living room window for the day that they can out out on the front porch. We have to wait for the 14 inches of snow to melt first though. 🙂

Aren’t they pretty? Is it spring yet?

Reviving my Kombucha


So I decided to revive my kombucha. I hadn’t made any since before our last move. Somehow between packing and morning sickness at the time, I couldn’t keep up. So, I put it in a jar with some of the kombucha liquid, stuck it in the fridge and it has sat there ever since. Two years later I’m finally ready to try again.

Tea and sugar water cooling.

I took my jar out and let it sit on the counter overnight so that it could warm up to room temperature. The next day I made up my sugar and tea mixture. For more specific directions on how to brew kombucha see my other posts – (Cranberry Ginger Kombucha).

I brewed three batches before I started drinking it again to be sure that it would revive. I’m pouring up a new batch today.

Ferments amaze me. The fact that all those little bacteria do what they do fascinates me. I think I need to start another ferment. Maybe I’ll go back to one of my favorites – Garlic, Onion, Jalepeno Relish. Or maybe I’ll try beets. Fermented beets are delicious. Until I get around to that, I think I’ll go enjoy my kombucha.

“More Drops please, Mom?”


I’ve been making what we call “Drops” for at least six years. My base recipe has changed little over the years except that for about the last four years rather than making an herbal tincture, about once a week I make an herbal syrup since it’s more economical than tinctures, and that’s about how fast we go through them giving them to four kids every day.

So, here’s what’s simmering on my stove right now. You can visit The Herb Shed for more herb recipes and ideas.


Well Drops Herbal Syrup:

This is my base recipe.

6 cups of water in a sauce pan

1/2 cup nettle

1/4 cup dried elderberries 

2 cinnamon sticks

1 head of garlic, chopped with peelings left on

2 tbls chopped ginger

Simmer for about 20-30 minutes. Cool, strain, rinse the pan. Return to the pan. Bring back to a simmer and add 1-2 cup of honey. Stir and simmer for about 15 more minutes. Cool again. Pour into a clean jar and store in the fridge. Use within a week. Makes about 32 ounces. 


I give my kids 2-4 ounces a day. These taste great and are a great carrier for other supplements like vitamin d, iron, cod liver oil, etc.

These are easily customizable. For example, my kids all have coughs and colds right now so today I threw in two handfuls of mullein to the mix as well to help with the coughs and congestion. Another one I toss in occasionally is milk thistle for liver support. 

Drink up everyone and stay well.

Double time it on the Waffles please

Waffles for my hungry kid this morning are brought to you by my favorite cast iron waffle maker.


See my post on Cast Iron Waffles for the many reasons why I love them. But what I’m loving most lately is that I have two of them. My mom gave me another one for my birthday. Two waffle irons for this family of six makes up a weeks worth of waffles in no time which is good for me. The other good thing is that because these are much less bulky than their electric counterparts, they both slide right in beside my pans and take up hardly any cabinet space at all. Who wants waffles now?