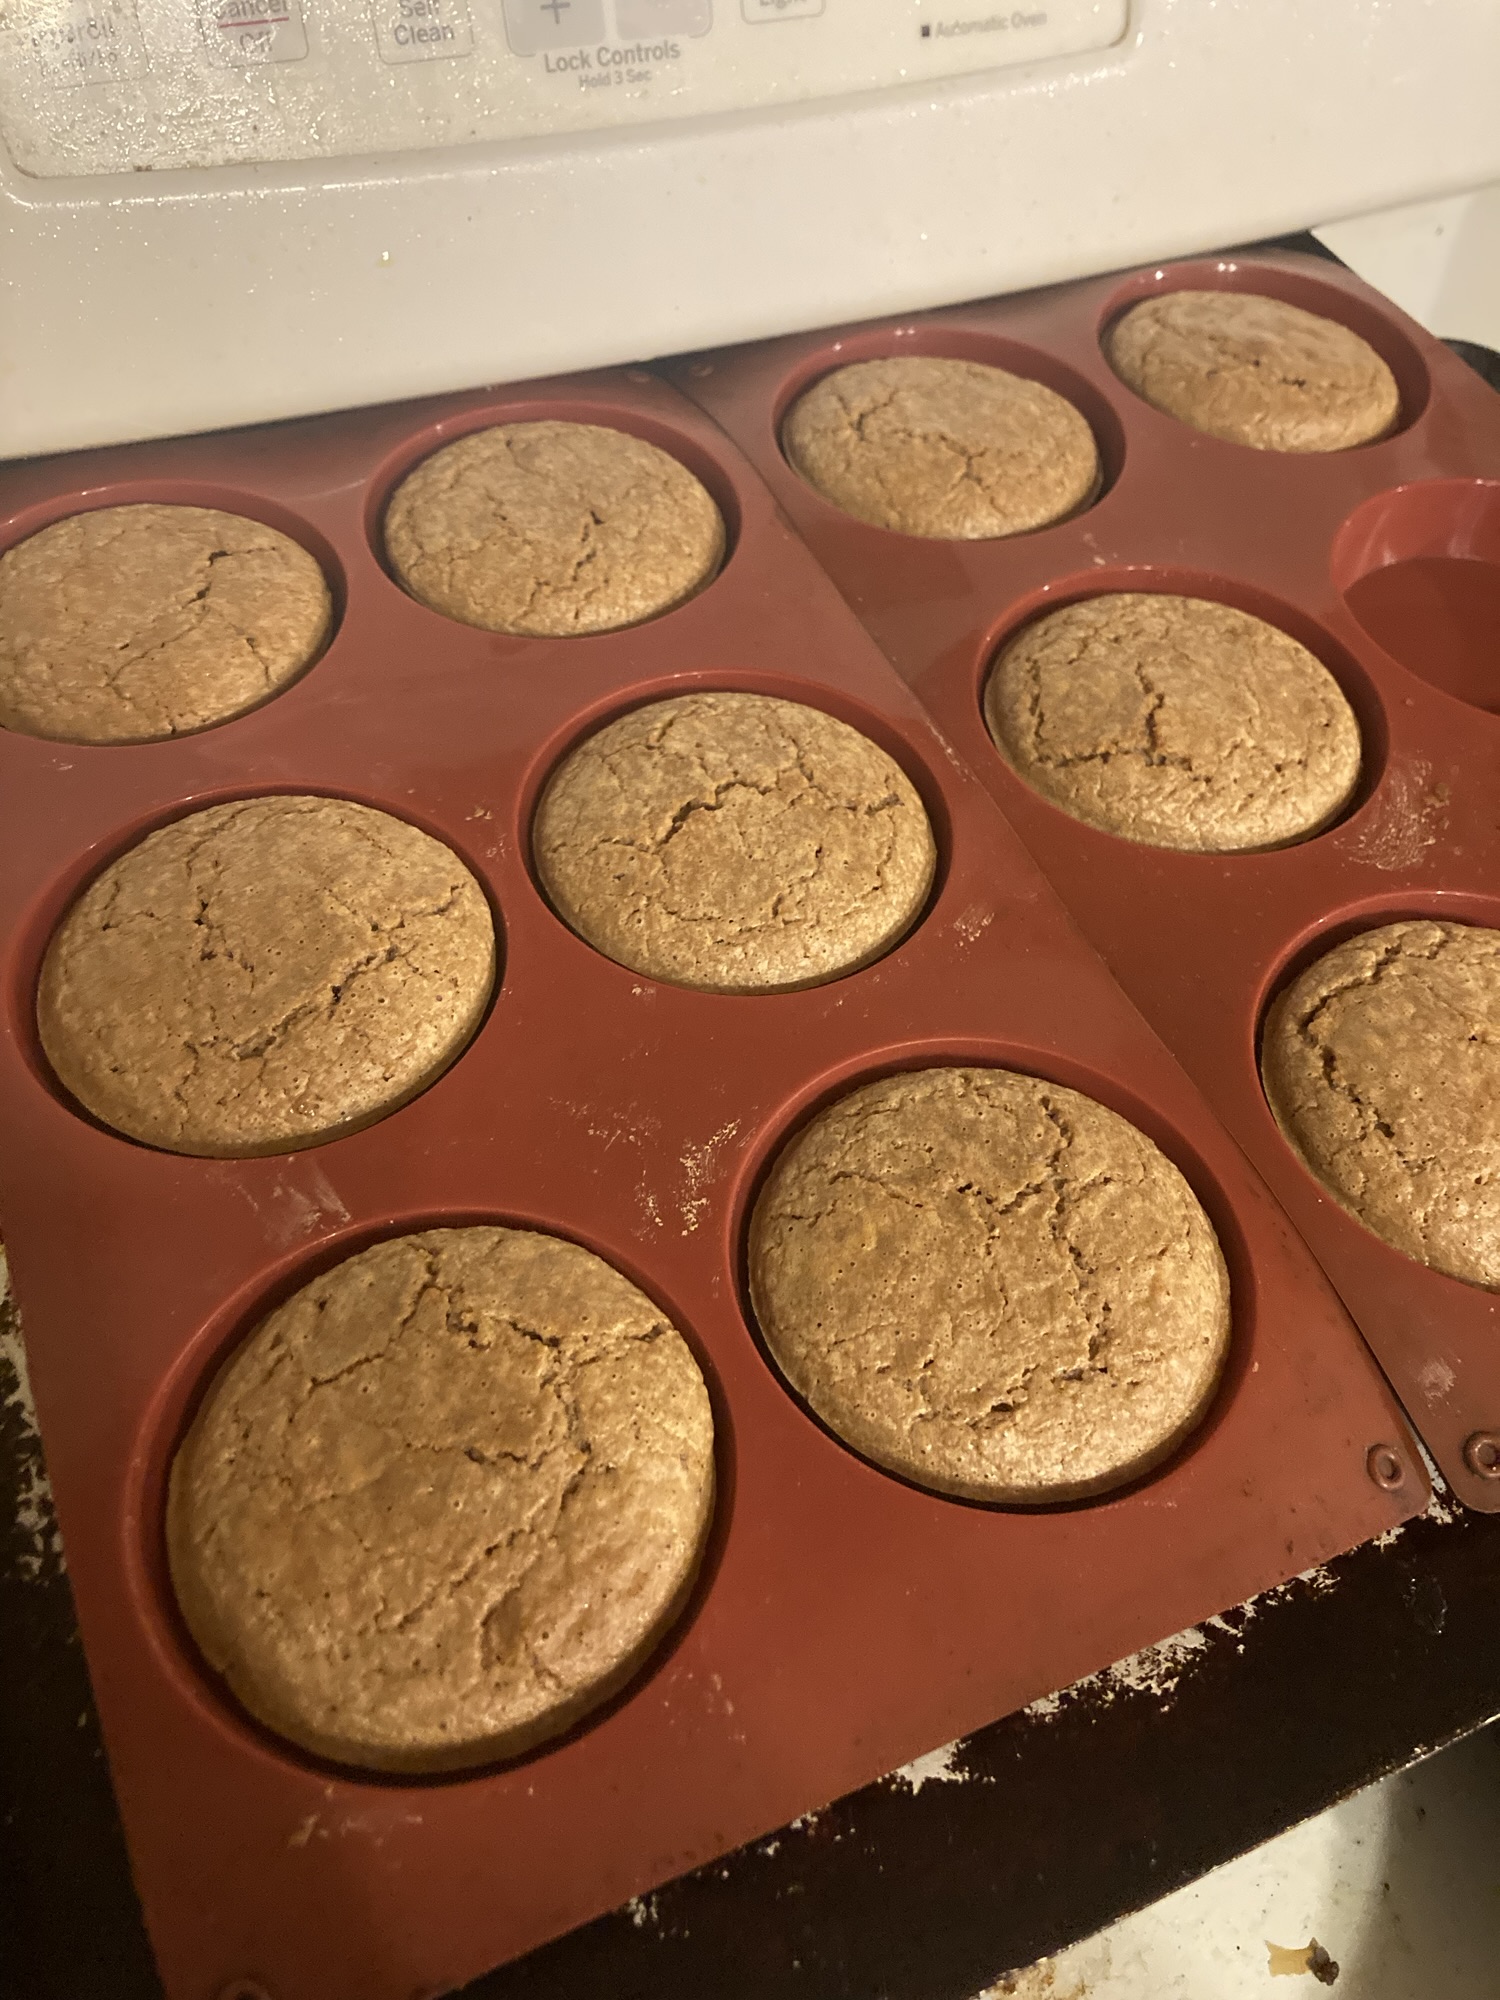
I eliminated gluten from my diet about 3 years ago. I realized that wheat was aggravating some of my other health symptoms. I’ve tried to various ancient wheats over the years – spelt, khorasan, einkorn, etc. to see if I could tolerate any of those, but to no avail.
I’ve recently discovered that I seem to tolerate Emmer which is a lesser known ancient wheat. I’ve been trying it in small amounts to try to build up the tolerance in my system slowly. This recipe is a result of my experimentation.
It is mostly gluten-free, with a little bit of Emmer. Substitutions are noted. in the recipe in parentheses.
Hybrid Gluten-Free, Ancient Wheat Biscuit Recipe:
3/4 cup Arrowroot Powder (or Tapioca Starch)
1/2 cup Teff Flour (or Buckwheat, Millet, Sorghum, or Oat flours)
3 tbsp. Emmer (Spelt, Khorasan, or Einkorn)
1/2 tsp salt
2 tsp baking powder
Mix the above together and then add….
1 cup milk (or non-dairy milk, or water)
2 tbsp melted butter (or oil)
1 egg (or 3 egg yolks, or 2 tbsp psyllium husk dissolved in 1/2 cup water to make the recipe egg free)
Combine the wet and dry ingredients together. Let the mixture sit for 10 minutes to hydrate.
Preheat the oven to 375 degrees.
Pour into silicone liners and bake for 20-24 minutes. Cool on wire racks.
I use my Instant Pot all the time to make mashed potatoes. It’s so much easier and faster than waiting for a full pot of water to boil. This recipe works for mashed potatoes or potato soup. Simply adjust the amount of milk you add.
Instant Pot Mashed Potatoes or Potato Soup Recipe:
I have an 8 quart Instant Pot, but you can make either of these recipes using a smaller size Instant Pot. Simply reduce the amount of potatoes that you use so that they don’t go above the max fill line on your IP liner.
8 Quart Instant Pot Recipe:
5-8 pounds of peeled potatoes
2 cups of water.
Place a wire trivet or mesh steamer basket inside your Instant Pot. Put all your peeled potatoes on top of the trivet or inside the basket. Add 2 cups of water. Seal the vent, set to High Pressure for 12 minutes for large potatoes, 10 minutes for medium potatoes, and 8 minutes for small potatoes. The warm setting should be off. The potatoes should be fork tender when done.
Drain the water from the Instant pot and remove the trivet or wire basket. Add your desired amounts of salt, pepper, butter, and milk and mash directly in the liner.
You just made mashed potatoes!
Instant Pot Potato Soup Recipe:
Follow the steps above but simply leave the water in the IP and add more milk or cream when you mash until your desired soupy texture is reached.
Allergy-friendly tip for those who need to add cooked milk:
If you have a milk sensitivity or allergy like my son, and you need to add cooked milk to your mashed potatoes so that they can eat it, then let me tell you about an Instant Pot tip that will make your lives so much easier. For years I’ve scaled milk on the stove to add to mashed potatoes. It’s such an inconvenient step, it takes so long, and I usually end up scrubbing burned milk off the bottom of my pan. Well, let the Instant Pot change your life on this one. Use the recipe above until the potatoes are cooked and you drain the 2 cups of water from the liner. At this point you can leave the potatoes on the trivet, and simply pour 2-4 cups of milk (I use about 4 for 8 pounds of potatoes) into your liner, put on the lid, and select the Yogurt setting. It will heat your milk to the pasteurization temperature of 160 degrees. Once your IP reads “Yogurt” your milk is heated, you can remove the trivet, and mash as normal. 😊
Mashed Potato or Potato Soup Fixings:
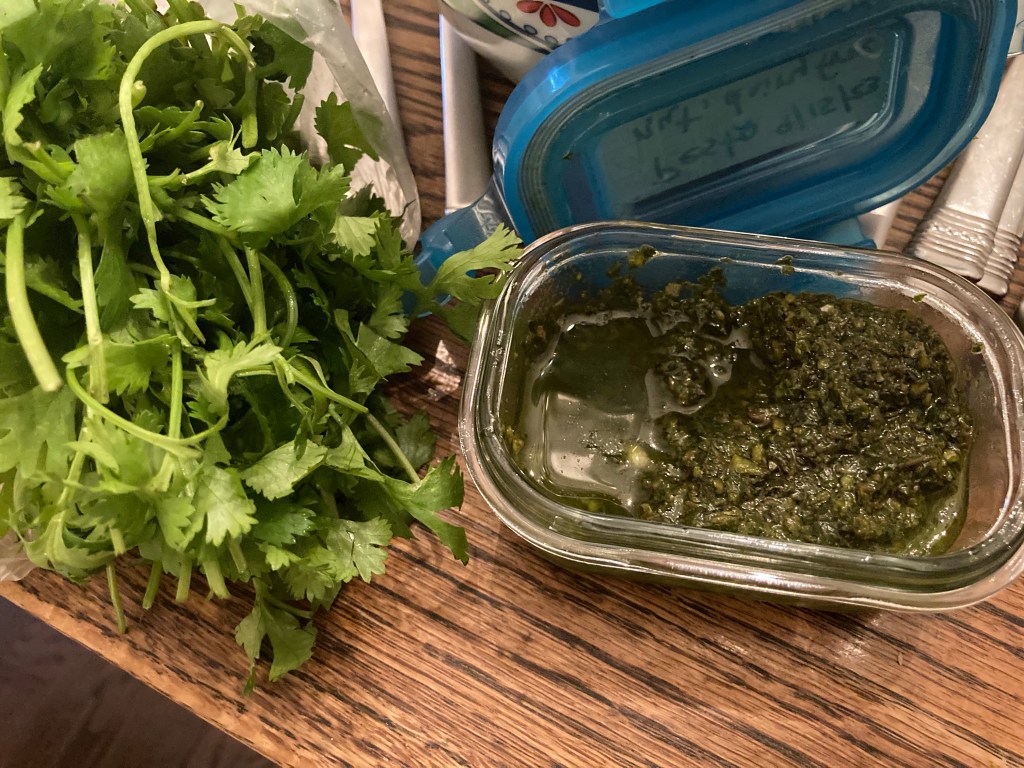
Dress up your mashed potatoes or potato soup with bacon, cheese, chives, or cilantro.
Or use the Pesto recipe I shared last week to make a delicious Pesto potato soup. 😋
Add some delicious homemade cheese to your soup!
Join Carolyn Thomas with Homesteading Family for a free Dairy Webinar. No cow needed. All recipes can be made with store bought milk.
I saw it recommended in Homesteading Family’s Homestead Kitchen Community. It’s become a good reference because even though I can’t use the recipes included in it because of all our allergies, I can use them as inspiration and modify them to suit our needs.
Do you have a sweet tooth and wish you have a healthier option from store bought cake mixes? Here’s your answer. Below, you’ll find make ahead mixes that will sit on your shelves for months until you need them.
Make Ahead Sweet Tooth Cake and Quick Bread Mixes:
Homemade Chocolate Cake Mix Recipe:
This recipe will fill two regular 24 oz spaghetti sauce jars or quart size canning jars.It yields two 9” cakes.
2 1/2 cups all purpose flour
1 1/2 cups sugar
1/4 cup cocoa powder
1 tsp salt
2 tsp baking powder
Combine all the above in a bowl, transfer to two glass jars, and label with ingredients, what to add on baking day, and baking instructions.
On Baking Day Add…
1 cup of milk
2 eggs
1/3 cup of oil
1 tsp vanilla
Chocolate Cake Baking Instructions:
Grease and flour two cake pans. Bake at 350 for 25 minutes until a toothpick comes out clean.
Cinnamon Coffee Cake Mix Recipe:
1 cup all purpose flour
1 cup whole wheat flour
3/4 tsp salt
1/4 tsp baking soda
1/8 tsp baking powder
2 tbsp sugar
1/4 cup brown sugar
1/2 tsp cinnamon
Combine all the above in a bowl, transfer to a glass jar, label with ingredients, what to add on baking day, and baking instructions.
On Baking Day Add…
3/4 cups milk
1 egg
1 tsp vanilla
1/3 cup oil
1 tbsp vinegar
Coffee Cake Topping:
Store this mixture in a baggie in the mouth of your jars. Pour topping mixture into a bowl and cut in 4 tbsp of butter. Then sprinkle on the top of yourcake just before baking.
1 tsp cinnamon
1/4 cup brown sugar
1/2 cup oatmeal or flakes spelt
1/4 cup all purpose flour
Coffee Cake Baking Instructions:
Bake in greased 9” cake pan, or 8×8” casserole on 350 for 35-40 minutes.
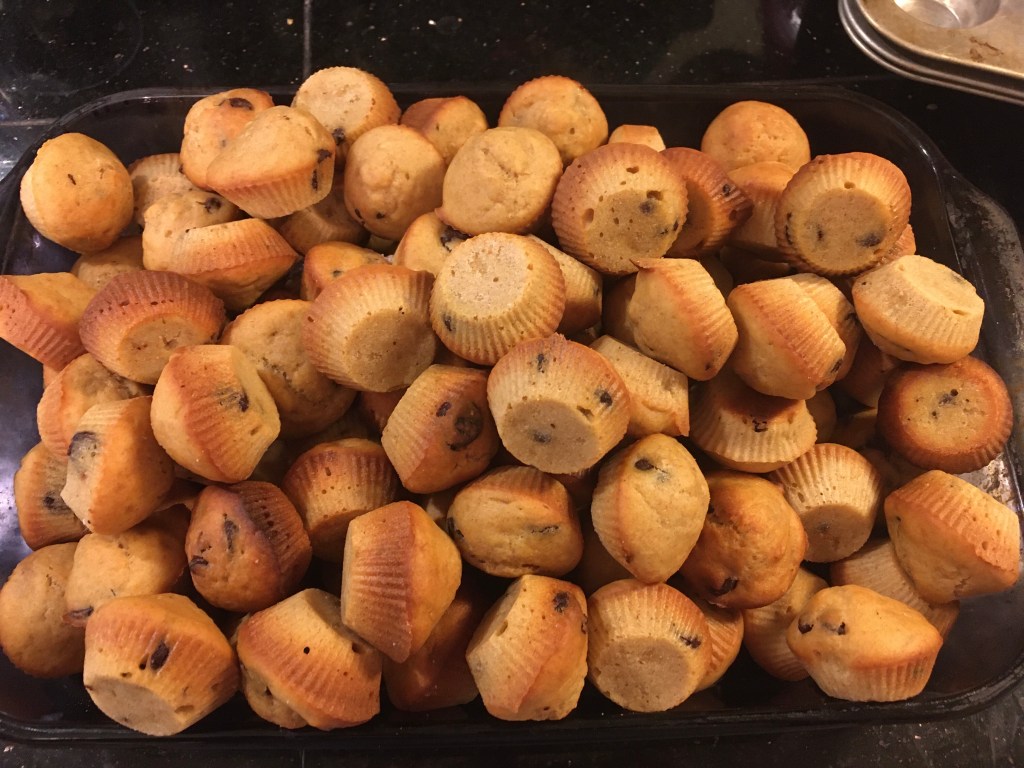
Homemade Banana Bread Baking Mix Recipe:
2 1/2 cups all purpose flour
3/4 cups whole wheat flour
1 1/2 tsp baking powder
1 1/2 tsp baking soda
1/2 cup sugar
1/4 cup brown sugar
1/2 tsp salt
1 tsp cinnamon
Optional: Add 1/4 cup chocolate chips.
Combine all the above in a bowl, transfer to two glass jars, and label with ingredients, what to add on baking day, and baking instructions.
On Baking Day Add…
2 eggs
1/3 cup oil
1-2 ripe bananas
Banana Bread Baking Instructions:
Bake in a greased 8×8” casserole on 325 for 1 hour until a toothpick comes out clean.
Shelf Life of Homemade Baking Mixes:
Shelf life is for all baking mixes is 4-5 months if kept cool and dry. See the note at the bottom of this post for how to extend the shelf life for a longer period.
I hope you’ll try some of these recipes. And guess what? If they sound good to you right now, there’s not need to wait for later. Go ahead and mix up a something sweet right now!
Pro Tips for Making Your Own Baking Mixes:
Pro Tip #1: Always use dried spices, never fresh as the moisture contained in fresh spices will cause your mixture to mold.
Pro Tip #2: Save your empty spaghetti sauce jars to fill with dry pantry mixes to give away to friends. That way you won’t have to give away your good canning jars.
Pro Tip #3: If using canning jars, use this little hand held vacuums sealer with this handy jar attachment to suck the air out of your jars and really increase the shelf life of the dry mixes that you make.
Preserving 101: Homesteading Family is currently running a Preserving Challenge in their Homestead Kitchen Community. Check it out if you want to learn more about stocking your pantry with shelf stable, natural foods. The challenge includes canning, dehydrating, freezing, fermenting, and freeze drying.
I saw this book recommended in Homesteading Family’s Homestead Kitchen Community the other day. It’s become a good reference for me as we can’t buy any packaged convenience meals, spice blends, cake mixes, and so on because of all of our unusual allergies and food sensitivities. But this book has been a great help to me because even though I can’t use the recipes included in it, I can take them as a starting off point and modify them to suit our food restrictions.
Here’s the ones we came up with. We decided to try two savory rice mixes, and three sweet ones. Comfort food you know… 😊
This week I’ll give you the instructions for the rice mixes, and next week I’ll share the sweet recipes which will include Cinnamon Coffee Cake, Chocolate Cake, and Banana Bread – all as shelf stable, make ahead desserts!
So, let’s get started!
Make Ahead Savory Rice Mixes:
Orange Rosemary Rice Mix Recipe:
This recipe will fill a regular 24 oz spaghetti sauce jar or quart size canning jar.
2.5 cups uncooked brown rice
1/4 cup dried orange peel
2 tsp dried chives
1 tsp salt
1/2 tsp pepper
1.5 tsp dried rosemary
1 tbsp parsley
1/2 tsp onion flakes
Herb & Spice Rice Mix Recipe:
This recipe will fill a regular 24 oz spaghetti sauce jar or quart size canning jar.
2 1/2 cups uncooked brown rice
2 tsp dry oregano
1/2 tsp dried Basil
1 tsp dried parsley
1 tsp paprika
1 tsp marjoram or thyme
1 tsp salt
1 tsp pepper
1/4 tsp chili powder
1/4 tsp cumin
Mixing and Storage Instructions for Rice Mixes:
Mix all the ingredients in a large bowl. Once combined, fill your jar, secure the lid, and label with ingredients and cooking instructions. Shelf life is 6 months it kept cool and dry. See the note at the bottom of this post for how to extend the shelf life for a longer period.
Cooking Instructions for Rice Mixes:
Add 2 cups of water for every cup of rice. Simmer covered for about 20 minutes until all the water is absorbed.
I hope you’ll try some of these recipes. And guess what? If they sound good to you right now, there’s not need to wait for later. Go ahead and mix up a batch of rice to go with dinner and something sweet for dessert.
Pro Tips for Making Your Own Baking Mixes:
Pro Tip #1: Always use dried spices, never fresh as the moisture contained in fresh spices will cause your mixture to mold.
Pro Tip #2: Save your empty spaghetti sauce jars to fill with dry pantry mixes to give away to friends. That way you won’t have to give away your good canning jars.
Pro Tip #3: If using canning jars, use this little hand held vacuums sealer with this handy jar attachment to suck the air out of your jars and really increase the shelf life of the dry mixes that you make.
Preserving 101: Homesteading Family is currently running a Preserving Challenge in their Homestead Kitchen Community. Check it out if you want to learn more about stocking your pantry with shelf stable, natural foods. The challenge includes canning, dehydrating, freezing, fermenting, and freeze drying.
We moved to a new to us house this summer and I’ve been thankful for some ready made crock-pot freezer meals that I’ve had prepared. We ran through most of them a few weeks ago when COVID made its way through our house. So it’s time to restock.
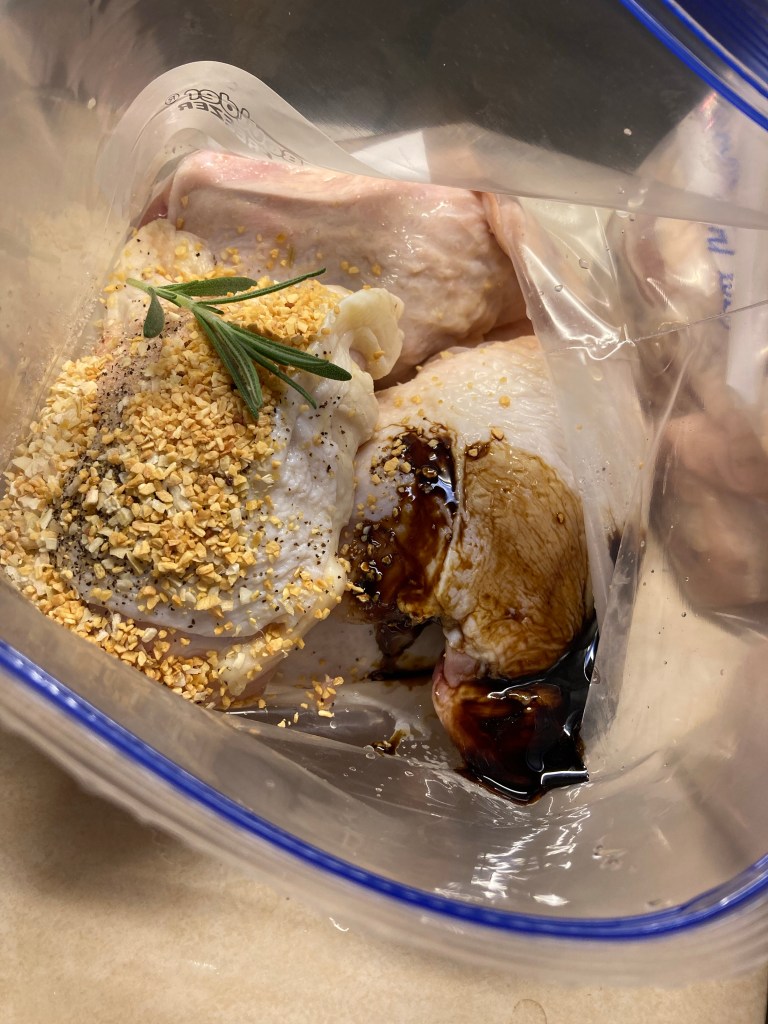
I came up with this recipe for Sunday dinner and the family loved it. The nice thing is that it’s flexible. It can be thawed and grilled, or you can simply throw the whole batch into the crock pot and cook it in low all day. It’s delicious served with brown rice or mashed potatoes.
Rosemary Lemon Chicken Recipe:
5-8 Chicken Thighs (boneless or bone-in) depending size of thighs and size of your family
Small sprig of fresh Rosemary or 1/4 tsp dried rosemary
1/2 tsp salt
1/4 tsp pepper
1 tsp minced garlic
1 tsp onion flakes or 2 rounds sliced onion
1/4 cup lemon juice
2 tbsp blackstrap molasses
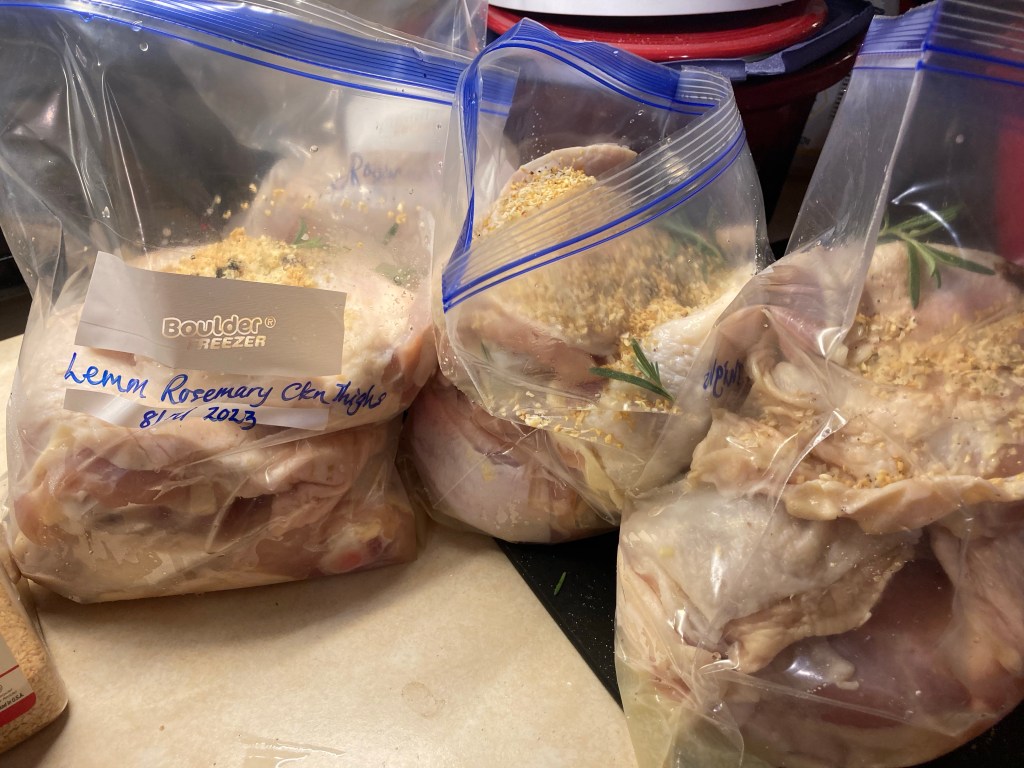
Combine all the ingredients in a gallon freezer bag. Freeze for up to 6 months.
On cooking day, either put the contents of the bag in 4 quart crock pot and cook 6-8 hours on low.
Of if you prefer to grill, thaw the bag in the fridge overnight before grilling.
This recipe is most cost effective if you buy family packs of chicken thighs and make up 3-4 bags at a time. Then you’ve got several dinners ready to go when you need them.
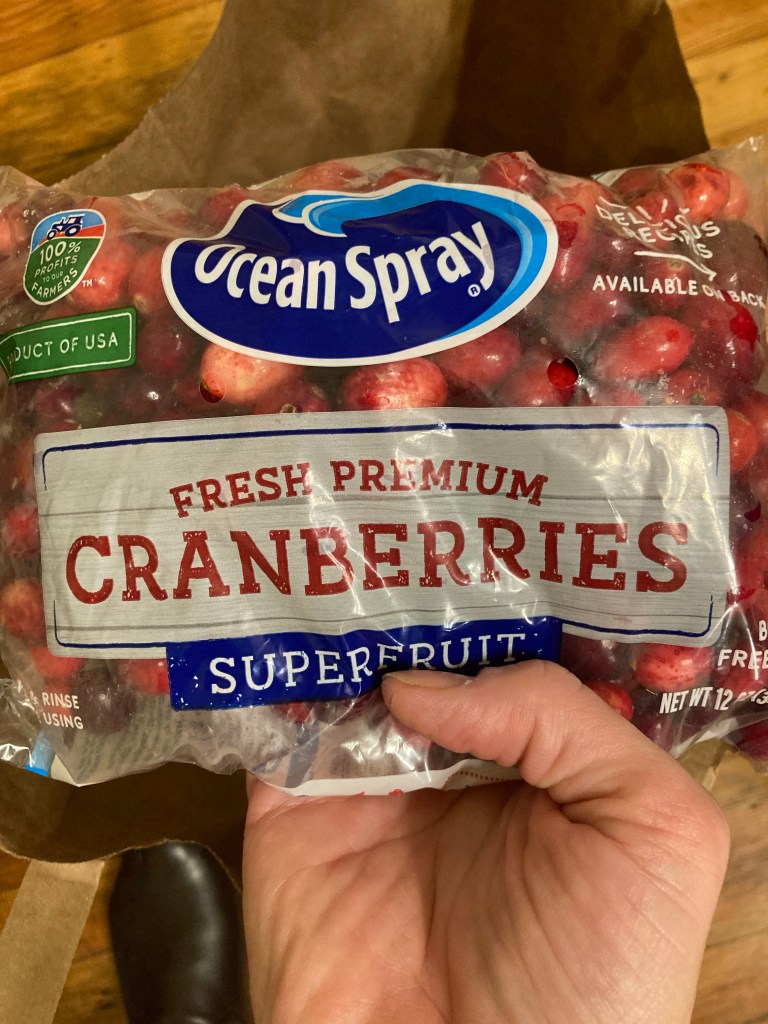
Do your local grocery stores have fresh cranberries yet? If so, snatch them up while you can. I’ve made this fermented Lemon Cranberry Honey the last couple of years and realized last year that I didn’t make nearly enough last time. So I upped my game and instead of the two jars I made last year, this year I made six! One bag of cranberries will yield about three cups worth of relish. Hopefully this will last us through till next year when I can get fresh cranberries again. I tell you there is nothing better on toast in the morning and it makes whipping up a batch of lemon cranberry scones a cinch!
It couldn’t be easier, chop the cranberries in your food processor, put them in a jar, add some lemon peel, cover them with honey, and put on the lid. Let it sit on the counter for a couple of weeks agitating the jar a little each day and then move to cold storage. I’ve had a forgotten jar last nearly a year and it was still delicious.
The six-year-old requested this for her birthday this year. We are mixing them up now! Give this recipe a try. 😊
Cast Iron Skillet Cookie:
1 stick butter and 1/4 cup tasteless oil (I use light olive oil), melted
3/4 cup sugar
1/3 cup honey
1 egg
1/2 tsp salt
1/2 tsp Vanilla
Whip the sugar, honey, and butter several minutes until light and creamy (this step is important, don’t skimp on the mixing). Then mix in the egg, salt, and vanilla.
1 3/4 cups all purpose flour
1 tsp Baking soda
1 cup chocolate chips
Stir together.
Mist your skillet(s) with cooking oil. You can either use one 10″ skillet, or three mini cast iron skillets. Fill with cookie batter. Bake at 350 for 20 minutes. Best served warm with vanilla ice cream.
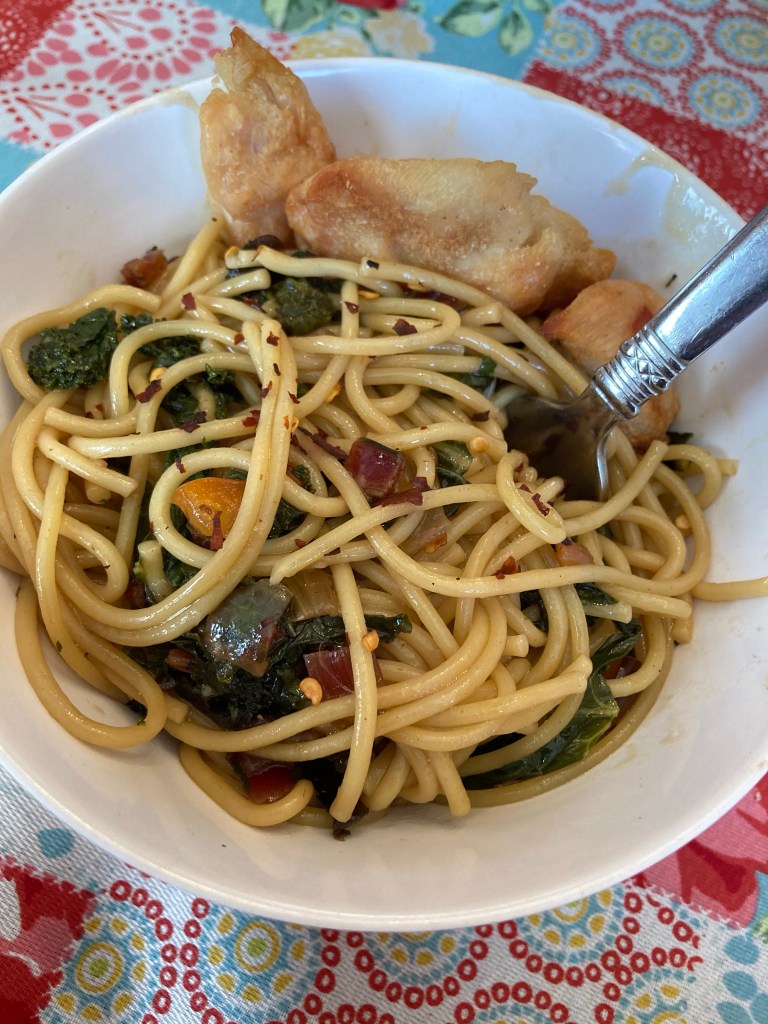
Similar to my IP Lo Mein of recipe, this is a vegetarian recipe but can easily be served with leftover meat if desired.
This can also easily be a one pot meal if you sauté the veggies in the IP liner before and remove them before cooking the noodles. If you are short on time though, set the noodles to cook in the broth and sauté the veggies on the stovetop to mix in once the noodles are done.
Vegetarian Instant Pot Ramen:
If you want a one pot meal, start by sautéing the vegetables of your choice. Today I used the ones listed below. This is a great recipe to use up little bits of a variety of vegetables that need to be eaten.
1/2 cup yellow onion, chopped
1/2 cup chard or celery stems, chopped
1/2 cup bell pepper, chopped
1 cup diced mushrooms
3 cloves of garlic, diced
4 cups chopped kale or chard
Sauté veggies in the liner of the IP and remove before adding noodles. Or sauté in a separate pan on the stovetop.
After the veggies have been removed if you sautés them in the IP liner, add….
1 tsp salt
1/4 tsp pepper
1/4 cup soy sauce or Bragg’s Aminos
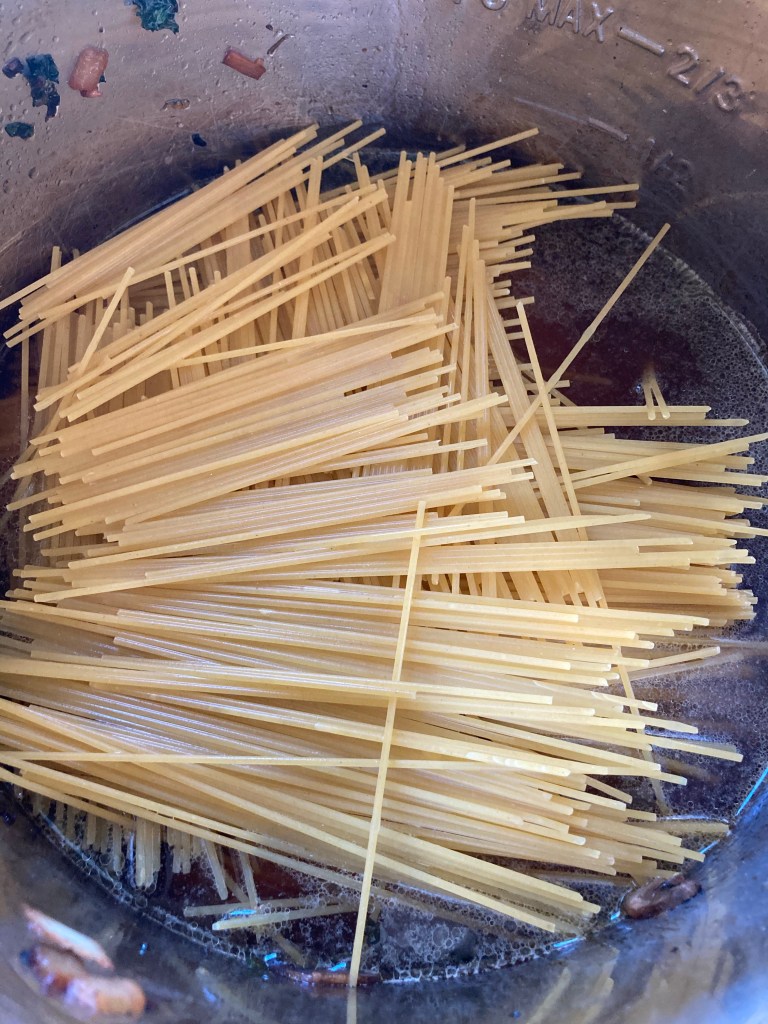
8 cups of chicken or beef broth, or 8 homemade bullion cubes and 8 cups of water (the liquid should come a little less than halfway up the sides of the pot)
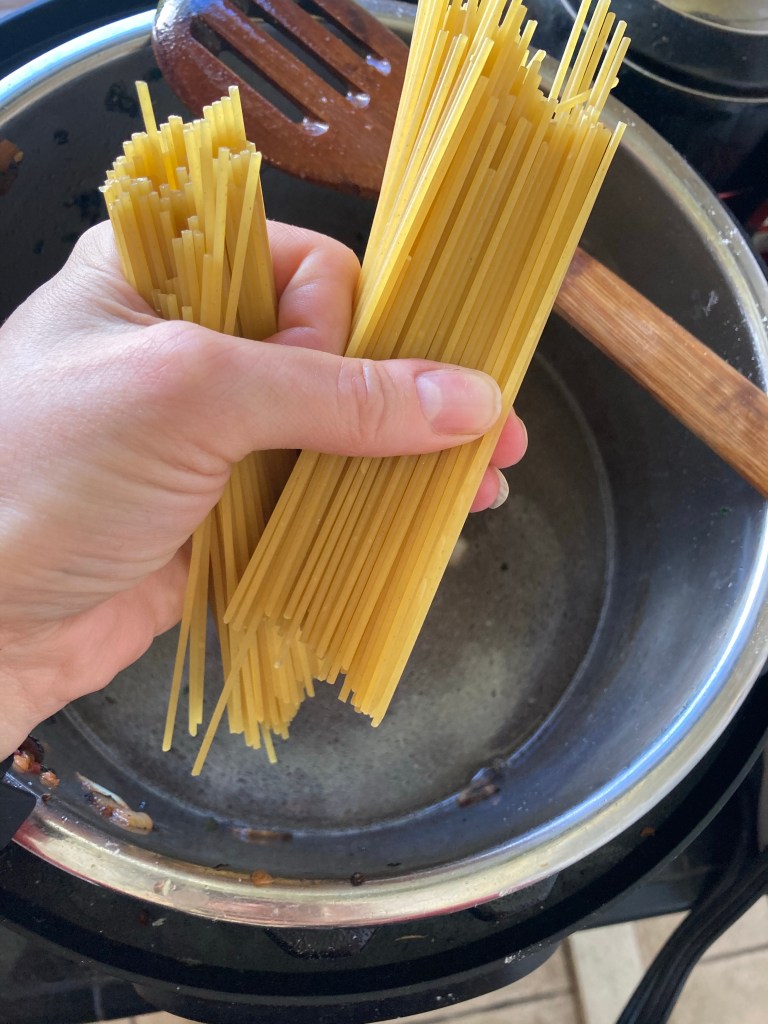
1 – 1 1/2 pounds thin spaghetti (I used regular spaghetti noodles the day I made this and took the pictures as I didn’t have think spaghetti on hand.)
Break the noodles in half alternating directions. The noodles don’t have to all be completely covered by the liquid but they should all be moistened. Do not stir or compress the uncooked noodles.
Lock the lid on the pot and seal the pressure valve. Cook on High Pressure, Warm setting OFF, for 3 minutes. Quick Release.
Immediately stir the noodles and add in the cooked veggies. Let it sit for 5-10 minutes to allow the past to absorb some more of the liquid.
Add meat if desired. We like to serve this with chicken strips on the side.
I haven’t made this in ages. I used to make it every week for my husband’s breakfast, but since COVID the poor man has been mostly stuck with store bought cereal. Time to make another batch.
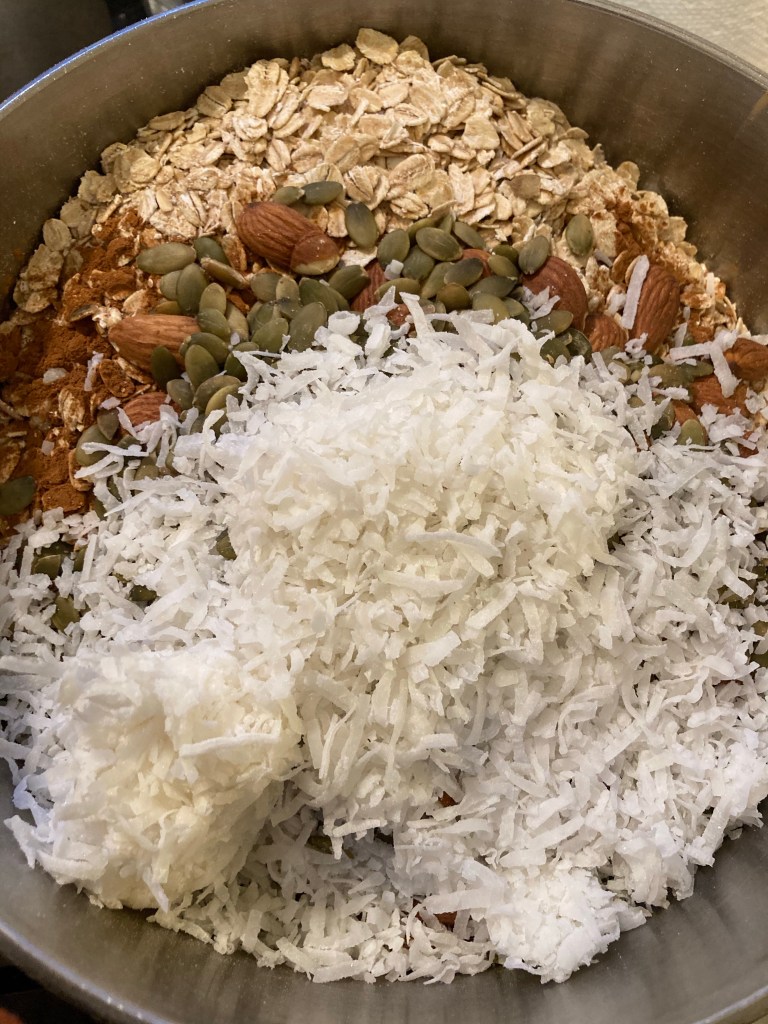
Granola:
First mix all the dry ingredients in a large bowl.
6 cups oats (I prefer regular, not quick-cooking) Note: If you have an oat allergy, substitute spelt flakes for the oats. 1 cup coconut 1 cup chopped nuts (You can use any nut you like or have on hand. I usually use walnuts but almonds or pecans even work.) 1 tbls. cinnamon 1 tsp. nutmeg 1 tsp. salt
1/2 cup pumpkin seeds (optional)
Stir the dry ingredients until mixed well. Then mix in following.
Stir well until all the oats are coated. Put in a baking pan with sides and bake on 350 for 20 minutes removing at the 10 minute mark to stir. When you stir be sure that you are careful to pull it away from the sides as the honey burns easily along the edges otherwise. When it has cooled off, stir in 2 cups of raisins. Makes a yummy breakfast or snack.
If you want to give this recipe a try, follow my basic waffle recipe here, but use half the oil, 3 cups of regular milk rather than the 4 cups of buttermilk (or soured milk), and add 1-2 cups of sourdough starter.
This batter bread is delicious, savory, and filling. Trying as a surprise side dish with dinner. It’s great way to use up your extra sourdough starter.
Garlic Herb Batter Bread:
3/4 cup sourdough starter
1 tsp. salt
1 cup water
1 tsp baking soda
1 tbls garlic powder or granulated garlic
1 tbls Italian seasoning
handful of sliced black olives
Add all purpose flour 1/2 cup at a time until the batter resembles a stiff buttercream frosting.
To bake, spray a casserole with oil. Pour in the batter and let it rise in a warm place for 2 hours. Preheat the oven to 400 degrees. Bake for 30 minutes.