Made from scratch, home cooked meals are the ideal goal of many a homemaker. If you have a garden and can add fresh, homegrown food to that, all the better! But the slog of deciding what to make every day can be overwhelming. Some days it’s just decision overload. When your days are filled with school, housework, cooking, kids’ activities, volunteer work, and life, sometimes something’s gotta give.
I can honestly say, that I don’t think I would have survived the last year if I hadn’t been faithful to plan out my meals each week. My diet has become more and more limited in the last year, so that coupled with our increasingly busy schedule, weekly meal planning has saved my sanity.
I’ll be right upfront with you though and say that I hate it. I never used to plan meals more than a day or two in advance. I’d look in the fridge and freezer, see what we had and throw something together. But before we moved last year, I realized that I wasn’t going to survive the weeks leading up to moving day if I didn’t plant out my meals. I knew I would have just been too distracted to keep food on the table, and with all our food allergies and restrictions, convenience meals or eating out wasn’t an option for us.
Now, I’ve said that I hate meal planning, (anyone else 🙋🏻♀️), and I do. When I come home from church on Sunday night tired and ready to crash, the last thing I want to do is sit down and think about a week’s worth of meals. But I make myself do it because I know that I won’t make it through the week if I don’t.
Here’s my method. It’s simple and it doesn’t require any complicated apps or planners.
Weekly Meal Planning for those with food allergies:
So, what’s my secret?
It’s nothing earth shattering. I simply use the notepad on my phone.

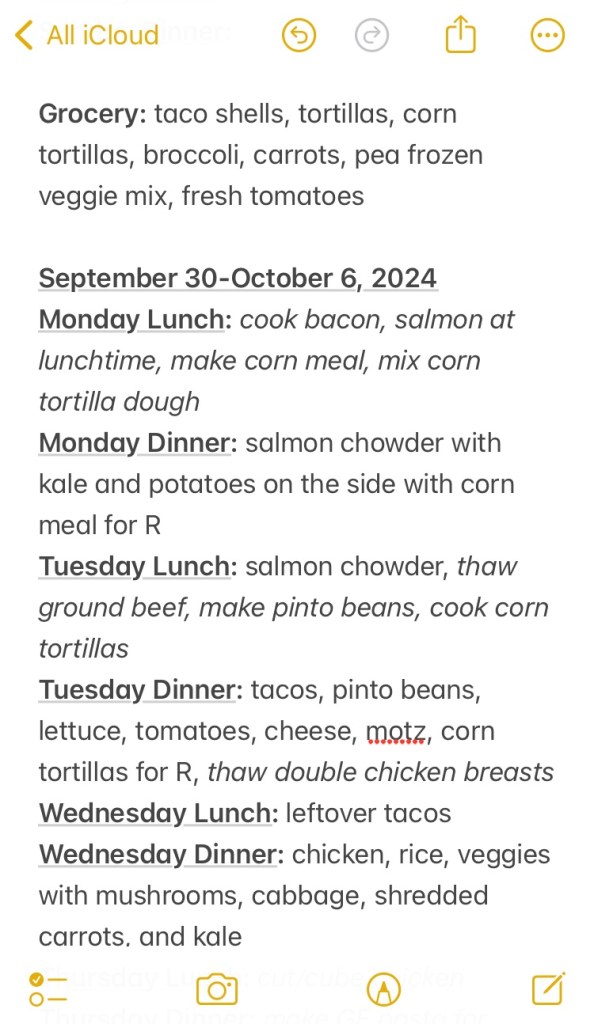
I keep this weekly breakdown at the top of my phone (photo above). Each week, I highlight and copy it and paste it underneath and fill it in to plan the upcoming week’s meals. So my current week is always at the top with the last week’s meals moving down the app in reverse date order.
Because of our food restrictions, our breakfasts are pretty standard so we stick to our regular routine on those, so I don’t plan each breakfast out separately, but you could easily add in a line for breakfasts if you wanted to do that. (Just in case you’re wondering, our breakfasts consist of large batches of waffles, biscuits, or sourdough bread made once or twice per week with sausages, eggs, or a nut butter for protein based on who can eat what.)
Sample Meal Plan:
Here’s a sample of my meal plan for this week:
Meal Planning Method:
Here’s my what I do…
I fill in what meal is planned for each day and if any modifications need to be made for anyone who has dietary restrictions. In italics I make note of anything that needs to be thawed the day before, or any prep that I might need to do in advance. Then at the top, I write anything I might need to buy at the grocery store that week in order to have everything on hand for the meals that I have planned. Then we print it out and put it in the fridge and write in names of anyone else that may be helping with prep or doing part of the meal. For example, last night my husband grilled, so his name was written in for that on Saturday night and my daughter was written in making roasted potatoes so I got the night off from cooking. Yay!
Why this works:
This method works for me because it saves me during the week. I don’t have to stop what I’m doing to figure out what we are going to eat at the last minute. And because it’s on my phone, I can easily make changes if I see a meal won’t work for some reason, or if I need to look up what I was supposed and to shop for when I find myself at the grocery store.
Make a Meal Rotation!
Recently though, we’ve taken it one step further. To give me my Sunday nights back from working out the meal plan details, my husband suggested creating a two week rotation of our favorite meals that we just repeat over and over again. This works well for us as most of our evening activities are on an every other week rotation so we can usually slot in the same meals over again pretty easily. To keep it from getting boring, every other week when we have a free Friday night, we make a Wild Card Friday where each kid gets to take a turn picking a meal of their choice to mix it up a bit and work in some of the meals that might take a little more time and effort to prepare.
Why should I meal plan?
Is meal planning work? Yes! But it makes the work of getting through your busy week that much easier. Give it a try. The relief of having the pressure of deciding what to make every day removed is immense for me. Your plan will look different from mine based on your family’s tastes, food restrictions, and schedule, but I hope that you’ll give it a try.