Calendula is one of the few plants in the Aster family that we use as my son has a allergy to ragweed which makes him sensitive to many of the plants in that same plant family.
I’ve grown Calendula for years and thought I’d share how I air dry them without a dehydrator. It is often recommended that you dry calendula with a dehydrator since the centers are so thick and resinous that they can be hard to air dry, and if not completely dry, they can mold in storage.
Why this method of air drying Calendula works. Two reasons:
Good air flow.
Long drying time.
Because my calendula is grown in containers, I usually have small harvests, meaning I’m not harvesting basketfuls at a time. I might harvest 2-3 flower heads per day. This is certainly not enough to warrant pulling out the dehydrator in order to dry them.
So mine sit and wait for me, and as they wait, they dry.
Here’s what I do…
Each flower that I pick goes into a little linen bag. This is in fact a little bag for sprouting micro greens, but since I use a different method for that, I’ve never used that bag for sprouting so I turned it into my calendula drying bag. Now, let’s stop here. You don’t need a bag for this. Any airy, piece of fabric, linen, muslin, flannel, burlap, or scrap of cheesecloth that is large enough to lay the flowers on and fold over on top of them will do. The purpose of the fabric is to keep your flowers clean and free of dust while drying.
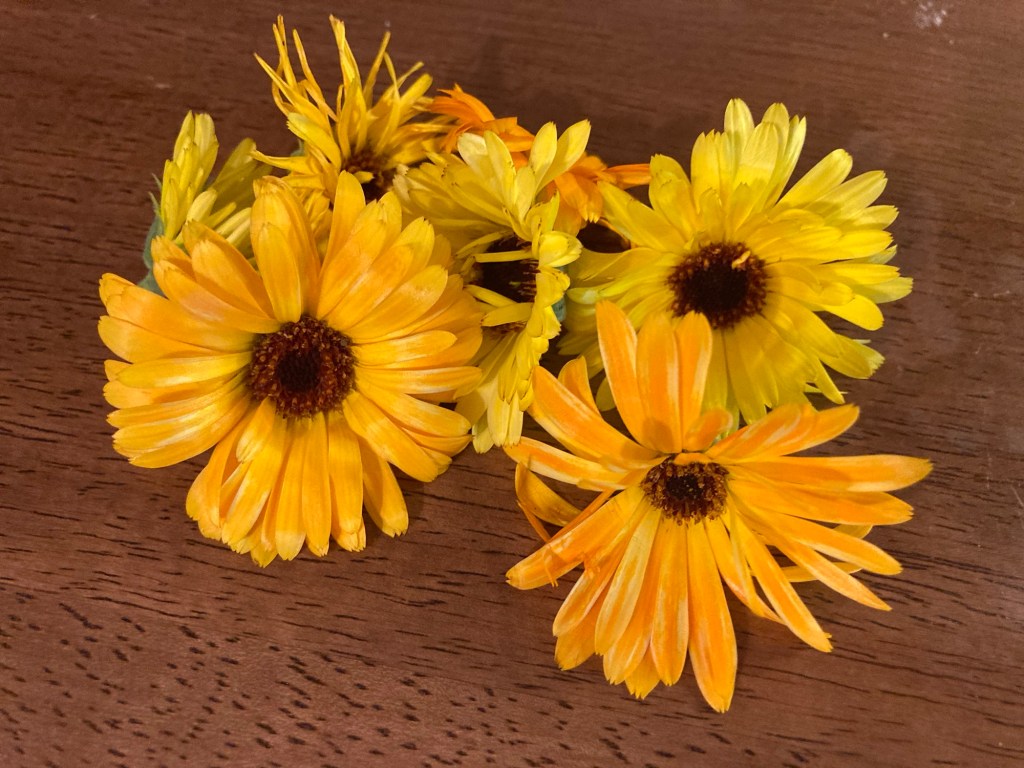
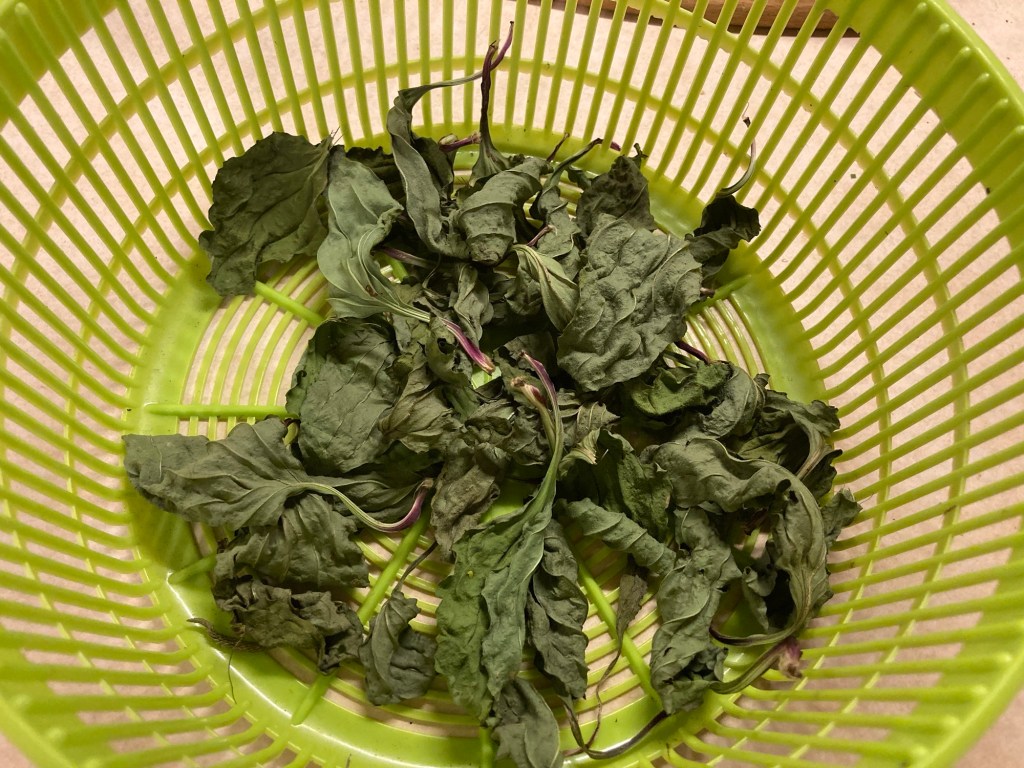
Tiny harvest. These Calendula blossoms have been drying for a few weeks.
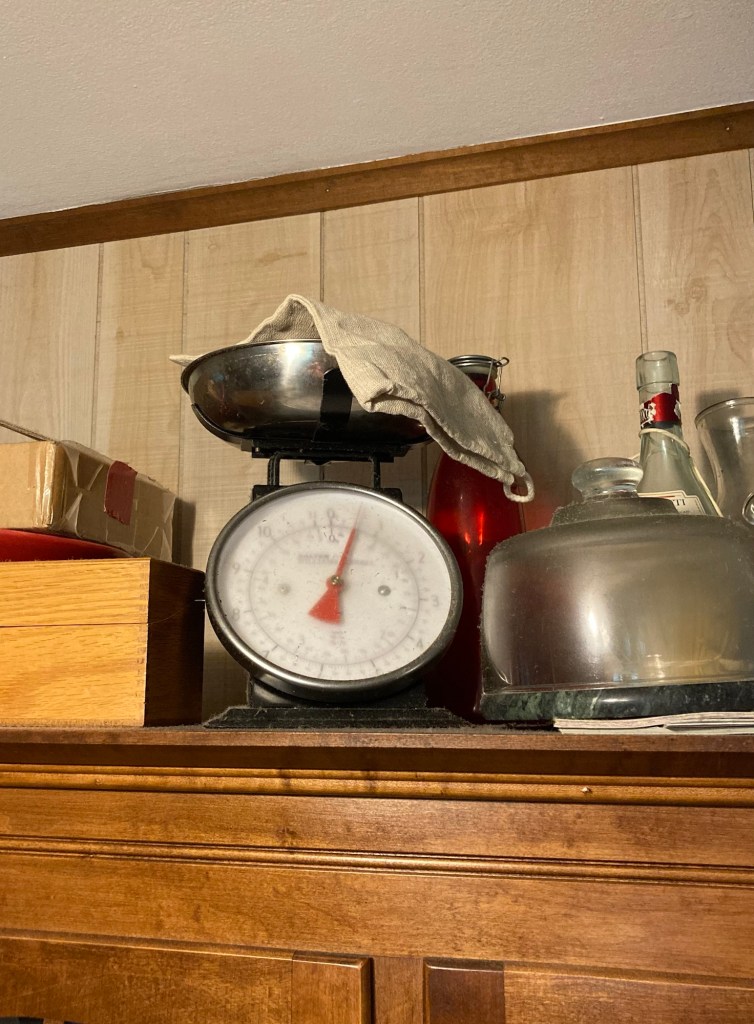
Next I lay this little bag on top of my hutch where the air is warm. I usually lay it in the bowl of my old fashioned kitchen scale which lives up here, but anywhere high and warm that is open to the air will do. On top of the fridge would work quite nicely. (Do not place anything inside an upper cupboard though. There would not be enough air flow in there.)
As I pick new flowers, I add them to the bag. Each time I take it down to add more I shuffle them around to ensure they are all getting moved around so that all the parts dry well.
New flowers added to the bag.
When I have new blooms to pick, I add the new flowers to the bag and it goes back up on the hutch. Sometime in the fall when they are all good and dry, I’ll take them down, ensure that they are all dry and can be crushed, and I’ll store them in a glass jar until I need them to make more infused oil or Calendula salve. They wait quite happily for me, and by the time I’m ready to use them in winter, they are dry and ready to use. In fact, most years, they just sit there until I remember to take them down sometime in December.
Growing, harvesting, and drying herbs doesn’t have to be a fussy process. Find a method that works and feels easy to you and go with it. What’s stopping you?
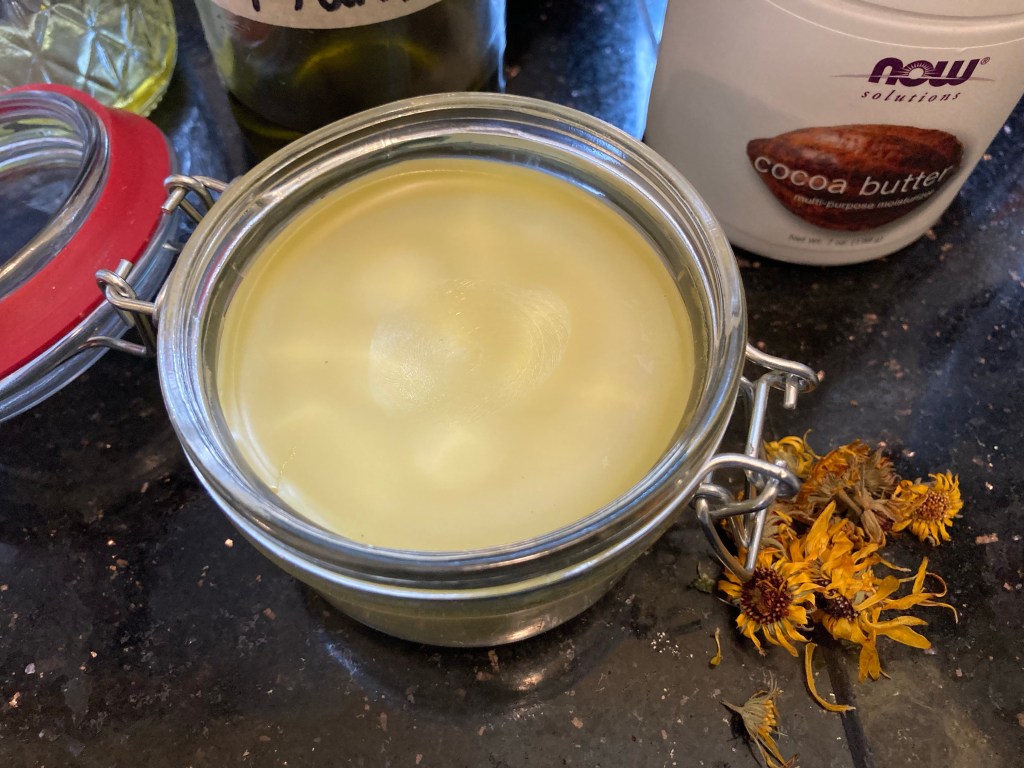
And once you have a homemade infused oil, you’re only one step away from making your own salve. You might want to check out my Healing Salve which is made with Calendula. (See the little dried up Calendula flowers laying there?) 😊
And if you really want to wrap your head around making all your own infused oils and slaves, let Carolyn with Homesteading Family hold your hand through the process. She recently came out with a Herbal Oils class that is quite nice which covers the basics of making culinary oils, infused medicinal oils, and using essential oils for your own handmade salves, balms, lip balms, and more. You can get access to it as part of their Homestead Kitchen Membership.
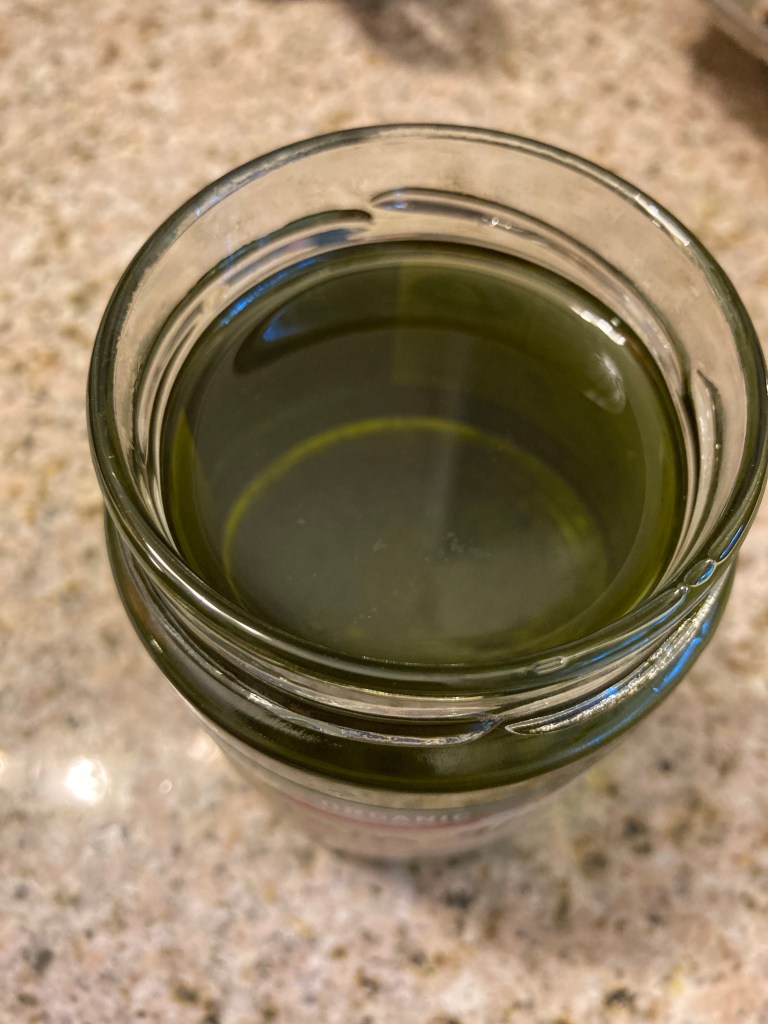
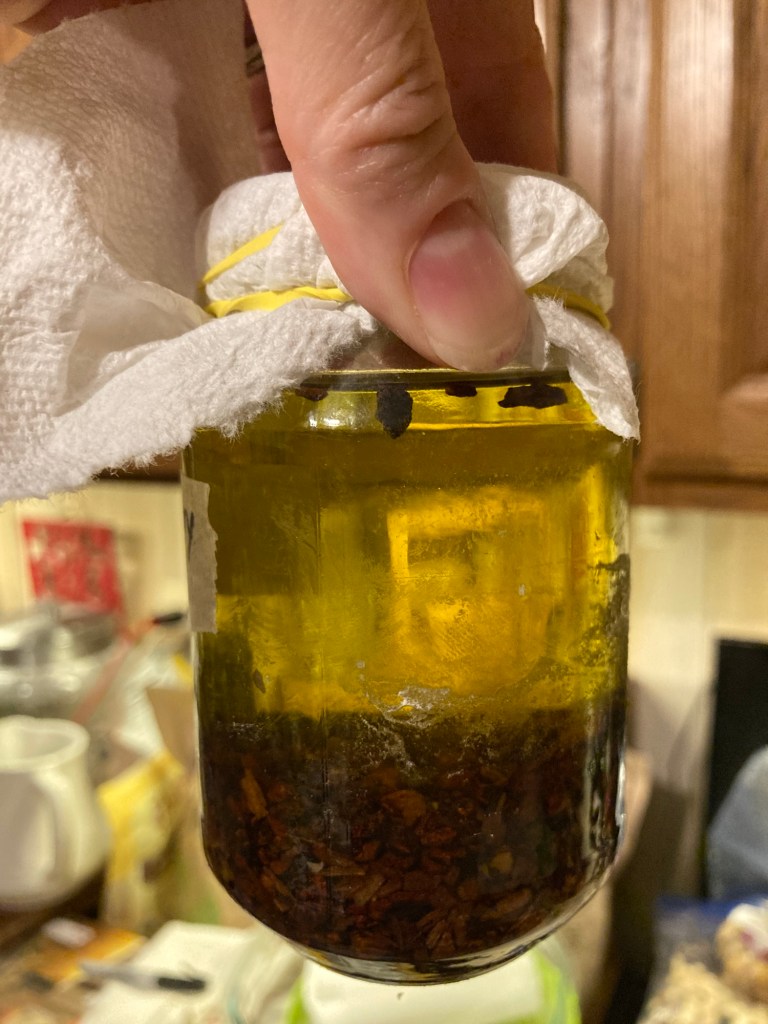
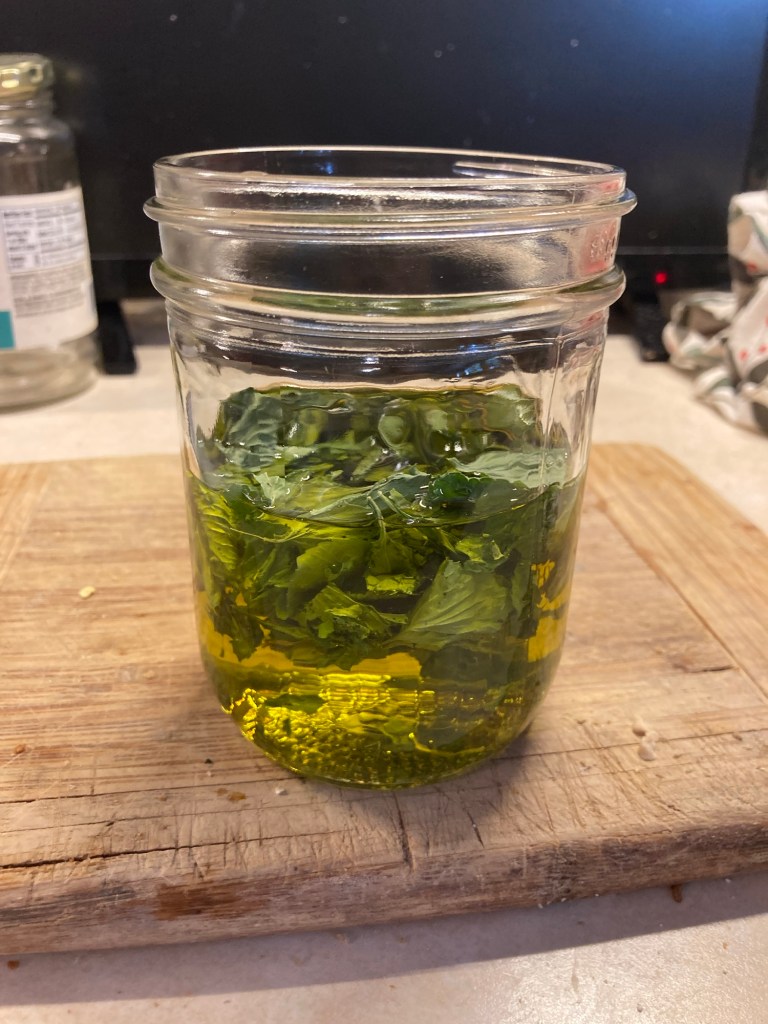
Look at that color!!! Have you ever seen a prettier dark green. Did you know that the deepness of color, indicates the potency of the oil. The deeper the color, the more potent the oil.
Note: This recipe is written for plantain but this method can be used with any plant. You could make rose, mullein, borage, Hawthorne, calendula…. The sky is the limit.
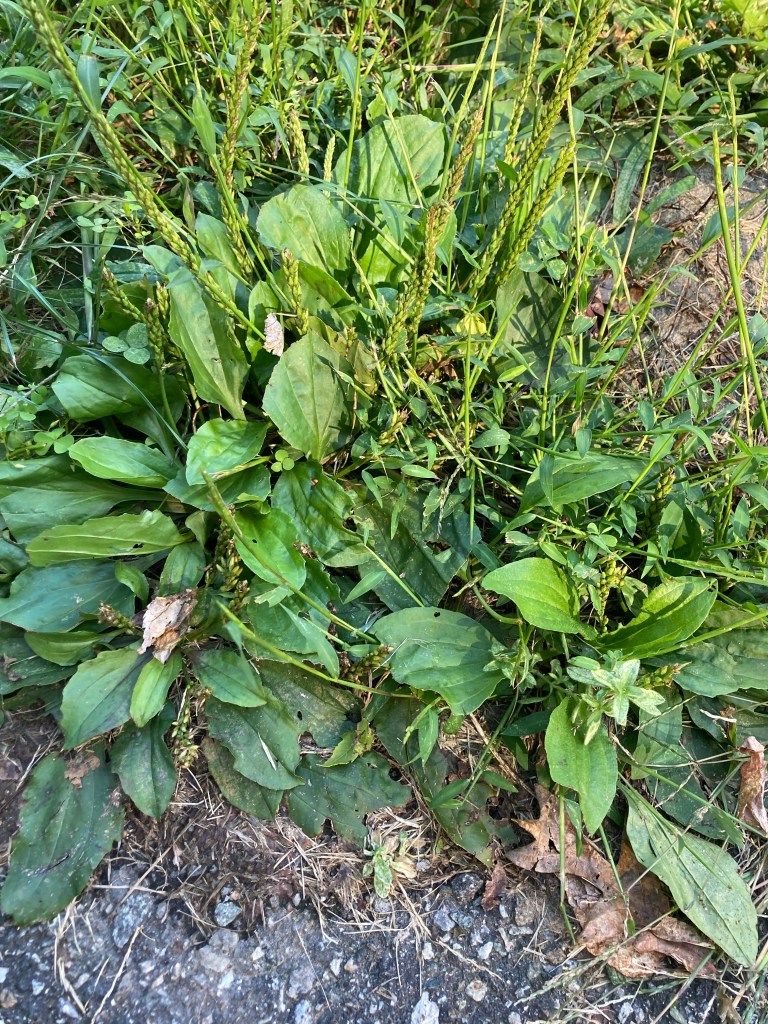
Anyone have this little plant in their back yard?
Plantain (Plantago major) is one of the most common “weeds” found in lawns. Many homeowners spend thousands of dollars every year trying to get rid of this little weed. It is a tough one to eradicate since it forms in low-growing rosettes. The fact that it hugs the ground means lawn mowers often pass right over it without doing any damage.
The other trait of plantain that makes it difficult to get rid of are all these little seed stalks that it sends up in the late summer to early fall. The seeds spread easily which means new little clusters will always pop up.
The fact that this little plant is so common and determined to survive means that it has a whole host of medicinal properties. So go find a lawn that you know is not sprayed with any weed killers, pick some leaves, and let’s make a batch of plantain oil.
Plantain leaves can be gathered any time of year when the plant is growing. The leaves will be most potent when gathered before the plant goes to seed. (Note: Do not harvest the seeds. They contain contraindications for some health conditions.)
Let’s make some oil!
Infused Plantain Oil Recipe:
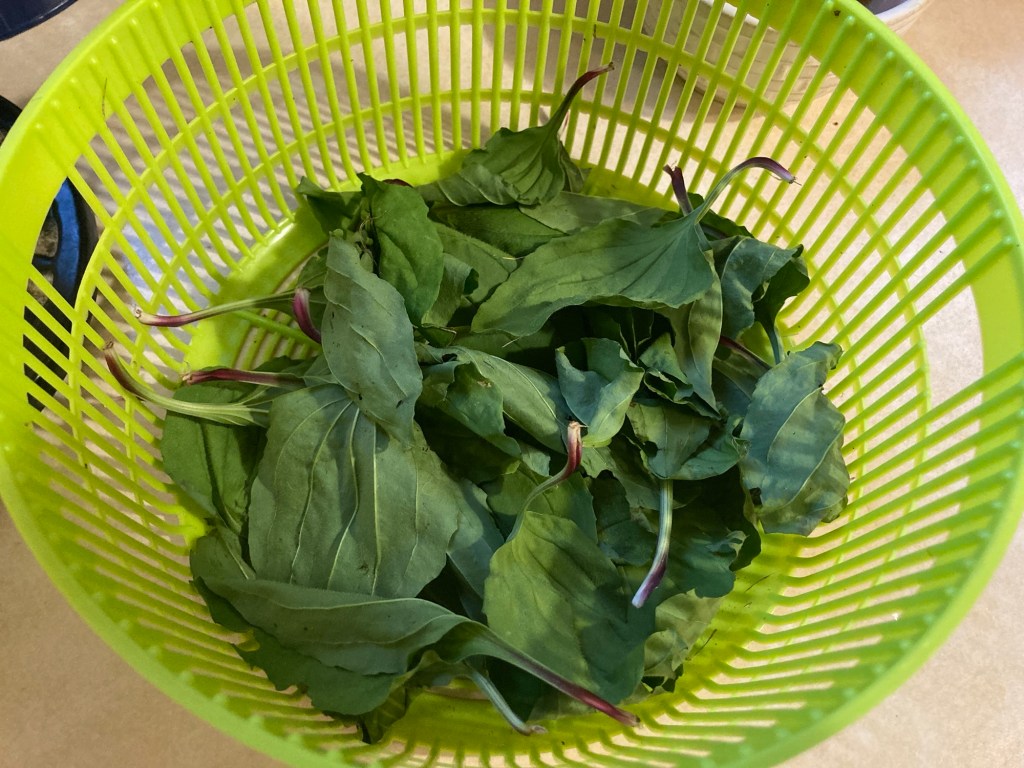
Gather your leaves. Choose whole, unblemished leaves if possible. Do not pull up the whole plant. Pinch from the bottom of the leaf stalk to pick each leaf individually. This will ensure more harvests later in the season.
Fill a bowl with cool water to rinse the leaves of any dirt or bugs. I actually like to use my salad spinner for this step. The mesh basket makes it easy to wash, drain, and dry. See step #3 below.
The next step is to let the leaves dry and wilt. They don’t have to dry completely, but the drier they are, the longer the shelf life of your oil will be. Using the mesh liner from your salad spinner by removing the strainer from the outer bowl so that the leaves can get good air flow works well for me. I like to fluff them up occasionally as I walk past them on the kitchen counter to keep them moving to ensure they dry evenly. Or if you don’t have a salad spinner, a pasta colander with larger holes will work as well. You can also lay the leaves out on a tea towel on top of a cookie cooling rack to air dry and wilt. Now, here, you could choose to let them air dry completely for winter storage in a glass jar, or you can wilt for 2-3 days or until dry before moving on to making your infused oil. A dehydrator could also be used in low heat if you don’t want to wait for them to air dry.
When sufficiently wilted or dried, take your leaves and roughly tear or crush them into a glass jar. Fill the jar half full with plant material.
Cover the plant material with olive oil or any oil of your choice that you have in your kitchen.
Put a lid on your jar and loosely tighten.
Set a clean dish rag or cloth in the bottom of a sauce pan that is half full of water. (Note: the dish rag prevents the glass from being too close to the heating element which could cause it to break.)
Set the jar in the sauce pan on top of the dish cloth.
Turn on the heat to medium high. (Set a timer for 10-15 minutes so you don’t forget your oil.)
Watch the oil, as soon as the water starts simmering, turn the heat off. We don’t want to cook the plant material. Just infuse it with a little warmth.
Let the jar sit until it is cold.
Strain your oil using a handheld mesh strainer (often the dollar store or grocery store will have these) into a clean, completely dry, glass jar.
Label your jar with the name of the oil and date. Masking tape and a sharpie works well for this. I keep a masking tape dispenser like this on my kitchen counter specifically for labeling things.
And you did it! You made your own Plantain oil! Well done!
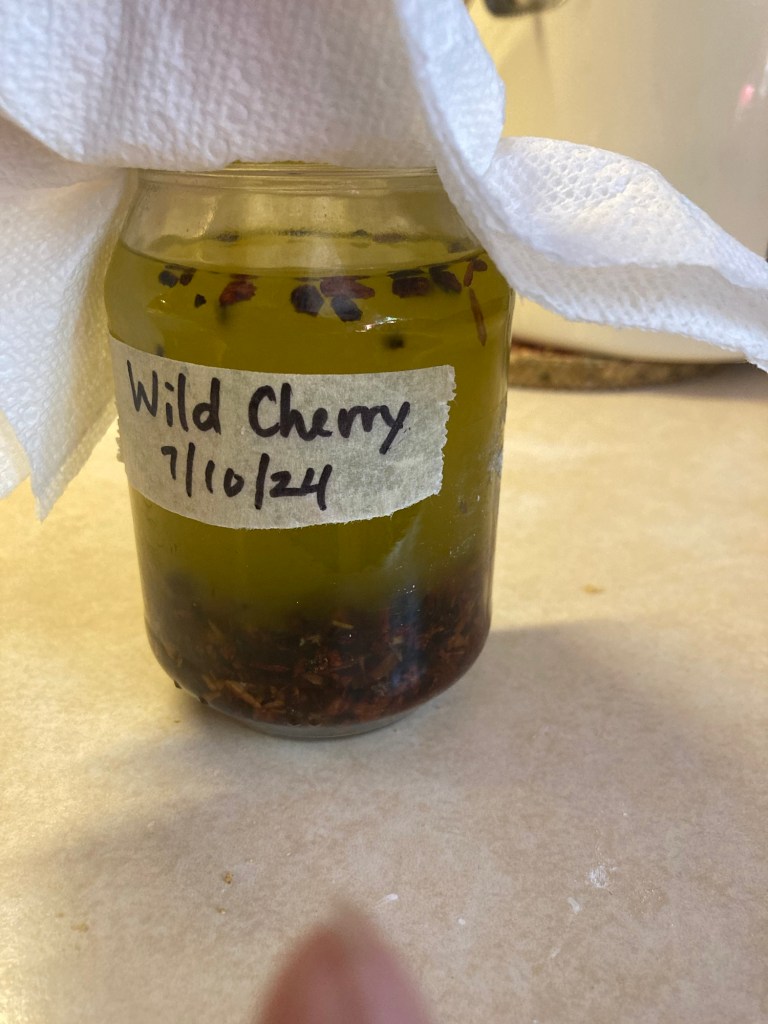
And now that you have the skill of making an infused oil under your belt, you can do it with any medicinal herb. Be creative. Some of my favorite plants to make oil with are mullein, rose, calendula, Pansy, violet, echinacea, pine, wild cherry, and yarrow. I use my infused oils every day.
Want to see a photo log of these steps? Scroll to the bottom of the page.
Infused Oil FAQ Section:
What is infused plantain oil good for?
Plantain is an excellent remedy for any type of bite, sting, or skin irritation. It is especially useful for anything that needs pulling or drawing out. It is a mild astringent and good for any skin or issue with any angry or inflamed membranes.
How long will my infused oil last?
Homemade infused oils are good indefinitely if made with dry plant material, and if stored in a cool, dry location. If fresh or wilted plant material is used, extra steps will need to be taken to ensure that your oil doesn’t mold.
What are the signs of moisture in my oil?
Condensation or cloudiness on the inside of the jar after straining is an indication of moisture. This is easy to remedy. Simply take the lid off of your jar and cover with a paper towel or coffee filter and secure with a rubber band. Let the jar sit until the oil is clear and all the moisture has evaporated. Then you can replace the lid and store in a cool, dry place.
Do you see the cloudiness in this jar of oil?Same jar of oil as above after 2-3 days sitting with a paper towel cover to allow the oil to evaporate. Can you see how much more clear the oil has become?
How do I know if my oil is moldy?
When an infused oil grows mold, it often does not grow on the surface like what we are used to seeing on food in our fridge. It grows down inside the oil and looks like dark fuzzy spots floating in the bottom of your jar. For this reason, I like to store my oils in clear, glass jars so that I can easily see if anything begins to grow or look amiss. An off smelling oil would be another indicator. However, be sure that you smell your oils right after making them to be sure that you know the scent of that plant. Not every plant has a pleasant smell, and you don’t want to throw out a perfectly good batch of oil simply because you aren’t familiar with the scent of that particular plant. So train your nose to know what your oil smells like right after you make it.
How to know if my oil has gone bad?
Visible mold on the surface, dark spots growing in the bottom of the jar, or rancid or putrid smells are signs that your oil has spoiled and should be discarded.
Can I use this same method to make an infused oil with a different plant?
Yes! This method can be used to make an infused oil with any medicinal plant. Keep in mind that infused oils dried plant material will have the longest shelf life.
Do you feel confident to make your own infused oil now? I hope so. Enjoy your creations. Using my oils through the year and especially during the winter is one of my favorite things.
Want to make your infused plantain oil into a salve?
Make this Healing Salve using your infused plantain oil. If you don’t have infused Calendula oil, just replace it with an extra part of plantain oil and you’ll be all set.
Healing Salve
Want to take a deeper dive into the world or herbal oils?
Consider the new Herbal Oils class by Homesteading Family. It covers making your own culinary oils, medicinal infused oils, as well as your own salves and body products using essential oils. It’s a great all-in-one course for beginners. You can get access through Homesteading Family’s Homestead Kitchen Membership.
Photo Log Step-by-Step of Making an Infused Plantain Oil:
Plantain (Plantago major) – freshly picked.Washed in my salad spinner.Air dried and wilted.Completely dry and crispy. These can be stored for use later in a sealed glass jar, or you can move straight into making your infused oil.Though not plantain here (this is torn violet leaf), the next step is to roughly tear your plant and place in your jar. Cover the plant material with the oil of your choice. Place the jar on a cloth in a sauce pan half full of water. Turn on the heat.When the water starts to simmer, turn off the heat and let it sit until completely cool. Then you’re ready to strain and store.
Note: Some links on this page are affiliate links.
If you’ve followed my blog for any time, you’ll know that I sell an embroidery pattern for this poem on my blog. You can find it on the Baby page.
The image on that page actually gets the most hits of anything page on my blog. The photo there is of the embroidery that my mom made of this poem when my brothers and I were kids. She has it at her house and I have fond memories of seeing growing up.
Well, I’m so excited! My brother found me a vintage embroidery of this same pattern at a Thrift store in Kentucky. Of course, I told him to grab it. I picked it up on a visit to my parent’s house this summer. I just hung it in our Sunroom and it feels right at home above my bookcase. So happy to have a vintage one.
Studying herbs. It’s a rabbit hole. You read, you reference, you study. Soon it all gets jumbled up in your head. How do keep it all straight.
My inexpensive, DIY solution was to use an old address book. It’s about 5×9” inches and perfect for this use, as who uses an address book for addresses anymore.
I used the alphabetized sections to record each herb and ailment in the lines where you would usually record peoples names and addresses. I take the herbs and ailments that I study, write them down in the section of the book with the letter associated when their name, and make notes about what I learn about them as I go. I don’t worry about alphabetizing my entries within each letter section. I just make sure that all the “A” herbs or health conditions are written on one of the pages of the “A” tab. I just looked and you can even still buy some old style address books. There are several spiral bound, pretty ones available on Amazon.
Another strategy that I use is that I highlight any family allergies to a particular herb in orange as a warning. I’ve told my husband, if I die, look in here to see what the kids are allergic to. We have some unusual plant allergies – yarrow, chamomile, chicory, clover, licorice.
I’ve found that it really helps to understand plants by their plant families in my studies of herbs due to all our allergies. That way if there is one herb that I know we respond to negatively, I can easily know what others I need to be careful of using medicinally because I know what plants are related to it.
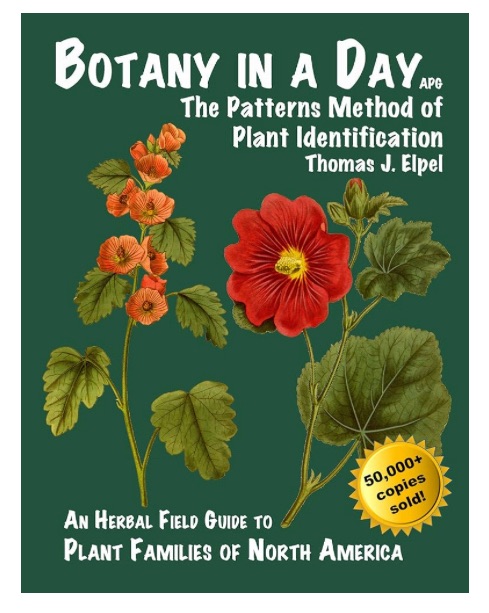
Botany in a Day by Thomas J. Elpel is the best book out there for learning plants by plant family. It teaches you to recognize plants by their family characteristics which helps you not only in learning to identify the plants but also in knowing their medicinal characteristics which is often consistent across plant families. Both can be extremely useful if you are learning to forage for your own plant material. For more info on identifying your local plants, check out my favorite regional medicinal plant books. And if you live in an urban area like we did when we lived in NYC, read my review on my favorite book on urban foraging here.
If you REALLY want to get a jumpstart on your herbal research though, look into the Herbal Monographs offered by Farmhouse Teas in their Herbal Studio. It is such a great herbal resource. They have compiled a set of nearly 100 monographs on different herbs that are just excellent! You get free access to them in their Herbal Studio. In my opinion, these monographs are unparalleled and I wish I could buy them as a book! Check them out. They are beautiful and totally worth having as a resource.
I like to use these mesh picnic table covers to cover my seedlings while we are in the process of planting. We will add permanent covers on the garden later, but these keep the birds from eating the seedlings until everything is in the garden and we can put the permanent bed covers on.
I find that the smaller size works well for small sections or containers, and the extra large covers are great for rows or raised beds.
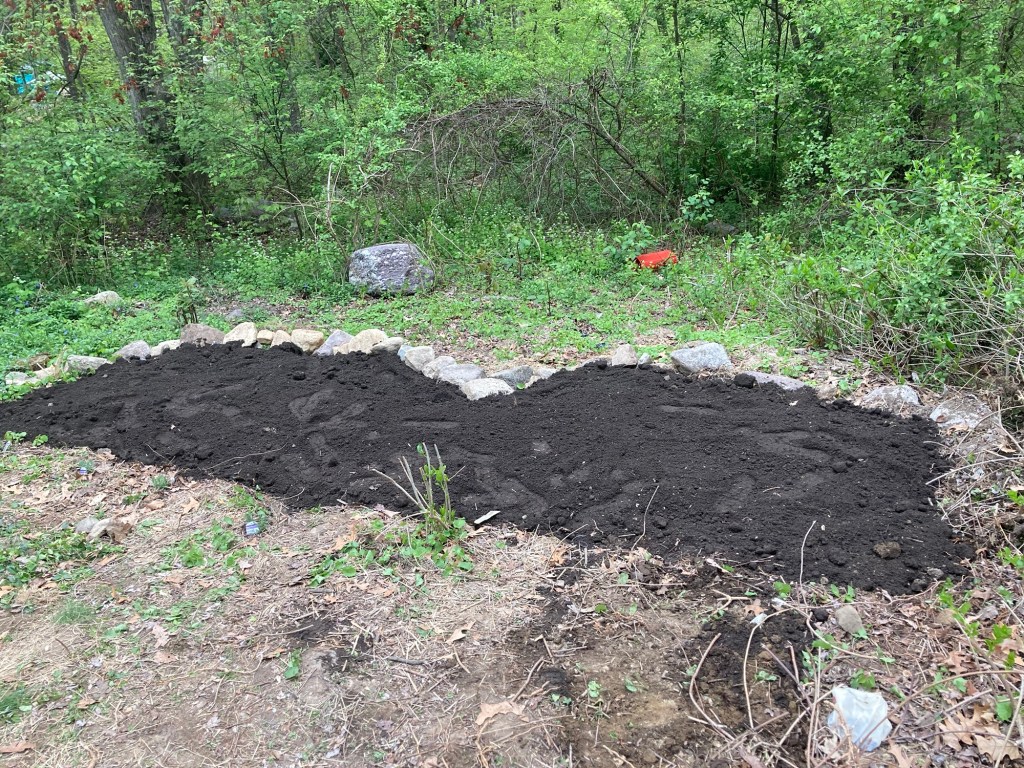
My sweet husband built these beds for me. You’ll notice that they aren’t your traditional raised garden beds. We decided to take advantage of the rocks on our property to build up the back wall of the beds and we used the slope of the terrain here to build contoured terraces which will harvest the natural runoff of rainwater that flows from the front of the property.
If harvesting rainwater is a new idea for you I’d highly recommend Rainwater Harvesting, Vol 2 by Brad Lancaster. There is a volume one, but this 3 volume set isn’t cheap, and the second one is the most essential in terms of implementation and determining what is most useful for your site.
So far our plan seems to be working. We have three drain pipes that are directed to this site and between collecting the rain flow and the runoff from the drain pipes the garden seems to be staying well watered. I put in our first seeds 1.5 weeks ago and I haven’t had to water once to keep them moist. We have had periodic rain and it seems like our rainwater harvest is a success so far.
Stay tuned as I post garden updates through the season. Next week I’ll give more details on how we built our beds.
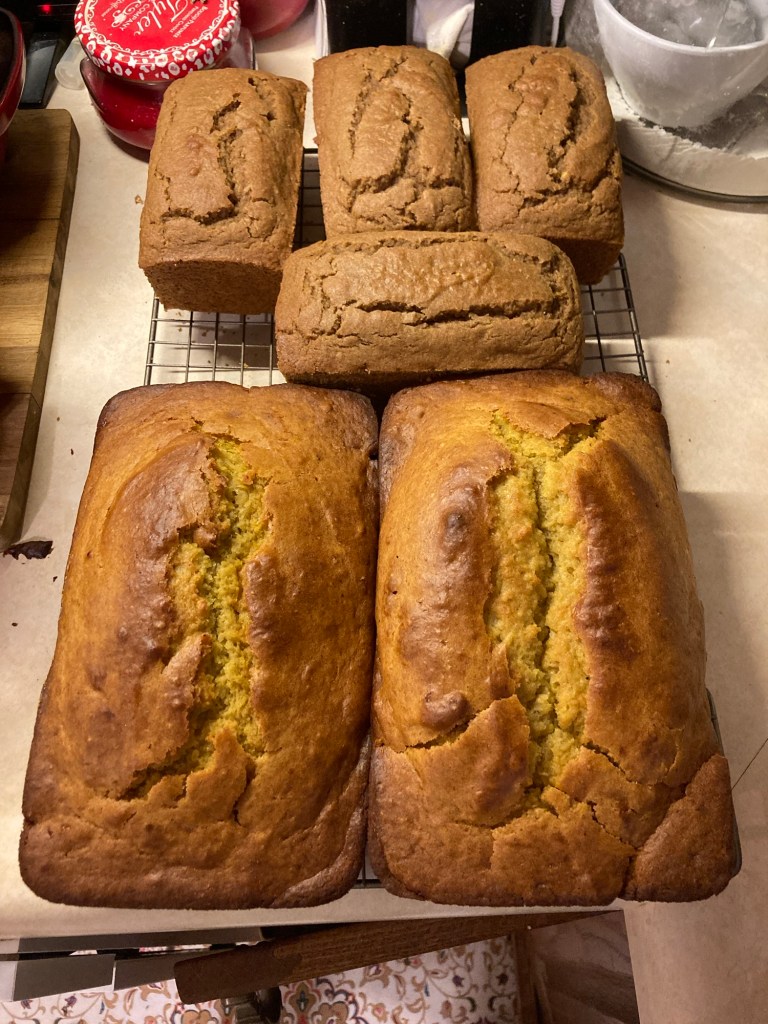
I resurrected what is probably the first recipe I ever put on my blog. I made pumpkin bread this week. Back in 2010 when I starred my blog, I made this every week as a snack for my kids. I hadn’t made it in a while, so I pulled these recipes out of the files to celebrate 3 anniversaries – the anniversary of starting my blog, the anniversary of the day we moved to our first house, and the 1 year anniversary of the day we moved to our new house.
I made the wheat version (large loaves)for the family and the gluten-free version (mini loaves) for me. If you want to try it, the wheat recipe can be found on the Family Favorites page, and the Gluten-Free version can be found on the Allergy-Friendly page. I also use one of my favorite substitutions for this batch. I substituted puréed butternut squash rather than using canned pumpkin. I actually like it better with the squash. The color isn’t as dark orange as with canned pumpkin, but I think the texture and flavor is better.
As you get to know your herbs, you may find some surprising uses that are not written up in the herb books and materia medicas.
If you have used mullein, you probably know that it is know for loosening things especially in the respiratory tract which is why it is often included in remedies for colds and coughs.
It is also a mild nervine which means that it acts and calms the nervous system.
Well, I’ve had a super busy stretch. Stress and not sleeping well has resulted in a tense muscle in my shoulder/neck that is causing me jaw pain.
Mullein is not your go to herb for muscle tension or pain. But as I have used and gotten to know this herb, I know that it loosens and speaks to my nervous system. So I know from past experimentation that if I apply it to my shoulder, neck, and jaw that it will help the tension and pain.
I have been applying it several times a day this last week, and the muscle generally stays much looser and doesn’t hurt any more. It still feels tight in some places but I’ll keep working on it.
For now though, I’m glad to have a remedy that I can rely on that helps me keep going, even if I am using it “outside the box.”
Pine, which is good for respiratory issues, also addresses pain, and frankincense which is resinous like pine is excellent at keeping muscles loose. Do you see a pattern there? Two of those herbs – pine resin and frankincense, are hard as rocks in their natural state, but they help loosen things.
Sometimes herbs reflect and look like the conditions God made them to heal. Isn’t it nice of Him to give us little clues like that?
And don’t forget to apply your herbs topically – even tinctures. I think our pill popping culture gives us the mistaken idea that medicine (whether herbal or conventional) has to be taken internally to be effective. They don’t. Rub them on. They will soak in and do their job just as well.
What herb would you like to know more about? Let me know in the comments.
We are putting in a couple of garden beds since we have a little space at our new house.
Here are the books I’ve been referencing from the bottom up.
Botany In A Day – probably my most referenced and studied botany book ever! This is the best book out there for learning plant identification. It teaches you the characteristics by plant families and in kids some basic medicinal qualities of each plant. It’s my go to for plant ID. I use it in my Botany classes and have taught Kindergartners through adults plant identification using this method. You can check out my online homeschool Botany Class here.
Eat Your Flowers – This book is hefty and beautiful. It’s a gorgeous hardcover and honestly the photographs and cooking ideas for edible flowers had me squealing in the bookstore as I was paying through it. My daughter said she could hear me on the other side of the store. Definitely deserves a place on your shelf if you have a garden.
Cooking with Flowers – this was a thrift store find so you’ll have to hunt down your own used copy. It’s older, so no beautiful photography here. But the recipes are solid and creative. Includes holiday ideas for using edible flowers.
Rainwater Harvesting for Drylands, Vol 2– This is all you ever wanted to know and more about rainwater catchment systems from barrels and cisterns, to berms and terraces, and more. I’ve been studying this book and I’m planning my garden around the water flow of my site in hopes to not have to water this summer. We shall see.
Native Plants of the Northeast– this is a good reference as well if you live in the Northeast and want to focus on native plants that will grow well in your garden and benefit wildlife.
Betty Crocker’s Kitchen Garden – This book was a gift from a dear friend. She thought that I would love it and she was right. If your dream is an old fashioned kitchen garden, this is the book for you. Paintings and illustrations by Tasha Tudor just making it all the more charming. Also an old book so you’ll probably have to source a used one.
The Tri-State Gardener’s Guide – This books is useful for those of you who live in New York, New Jersey, and Connecticut. It mostly addresses landscaping plants but is useful for finding possible deer resistant varieties.
Territorial Seed Company – I plan to order seeds from Territorial this year as they are well tested, have many open pollinated varieties, and many varieties good for long term root cellar storage.
Root Cellaring – This is my go to reference for cool crop storage.
Made from Scratch Life – I almost passed this book by because I thought, I can’t possibly need one more gardening/homemaking/homesteading book. But I was wrong. I love books with working charts. She has charts with to help you figure out how many of plants you need for each veggie, and charts to help you determine the best preserving methods for each veggie. There are charts for you to fill in as you make your garden plan so this little book becomes your garden journal. In my opinion all the recipes in the back are just a bonus. I would buy the book for the charts alone.
Preserving Food – This was a serendipitous find at a book store. I love it because it’s full of old time, little know, traditional preservation techniques.
The top two items of the stack are my Kindle and my paper garden journal.
I watch for good deals on Kindle books and Square Foot Gardening is one that I referenced this time around.
And lastly, but most importantly, my garden journal. I make lists of plant varieties that I want to try, add charts with plant heights, spacing, and planting times, and draw diagrams of my garden beds. Planning this year was bittersweet as I thumbed through the pages of my past gardens at our old house. I hope you have a trusty garden journal. Everyone should have one. As you see mine is old and worn and scribbled in. But I wouldn’t trade it for the world. ❤️
I’m working on updating my herbal first aid kit. We are undertaking new to us adventures at our new property – chopping wood, building garden beds and playhouses, cutting limbs, etc. Since these activities have the potential for new injuries, I figured I should need up my first aid supplies. But I’ll post more about that later.
I have a collection of herbal oils at the ready (see photo above). The one I use the most in first aid situations is an essential oil blend we like to call Tiny Oil. I’ve used it since mine kids were babies for soothing and disinfecting scrapes, bites, and stings. You can find the recipe on the Homemade Baby Products Page. This is a great natural alternative to over the counter antibiotic ointment.
But, in pondering what else I would need in my herbal first aid kit, I was reminded not to discount some of the most basic things that I already have on hand. Primarily, using cloth as a bandage. 🤕
I encountered two instances recently for which I found cloth to be preferable to standard bandaids or bandages.
Plantain – Plantago Major
The first was a bite that I had right under my hair line that healed over on the top but still was puffy underneath. I wanted put plantain on it as well but I couldn’t put a bandaid on without pulling my hair out when it was time to take it off. Enter my cute little cloth headband. It holds the plantain in place and is fashionable at the same time. 😉
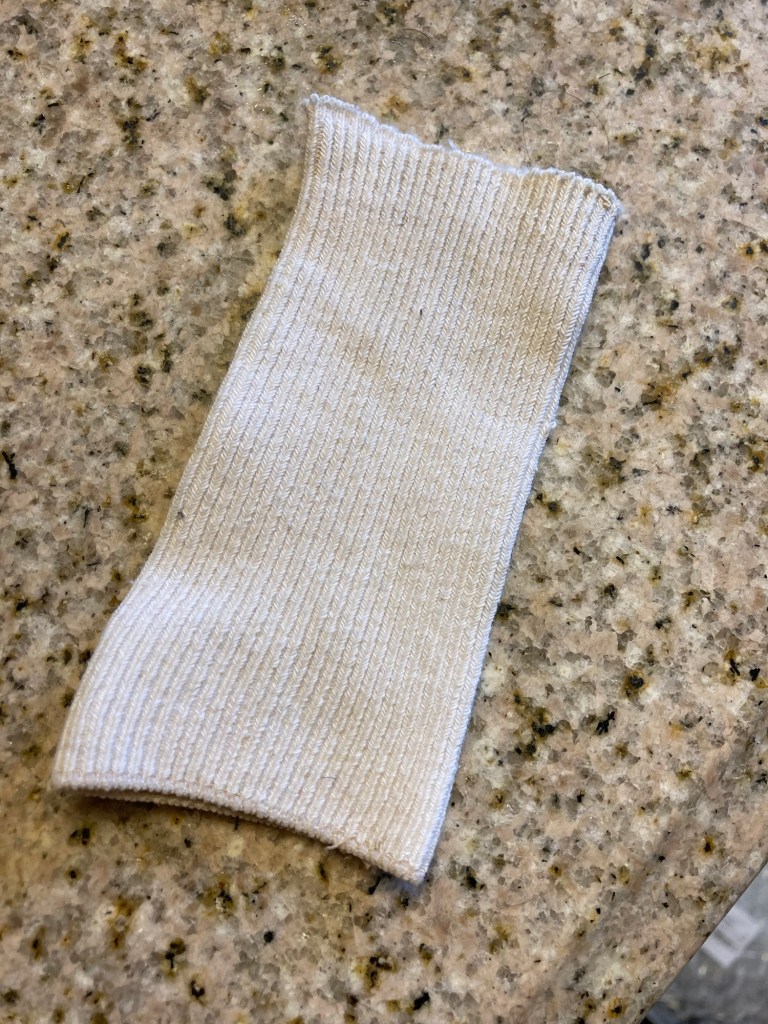
The second instance was realizing that my youngest child is very allergic to the adhesive on bandaids. 🩹I guess I don’t use them on her often. I used one to put some plantain on an old bite that she had that had gotten inflamed. Well, the bite got better, but now she has welts from the bandaid. 😞 Enter cotton baby socks. You know, all those little socks that the washing machine eats. Save them. They make excellent cloth bandages for little arms, wrists, and ankles.
Cut the cuffs off all those orphaned baby socks and add them to your first aid supplies. If you fold them over, it makes a little pocket where you can tuck loose herbs in to apply to bites, cuts, or stings.
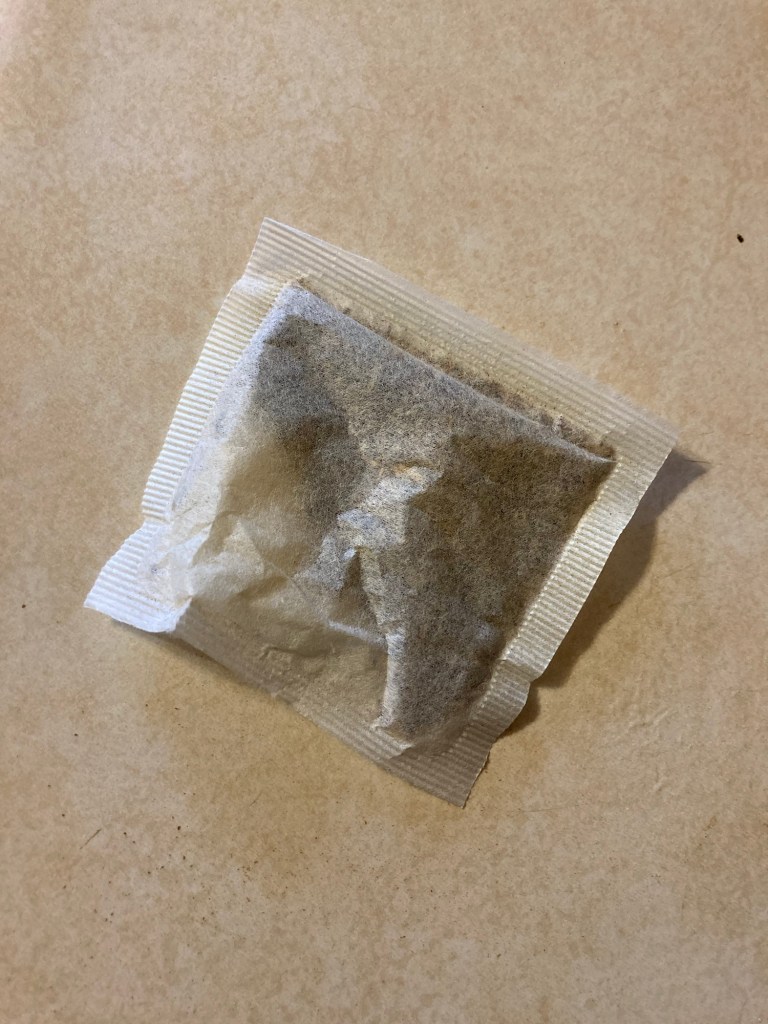
And lastly, the best remedy I’ve used for inflamed bites and stings you probably already have in your kitchen cabinet – herbal tea bags! ☕️ I’ve used this for years on my kids and it works wonders. Apply it when it is comfortably hot directly to the skin and leave until cold. The moist heat pulls out the toxins and reduces swelling. And the cuffs of those little baby socks are great for holding tea bags, plantain, or any other herb on a little person who won’t hold still, or they work if you are a grown up as well. 😊
Stay tuned for more. I’ll be posting about my Herbal First Aid kit as it comes together.
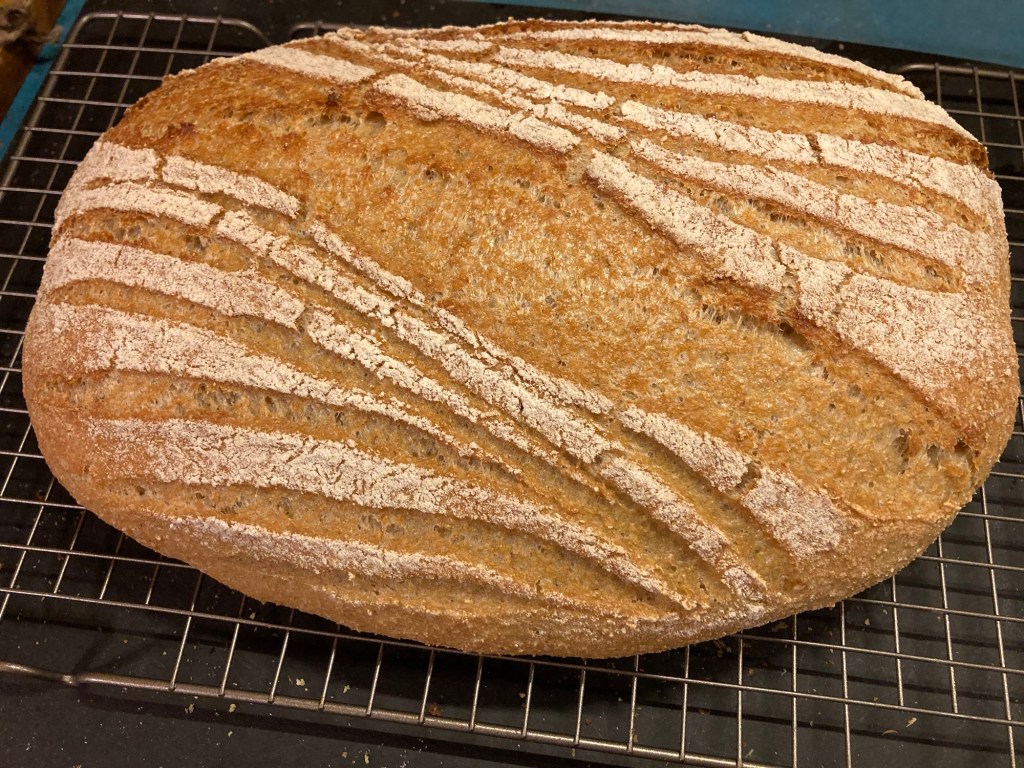
Homesteading Family is offering a free bread webinar. Carolyn will cover yeast, sourdough, and the common mistakes that cause your bread not to turn out. It’s a great mini class if you’ve been struggling with bread making at home.