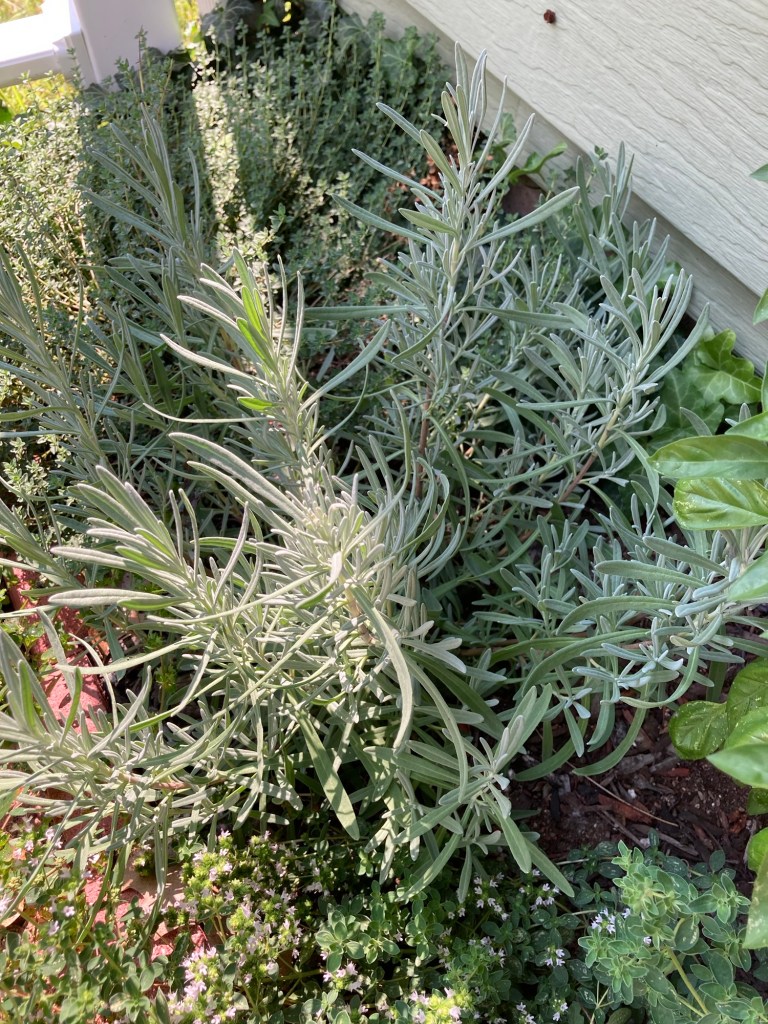
We are putting in a couple of garden beds since we have a little space at our new house.
Here are the books I’ve been referencing from the bottom up.
Botany In A Day – probably my most referenced and studied botany book ever! This is the best book out there for learning plant identification. It teaches you the characteristics by plant families and in kids some basic medicinal qualities of each plant. It’s my go to for plant ID. I use it in my Botany classes and have taught Kindergartners through adults plant identification using this method. You can check out my online homeschool Botany Class here.
Eat Your Flowers – This book is hefty and beautiful. It’s a gorgeous hardcover and honestly the photographs and cooking ideas for edible flowers had me squealing in the bookstore as I was paying through it. My daughter said she could hear me on the other side of the store. Definitely deserves a place on your shelf if you have a garden.
Cooking with Flowers – this was a thrift store find so you’ll have to hunt down your own used copy. It’s older, so no beautiful photography here. But the recipes are solid and creative. Includes holiday ideas for using edible flowers.
Rainwater Harvesting for Drylands, Vol 2– This is all you ever wanted to know and more about rainwater catchment systems from barrels and cisterns, to berms and terraces, and more. I’ve been studying this book and I’m planning my garden around the water flow of my site in hopes to not have to water this summer. We shall see.
Native Plants of the Northeast– this is a good reference as well if you live in the Northeast and want to focus on native plants that will grow well in your garden and benefit wildlife.
Betty Crocker’s Kitchen Garden – This book was a gift from a dear friend. She thought that I would love it and she was right. If your dream is an old fashioned kitchen garden, this is the book for you. Paintings and illustrations by Tasha Tudor just making it all the more charming. Also an old book so you’ll probably have to source a used one.
The Tri-State Gardener’s Guide – This books is useful for those of you who live in New York, New Jersey, and Connecticut. It mostly addresses landscaping plants but is useful for finding possible deer resistant varieties.
Territorial Seed Company – I plan to order seeds from Territorial this year as they are well tested, have many open pollinated varieties, and many varieties good for long term root cellar storage.
Root Cellaring – This is my go to reference for cool crop storage.
Made from Scratch Life – I almost passed this book by because I thought, I can’t possibly need one more gardening/homemaking/homesteading book. But I was wrong. I love books with working charts. She has charts with to help you figure out how many of plants you need for each veggie, and charts to help you determine the best preserving methods for each veggie. There are charts for you to fill in as you make your garden plan so this little book becomes your garden journal. In my opinion all the recipes in the back are just a bonus. I would buy the book for the charts alone.
Preserving Food – This was a serendipitous find at a book store. I love it because it’s full of old time, little know, traditional preservation techniques.
The top two items of the stack are my Kindle and my paper garden journal.
I watch for good deals on Kindle books and Square Foot Gardening is one that I referenced this time around.
And lastly, but most importantly, my garden journal. I make lists of plant varieties that I want to try, add charts with plant heights, spacing, and planting times, and draw diagrams of my garden beds. Planning this year was bittersweet as I thumbed through the pages of my past gardens at our old house. I hope you have a trusty garden journal. Everyone should have one. As you see mine is old and worn and scribbled in. But I wouldn’t trade it for the world. ❤️
Want to learn to use the herbs that are growing outside your kitchen door more effectively? Carolyn Thomas with Homesteading Family is hosting a live Herbal Medicine webinar tomorrow 4PM ET. But don’t worry if you can’t make it live. Sign up for the webinar and you can view the replay after.
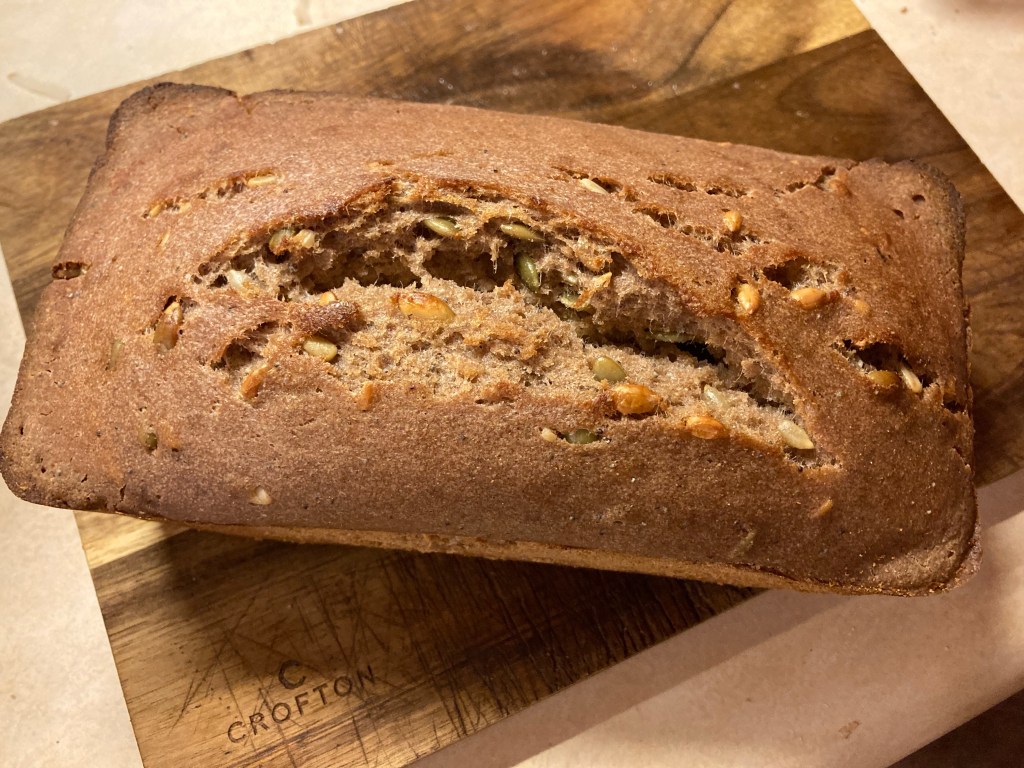
I developed this sourdough bread recipe for a friend who requested a “Seedy Loaf.” I’d never tried this with gluten-free before, but it turned out quite nicely and she requests one every week.
Gluten-Free “Seedy” Loaf Recipe:
Whisk the following in a small mixing bowl:
1 cup of gluten-free sourdough starter
2 tsp salt
2 tbsp oil
2 tbsp honey
2 1/2 tbsp psyllium husk
2 cups water
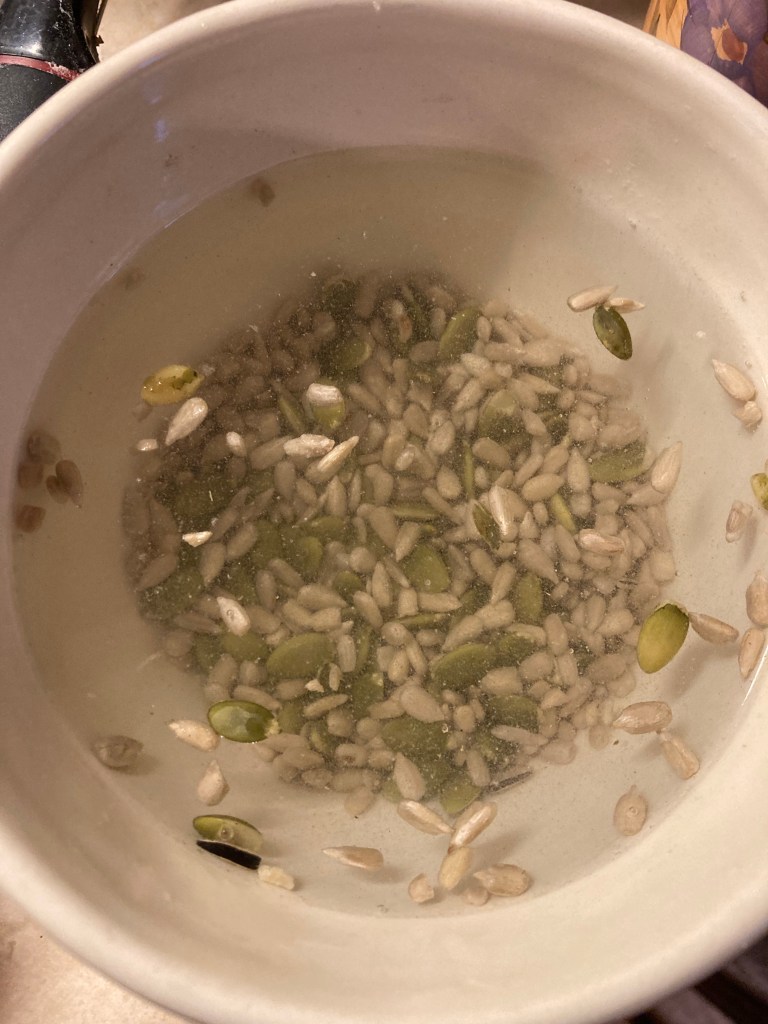
Whisk together and let the mixture sit for 15 minutes to thicken. While your mixture is resting, collect the rest of your seeds for soaking. In a small bowl measure out…
1/3 cup pumpkin seeds
3 tbsp of hulled sunflower seeds
Cover the seeds in the bowl with water and let them soak until just before your bread is ready to go into the oven the next day.
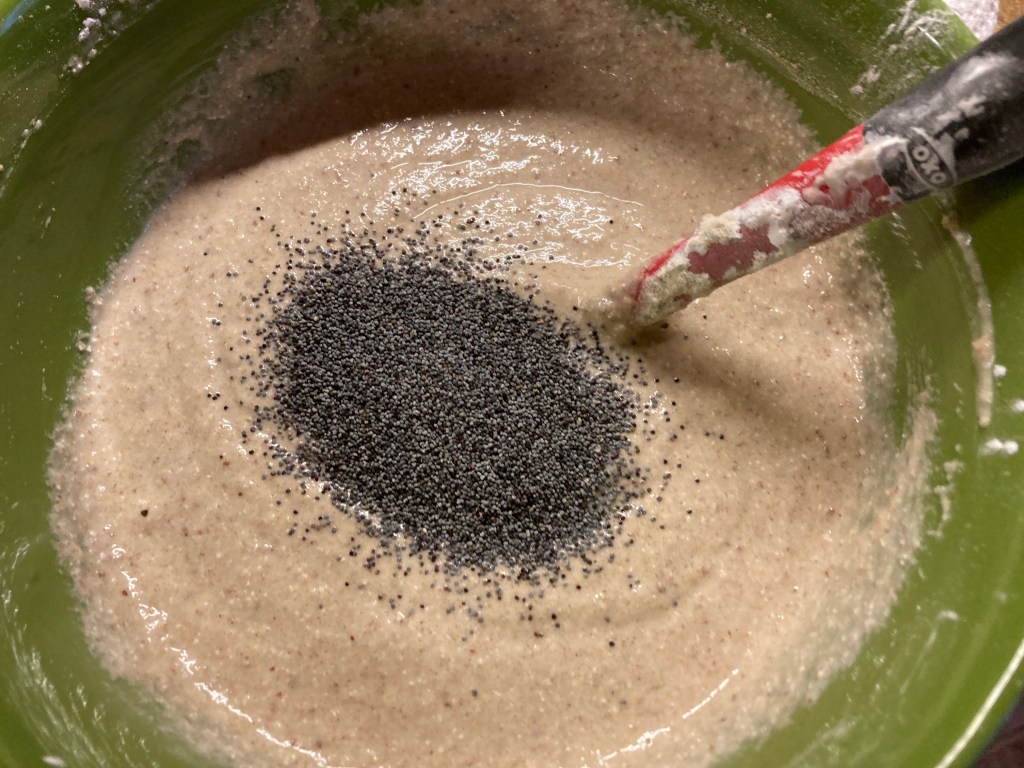
Now back to your mixing bowl. To the liquid mixture add…
1/4 cup quinoa flour
1/3 cup brown rice flour
1/3 cup arrowroot powder (or tapioca starch)
1/3 cup potato starch (or cassava flour)
1/3 cup sorghum flour (or chickpea flour or oat)
1/4 cup millet (or sorghum)
1/4 cup teff (or buckwheat)
1 tsp poppy seeds
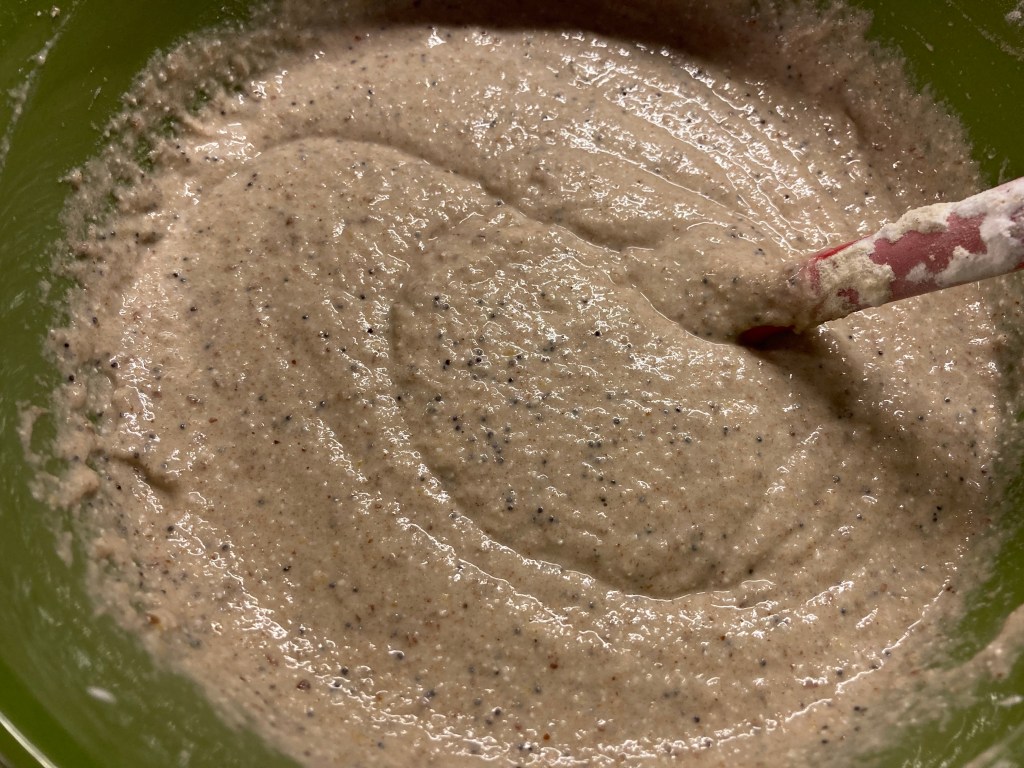
Mix together until there are no more lumps. Batter should be the texture of a very thick pancake batter or thick oatmeal. If it is too thin add a little more of one of the flours until the correct texture is achieved.
Cover your bowl with a damp tea towel or lid and refrigerate for 24 hours.
On Bake Day:
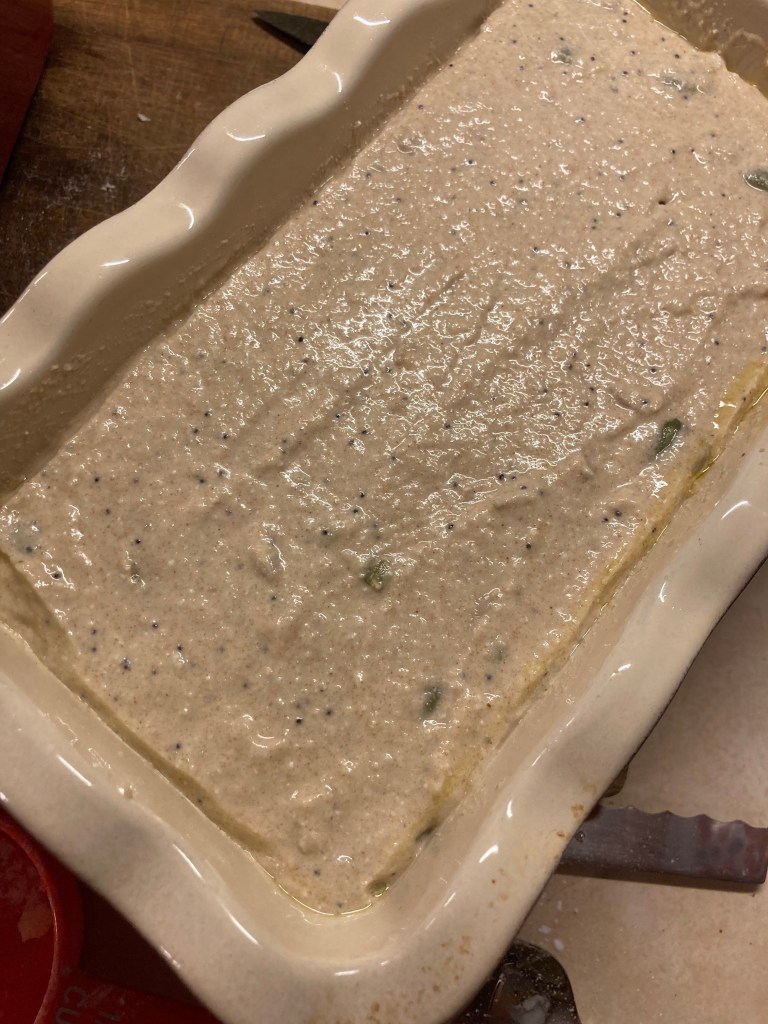
Preheat the oven to 450 degrees. Drain the water from your soaked seeds. Remove your bowl from the fridge and add your seeds to the batter. Mix well until they are all distributed. Then pour your batter into a greased loaf pan.
Next, with a rubber spatula, gently press down around all the edges about 1/4” pulling the batter at the top just away from the edge of the pan. This will help with the rise.
Immediately transfer to the hot oven. Bake for 1 hour. Internal temp when done should read 210 degrees on a digital thermometer. If it is not done, bake for 10 more minutes. Cool overnight or for 12 hours before slicing so that the texture of the bread can set.
The Art of Gluten-Free Homemade Bread Book by Homesteading Family:
It’s finally available! I created these recipe for Homesteading Family and the book is available just in time for Christmas. Order your copy from Homesteading Family!
And if you want a wheat based bread class that covers it all – yeast, sourdough, fresh milled flour, sprouting, and ancient grains, check out Homesteading Family’s The Art of Homemade Bread Course. Carolyn taught me how to make bread and sprout my grains. It’s the most comprehensive course I know of.
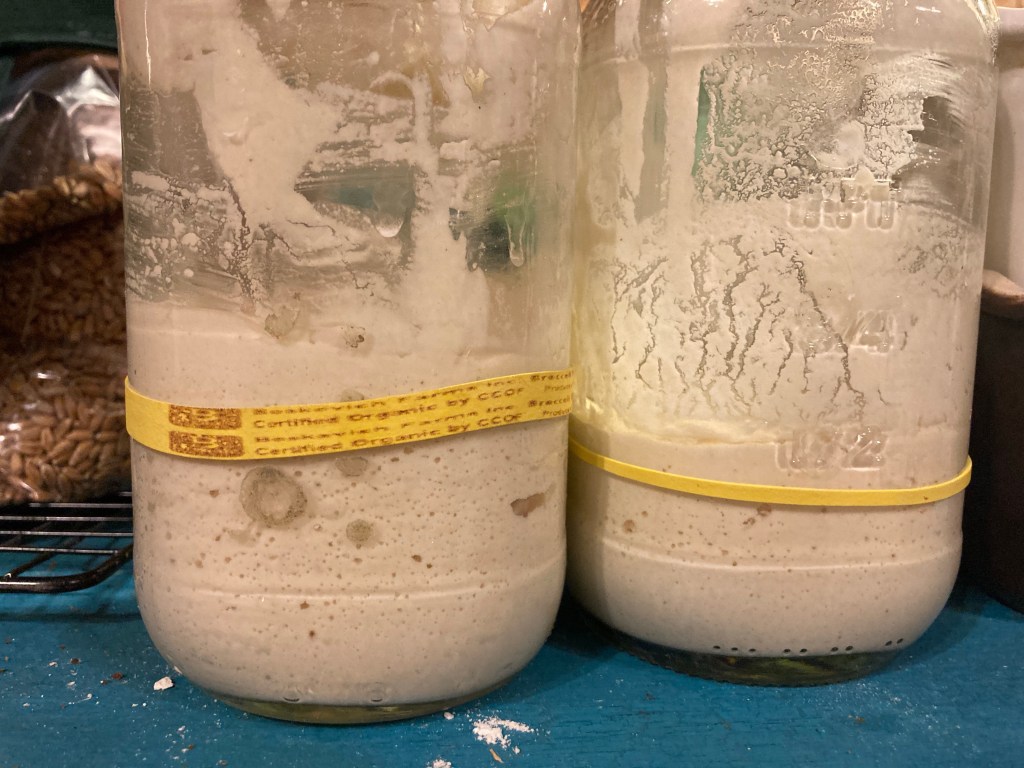
These are two gluten-free starters made from brown rice and quinoa. They are just starting to show signs of life. See the tiny bubbles?
I’ve been making sourdough bread for several years. My daughter and I made our first gluten-free sourdough starter in 2020 as part of her science experiment. I’ve since made several different gluten-free sourdough starters. What follows is the technique that I’ve found works the best.
(Note: This technique also works equally well with wheat wheat based, whole grain flours like hard white or red wheat, spelt, rye, khorasan, or einkorn.)
How to make your own Gluten-Free Sourdough Starter from Scratch:
1. Choose your flours: Sourdough always performs best when some of the flour the recipe is the same flour that the sourdough starter is made from. Unlike wheat baking, several different flours are needed in gluten-free baking to replicate the starch, protein, mineral, and vitamin content of the wheat berry in order to achieve the light, moist, nutritious baked goods we all enjoy. For gluten-free baking, this means that it is best to use between two to three different flours, rather than a single one, that you tolerate well when making your sourdough starter. This will ensure that your starter performs well because you will use the same flours in your baking that your starter is built from.
What flour combinations can I use tomake a gluten-free sourdough starter?
Choose 2-3 of the any of following flours to create your sourdough starter from scratch:
– Millet flour – Quinoa flour
– Brown rice flour – Buckwheat flour
– Sorghum flour – Oat flour
– Teff flour
Notice you don’t see any starches or nut flours in this list. I avoid starch based flours when making a sourdough starter as they just don’t have the same microbial content that whole grain gluten-free flours do. As a result using a starch like potato starch, tapioca flour, or arrowroot powder will not contribute much to the microbial makeup of your starter. I avoid nut flours also because of their high oil content. Flours with high oil contents can go rancid quickly, which would not be ideal for a sourdough that you might need to store in the fridge for a while if you come upon a time when you can’t feed or bake with it frequently.
Notice also that I put quinoa in bold. This is because quinoa is a microbial powerhouse! If you’re used to baking with wheat based sourdough you may know that the way to give your sourdough a microbial boost is to give it a feeding or two or rye flour. Well quinoa is the rye of the gluten-free world.
Using quinoa in your gluten-free sourdough will make it super active! In my experiments my quinoa starters matured more quickly (before any of my others) and were more active than any of my other sourdough starters. Quinoa even matures in cold temperatures when others don’t. It’s really quite an amazing, nutritious grain.
Quinoa should definitely be one of the 2-3 flours that you use to build your sourdough starter. It doesn’t take much. Only a teaspoon or less at each feeding.
2. Gather your Equipment :
The tools needed here are simple. All you need is…
– quart size jar
– plastic lid (not metal)
– a rubber band
– stirring implement
– small measuring cups or spoons
3. Mix your Sourdough:
So you’ve decided on the 2 or 3 flours that you plan to use from the discussion above and you’ve got your equipment ready. Let’s get started.
Steps for Mixing and Feeding Your Sourdough:
Gluten-free flours are much more expensive than wheat. Because of this, we are doing to mix in small amounts. This will keep us from wasting any of our flours and ending up with more sourdough starter than we can use.
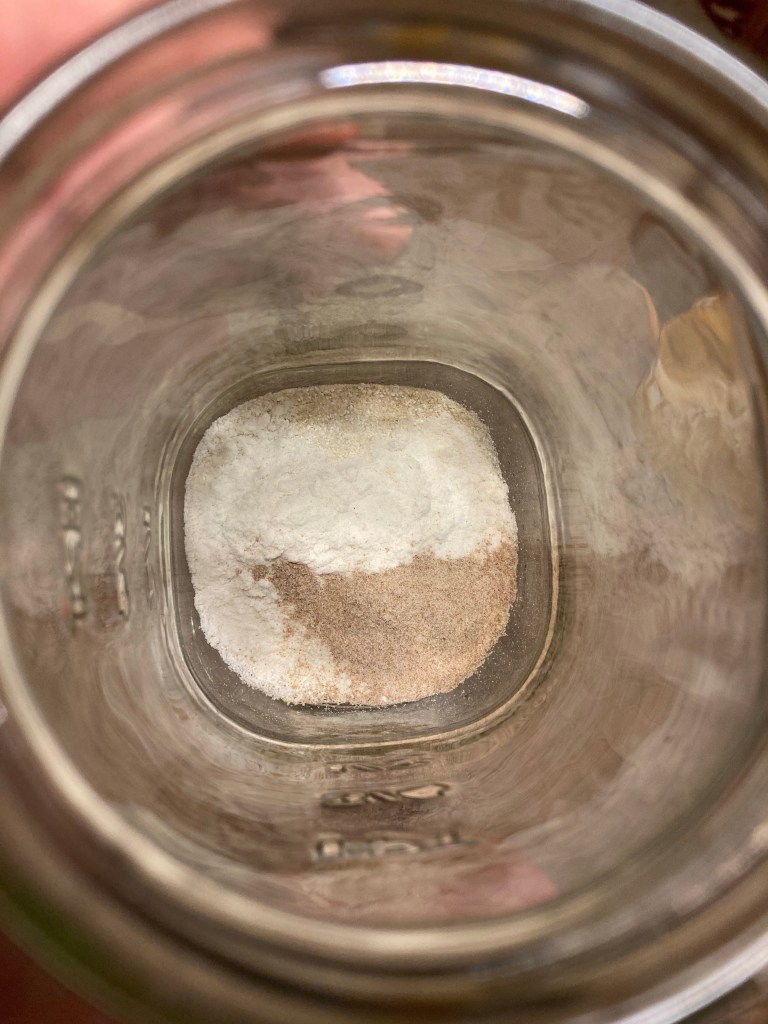
Day 1: Add 1 tablespoon each of your chosen flours to your quart sized jar. If you have planned to use 2 flours in your starter, feed it 2 tbsp total, one of each. If you chose 3 flours, feed it one tbsp of each flour type, and so on. Don’t forget to put quinoa in the mix if you can. Put a rubber band on the outside of the jar so you can keep an eye on the level of the starter. This will help you gauge the activity of the starter as it starts to get active and rise.
Pro Tip: Use a minimum of two gluten-free flours in your sourdough, but no more than five.
Next, into your quart size jar, add 1/2 tablespoon of water for each of the flours that you used. So if you used two flours, add 1 tablespoon of water. 3 flours – 1.5 tbsp water, 4 flours – 2 tbsp water, and so on.
Stir well and let it sit for 24 hours.
In the starter pictured below, I chose three flours – brown rice, quinoa, and teff flours.
Day 2: Repeat your day 1 feeding of 1 tablespoon each of each of the flours you chose and 1/2 tablespoon of water per flour used. Adjust the rubber band to the level of the starter in the jar after the feeding. Let it sit for another 24 hours.
Pro Tip: Different flours may need more or less water to fully hydrate. If you go to feed your starter on day 2 and it has a lot of liquid on top, then give it a little less water next time. On the other hand, if you go to feed your starter and it thick, dry, and crumbly, give it extra water at that feeding. Did you know that you can choose the texture of your sourdough? I like to keep mine like a thick cake batter, but you can use more water if you prefer a thinner, pancake batter like texture.
Here is a photo of my starter with water added after feeding. It’s still just a tiny amount, and that’s okay. It doesn’t have to be a large amount to ferment and flourish.
Day 3: Feed again as you did on day 1 and 2 and adjust the position of the rubber band, but this time, pop it in the fridge for 2 days for a cold ferment period.
Day 5: Your starter should have been happily sitting in the fridge for you for the past two days. Today, you should take it out, sit it on the counter, and let it warm back up for 24 hours.
Day 6: Feed your starter as before, adjust the rubber band to the level of the starter in the jar, and now let it sit at room temperature and wait. Let the starter sit undisturbed until you start to see bubbles and rise. Once it doubles or nearly doubles, your starter is ready. How fast a sourdough starter develops depends largely on the temperature in your kitchen. You may need to let it sit for 36-48 hours before you see rise.
Here is my starter after taking it from the fridge, feeding it, and letting it sit for 12 hours. Look how active and happy it is!
So with a little care and patience, you can have a robust, active, healthy, happy starter within a week.
Pro Tip: This method works with wheat based flours too. You can have a new wheat, spelt, or rye starter in a week’s time if needed.
How to maintain your gluten-free sourdough starter:
Once your starter is ready and has doubled in your jar, now you want to bake with it. You can try your hand at bread, or simply make some sourdough pancakes or muffins. The more you use your starter the more active it will become. Just remember, don’t use it all. Keep at least 1/2 cup – 1 cup in your jar at all times to continue feeding so that you will always have enough sourdough for your baking needs.
To keep the best and strongest starter, keep it on the counter and feed it twice a day, morning and evening for maintenance, baking something with it several times a week. If you find you need a break from feedings, pop it in the fridge and it will wait for you until you need it again, but it’s best to still feed your starter once a week even while you are keeping it in the fridge to keep it happy and active.
What if I don’t see bubbles?
If you have fed it several times, just let it sit at room temperature until you start to see bubbles. It will ferment if given enough time and your room temperature is warm enough. The ideal temp is between 65 and 75 degrees, but colder is fine too as it will ferment at any temperature above freezing. Just know, the cooler it is, the longer the fermentation will take. If it takes more than 36 hours, it’s not a bad idea to stir your starter every 12 hours without adding any more flour or water until you see tiny bubbles. This just helps prevent anything from getting moldy by keeping the parts that are exposed to air moving around. Once you start to see bubbles, stop stirring and let it sit.
What is my starter develops mold?
If this happens, and it does sometime, throw it out and start again. Now, if you have a mature, active starter and it develops mold, sometimes those can be saved. But in the early days of sourdough development, mold can sometimes happen before the starter is strong, active, and acidic enough to prevent it.
What if my starter smells like alcohol, acetone, kerosene, or vomit?
As unappealing as this is in the beginning, these smells are all a completely normal part of the development of sourdough. Don’t worry, as the starter continues to mature the smell will lessen and gradually progress into just smelling sour as it should. As long as your starter does not smell putrid or spoiled, it is fine to just keep on going.
Share Your Starter Stories:
I’d love to see pictures of your starters. Please share photos or ask questions here in the comments. 😊
All my recipes are available in this comprehensive book that I wrote for Homesteading Family. Get your copy here.
For Further Study:
• If you would like a video based sourdough course I recommend Homesteading Family’s The Art of Homemade Bread Course. Carolyn covers yeast and sourdough breads in step-by-step video lessons. It’s how I learned to make bread and now I’ve advanced to developing my own systems. So, if you are a visual learner, she gives you a daily video of what to do.
• If you are on the fence about the complete bread course, give Carolyn’s FREE bread training a try. She gives away a lot of good, free info that will get you baking good bread right away.
• Already have a sourdough starter? Homesteading Family’s Homestead Kitchen Community has a Sourdough Challenge doing on right now! It’s a great way to jump in to sourdough baking or advance your skills. And if you join you’ll get a sneak peek at the new Art of Gluten-Free Homemade Bread book that will be released this winter.
• If you are fascinated by microbes and all things sourdough take a deep dive into my friend Diana’s book: Olwes Miaken’s Creatures. She is truly a sourdough wizard and can make bring any flour or grain to life! Her book is fascinating and fun! She names all her creations. Check it out to see all that she has made.
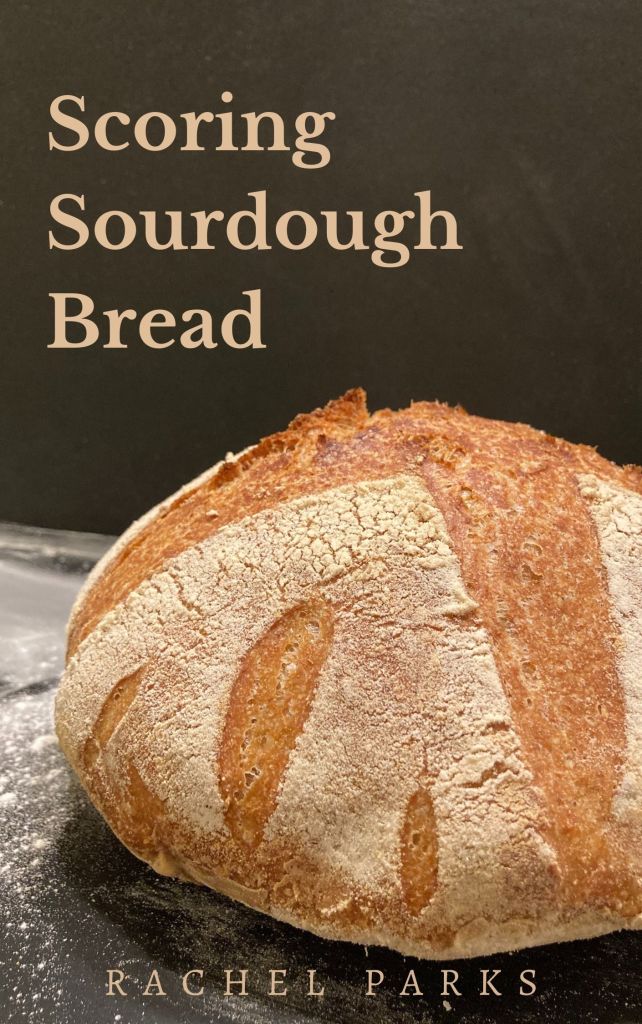
• And if you have success with sourdough and want to make it beautiful, check out my book on scoring sourdough. You can buy a copy of the e-book here on my blog, or you canvisitAmazon for a physical copy of Scoring Sourdough Bread.
This blog post on Basil Infused Water by Farmhouse Teas inspired me to try making my own herbal infused water. My body is very sensitive to herbs. Even a small amounts of herbs made into a hot tea can be too strong for me sometimes. So, I decided to try an herbal infused water hoping it would be milder than a hot infusion. I’m also on a very restricted, low-histamine diet right now, so except for a tiny bit of coffee occasionally, the only thing I can drink right now is water. That gets boring, so this also gives me something with a little bit of flavor to drink occasionally.
This is my favorite flavor so far. It’s mild, tasty, and easy to make. All you need is a tea infuser and a glass jar. Or if you want something you can take on the go, you might like this fancy glass water bottle with its own infuser.
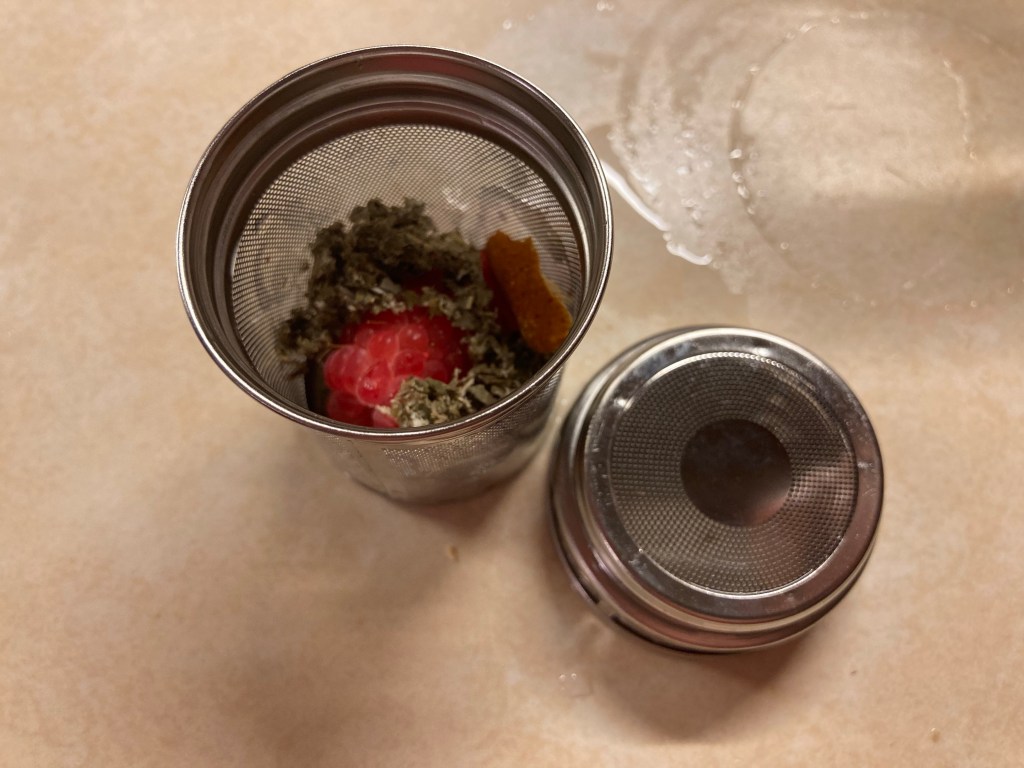
Orange Raspberry Infused Water Recipe:
Red Raspberry Leaf loose leaf herb
Fresh or frozen raspberries
Dried orange peel or fresh orange zest (substitute: dried lemon peel or lemon zest)
Glass Jar
3-4 cups of Water
Pinch of salt
This recipe couldn’t be easier. Simply combine 1/2 teaspoon of red raspberry leaf herb, 1-2 crushed raspberries, a small piece of dried orange peel or zest, and pinch of salt in your infuser. Place the infuser in your jar (or water bottle), fill with fresh water and place the jar in the fridge for 12-24 hours. The longer the infusion time, the stronger the infusion.
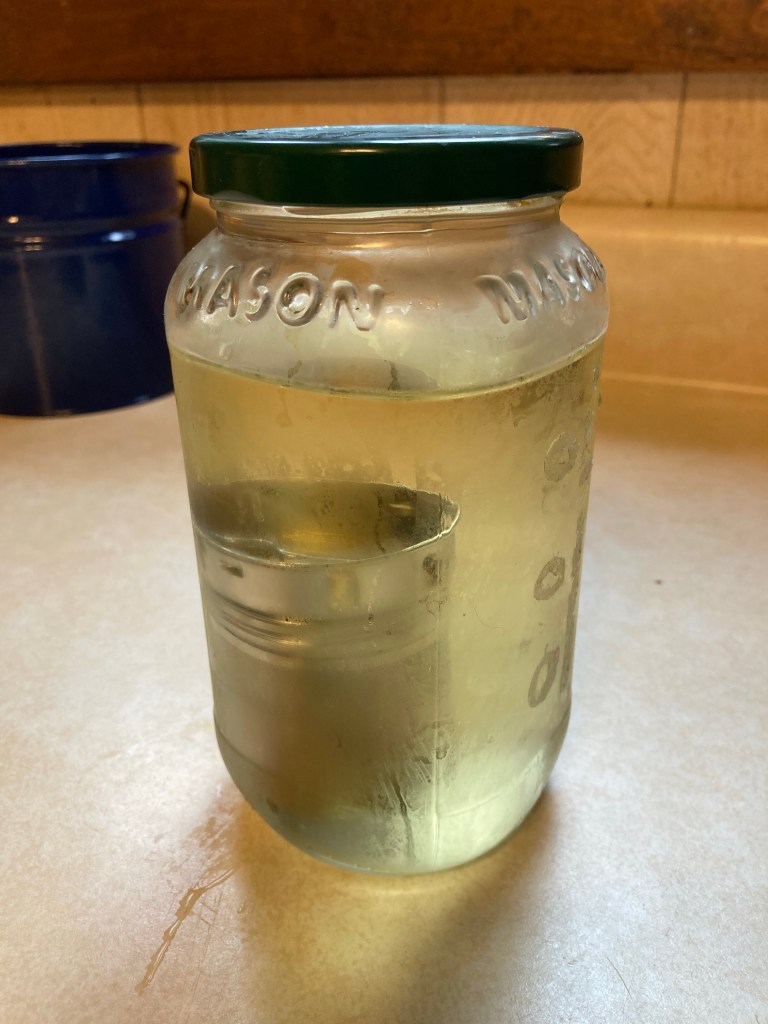
This jar infused overnight. It’s slightly sweet from the raspberries and just a bit of citrus flavor from the orange peel. The minerals from the herbs plus the pinch of salt makes this a pleasant electrolyte drink.
You can tailor this to your taste and change up the fruit or citrus flavors easily.
Try these other flavor combinations:
Lemon Raspberry
Blackberry Lime
Blueberry Lemon
Strawberry Lemon
Other Herbs that make mineral rich and tasty infusions:
There’s something satisfying about having all you brews, infusions, and concoctions ready and within arms reach when you need them.
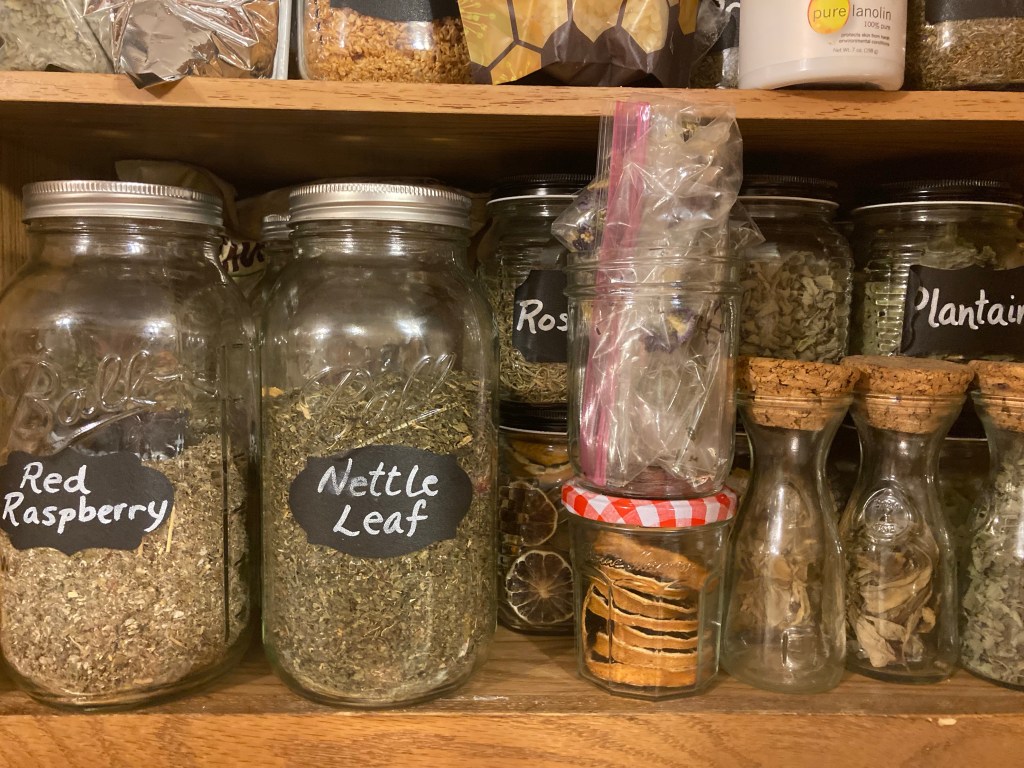
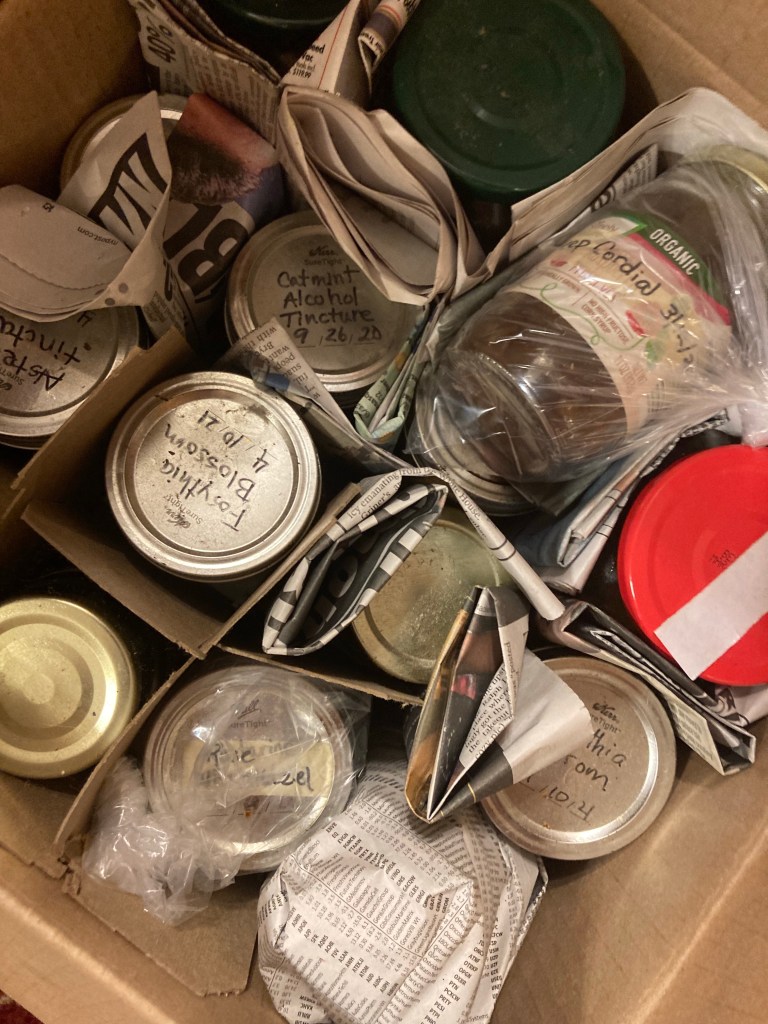
We moved to a new house this summer. I finally got around to opening up my box of herbal remedies this week. I hope to unpack it soon and get it all nicely arranged on the shelves with my other herbs.
I haven’t made anything new this year except a new batch of mullein oil from last year’s leaves. I need to re-establish all my medicinal plants here at the new house so I don’t have much to harvest yet. And there is no mullein growing here if you can believe that. I was so jealous on the way to PA this summer as it was growing all over the roadsides. It was all I could do to keep from asking my husband to pull over so I could jump out of the car to grab some. I’m going to have to plant some I guess.
I also need to pull out my favorite local medical plant ID book and investigate what is actually growing here at the new place. There’s got to be some good stuff in the woods behind our house. So far I’ve found some plantain and yarrow in the front yard, but I haven’t investigated the woods yet. One thing at a time. Trying to get the inside of the house live-able and settled. The outside will have to wait for now.
Do plants have personalities?
Making your own remedies either from herbs you grow and harvest yourself or from dried herbs that you buy requires you to get to know the herbs. I like to think of them as friends who can help me when I’m in a time of need, but first I have to get to know their personality so that I know what they have to offer. Reading and studying about them is helpful, but rather than solely focusing on the medical conditions that an herb may help, I file my herbal friends away in my address book describing their characteristics. This way I get to know the “personality” of the herb.
This is a little address book that I’ve had for years. I use it to make notes on herbs or conditions that I’m reading and researching. Since the address book is organized alphabetically, I use the lines where you would typically write a person’s name and contact information instead to write the name of the herb or condition that I’m researching and then I use the extra lines to make notes of what I’m learning. That way I can always come back and remind myself of information that I may have forgotten when the need arises. I can’t tell you how many times I’ve referred to my little book over the years.
How to Further Your Herbal Studies:
If you’re interested in taking your herbal studies up a notch, consider Homesteading Family’s free herbal trainings. Join in and maybe I’ll see you in class. I’m one of the online moderators for that course and it would be fun to see you over there. 😊
And if you really want to dive deep into herbs I highly recommend the Homegrown School of Herbal Medicine. I’m a student, though albeit progressing slowly, but the school really gives you an excellent foundation into anatomy and physiology of the human body so that you can properly understand how different herbs are going to work on the different systems of the body. And Doc Jones is a funny teacher to boot! 😊
However you choose to study herbs, keep good notes, enjoy what you are learning, get to know herbs as friends, and most importantly use the things you make.
From L to R: Rose Petal Sugar Scrub, Dried Rose Petals, and dried Forsythia blossoms.
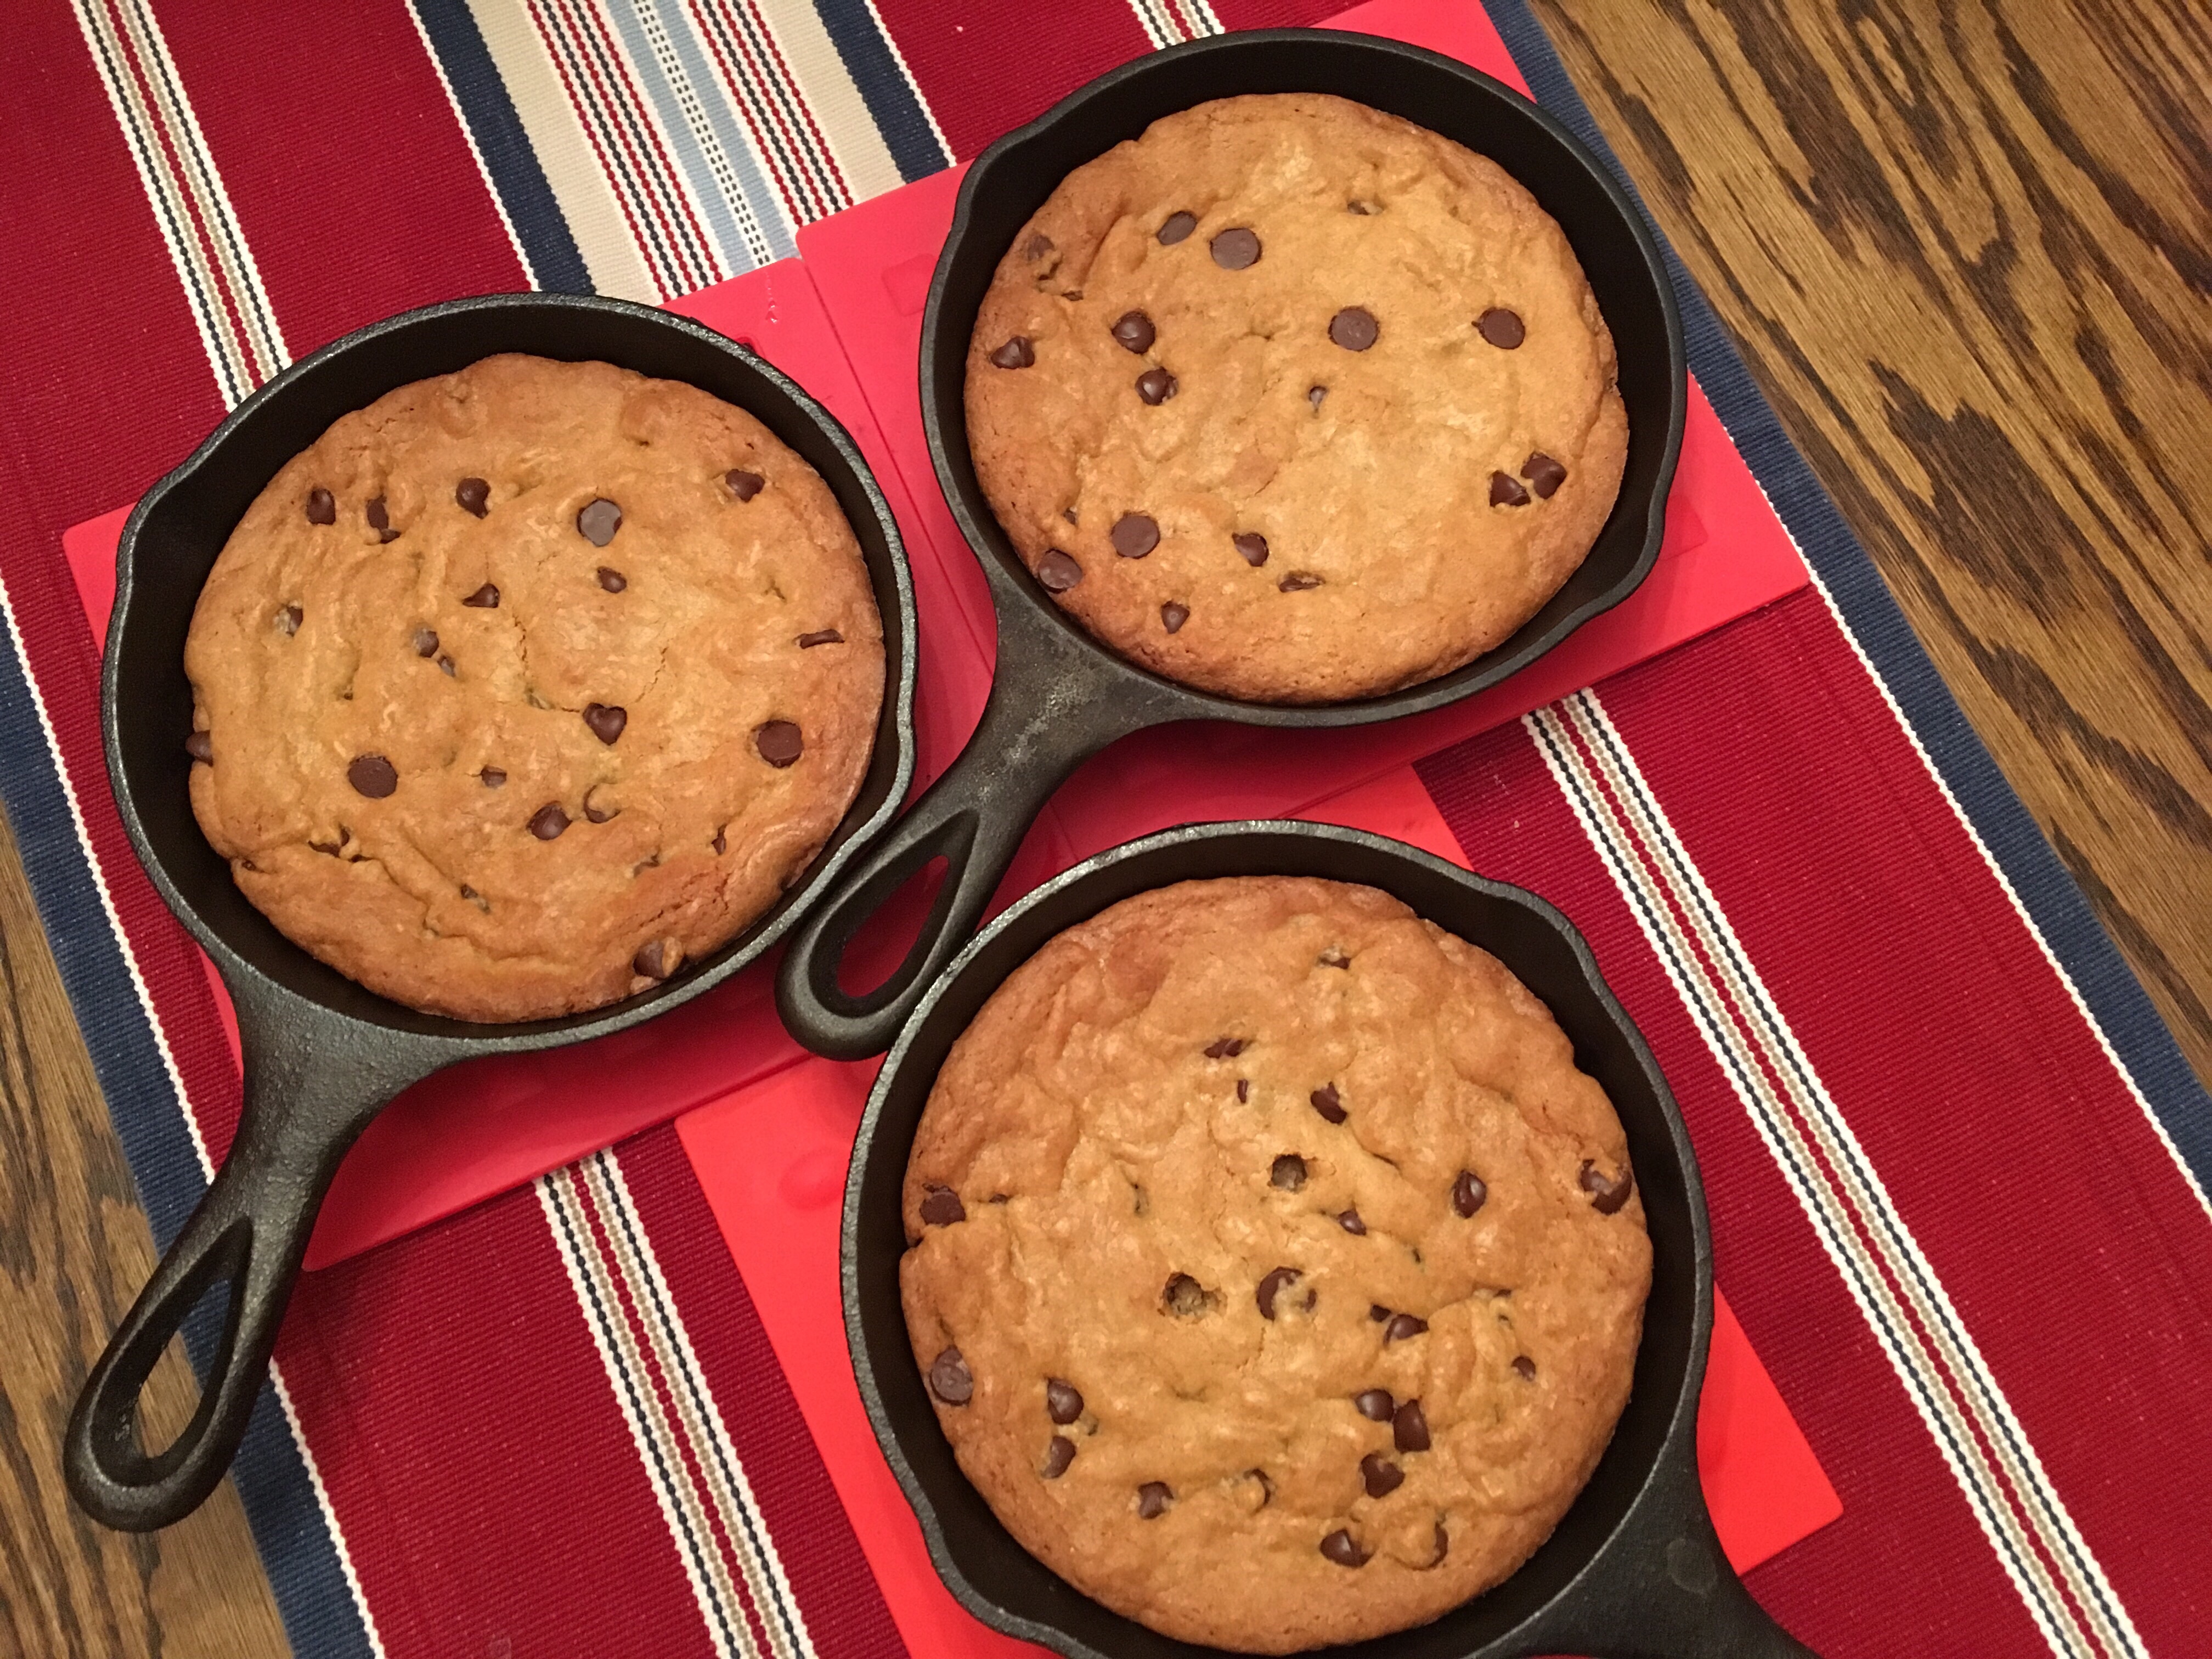
The six-year-old requested this for her birthday this year. We are mixing them up now! Give this recipe a try. 😊
Cast Iron Skillet Cookie:
1 stick butter and 1/4 cup tasteless oil (I use light olive oil), melted
3/4 cup sugar
1/3 cup honey
1 egg
1/2 tsp salt
1/2 tsp Vanilla
Whip the sugar, honey, and butter several minutes until light and creamy (this step is important, don’t skimp on the mixing). Then mix in the egg, salt, and vanilla.
1 3/4 cups all purpose flour
1 tsp Baking soda
1 cup chocolate chips
Stir together.
Mist your skillet(s) with cooking oil. You can either use one 10″ skillet, or three mini cast iron skillets. Fill with cookie batter. Bake at 350 for 20 minutes. Best served warm with vanilla ice cream.
Follow me on Facebook if you want to keep track of new blog posts. But, I’ll be posting more frequently about what keeps me busy each day on Instagram.
If you want to see who and what I follow, other people’s recipes, and ideas that I like, what videos I watch, and what books I read, then step into the Parlor and join my running Conversations with my other friends on the web.
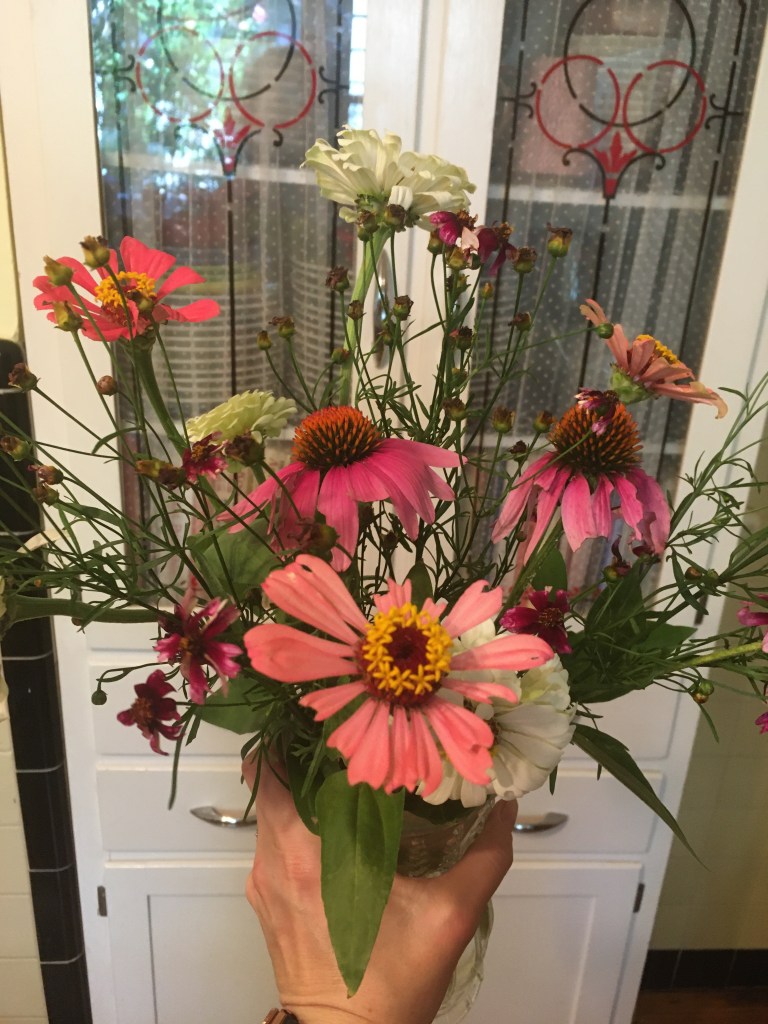
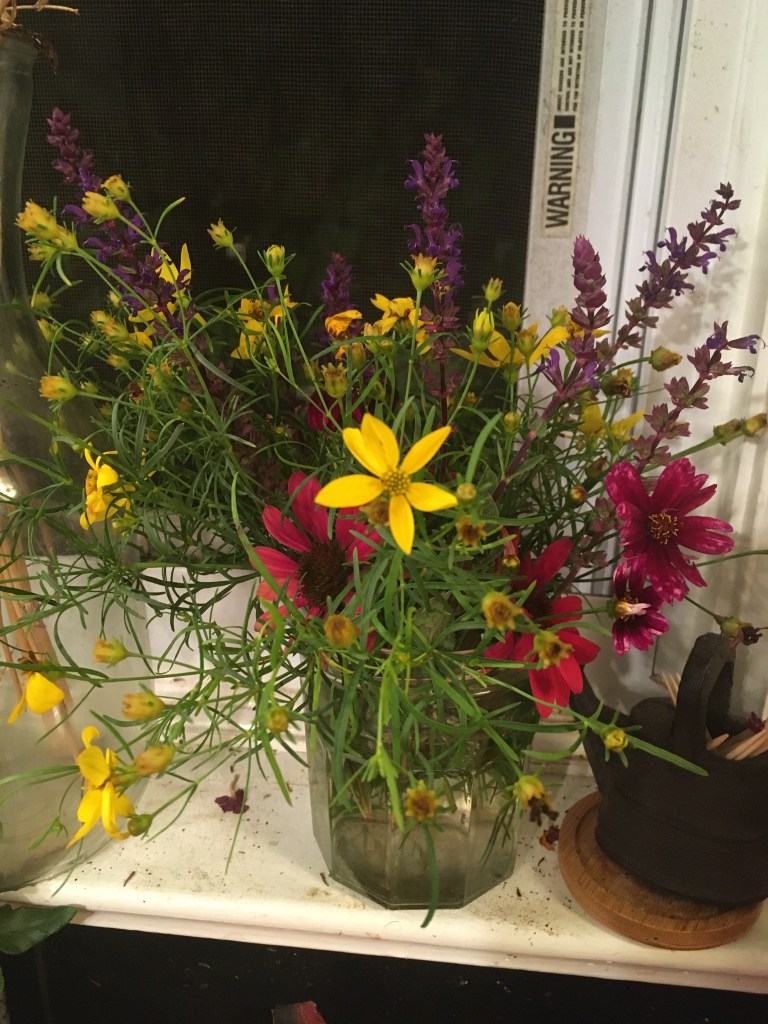
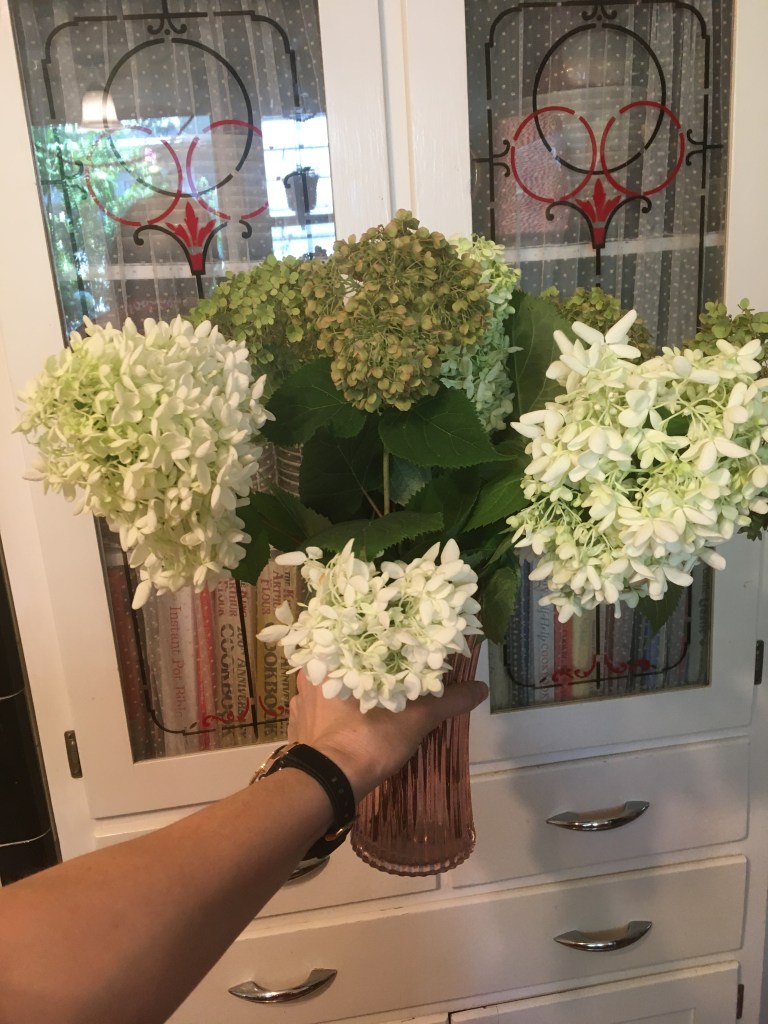
I’ve always had a hard time cutting flowers from my garden. I just never seem to want to ruin their beauty by taking them from their natural state.
I’ve been experimenting this year though, and I’ve found which flowers last well as a cut flower and which ones don’t. Some, like Zinnias even put on more blooms when you cut them.
Long-Lasting Cut Flowers: Zinnia, Coreopsis, Salvia, Cosmos. Hydrangeas can be long lasting as well if you wait to cut them when they are beginning to feel papery on the stem.
Flowers that Fade Quickly: Echinacea, Black-Eyed Susan.