I eliminated gluten from my diet about 3 years ago. I realized that wheat was aggravating some of my other health symptoms. I’ve tried to various ancient wheats over the years – spelt, khorasan, einkorn, etc. to see if I could tolerate any of those, but to no avail.
I’ve recently discovered that I seem to tolerate Emmer which is a lesser known ancient wheat. I’ve been trying it in small amounts to try to build up the tolerance in my system slowly. This recipe is a result of my experimentation.
It is mostly gluten-free, with a little bit of Emmer. Substitutions are noted. in the recipe in parentheses.
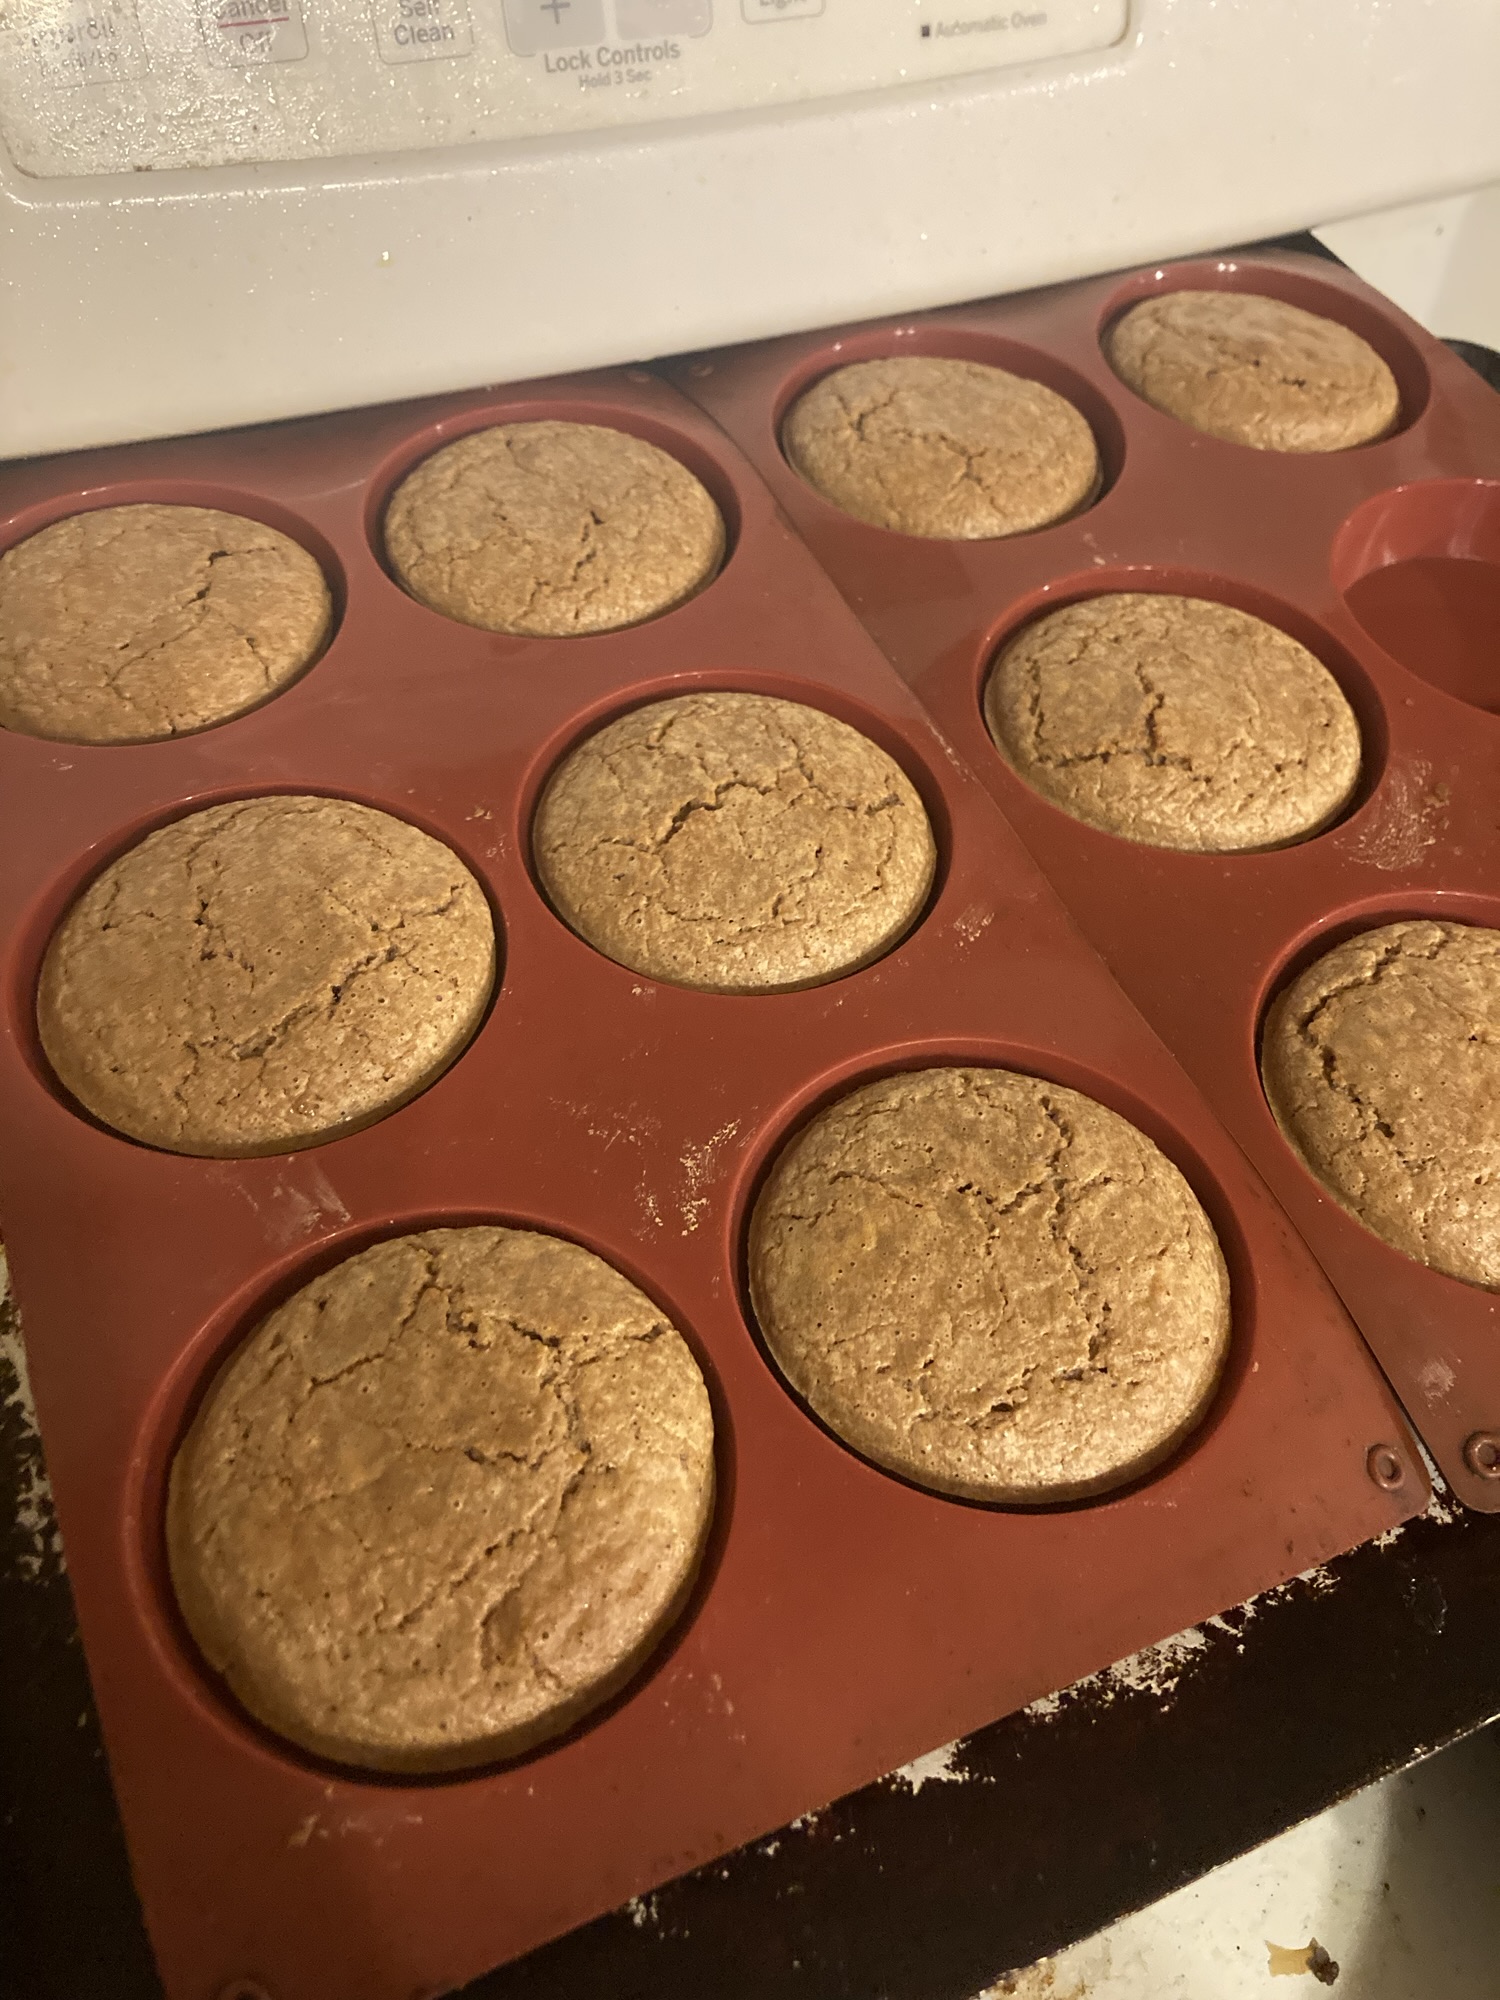
Hybrid Gluten-Free, Ancient Wheat Biscuit Recipe:
3/4 cup Arrowroot Powder (or Tapioca Starch)
1/2 cup Teff Flour (or Buckwheat, Millet, Sorghum, or Oat flours)
3 tbsp. Emmer (Spelt, Khorasan, or Einkorn)
1/2 tsp salt
2 tsp baking powder
Mix the above together and then add….
1 cup milk (or non-dairy milk, or water)
2 tbsp melted butter (or oil)
1 egg (or 3 egg yolks, or 2 tbsp psyllium husk dissolved in 1/2 cup water to make the recipe egg free)
Combine the wet and dry ingredients together. Let the mixture sit for 10 minutes to hydrate.
Preheat the oven to 375 degrees.
Pour into silicone liners and bake for 20-24 minutes. Cool on wire racks.
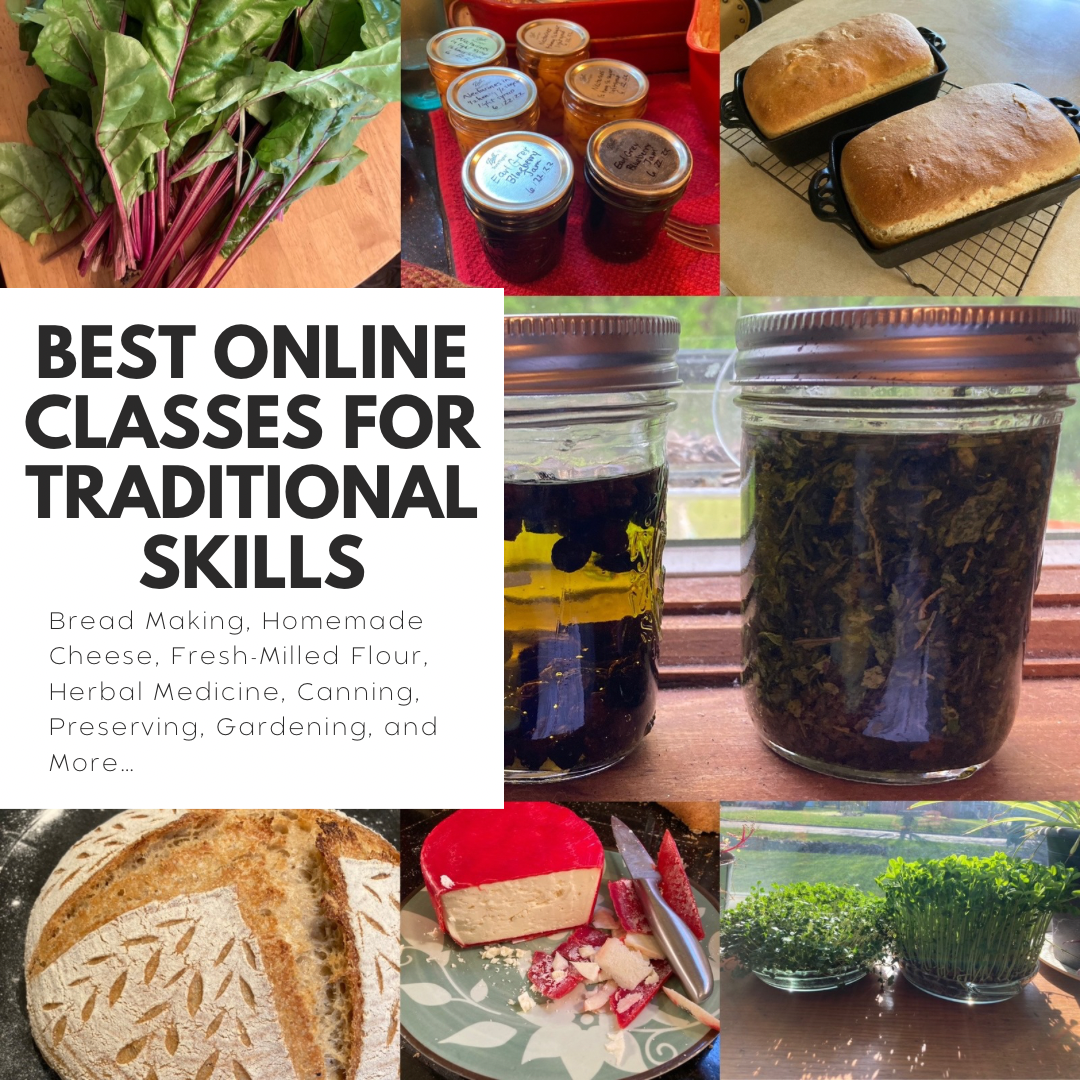
If you’ve followed my blog for any amount of time, you know that I love the classes at Homesteading Family. I’ve learned so much from them – bread making, sourdough, homemade cheese, canning. Their classes on herbal medicine, preserving, and permaculture are a great starting point if you are wanting to learn more about traditional homemade skills. The skills that our grandparents knew are becoming less commonly known, if not forgotten altogether, but they are so much more important to our daily lives as grocery prices soar and uncertainty looms around the corner. Consider these Homesteading Family Classes as a way to take back some of your independence and the skills we have lost.
Read to the end for a special coupon code! Take advantage of this discount code just for Maggie Lane subscribers!
This course covers yeast and sourdough. It is broken down step-by-step so that anyone can do it. If you’ve tried to make bread before and failed, this course is for you. By the end you’ll know just what to do to achieve the perfect loaf every time. What’s the secret? Knowing how to read the dough. The course gives you benchmarks at each step to know when your dough is ready for the next step.
Think you can’t make use of this class because you don’t have a cow? Think again. You can make all the recipes in this course using store-bought milk. Every recipe I’ve made have been made with milk from the store. The course starts out simple and builds your skills so that you can make the simplest fresh cheese all the way up to mozzarella or hard cheeses like cheddar and parmesan. No special equipment needed. You can use the things you already have in your own kitchen.
Want to learn the ins-and-outs of milling your own flour at home. This mini-course is a great companion to the Art of Homemade Bread class and gives you even more tips on using fresh-milled flour at home.
Learn how to safely water bath and pressure can in this masterclass. This comprehensive course gives you step by step instructions in over 70 lessons. You’ll get all your questions answered and learn to can with confidence. This class will remove all the doubt in eating your home-canned food.
If you have your own animals, these two classes will help you know what to do with all those eggs from your chickens and milk from your cow rather than give them to the neighbors. Learn to preserve your eggs like they are fresh for over a year, and find out how to use the good bacteria naturally present in your raw milk to your advantage.
Discover how to grow, harvest, and prepare your own herbal remedies. This beginner course is just what you need if you’ve been wanting to learn how to make your own teas, tinctures, gylcerites, syrups, herbal vinegars, oxymels, and steams, but don’t know where to start.
Learn how to work with nature in this introductory course to growing a productive and sustainable garden. Gain the basic skills you need to maximize your food production and provide your family with good home-grown food.
Gain tips on managing a busy home, homeschool, and homestead. From tips to streamline breakfast to managing your time and finding joy in your day, let this course guide you to peaceful productivity.
This digital and print magazine is a beautiful addition to your coffee table and a valuable resource to your kitchen. The kitchen is truly the hub of the home. Whether your homestead is acres of land or a tiny balcony garden, you can make use of these tips and recipes in any kitchen. Take your cooking from scratch skills up a notch. This will soon become your favorite cookbook!
Want access to all these classes and more?
Homesteading Family offers a monthly or annual membership to their Homestead Kitchen Community. Membership offers you all these classes plus access to members-only content and challenges.
Whether you’re seeking greater self-sufficiency, trying to balance the budget, or simply wanting to experience the joy of making things at home, these online courses offer guidance and experience that makes traditional skills accessible to anyone.
Special BONUS for Maggie Lane readers!
Enter your email below to get the Homesteading Family coupon code.
Made from scratch, home cooked meals are the ideal goal of many a homemaker. If you have a garden and can add fresh, homegrown food to that, all the better! But the slog of deciding what to make every day can be overwhelming. Some days it’s just decision overload. When your days are filled with school, housework, cooking, kids’ activities, volunteer work, and life, sometimes something’s gotta give.
I can honestly say, that I don’t think I would have survived the last year if I hadn’t been faithful to plan out my meals each week. My diet has become more and more limited in the last year, so that coupled with our increasingly busy schedule, weekly meal planning has saved my sanity.
I’ll be right upfront with you though and say that I hate it. I never used to plan meals more than a day or two in advance. I’d look in the fridge and freezer, see what we had and throw something together. But before we moved last year, I realized that I wasn’t going to survive the weeks leading up to moving day if I didn’t plant out my meals. I knew I would have just been too distracted to keep food on the table, and with all our food allergies and restrictions, convenience meals or eating out wasn’t an option for us.
Now, I’ve said that I hate meal planning, (anyone else 🙋🏻♀️), and I do. When I come home from church on Sunday night tired and ready to crash, the last thing I want to do is sit down and think about a week’s worth of meals. But I make myself do it because I know that I won’t make it through the week if I don’t.
Here’s my method. It’s simple and it doesn’t require any complicated apps or planners.
Weekly Meal Planning for those with food allergies:
So, what’s my secret?
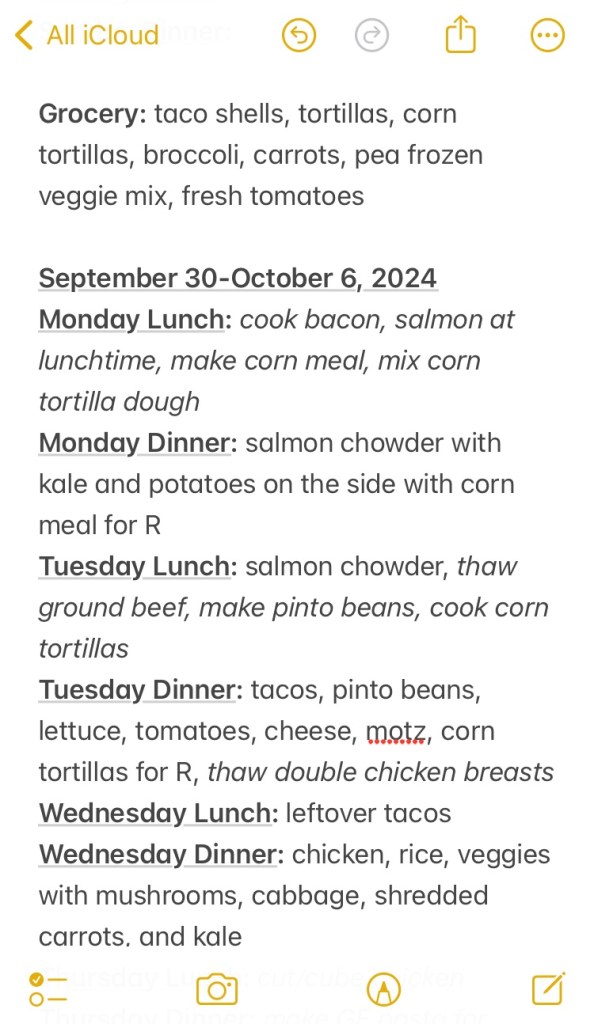
It’s nothing earth shattering. I simply use the notepad on my phone.
I keep this weekly breakdown at the top of my phone (photo above). Each week, I highlight and copy it and paste it underneath and fill it in to plan the upcoming week’s meals. So my current week is always at the top with the last week’s meals moving down the app in reverse date order.
Because of our food restrictions, our breakfasts are pretty standard so we stick to our regular routine on those, so I don’t plan each breakfast out separately, but you could easily add in a line for breakfasts if you wanted to do that. (Just in case you’re wondering, our breakfasts consist of large batches of waffles, biscuits, or sourdough bread made once or twice per week with sausages, eggs, or a nut butter for protein based on who can eat what.)
SampleMeal Plan:
Here’s a sample of my meal plan for this week:
Meal Planning Method:
Here’s my what I do…
I fill in what meal is planned for each day and if any modifications need to be made for anyone who has dietary restrictions. In italics I make note of anything that needs to be thawed the day before, or any prep that I might need to do in advance. Then at the top, I write anything I might need to buy at the grocery store that week in order to have everything on hand for the meals that I have planned. Then we print it out and put it in the fridge and write in names of anyone else that may be helping with prep or doing part of the meal. For example, last night my husband grilled, so his name was written in for that on Saturday night and my daughter was written in making roasted potatoes so I got the night off from cooking. Yay!
Why this works:
This method works for me because it saves me during the week. I don’t have to stop what I’m doing to figure out what we are going to eat at the last minute. And because it’s on my phone, I can easily make changes if I see a meal won’t work for some reason, or if I need to look up what I was supposed and to shop for when I find myself at the grocery store.
Make a Meal Rotation!
Recently though, we’ve taken it one step further. To give me my Sunday nights back from working out the meal plan details, my husband suggested creating a two week rotation of our favorite meals that we just repeat over and over again. This works well for us as most of our evening activities are on an every other week rotation so we can usually slot in the same meals over again pretty easily. To keep it from getting boring, every other week when we have a free Friday night, we make a Wild Card Friday where each kid gets to take a turn picking a meal of their choice to mix it up a bit and work in some of the meals that might take a little more time and effort to prepare.
Why should I meal plan?
Is meal planning work? Yes! But it makes the work of getting through your busy week that much easier. Give it a try. The relief of having the pressure of deciding what to make every day removed is immense for me. Your plan will look different from mine based on your family’s tastes, food restrictions, and schedule, but I hope that you’ll give it a try.
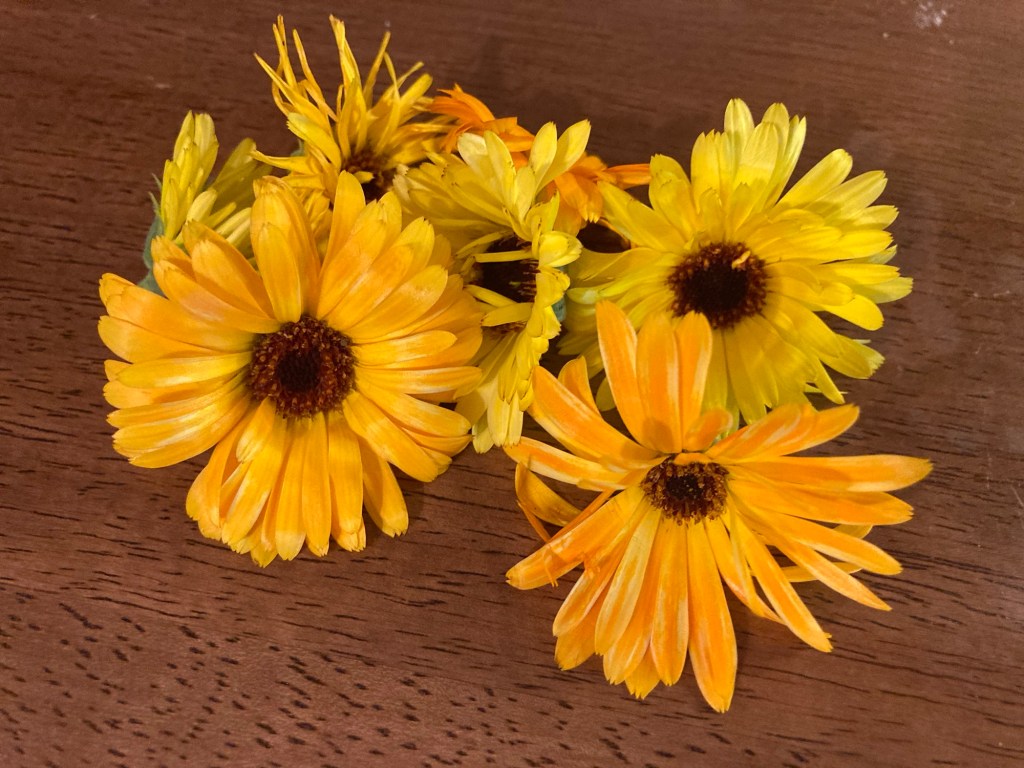
Calendula is one of the few plants in the Aster family that we use as my son has a allergy to ragweed which makes him sensitive to many of the plants in that same plant family.
I’ve grown Calendula for years and thought I’d share how I air dry them without a dehydrator. It is often recommended that you dry calendula with a dehydrator since the centers are so thick and resinous that they can be hard to air dry, and if not completely dry, they can mold in storage.
Why this method of air drying Calendula works. Two reasons:
Good air flow.
Long drying time.
Because my calendula is grown in containers, I usually have small harvests, meaning I’m not harvesting basketfuls at a time. I might harvest 2-3 flower heads per day. This is certainly not enough to warrant pulling out the dehydrator in order to dry them.
So mine sit and wait for me, and as they wait, they dry.
Here’s what I do…
Each flower that I pick goes into a little linen bag. This is in fact a little bag for sprouting micro greens, but since I use a different method for that, I’ve never used that bag for sprouting so I turned it into my calendula drying bag. Now, let’s stop here. You don’t need a bag for this. Any airy, piece of fabric, linen, muslin, flannel, burlap, or scrap of cheesecloth that is large enough to lay the flowers on and fold over on top of them will do. The purpose of the fabric is to keep your flowers clean and free of dust while drying.
Tiny harvest. These Calendula blossoms have been drying for a few weeks.
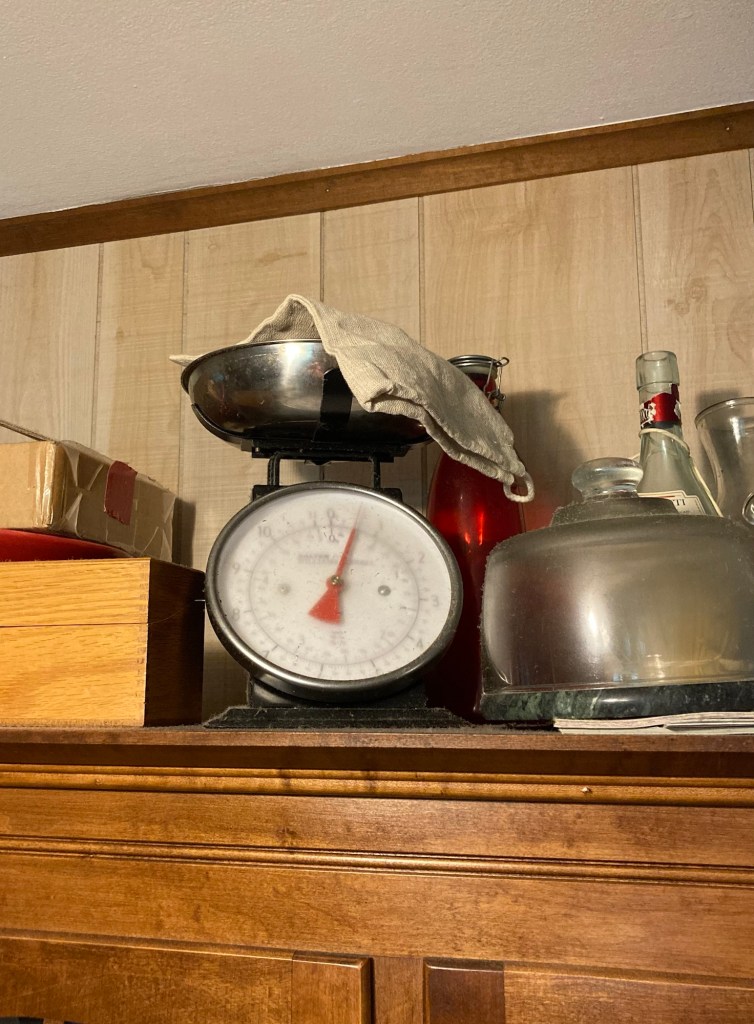
Next I lay this little bag on top of my hutch where the air is warm. I usually lay it in the bowl of my old fashioned kitchen scale which lives up here, but anywhere high and warm that is open to the air will do. On top of the fridge would work quite nicely. (Do not place anything inside an upper cupboard though. There would not be enough air flow in there.)
As I pick new flowers, I add them to the bag. Each time I take it down to add more I shuffle them around to ensure they are all getting moved around so that all the parts dry well.
New flowers added to the bag.
When I have new blooms to pick, I add the new flowers to the bag and it goes back up on the hutch. Sometime in the fall when they are all good and dry, I’ll take them down, ensure that they are all dry and can be crushed, and I’ll store them in a glass jar until I need them to make more infused oil or Calendula salve. They wait quite happily for me, and by the time I’m ready to use them in winter, they are dry and ready to use. In fact, most years, they just sit there until I remember to take them down sometime in December.
Growing, harvesting, and drying herbs doesn’t have to be a fussy process. Find a method that works and feels easy to you and go with it. What’s stopping you?
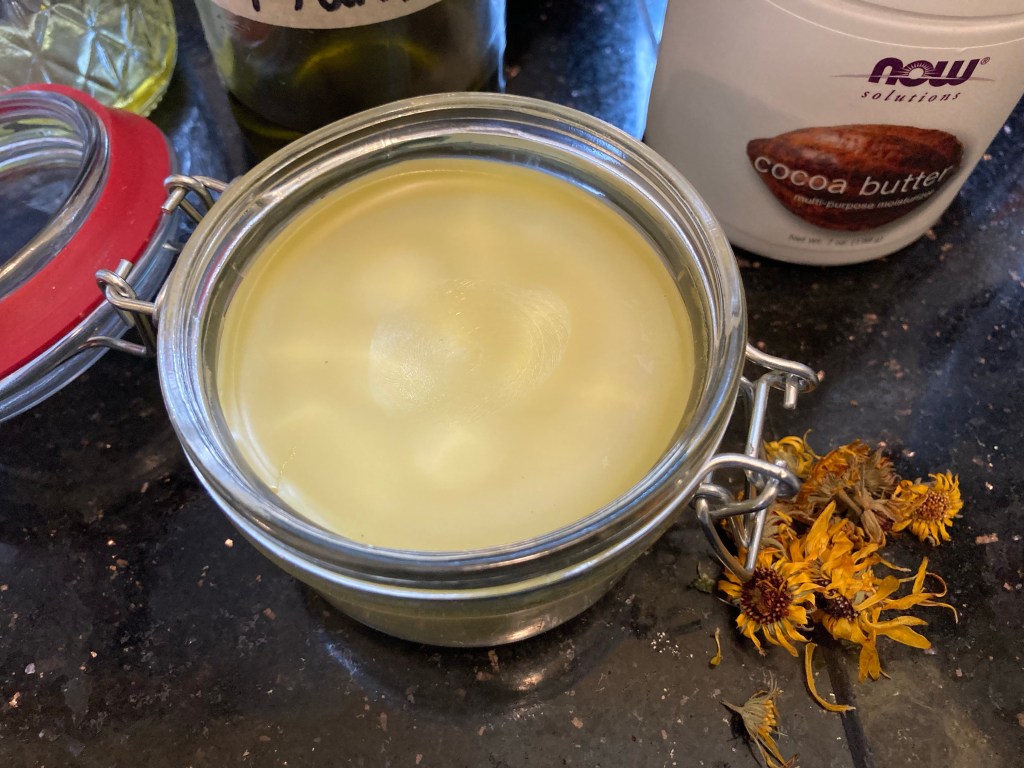
And once you have a homemade infused oil, you’re only one step away from making your own salve. You might want to check out my Healing Salve which is made with Calendula. (See the little dried up Calendula flowers laying there?) 😊
And if you really want to wrap your head around making all your own infused oils and slaves, let Carolyn with Homesteading Family hold your hand through the process. She recently came out with a Herbal Oils class that is quite nice which covers the basics of making culinary oils, infused medicinal oils, and using essential oils for your own handmade salves, balms, lip balms, and more. You can get access to it as part of their Homestead Kitchen Membership.
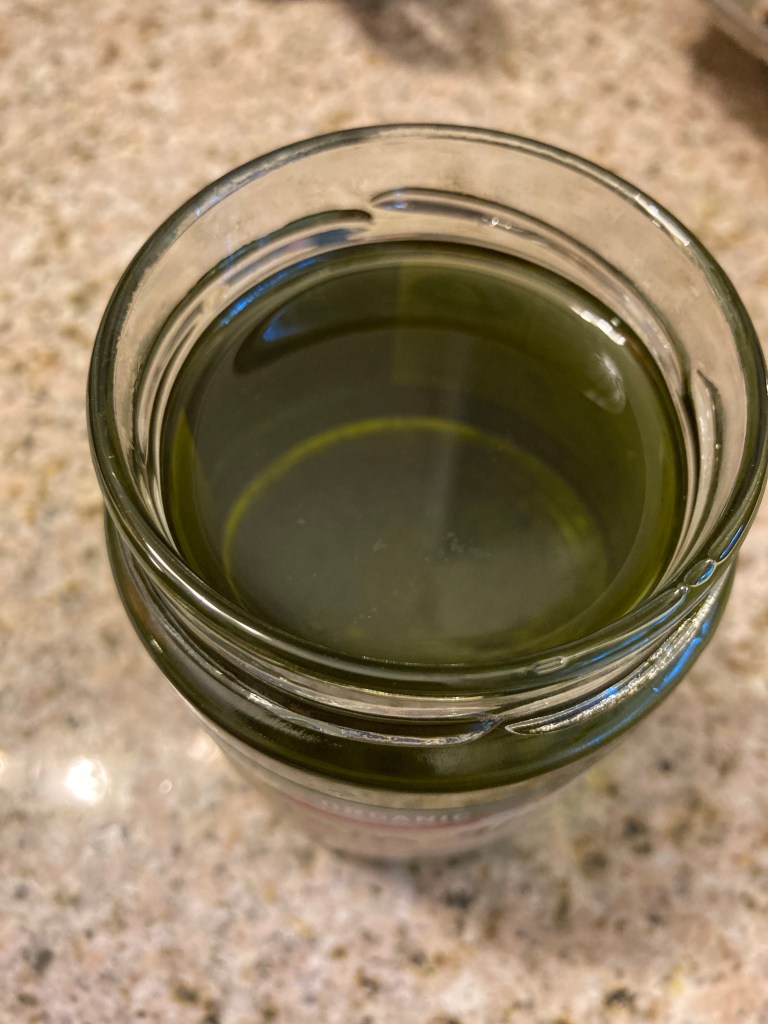
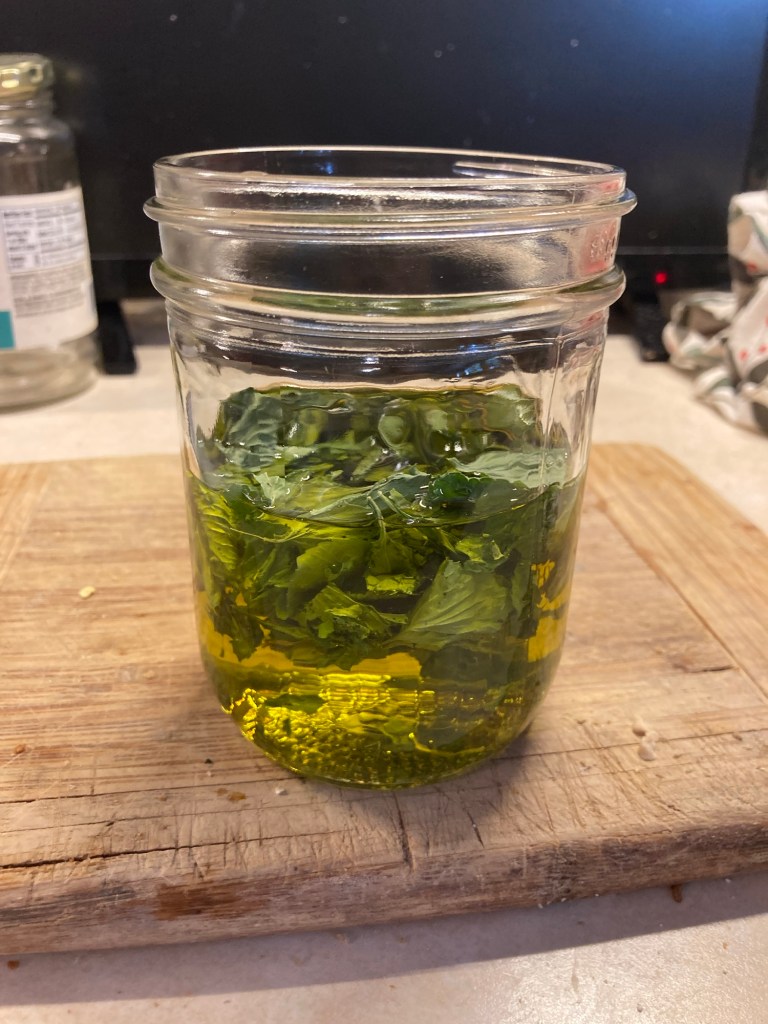
Look at that color!!! Have you ever seen a prettier dark green. Did you know that the deepness of color, indicates the potency of the oil. The deeper the color, the more potent the oil.
Note: This recipe is written for plantain but this method can be used with any plant. You could make rose, mullein, borage, Hawthorne, calendula…. The sky is the limit.
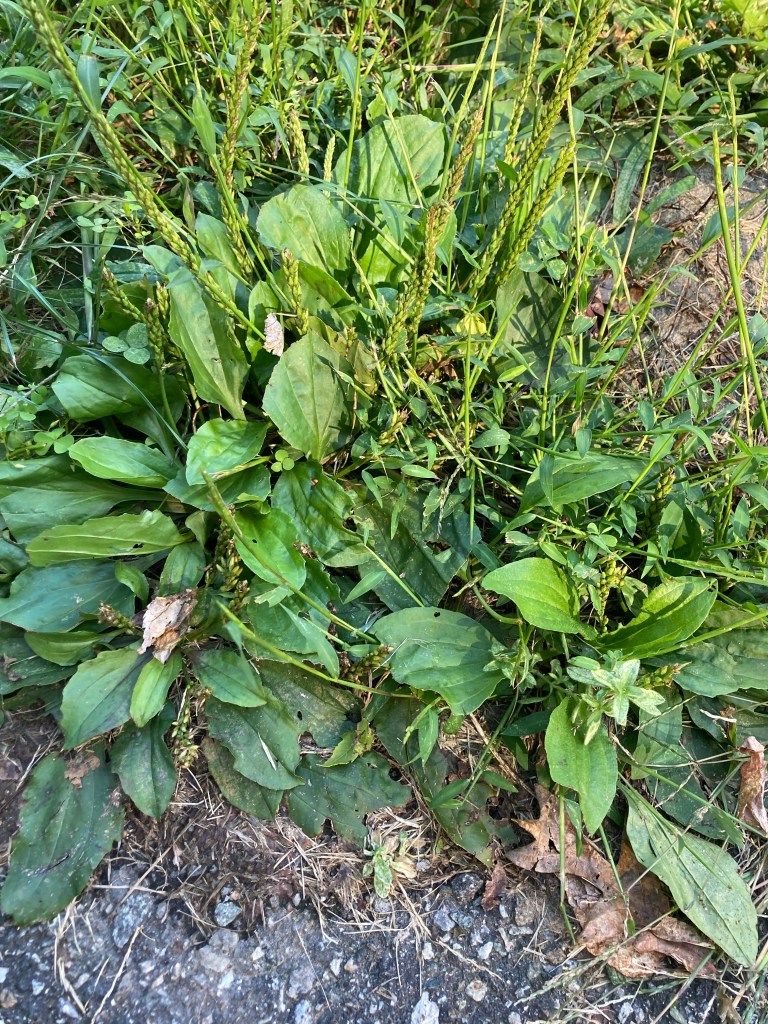
Anyone have this little plant in their back yard?
Plantain (Plantago major) is one of the most common “weeds” found in lawns. Many homeowners spend thousands of dollars every year trying to get rid of this little weed. It is a tough one to eradicate since it forms in low-growing rosettes. The fact that it hugs the ground means lawn mowers often pass right over it without doing any damage.
The other trait of plantain that makes it difficult to get rid of are all these little seed stalks that it sends up in the late summer to early fall. The seeds spread easily which means new little clusters will always pop up.
The fact that this little plant is so common and determined to survive means that it has a whole host of medicinal properties. So go find a lawn that you know is not sprayed with any weed killers, pick some leaves, and let’s make a batch of plantain oil.
Plantain leaves can be gathered any time of year when the plant is growing. The leaves will be most potent when gathered before the plant goes to seed. (Note: Do not harvest the seeds. They contain contraindications for some health conditions.)
Let’s make some oil!
Infused Plantain Oil Recipe:
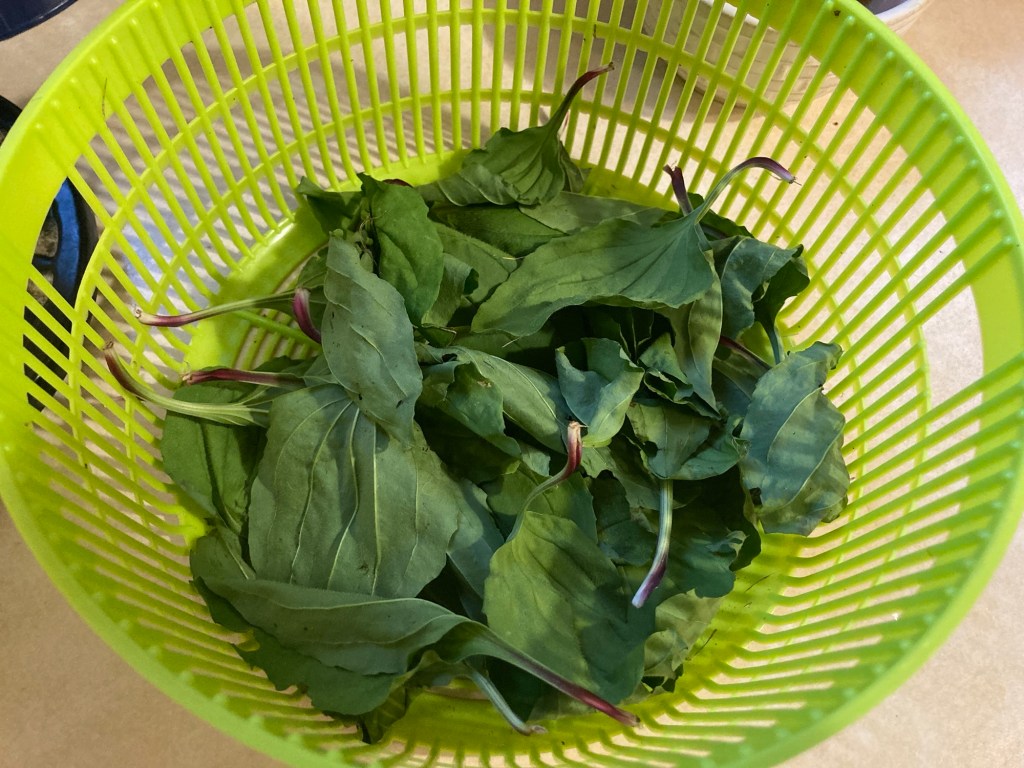
Gather your leaves. Choose whole, unblemished leaves if possible. Do not pull up the whole plant. Pinch from the bottom of the leaf stalk to pick each leaf individually. This will ensure more harvests later in the season.
Fill a bowl with cool water to rinse the leaves of any dirt or bugs. I actually like to use my salad spinner for this step. The mesh basket makes it easy to wash, drain, and dry. See step #3 below.
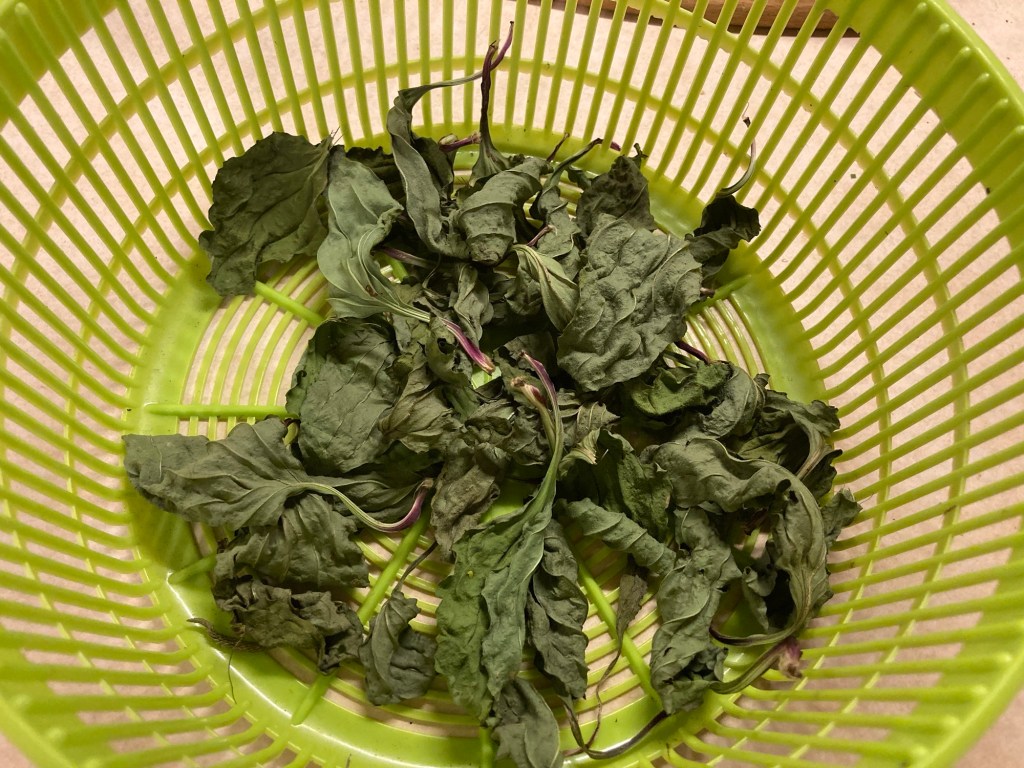
The next step is to let the leaves dry and wilt. They don’t have to dry completely, but the drier they are, the longer the shelf life of your oil will be. Using the mesh liner from your salad spinner by removing the strainer from the outer bowl so that the leaves can get good air flow works well for me. I like to fluff them up occasionally as I walk past them on the kitchen counter to keep them moving to ensure they dry evenly. Or if you don’t have a salad spinner, a pasta colander with larger holes will work as well. You can also lay the leaves out on a tea towel on top of a cookie cooling rack to air dry and wilt. Now, here, you could choose to let them air dry completely for winter storage in a glass jar, or you can wilt for 2-3 days or until dry before moving on to making your infused oil. A dehydrator could also be used in low heat if you don’t want to wait for them to air dry.
When sufficiently wilted or dried, take your leaves and roughly tear or crush them into a glass jar. Fill the jar half full with plant material.
Cover the plant material with olive oil or any oil of your choice that you have in your kitchen.
Put a lid on your jar and loosely tighten.
Set a clean dish rag or cloth in the bottom of a sauce pan that is half full of water. (Note: the dish rag prevents the glass from being too close to the heating element which could cause it to break.)
Set the jar in the sauce pan on top of the dish cloth.
Turn on the heat to medium high. (Set a timer for 10-15 minutes so you don’t forget your oil.)
Watch the oil, as soon as the water starts simmering, turn the heat off. We don’t want to cook the plant material. Just infuse it with a little warmth.
Let the jar sit until it is cold.
Strain your oil using a handheld mesh strainer (often the dollar store or grocery store will have these) into a clean, completely dry, glass jar.
Label your jar with the name of the oil and date. Masking tape and a sharpie works well for this. I keep a masking tape dispenser like this on my kitchen counter specifically for labeling things.
And you did it! You made your own Plantain oil! Well done!
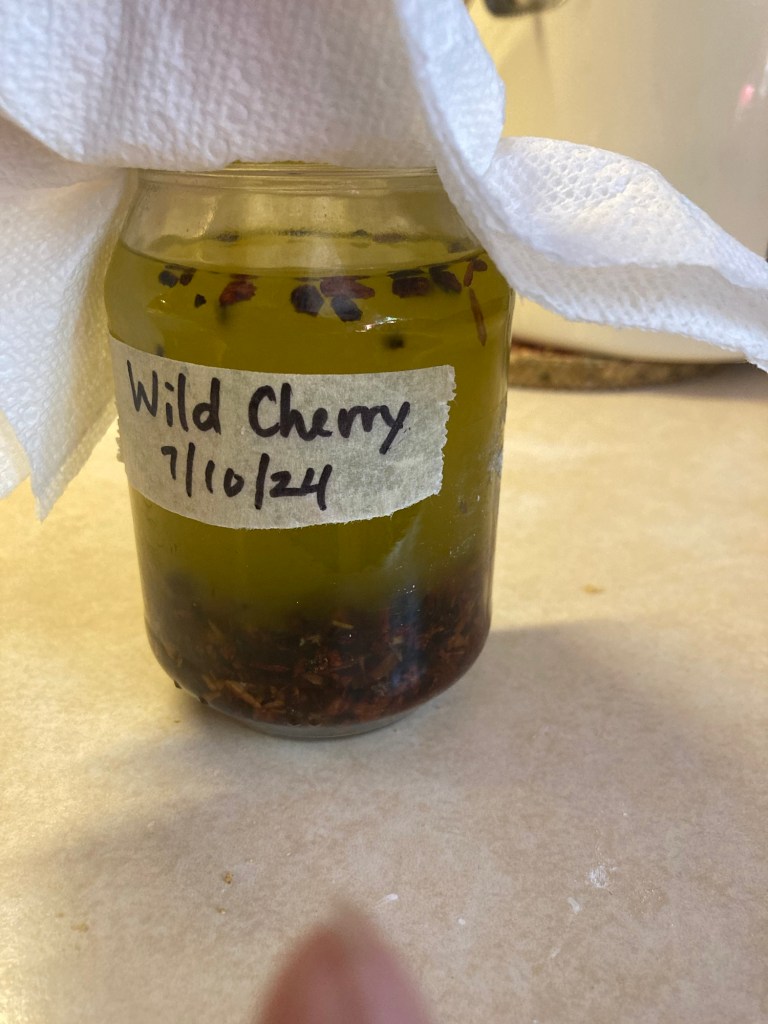
And now that you have the skill of making an infused oil under your belt, you can do it with any medicinal herb. Be creative. Some of my favorite plants to make oil with are mullein, rose, calendula, Pansy, violet, echinacea, pine, wild cherry, and yarrow. I use my infused oils every day.
Want to see a photo log of these steps? Scroll to the bottom of the page.
Infused Oil FAQ Section:
What is infused plantain oil good for?
Plantain is an excellent remedy for any type of bite, sting, or skin irritation. It is especially useful for anything that needs pulling or drawing out. It is a mild astringent and good for any skin or issue with any angry or inflamed membranes.
How long will my infused oil last?
Homemade infused oils are good indefinitely if made with dry plant material, and if stored in a cool, dry location. If fresh or wilted plant material is used, extra steps will need to be taken to ensure that your oil doesn’t mold.
What are the signs of moisture in my oil?
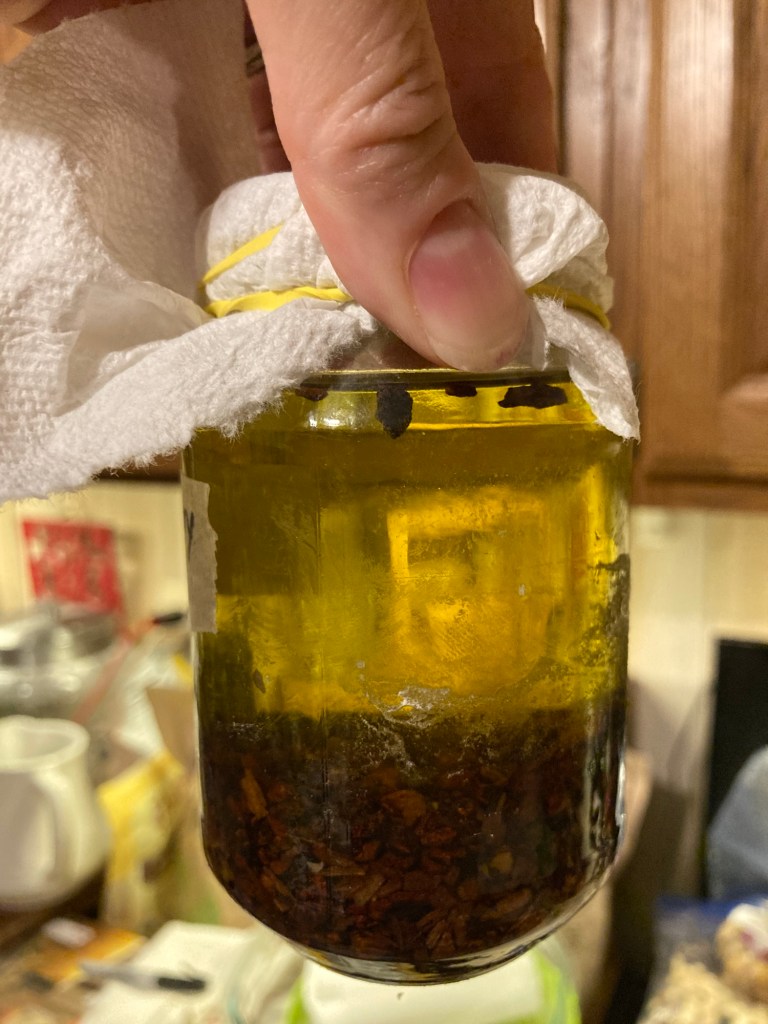
Condensation or cloudiness on the inside of the jar after straining is an indication of moisture. This is easy to remedy. Simply take the lid off of your jar and cover with a paper towel or coffee filter and secure with a rubber band. Let the jar sit until the oil is clear and all the moisture has evaporated. Then you can replace the lid and store in a cool, dry place.
Do you see the cloudiness in this jar of oil?Same jar of oil as above after 2-3 days sitting with a paper towel cover to allow the oil to evaporate. Can you see how much more clear the oil has become?
How do I know if my oil is moldy?
When an infused oil grows mold, it often does not grow on the surface like what we are used to seeing on food in our fridge. It grows down inside the oil and looks like dark fuzzy spots floating in the bottom of your jar. For this reason, I like to store my oils in clear, glass jars so that I can easily see if anything begins to grow or look amiss. An off smelling oil would be another indicator. However, be sure that you smell your oils right after making them to be sure that you know the scent of that plant. Not every plant has a pleasant smell, and you don’t want to throw out a perfectly good batch of oil simply because you aren’t familiar with the scent of that particular plant. So train your nose to know what your oil smells like right after you make it.
How to know if my oil has gone bad?
Visible mold on the surface, dark spots growing in the bottom of the jar, or rancid or putrid smells are signs that your oil has spoiled and should be discarded.
Can I use this same method to make an infused oil with a different plant?
Yes! This method can be used to make an infused oil with any medicinal plant. Keep in mind that infused oils dried plant material will have the longest shelf life.
Do you feel confident to make your own infused oil now? I hope so. Enjoy your creations. Using my oils through the year and especially during the winter is one of my favorite things.
Want to make your infused plantain oil into a salve?
Make this Healing Salve using your infused plantain oil. If you don’t have infused Calendula oil, just replace it with an extra part of plantain oil and you’ll be all set.
Healing Salve
Want to take a deeper dive into the world or herbal oils?
Consider the new Herbal Oils class by Homesteading Family. It covers making your own culinary oils, medicinal infused oils, as well as your own salves and body products using essential oils. It’s a great all-in-one course for beginners. You can get access through Homesteading Family’s Homestead Kitchen Membership.
Photo Log Step-by-Step of Making an Infused Plantain Oil:
Plantain (Plantago major) – freshly picked.Washed in my salad spinner.Air dried and wilted.Completely dry and crispy. These can be stored for use later in a sealed glass jar, or you can move straight into making your infused oil.Though not plantain here (this is torn violet leaf), the next step is to roughly tear your plant and place in your jar. Cover the plant material with the oil of your choice. Place the jar on a cloth in a sauce pan half full of water. Turn on the heat.When the water starts to simmer, turn off the heat and let it sit until completely cool. Then you’re ready to strain and store.
Note: Some links on this page are affiliate links.
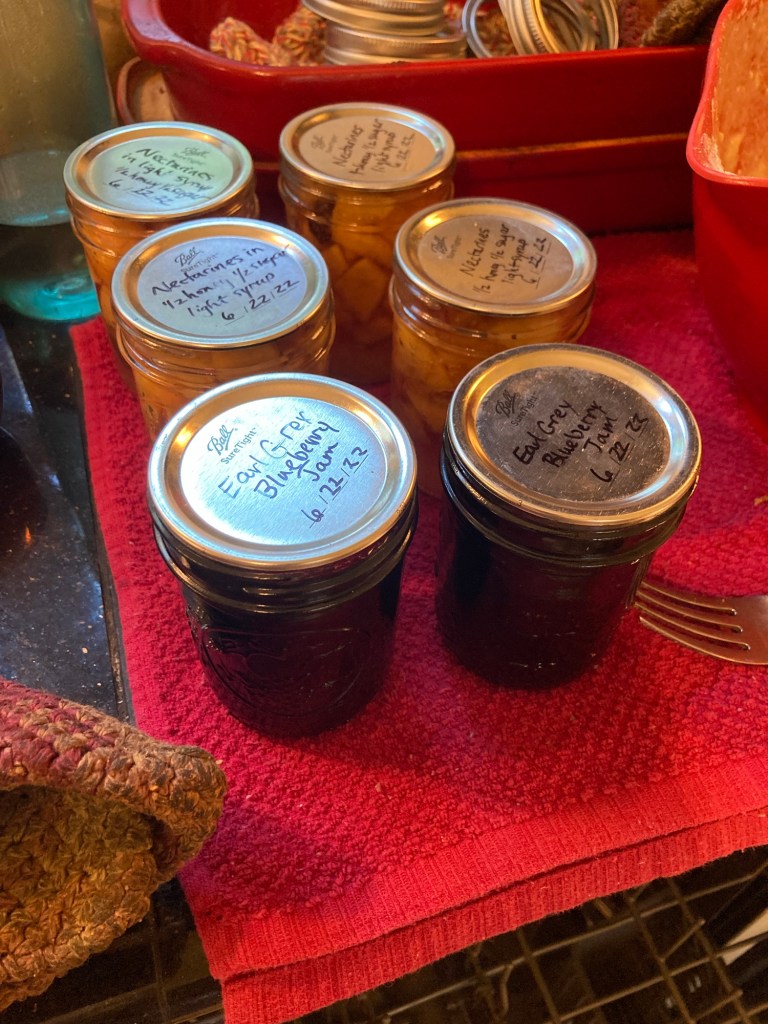
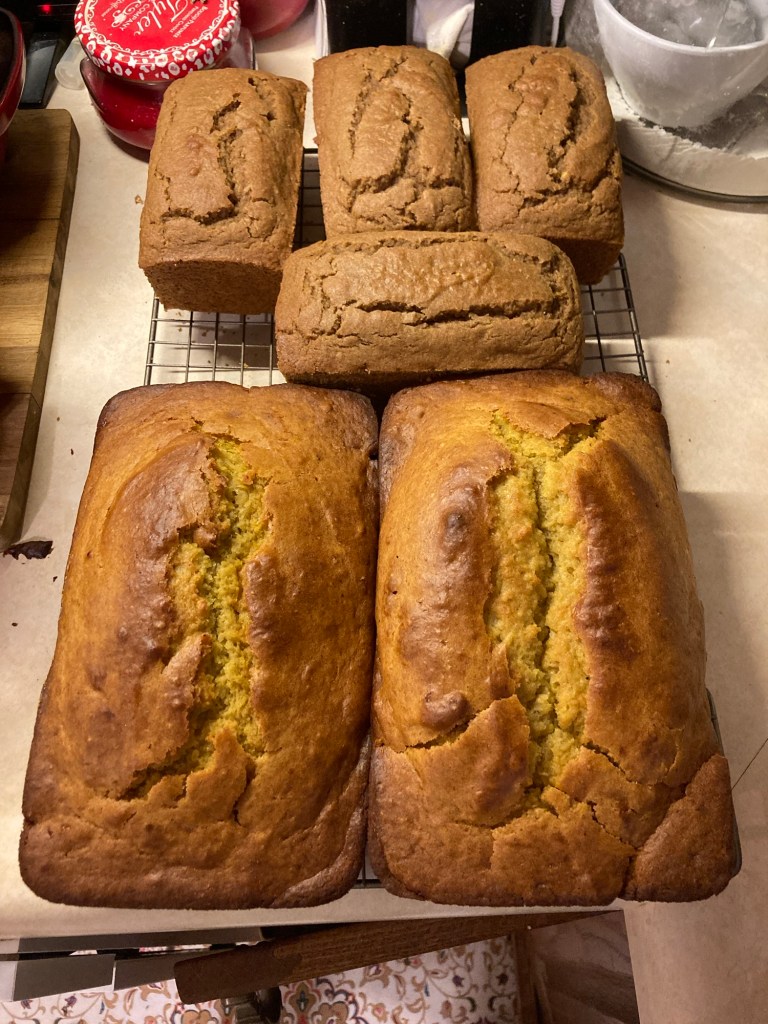
I resurrected what is probably the first recipe I ever put on my blog. I made pumpkin bread this week. Back in 2010 when I starred my blog, I made this every week as a snack for my kids. I hadn’t made it in a while, so I pulled these recipes out of the files to celebrate 3 anniversaries – the anniversary of starting my blog, the anniversary of the day we moved to our first house, and the 1 year anniversary of the day we moved to our new house.
I made the wheat version (large loaves)for the family and the gluten-free version (mini loaves) for me. If you want to try it, the wheat recipe can be found on the Family Favorites page, and the Gluten-Free version can be found on the Allergy-Friendly page. I also use one of my favorite substitutions for this batch. I substituted puréed butternut squash rather than using canned pumpkin. I actually like it better with the squash. The color isn’t as dark orange as with canned pumpkin, but I think the texture and flavor is better.
Homesteading Family is offering a free bread webinar. Carolyn will cover yeast, sourdough, and the common mistakes that cause your bread not to turn out. It’s a great mini class if you’ve been struggling with bread making at home.
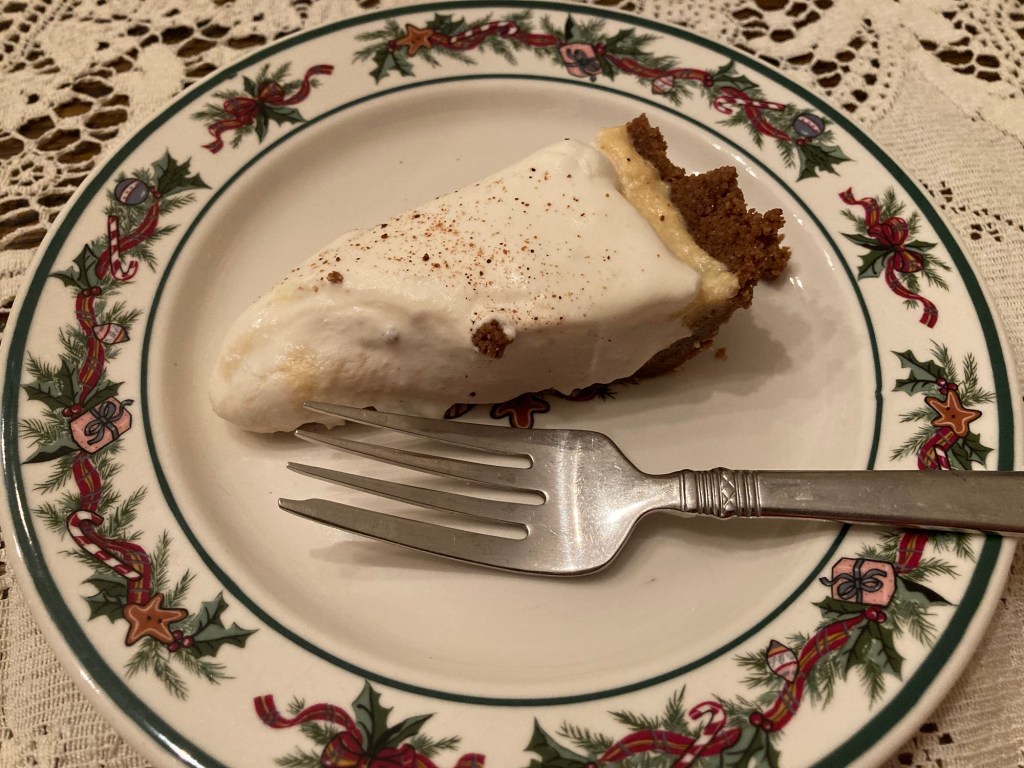
I admit that I typically do without when it comes to some gluten-free items. I often assume that they just won’t be as good and I’ll just skip it. I may need to change my attitude on that though. I was skeptical at going to the trouble of trying this GF graham cracker crust, but I was pleasantly surprised. It is flavorful, the correct texture, good leftover even after sitting with filling in it for two days, and it held together. And honestly, my non-gluten-free family preferred this pie to the one I made for the rest of them with regular graham crackers.
Here’s the recipe. Try it out. It was certainly a treat for me to have dessert that I could eat and even feel good afterwards.
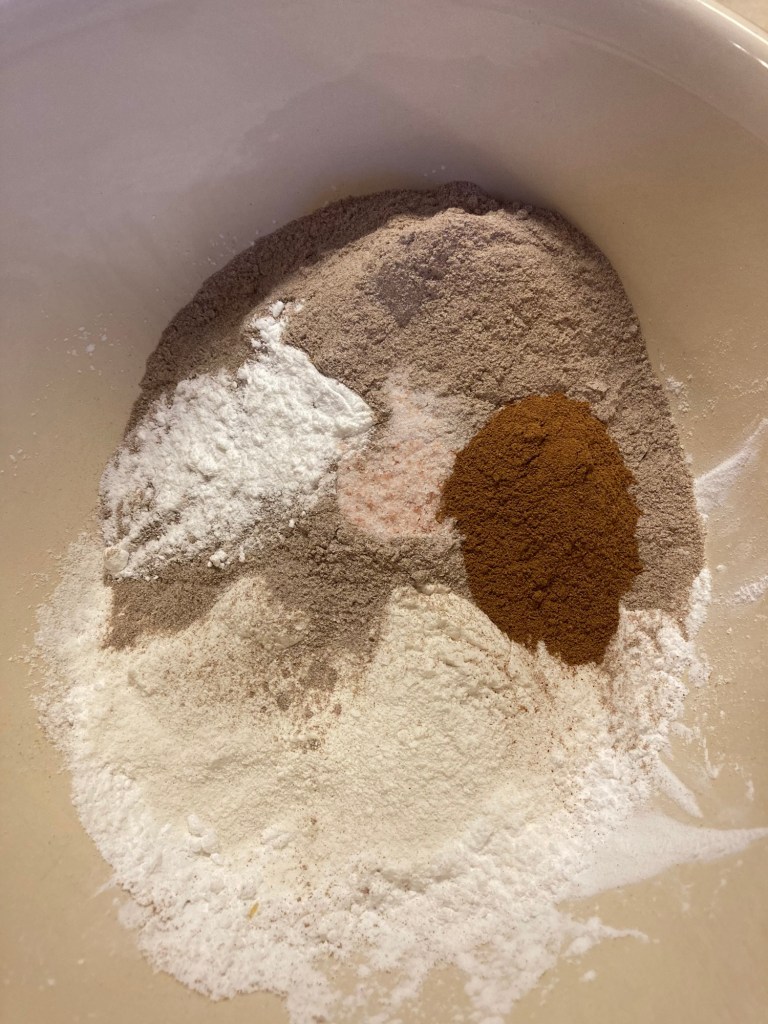
Gluten-Free Pie Crust Recipe:
Begin by combining the following in a small bowl…
1/2 cup tapioca starch
1/2 cup sweet rice flour
1 cup teff flour (or millet if you prefer a lighter color)
1/2 tsp salt
1/2 tsp baking powder
1 tsp cinnamon
4 tsp cane sugar
Note: This dough will be dark in color because of the teff. If you prefer a lighter color cracker or crust substitute millet for the teff flour.
In a separate bowl combine the liquid ingredients.
2 egg yolks
1 tsp molasses
4 tbsp melted butter
1 tsp vanilla
3-4 tbsp milk
Combine the wet and dry together. It should be thick and soft dough. Err on the side of it being sticky rather than dry.
Roll or press on to a parchment paper lined cookie sheet. Try to get it thin – like 1/2” or thinner, but don’t worry to much about it being even. They still turn out to be tasty even if they are different thicknesses. And if you plan to turn these into a crust then it really doesn’t matter anyway.
Cut through the dough to make cracker sections using a knife or pizza cutter. Then bake at 300 degrees for 30 minutes. Check and if they haven’t browned, turn the heat up to 350 or 400 for 5 minutes.
Remove and let them cool before breaking into crackers. If making a graham cracker crust follow the instructions below.
Gluten-Free Graham Cracker Crust Recipe:
Place your most of your crackers in a food processor and grind into a crumbs and add the following…
1 tsp sugar
3-4 tbsp butter
Blend adding more butter until the crumb mixture sticks together when pressed between your fingers.
Press the mixture into a pie plate using the bottom of a measuring cup. Bake the crust at 350 degrees for 12 minutes. Remove and cool before adding your filling.
I made an eggnog custard for this pie and it turned out delicious! Enjoy!
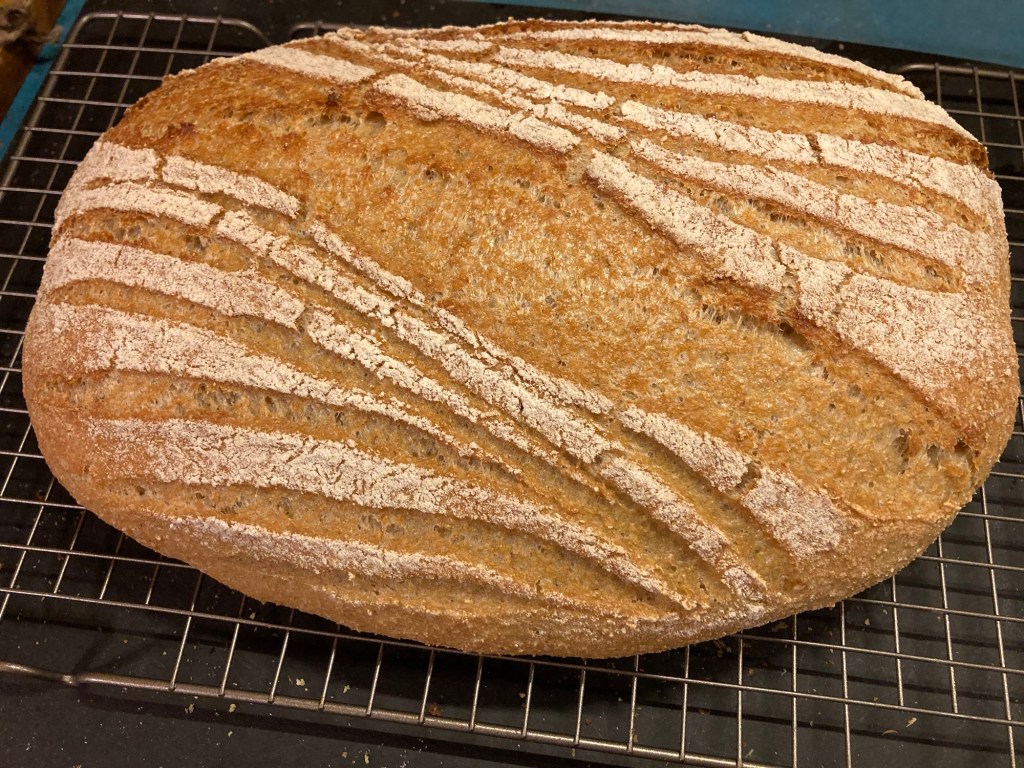
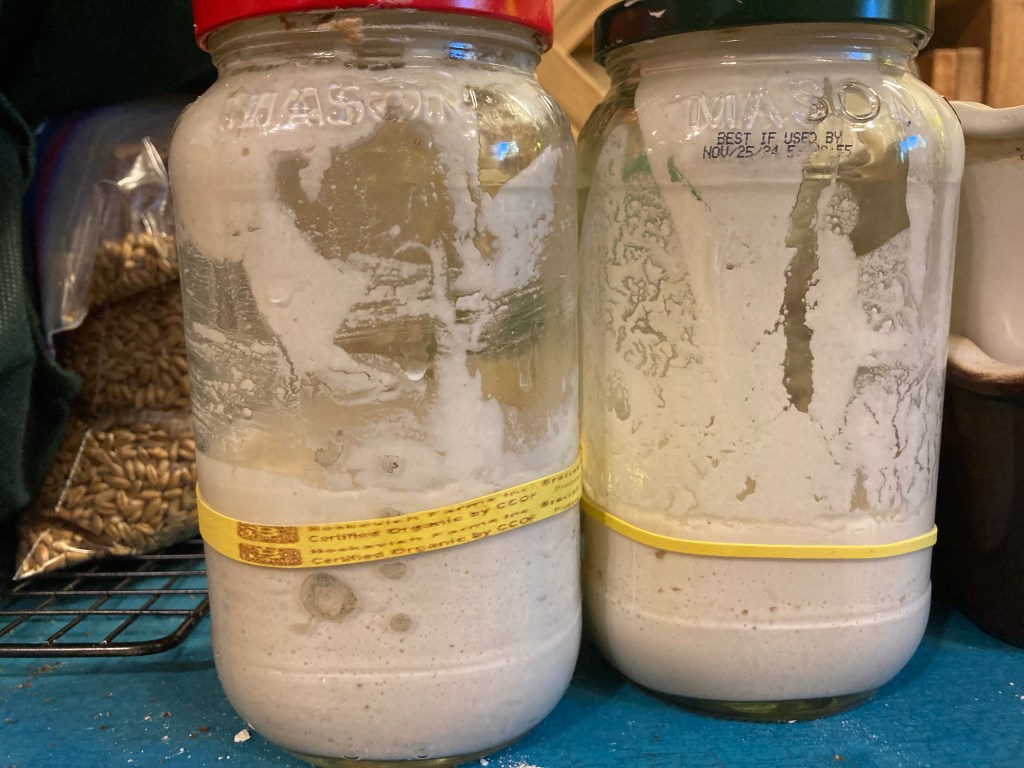
This is my gluten-free sourdough. I used it often this summer until I started to react to sourdough and other fermented foods due to a histamine intolerance. So into the fridge it went. It’s been there since June. Unpacking after our move, painting, refinishing the floors, and getting COVID means that I haven’t baked with it since. I have a friend though that asked me to make her a loaf of gluten-free sourdough bread so I thought, I’ll take this out and it will wake up, and I’ll bake some beautiful bread.
Well, it’s a week later and I still haven’t made that loaf of bread. Why? I’m still waiting for my sourdough starter to wake up! It had been stored in the fridge unfed for about 2.5 months.
But, I’m not worried. Did you know that it can take more than a week to wake up a sourdough starter that has been in cold storage for a long time.
I took this sourdough out on Wednesday. It’s now the following Wednesday and the starter is just now starting to show signs of life. A loaf of bread will be coming soon. Let me tell you how to wake up your sourdough starter after being stored for months in refrigerator.
How to Wake Up a Sourdough Starter from Long-Term Cold Storage:
1. Day 1:Take your sourdough starter out of the fridge and let it warm up on the counter overnight or for 8-12 hours.
2. Day 1, 12 Hour Mark: Feed your starter some flour and water and let it sit for 12 hours. Exact amounts aren’t super important, but over feeding is a concern here. You don’t want to over dilute your starter. My recommendation is to feed your starter about 1/4 of its total volume. So if you have 1 cup of starter, you would feed it approximately 1/4 cup of flour. If you feed it more than that, it would be like feeding someone who had just come out of a coma a five course meal. When sourdough has been hibernating for a long time, you want to gradually introduce food again or you will over dilute it and it and the microbes won’t be able to catch up and consume the food that you give it fast enough.
3. Day 2: Feed your starter again and let it sit for another 12 hours.
4. Day 2, 12 hour mark: Feed your starter a third time and let it sit for another 12 hours.
5. Day 3through Day ?: Now you wait. Let your starter sit. You may stir your starter approximately every 12 hours until you start to see tiny bubbles form. Stirring periodically will prevent mold from forming while you wait for your starter to wake back up and ferment all that flour you just fed it. Once you see bubbles forming, don’t feed or stir the starter. Let it sit until you see some rise. The starter should double or almost double in volume. This may take another 12 hours or more to double once you start seeing bubbles. Once it has risen you can resume regular feedings and your starter is ready to use again.
Don’t be surprised if it takes a week or more to wake up your starter. After your three feedings 12 hours apart, just let it sit with occasional stirrings until you start to see bubbles. Once you are seeing some bubbles, don’t touch it. Let it sit until you see some rise. This is my starter one week after taking it out of the fridge. It’s day 8 for me and I’m just now starting to see some activity. See the tiny bubbles in the jar.
This is at the end of the day, about 12 hours after I started seeing some activity on day 8.
So don’t give up on your starter. Just give it time. Almost any starter will wake up again. I’ve known so many people who throw out their mature starter because they think it’s dead. It’s not. It’s just still asleep and hungry. You can nurse it back to being healthy and active again. It just needs some time after that long, cold nap. Even if you take it out and it’s covered with black liquid, it can be revived. That black liquid is called “hooch.” It is alcohol that is given off when the microbes are starving. So, don’t throw it out. It can still be saved.
These steps for waking up your sourdough will work for any sourdough starter made of any type of flour – wheat, spelt, gluten-free, etc. So don’t assume you’ve ruined it by leaving it in the fridge so long. Give these steps a try. It’s definitely worth a try to wake it up rather than starting a new starter from scratch.
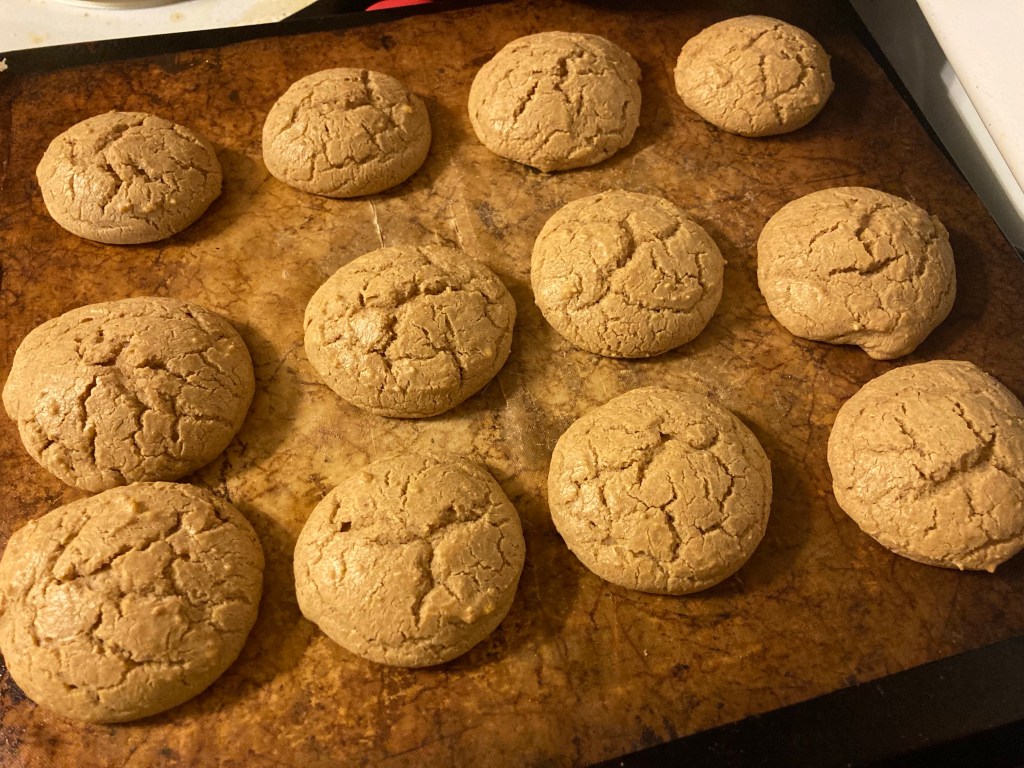
I made these cookies up to share with a friend this week. I started mixing and realized that I had added dairy and that they needed to be dairy free. Whoops! So I made two batches. One with diary and one without. So my mistake means you get two recipes out of this one. 😊