Chocolate Spice Tooth Powder

9.16.13 021This is my new favorite invention. My kids don’t like the powdered texture as much as their regular toothpaste but I like that this recipe has an indeterminate shelf life, the cloves and cinnamon disinfect, the bentonite clay absorbs the toxins and helps remineralize the teeth, and the cocoa powder whitens. I can say that I did see a noticeable difference in the whiteness of my teeth after just two uses. And it tastes pretty good too!

While researching for this recipe I found this interesting article on Science Daily about the oral health benefits of cocoa. Chocolate good for the teeth? Who is going to argue with that? Here’s what they say…

“… an extract of cocoa powder that occurs naturally in chocolates, teas, and other products might be an effective natural alternative to fluoride in toothpaste. In fact, his research revealed that the cocoa extract was even more effective than fluoride in fighting cavities. The extract…helps harden teeth enamel, making users less susceptible to tooth decay.”

That sounds pretty good to me. I actually initially thought of the cocoa powder in this recipe for taste and I thought that it might help in whitening teeth, but the research above seems to indicate that it may offer even more benefits.

9.16.13 045So, wanna try the chocolate tooth powder with me? Here’s what you do… it’s easy!

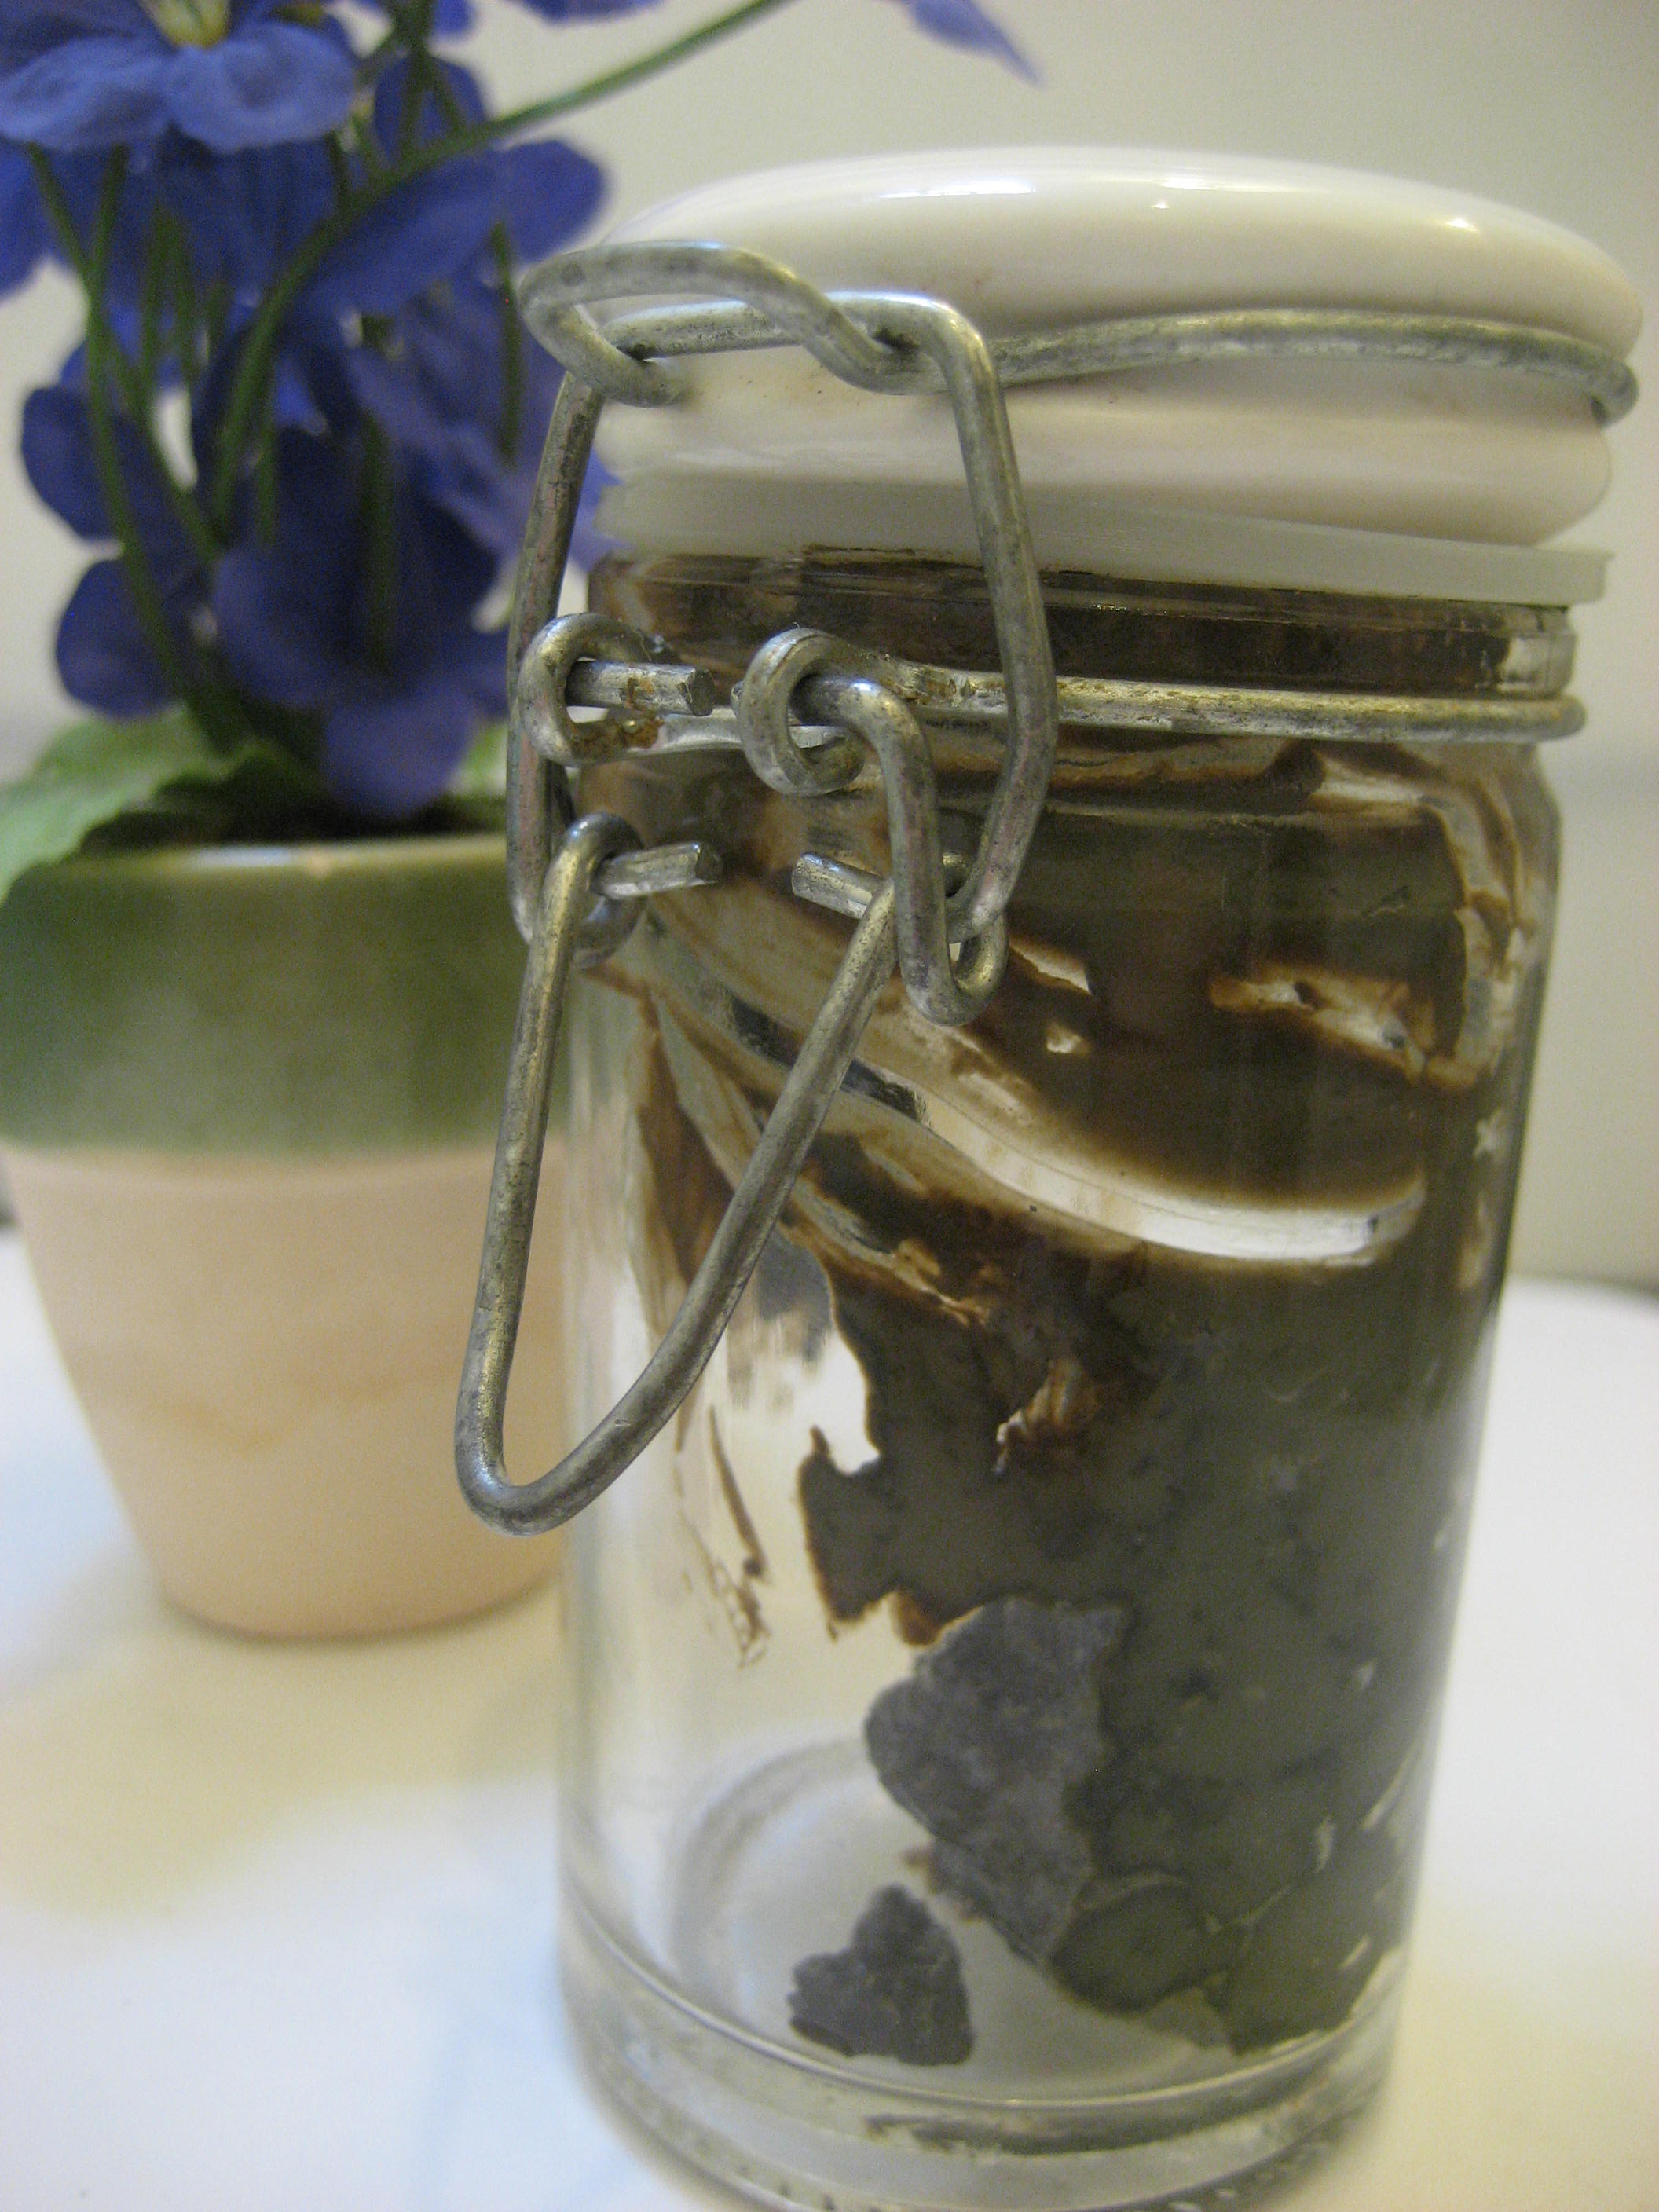
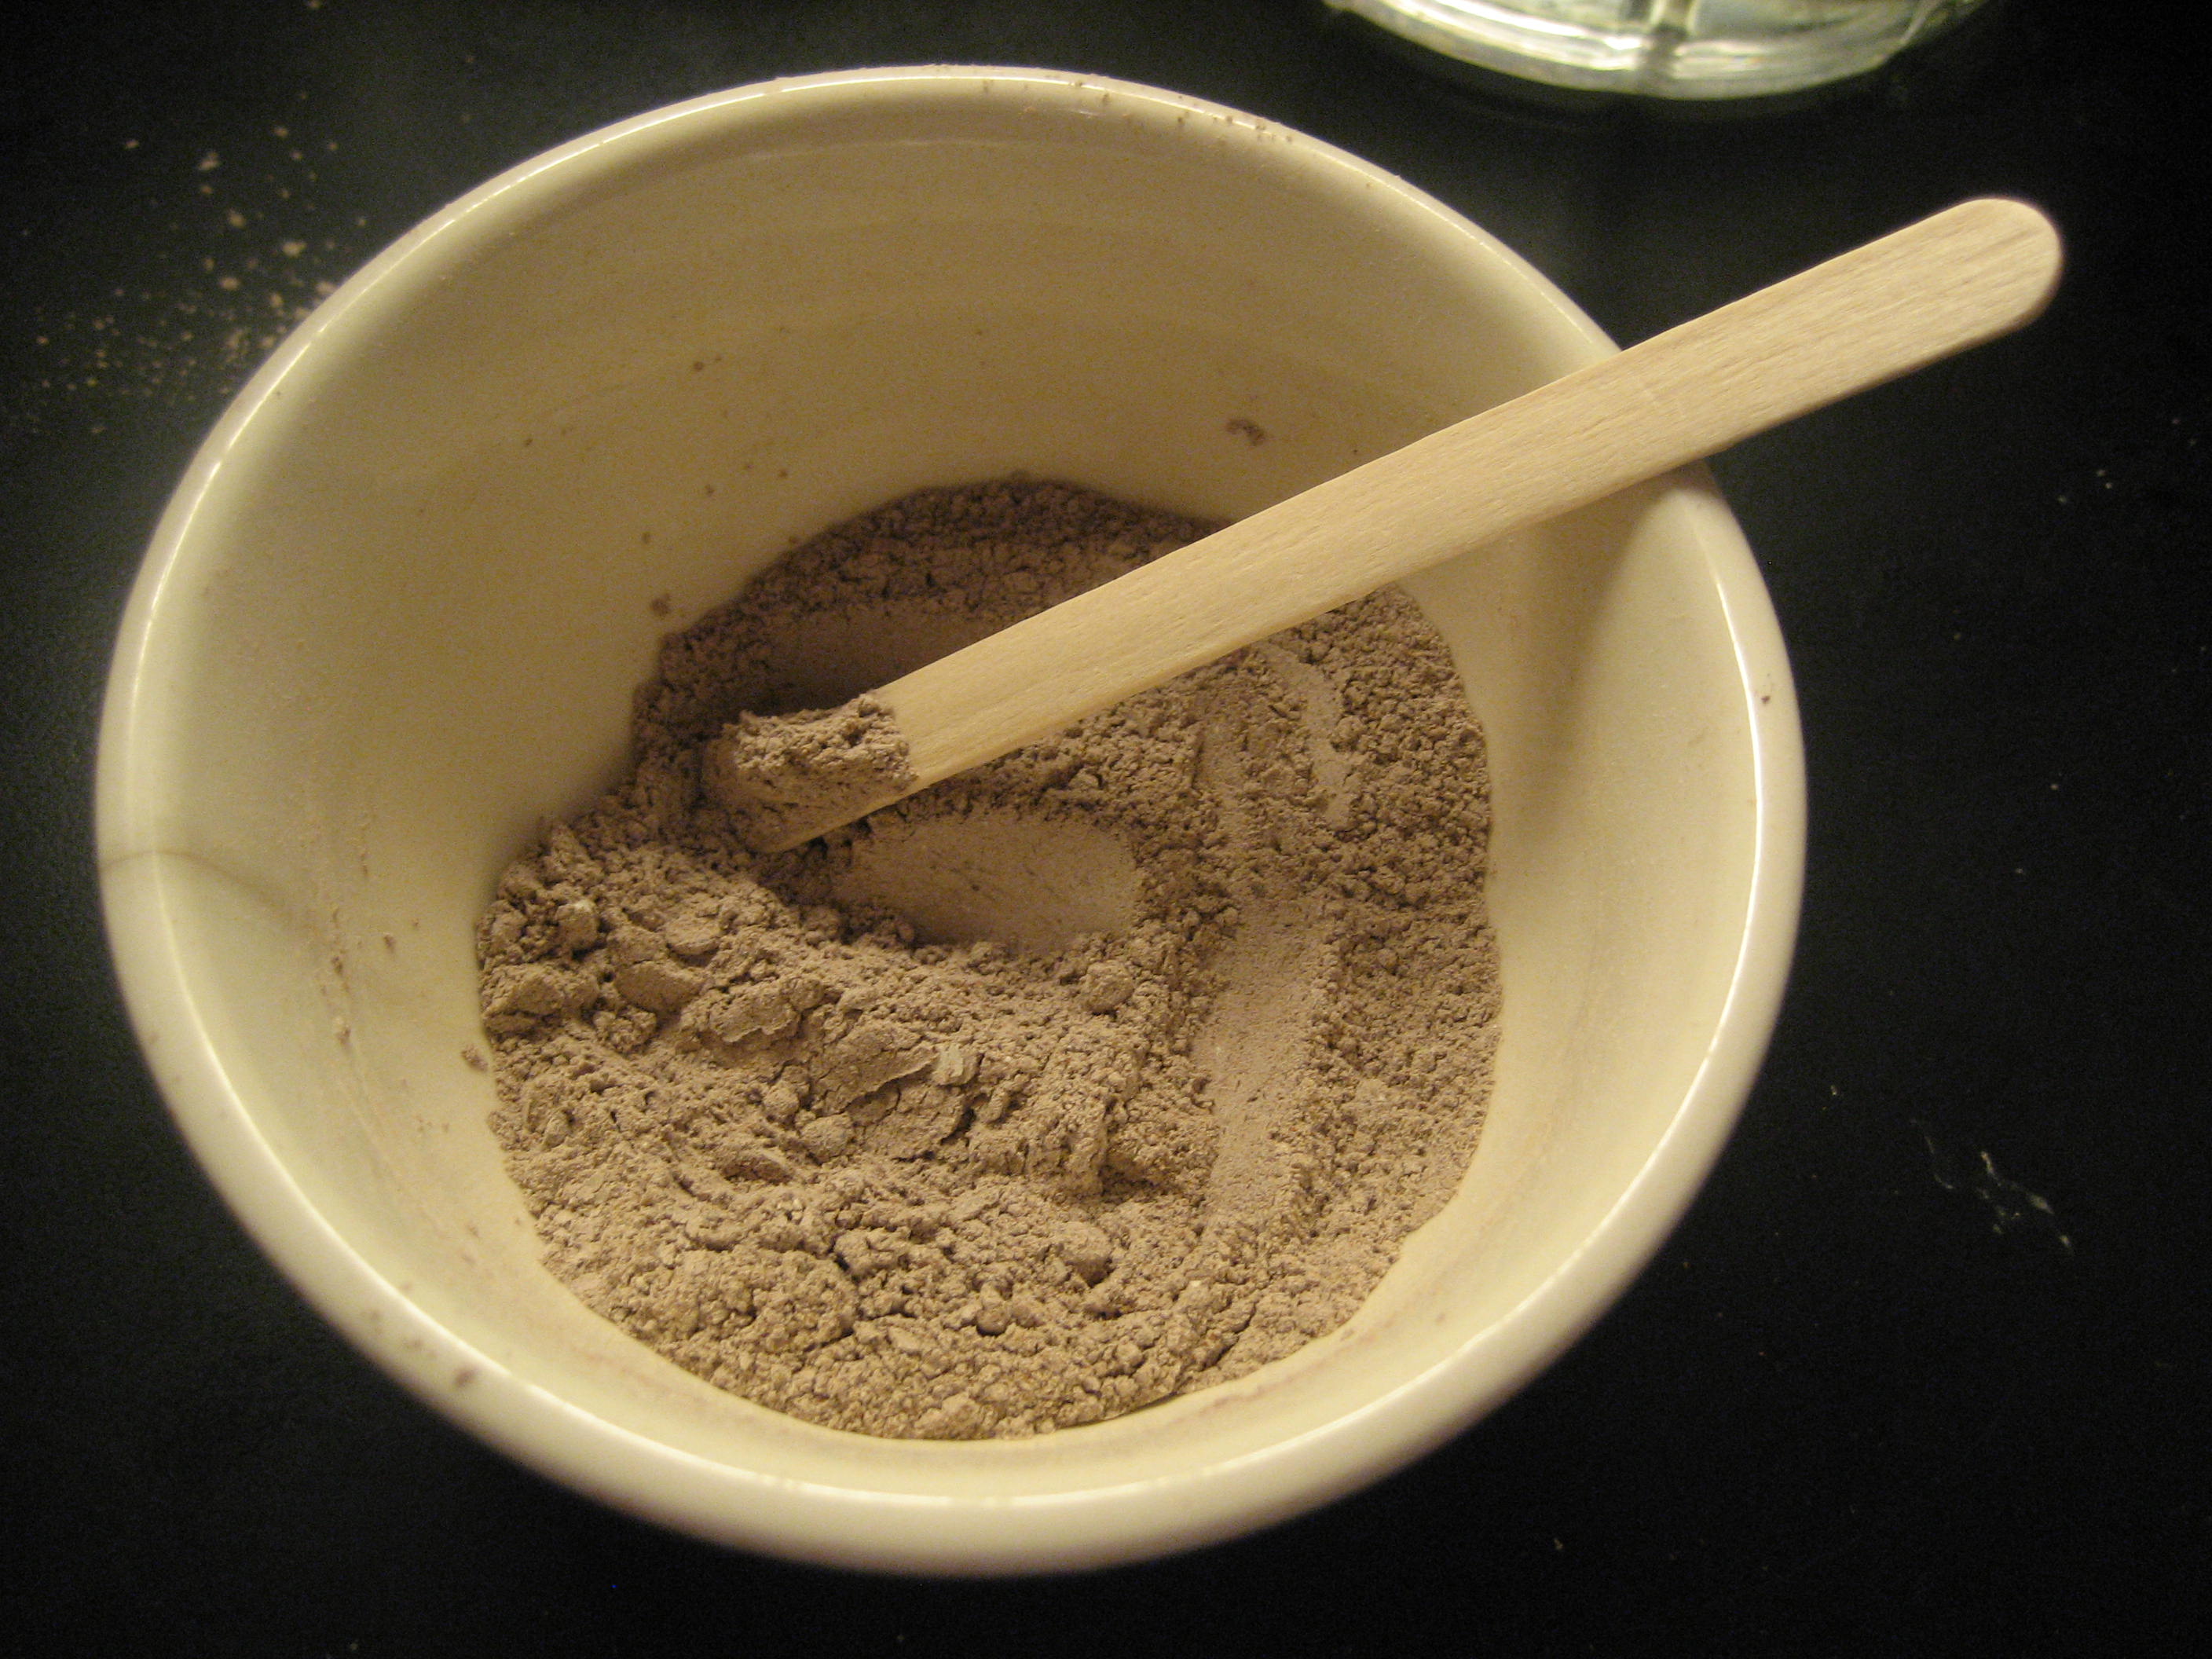
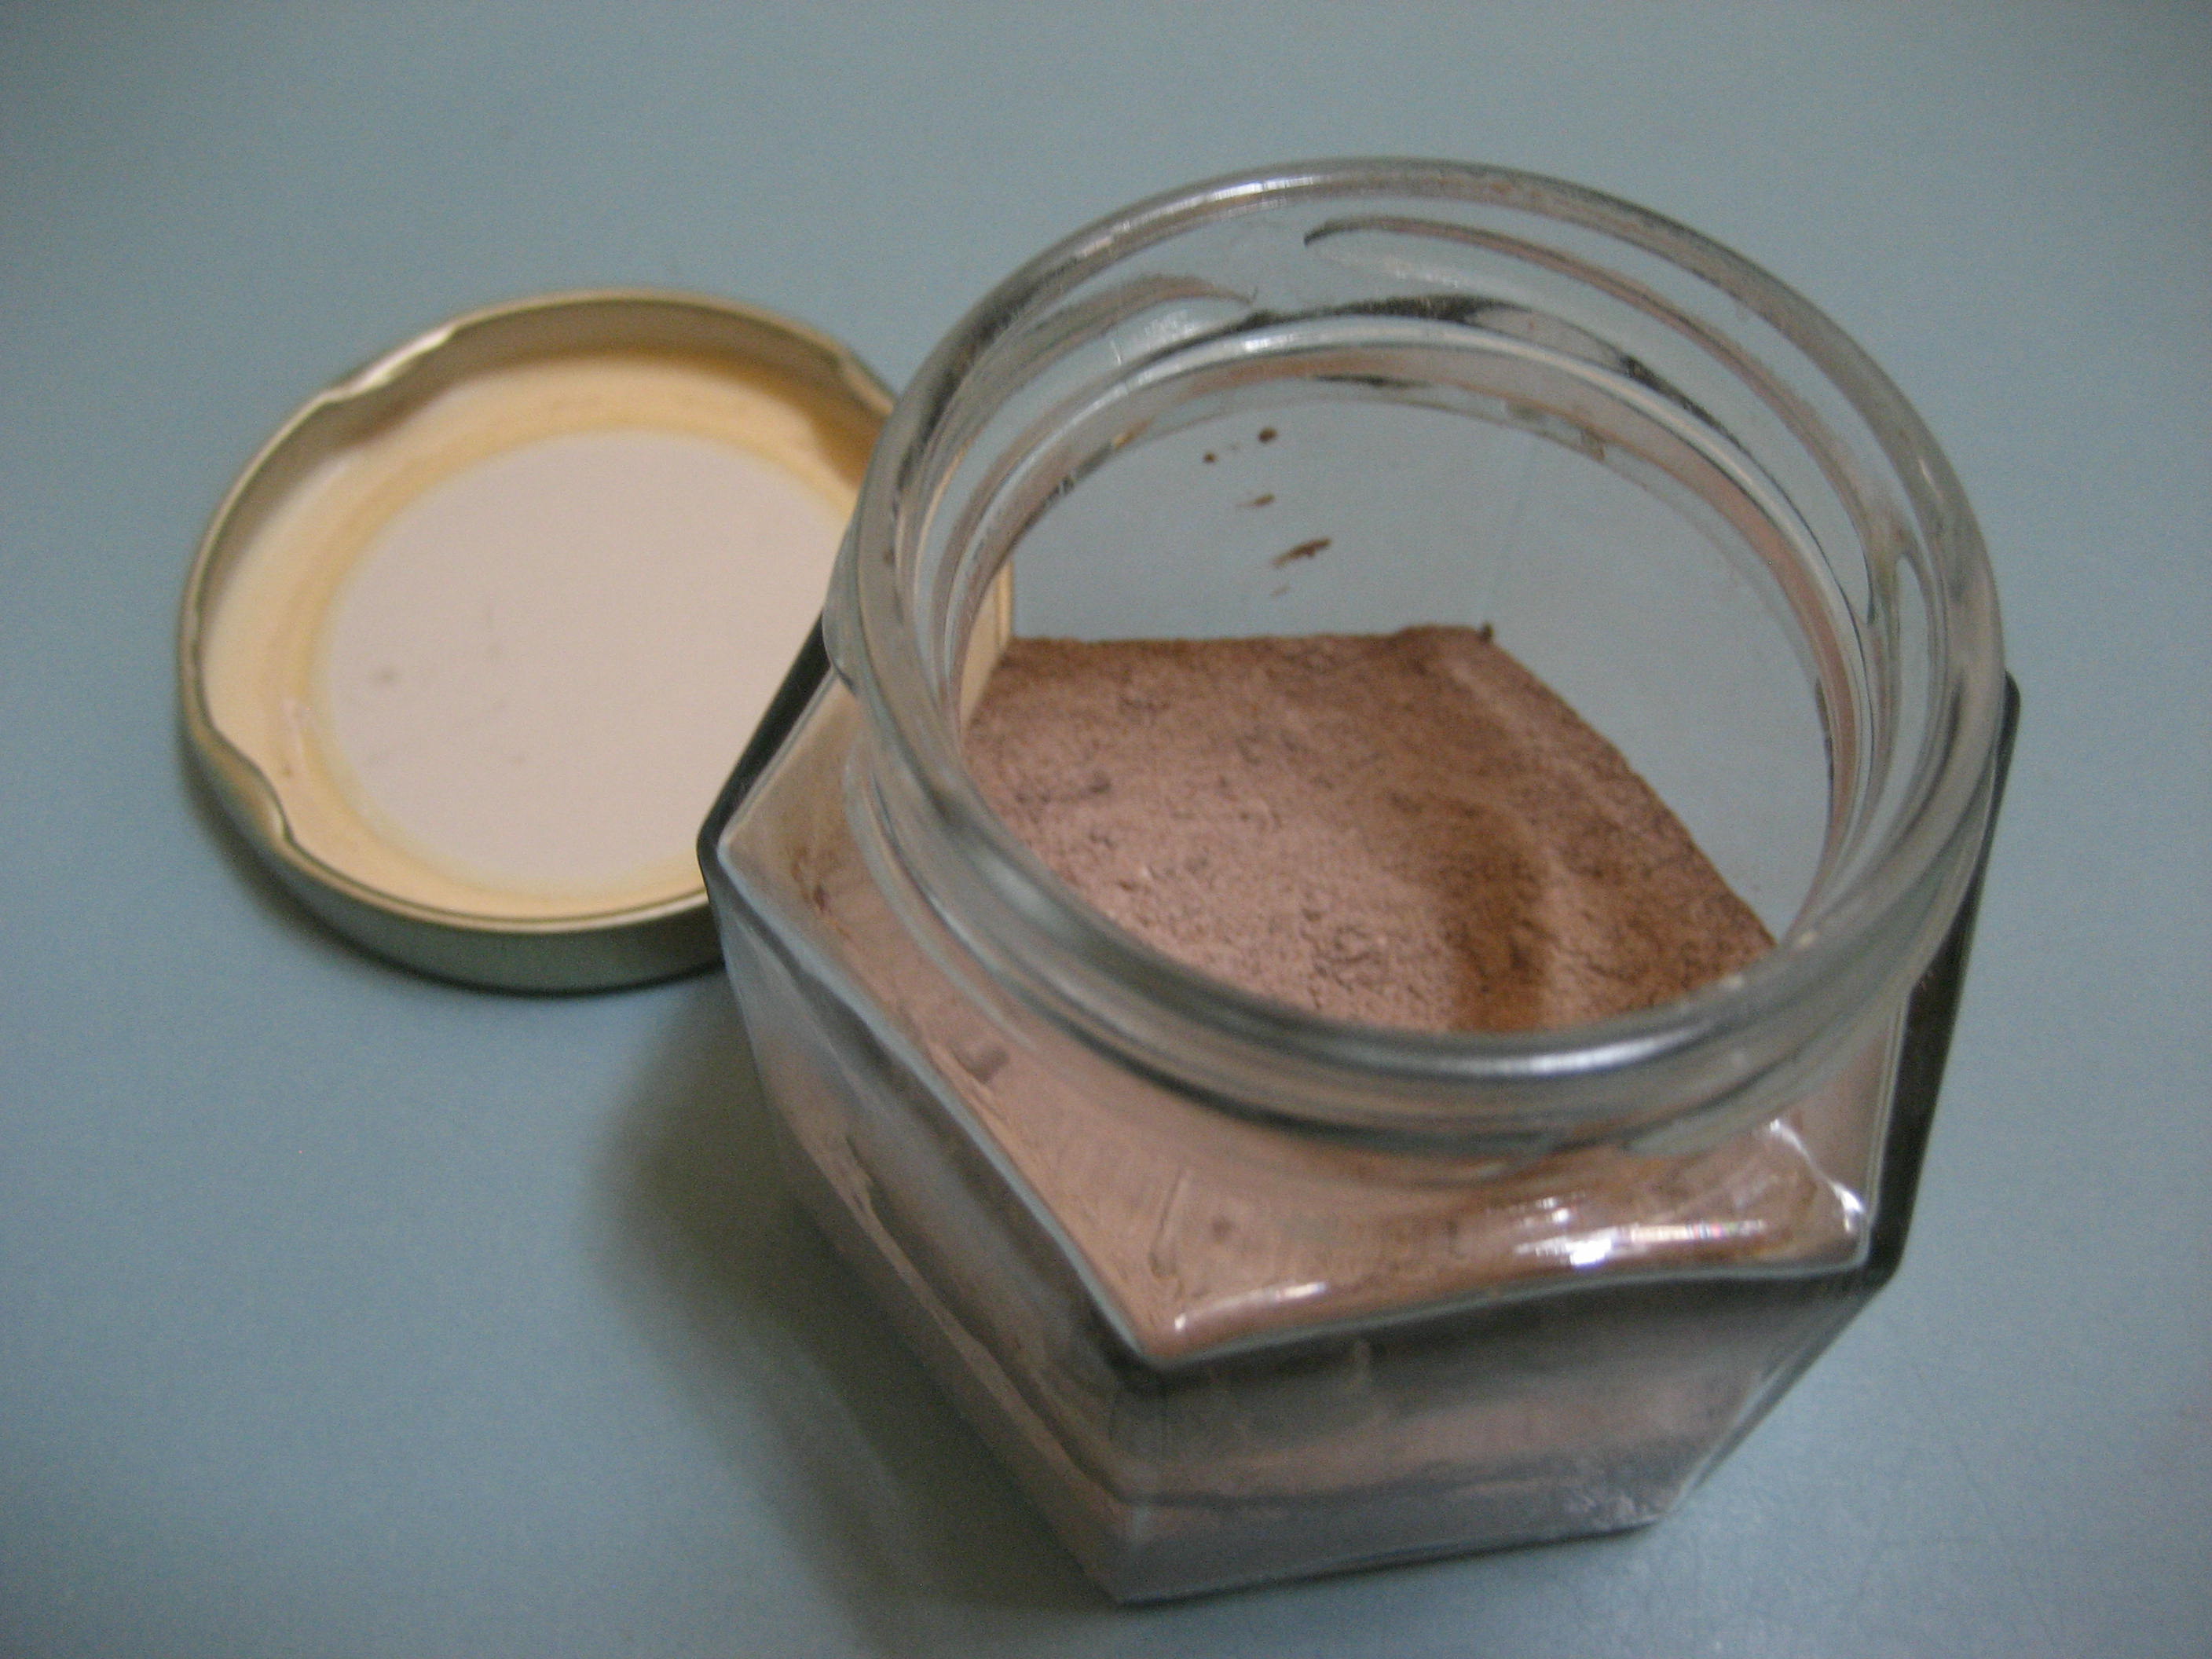
Combine 1 tsp. powdered cinnamon, 1/4 tsp. ground cloves, 1 tsp. cocoa powder, 2 tsp. bentonite clay an a pinch of sea salt. Stir and store in a glass jar (due to the bentonite clay it is best not to store in plastic or metal containers).

To use, wet your toothbrush and dip in the jar and brush adding more water to your toothbrush if needed. Try it out!

(See Disclosures and Disclaimers here.)

Mint Berry Toothpaste

9.16.13 047This is an updated version of my Candy Cane Toothpaste recipe. The taste is not drastically different, but the dried elderberries at an extra touch of flavor and color. It is made the same way as the Candy Cane Toothpaste with a few minor adjustments.

FIrst, simmer the following ingredients to make a very strong tea using 2 cups of distilled water (this will prolong the shelf life), 1/2 cup peppermint leaf (for taste and disinfecting purposes), a bit of stevia leaf (to sweeten –  doesn’t take much – 1 tsp. or less), and 1/8 cup dried elderberries,. Strain the dried herbs and reduce the liquid to about 1/2 cup. Mix your tea into bentonite clay with a popsicle stick (do not use metal utensils) until desired texture is achieved. To prolong the shelf life and add a little taste, add one drop of peppermint oil (take care not to add more than that or it may be too strong). Store the mixture in glass jar (as pictured above) and apply to toothbrush with a popsicle stick. This mixture should last about 3 months at room temperature.

Cranberry Ginger Kombucha

Cranberry-ginger Kombucha Cranberry-ginger Kombucha

We’ve been brewing kombucha lately. A friend gave us a scoby and this is our fourth or fifth batch. If you’ve never brewed kombucha you can read more about what it is and it’s health benefits at Wellness Mama.

So, once you brewed your kombucha and decanted or siphoned it off from your brewing container, add the liquid to a glass swing top jar.  Then toss in about 1/2 cup of ginger root (peeled and chopped), and 1/2 cup cranberries.  Let it sit again on your counter for about 3 more days. It will continue to ferment feeding off the ginger and the sugar in the cranberries. This second fermentation will also add carbonation. Be sure you release the carbonation about twice a day, otherwise the pressure will build, and as the swing top jar is designed to do, it will fly open on it’s own. If you want more carbonation, leave it on your counter for a day or two longer until the fermentation is slowed and there is very little pressure when you open the lid.

Once you are satisfied with the amount of carbonation, remove/strain the ginger and cranberries, and refrigerate your new delicious, homemade drink.

Our kombucha fermenting. You can see the scoby floating on the top. Our kombucha fermenting. You can see the scoby floating on the top.

For more information on starting your own kombucha you can refer to the resources below. They are my favorite books. Some of them are even on the Kindle.  Wild Fermentation is especially facinating as it discusses how to begin cultures and ferments using just the natural yeasts and bacteria in your environment without using purchased starters – after all that’s how Maggie would have done it – passing each starter along from friend to friend and neighbor to neighbor. So, if you don’t want to buy a starter go about it the old-fashioned way using a little modern technology to boost your efforts. Post on Facebook and ask your friends. You never know who secretly has kombucha brewing on their counter. And if you find someone they will certainly have a scoby to share and you’ll be off on your brewing adventure.

Wild Fermentation: The Flavor, Nutrition, and Craft of Live-Culture Foods

Real Food Fermentation: Preserving Whole Fresh Food with Live Cultures in Your Home Kitchen

How to Make Probiotic Drinks for a Raw Food Diet: Kefir, Kombucha, Ginger Beer, and Naturally Fermented Ciders, Sodas, and Smoothies

(See my Disclosures page here.)

Fall Recipes: Pumpkin, Spiced Chai and more…

10.10.10 089

“Don’t you just love New York in the Fall?”

Anyone ever see You’ve Got Mail? It may be a cliche one-liner, but there is something special about Fall. The leaves change, the air is crisp, you pull out your favorite sweaters and hats, and curl up on the couch in the evenings with your favorite afghan spread across your lap. Add these recipes to your list of fall favorites. They are delicious and they fit the season perfectly.

Pumpkin Butter

Pumpkin Butter on homemade spelt biscuits

Pumpkin Butter on homemade spelt biscuits

Chocolate Chip Pumpkin Bread
Allergy-Friendly Pumpkin Bread

Pumpkin Bread 001

Spiced Chai Tea

Christmas Chai Tea

Quinoa Cornmeal Breakfast Pudding

9.16.13 015 This yummy porridge combines protein packed quinoa and cornmeal to make a delicious and versatile breakfast dish. You can make a whole batch ahead of time to eat on all week. Or make a double batch and freeze half for later.

Start by soaking 2 cups of whole grain quinoa overnight. (Note: I recommend soaking even if your quinoa is pre-rinsed and says ready to cook. It will cook much faster and ensure that there is no residual bitter taste which can happen if not soaked/rinsed properly.)

Drain and rinse in a collander.

Pour the 2 cups of rinsed quinoa into your saucepan and add the following.

2 cups of cornmeal
1 tbls. cinnamon
1/2 tsp. powdered ginger
2 tbls. butter (or coconut oil, or other oil/fat of your choice)
1/2 tsp. salt
2 tsp. vanilla
1/2 cup brown sugar (or honey)

Stir these ingredients together to combine.

Now add enough water to cover the quinoa/corn mixture. Probably about 5 cups.

Cook over medium heat stirring often until the mixture is thick and the quinoa is less white and slightly transparent. Cover and let stand for 10 minutes. Stir in the 1/2 of dried cranberries and pour into a loaf pan or casserole dish. (Note: It is best to store this mixture in a glass casserole dish or steel loaf pan and not in cast iron. Long-term storage in cast iron may cause the cast iron to rust due to moisture. Also, I was running out of cranberries when I made the batch pictured above so there’s not many showing.)

At breakfast time scoop out the serving size that you want and heat with a little cream and brown sugar to taste if needed.

Or you can change things up a bit and cut the mixture into slices, coat with flour and fry in a bit of oil for a gluten-free granola bar on the go.

You can see my other Allergy-Friendly Recipes by clicking here.

Homemade perfume, cologne or body scents

8.30.13 031

Make your own custom perfume, cologne or body scents. Simply mix your favorite essential oils together in 1-2 ounces of a carrier oil such as olive oil or almond oil. Add more drops of essential oils for a stronger scent or less for a lighter one. Try some of the scent combinations pictured on the Beauty page.

Essential Oil Quick Reference Chart

8.8.13 009
Here’s a handy, dandy essential oil quick reference chart for my favorite essential oils. The primary properties of each oil is listed along with cautions and links to the recipes that I use them in. Be sure to do your own research first before using them topically. Otherwise, enjoy their scents in your favorite homemade products.

Probiotic Chocolate “Pudding”

130831_0000A new favorite for my kids. It’s not actually pudding mind you. But it’s very tasty and makes a great healthy dessert. Simply melt a handful of chocolate chips. (Try Enjoy Life Chocolate Chips if you need to avoid dairy, nuts or soy.) To cool the chocolate down a bit stir in a bit of cream, coconut oil, or almond milk depending on your dietary needs. Then mix in 2-3 heaping spoonfuls of your favorite yogurt. I like plain whole milk yogurt. And just like that you have a yummy mock chocolate pudding that is delicious and full of probiotic goodness. Eat up kids.

Mineral and Herb Deodorant Spray

8.30.13 049This is a new and improved deodorant spray recipe. It combines the antibacterial properties of herbs, ph correcting properties of apple cider vinegar, and the added benefit of getting a daily dose of magnesium which is efficiently absorbed through your skin.

Deodorant Spray Recipe:
32 oz. Magnesium Oil (recipe by Wellness Mama).
32 oz. Herbal infused vinegar

Mix equal amounts in a spray bottle. Spray on. Will keep indefinitely in your medicine cabinet.

(Note: Both the vinegar and magnesium oil will sting if applied to freshly shaved skin. So do not apply if you have just shaved your underarms.)

Herbal infused vinegar

8.30.13 047I’ve been making herbal infused vinegars lately. I started making one to use as a hair rinse and found that I like it in my new deodorant recipe too (coming soon).

It’s easy to make. Just takes a little time.

Here’s what you need….
1 – 32 oz. glass jar and lid
apple cider vinegar
1 cup herbs of choice (I use nettle, lavender and rosemary)

Place the dried herbs in the glass jar. Pour the apple cider vinegar over the herbs filling up to one inch from the top of the jar. Seal. Let it sit for 3 weeks agitating the jar daily. After 3 weeks (give or take) strain the herbs and rebottle using in the shower as a hair rinse, toner for your face, or as an ingredient in homemade deodorant.

For complete list of all my homemade recipes visit the General Store.

Allergy Friendly: Stir Fry!

Beef stir fry with ginger and garlic.

If you can’t have sesame and soy eating Chinese, Korean or other Oriental dishes is out. Here are some my favorite ways to adapt your favorite Chinese food to make them allergy friendly.

These recipes are free of soy, sesame, egg, dairy, nuts and either corn or wheat.

Start with a pot of your favorite rice cooked according to the package directions (I like brown rice).

Beef Stir Fry:
Next saute 1 1/2 lbs of  your favorite cut of beef cut into thin strips with salt and pepper. Throw a 6 cloves of garlic, 2 tbls. of fresh ginger root into the food processor and process until minced and add to the pan. Now add your favorite veggies – onions and peppers, broccoli and carrots, string beans, etc. Cook until the beef is done and the veggies are fork tender.

Chicken Stir Fry

Chicken Stir Fry

Chicken Stir Fry:
Begin by cutting uncooked chicken breasts into strips and saute with your oil of choice. Chop your favorite veggies – mushrooms, broccoli, carrots, onion, etc. Add the veggies to the pan stirring often. Next, prepare your sauce. Combine 2 cups of chicken stock, 1/4 cup of vinegar, 3 tbls. honey, salt/pepper (to taste), 2 tsp. garlic powder, crushed red pepper (optional). Whisk to combine. Add 2 tbls. of corn starch and stir into the sauce to thicken. (If you can’t use corn starch, then add some extra oil to your meat before you add your veggies and sprinkle 2 tbls. of flour (wheat or spelt) over the chicken. This will coat the chicken and combine with the fat to make a roux which will then thicken the sauce when you add it.) Pour over the meat and continue to cook over medium heat, stirring until thickened.

Click here to see my other allergy friendly recipes.