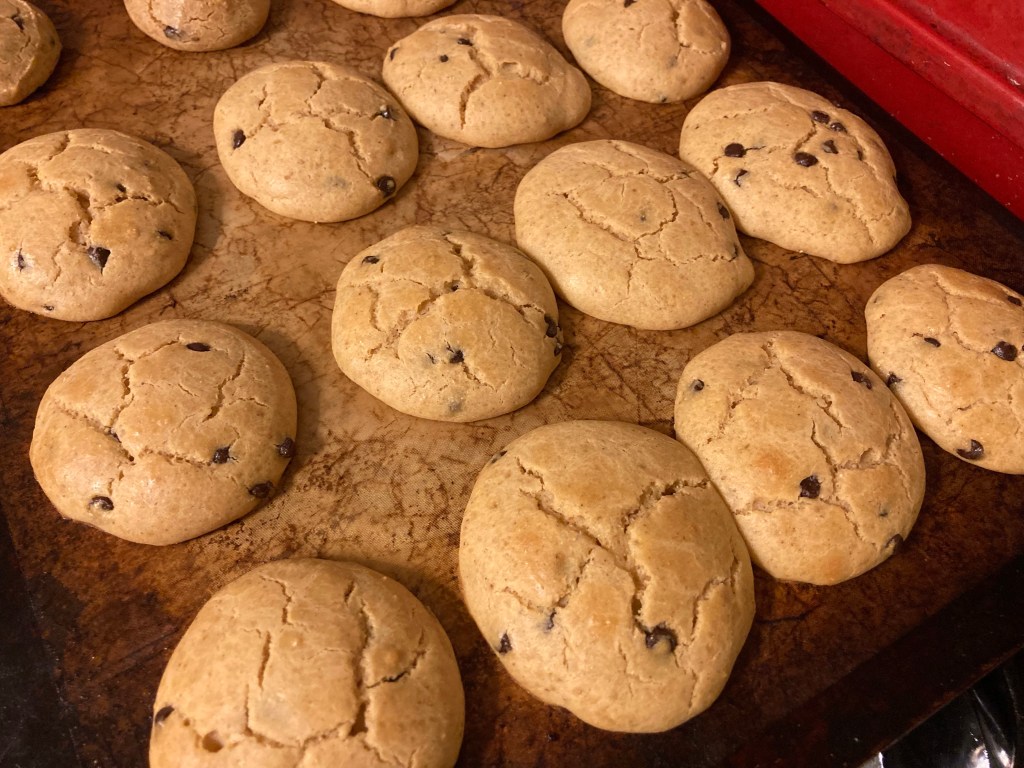
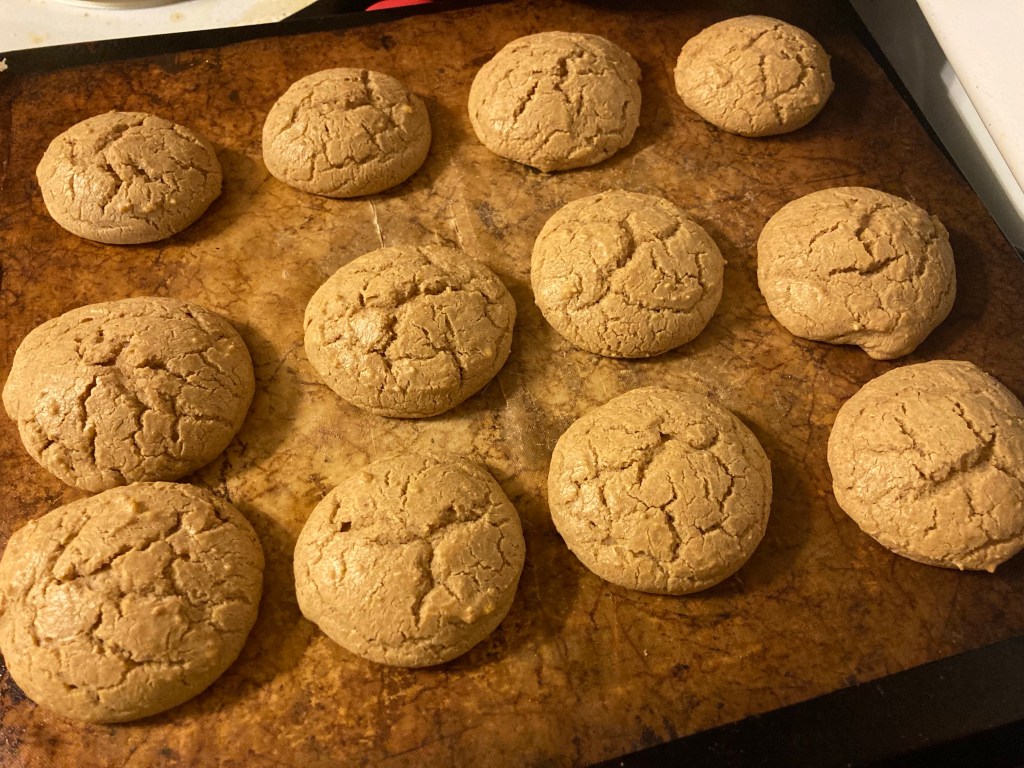
I eliminated gluten from my diet about 3 years ago. I realized that wheat was aggravating some of my other health symptoms. I’ve tried to various ancient wheats over the years – spelt, khorasan, einkorn, etc. to see if I could tolerate any of those, but to no avail.
I’ve recently discovered that I seem to tolerate Emmer which is a lesser known ancient wheat. I’ve been trying it in small amounts to try to build up the tolerance in my system slowly. This recipe is a result of my experimentation.
It is mostly gluten-free, with a little bit of Emmer. Substitutions are noted. in the recipe in parentheses.
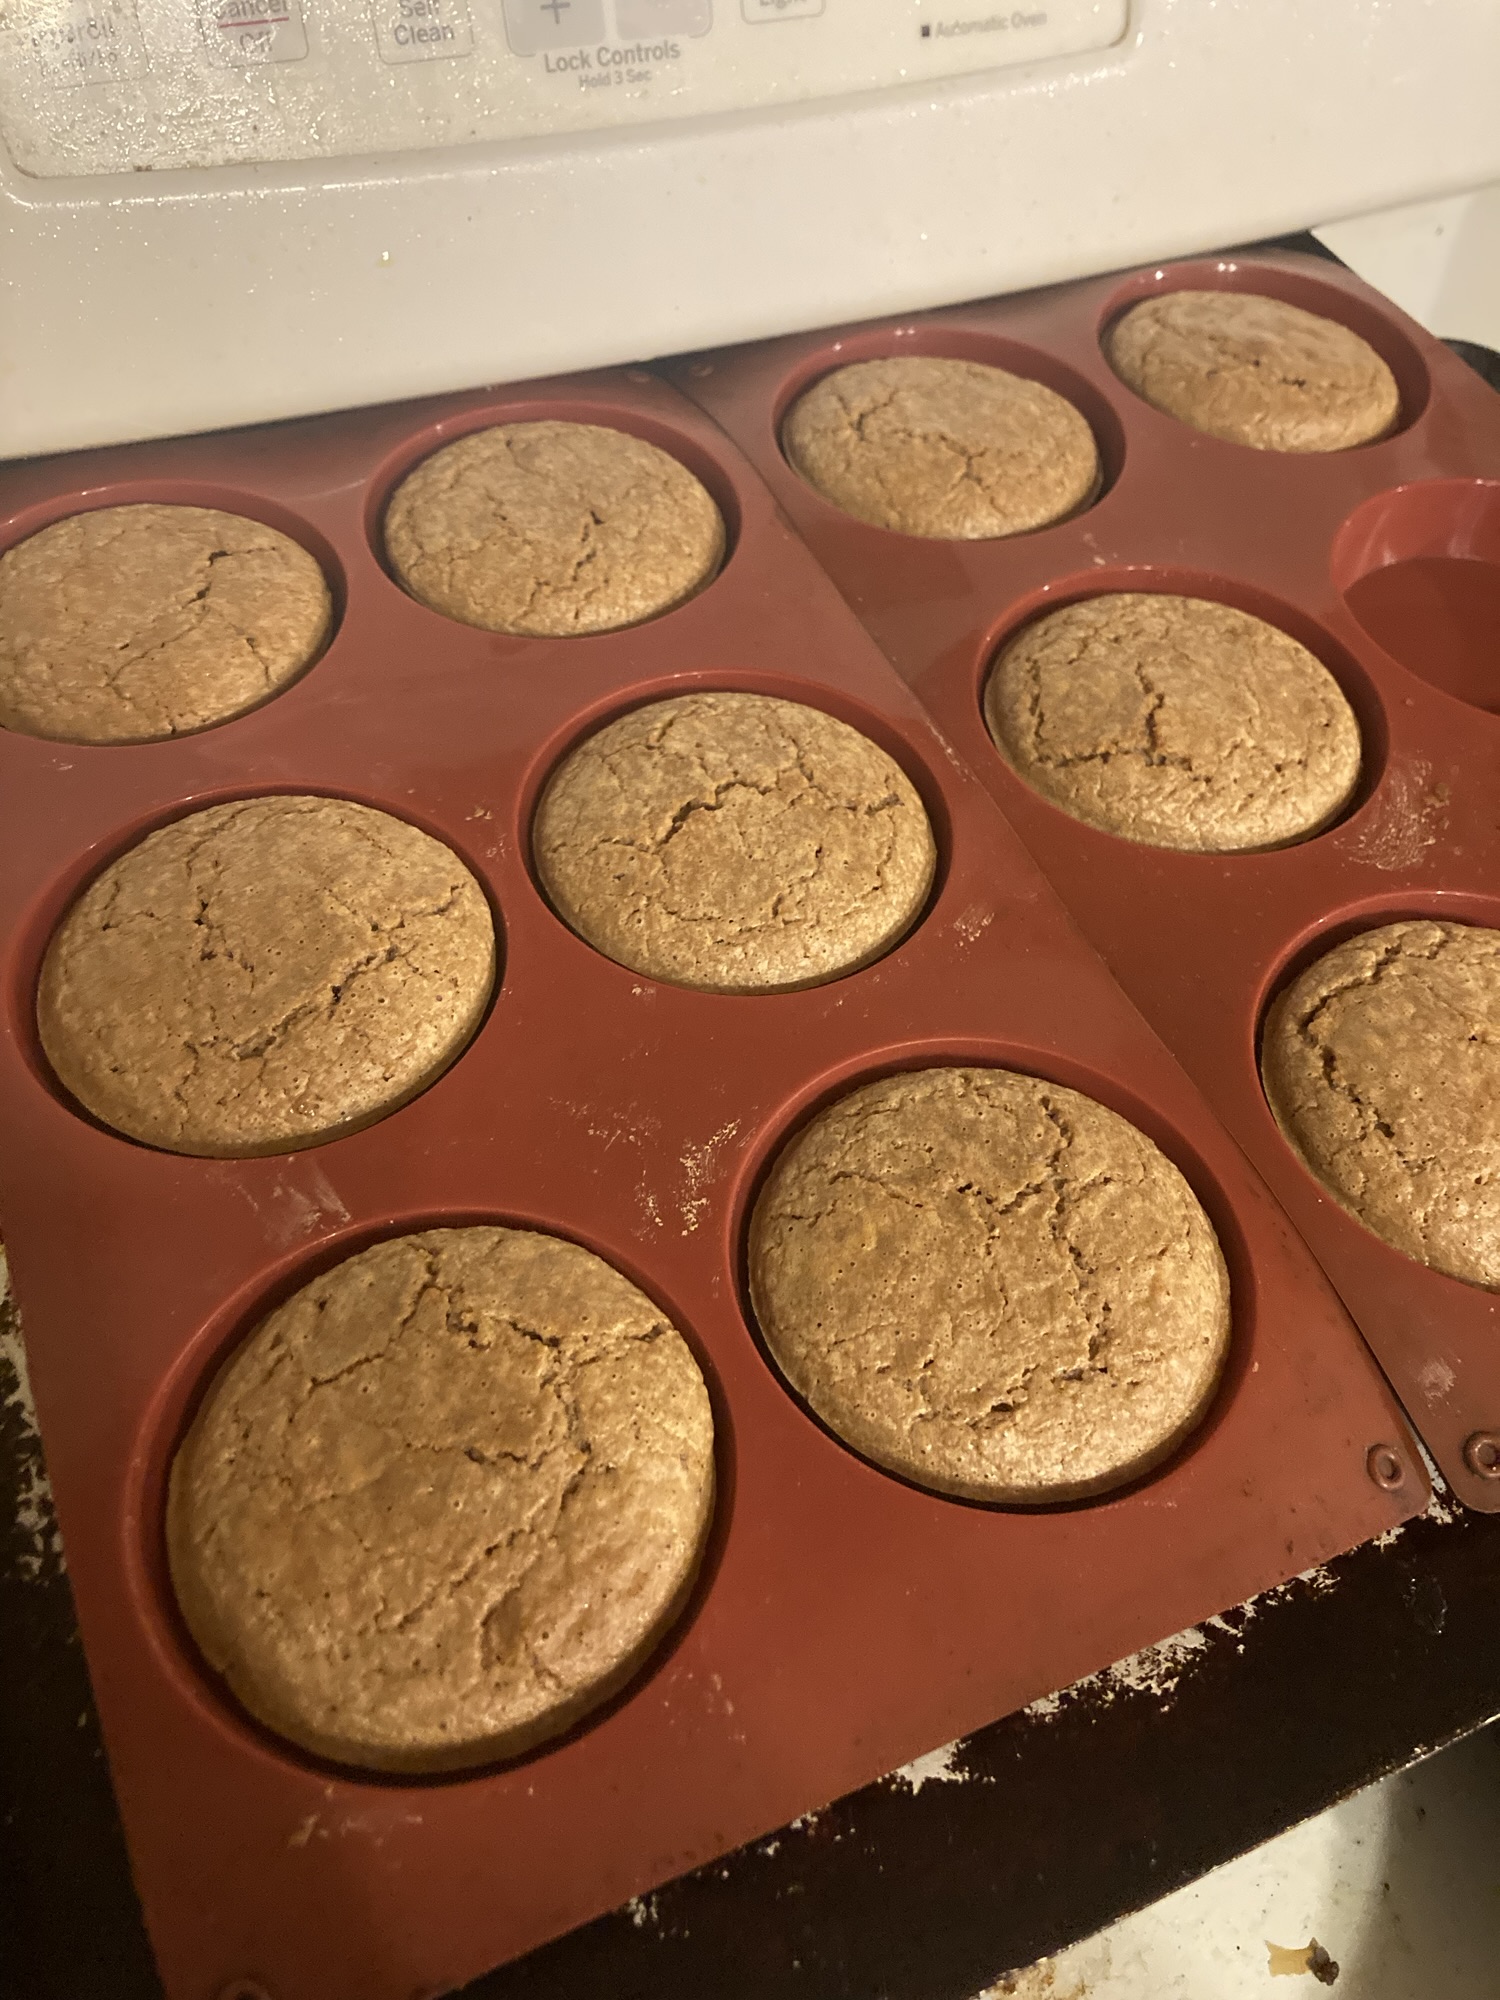
Hybrid Gluten-Free, Ancient Wheat Biscuit Recipe:
3/4 cup Arrowroot Powder (or Tapioca Starch)
1/2 cup Teff Flour (or Buckwheat, Millet, Sorghum, or Oat flours)
3 tbsp. Emmer (Spelt, Khorasan, or Einkorn)
1/2 tsp salt
2 tsp baking powder
Mix the above together and then add….
1 cup milk (or non-dairy milk, or water)
2 tbsp melted butter (or oil)
1 egg (or 3 egg yolks, or 2 tbsp psyllium husk dissolved in 1/2 cup water to make the recipe egg free)
Combine the wet and dry ingredients together. Let the mixture sit for 10 minutes to hydrate.
Preheat the oven to 375 degrees.
Pour into silicone liners and bake for 20-24 minutes. Cool on wire racks.
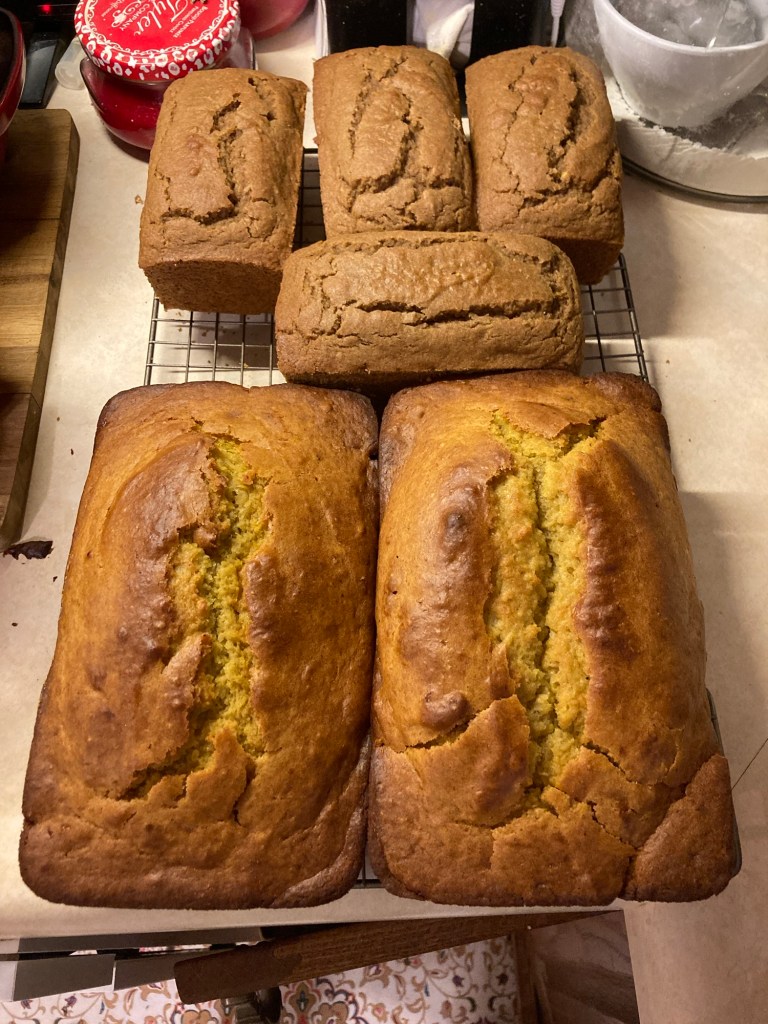
I resurrected what is probably the first recipe I ever put on my blog. I made pumpkin bread this week. Back in 2010 when I starred my blog, I made this every week as a snack for my kids. I hadn’t made it in a while, so I pulled these recipes out of the files to celebrate 3 anniversaries – the anniversary of starting my blog, the anniversary of the day we moved to our first house, and the 1 year anniversary of the day we moved to our new house.
I made the wheat version (large loaves)for the family and the gluten-free version (mini loaves) for me. If you want to try it, the wheat recipe can be found on the Family Favorites page, and the Gluten-Free version can be found on the Allergy-Friendly page. I also use one of my favorite substitutions for this batch. I substituted puréed butternut squash rather than using canned pumpkin. I actually like it better with the squash. The color isn’t as dark orange as with canned pumpkin, but I think the texture and flavor is better.
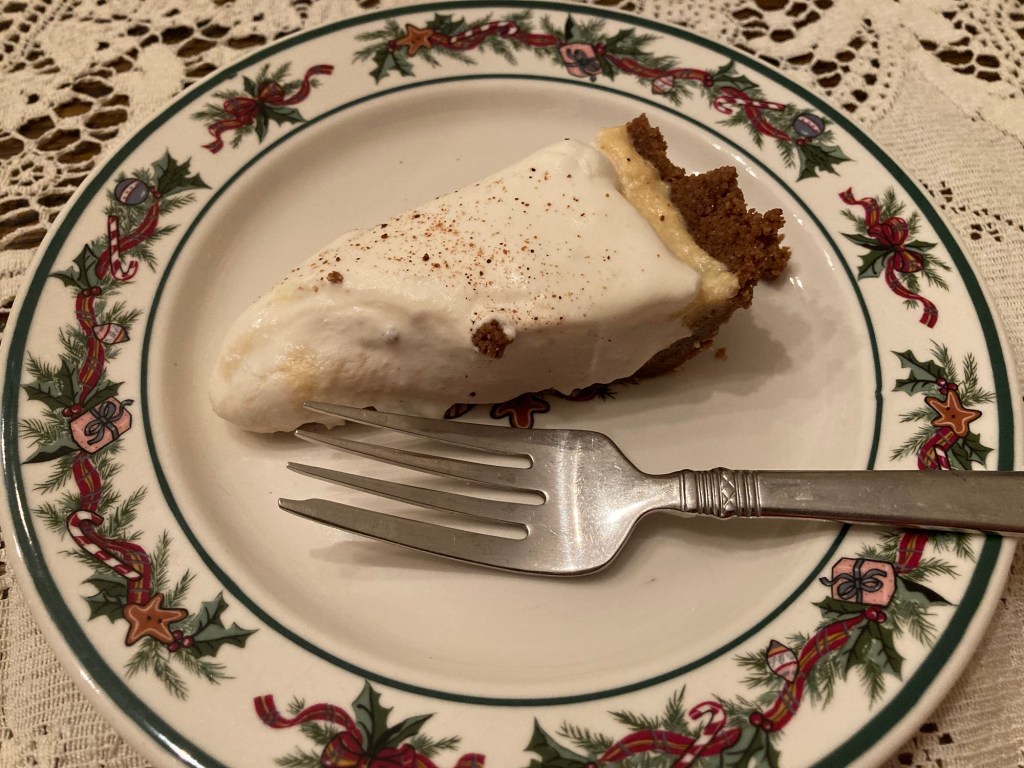
I admit that I typically do without when it comes to some gluten-free items. I often assume that they just won’t be as good and I’ll just skip it. I may need to change my attitude on that though. I was skeptical at going to the trouble of trying this GF graham cracker crust, but I was pleasantly surprised. It is flavorful, the correct texture, good leftover even after sitting with filling in it for two days, and it held together. And honestly, my non-gluten-free family preferred this pie to the one I made for the rest of them with regular graham crackers.
Here’s the recipe. Try it out. It was certainly a treat for me to have dessert that I could eat and even feel good afterwards.
Gluten-Free Pie Crust Recipe:
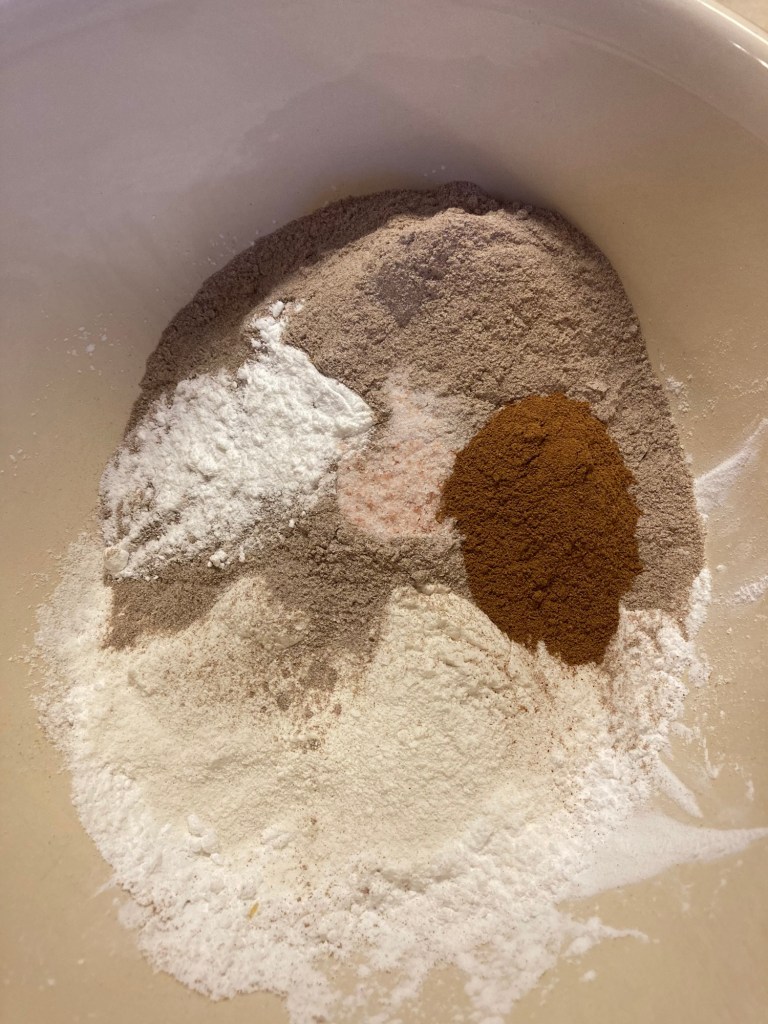
Begin by combining the following in a small bowl…
1/2 cup tapioca starch
1/2 cup sweet rice flour
1 cup teff flour (or millet if you prefer a lighter color)
1/2 tsp salt
1/2 tsp baking powder
1 tsp cinnamon
4 tsp cane sugar
Note: This dough will be dark in color because of the teff. If you prefer a lighter color cracker or crust substitute millet for the teff flour.
In a separate bowl combine the liquid ingredients.
2 egg yolks
1 tsp molasses
4 tbsp melted butter
1 tsp vanilla
3-4 tbsp milk
Combine the wet and dry together. It should be thick and soft dough. Err on the side of it being sticky rather than dry.
Roll or press on to a parchment paper lined cookie sheet. Try to get it thin – like 1/2” or thinner, but don’t worry to much about it being even. They still turn out to be tasty even if they are different thicknesses. And if you plan to turn these into a crust then it really doesn’t matter anyway.
Cut through the dough to make cracker sections using a knife or pizza cutter. Then bake at 300 degrees for 30 minutes. Check and if they haven’t browned, turn the heat up to 350 or 400 for 5 minutes.
Remove and let them cool before breaking into crackers. If making a graham cracker crust follow the instructions below.
Gluten-Free Graham Cracker Crust Recipe:
Place your most of your crackers in a food processor and grind into a crumbs and add the following…
1 tsp sugar
3-4 tbsp butter
Blend adding more butter until the crumb mixture sticks together when pressed between your fingers.
Press the mixture into a pie plate using the bottom of a measuring cup. Bake the crust at 350 degrees for 12 minutes. Remove and cool before adding your filling.
I made an eggnog custard for this pie and it turned out delicious! Enjoy!
I made these cookies up to share with a friend this week. I started mixing and realized that I had added dairy and that they needed to be dairy free. Whoops! So I made two batches. One with diary and one without. So my mistake means you get two recipes out of this one. 😊
My youngest is struggling with a restricted diet at the moment due to high histamine levels which means she can’t have yeast or sourdough bread. So, I’ve been scrolling back through my recipes to try to think of what to make for her. This one is just the ticket. I refreshed this old recipe and just pulled a loaf out of the oven for her this morning. My house smells delicious and now my only problem is how to keep the other kids from eating it all before she gets some.
5 Minute Biscuit Bread Recipe for Low Histamine Diets:
In a medium sized mixing bowl combine the following:
2 cups all purpose flour
1 1/2 cups whole wheat or spelt (best if freshly milled)
1 tsp salt
2.5 tsp baking powder
Give it a quick stir and then add…
2 tbsp honey
1 tbsp molasses
1/4 cup oil
2 cups water
Stir until all the ingredients are just moistened. Pour into a greased loaf pan. Bake at 400 degrees for 15 minutes, then reduce the heat and bake for 50 minutes or until it tests done in the center with a toothpick.
This recipe mixes up super quick and is a great alternative when you can’t have yeast or sourdough but want a yummy slice of bread.
This recipe came about by accident. I was experimenting with recipe that I could use for Christmas morning as a gluten-free sweet roll option, and happily my mistake turned out delicious. The nice thing is that this recipe is really a three-in-one recipe. With the same base recipe you can make a delicious gluten-free sweet roll or biscuit either egg nog or cinnamon roll flavored, but one little tweak and it is an excellent whole grain gluten-free English Muffin.
So if you have any leftover egg-nog from Christmas Eve, pull it out of the fridge and give this recipe, or one of its variations a try.
Gluten-free Sweet Egg Nog Biscuit Recipe:
Combine the following into a bowl:
1 egg yolk
2/3 cups egg nog
3 tbsp oil
1/2 tsp salt
2 tsp lemon juice
Whisk to combine.
In a separate bowl add…
1/2 cup sweet rice flour
1/2 cup tapioca starch
1/3 cup teff
1 tsp baking powder
1 tbsp frozen or hard butter, grated into flour
After the butter has been stirred into the flour add your liquid ingredients and stir until all the flour is combined and the batter has a light and fluffy texture. It should be the texture of a thick cake batter. Add more flour or liquid as needed. Cover and let the batter rest for 30 minute. Don’t skip the rest period or the final texture will be sub-par.
Preheat the oven to 375 degrees. Pour into greased crumpet rings laid out on a cookie sheet over parchment paper. (I like reusable parchment paper. Have you tried it?)
Bake at 375 for 20 minutes. Gently remove from rings and cool on a wire cooling rack.
These are delicious served warm with butter and a little sugar sprinkled on top.
Cinnamon Roll Biscuit Recipe:
For this version make the following changes to the above recipe.
Add 1 tsp cinnamon to the dry ingredients.
Use 2 egg yolks rather than one, 1/2 cup heavy cream, 1/4 cup of milk, and 4 tsp of sugar in place of the egg nog.
Gluten-Free English Muffin Recipe:
Follow the base recipe at the beginning of this post adding 2 egg yolks and subbing 1/2 cup of heavy cream and 1/4 cup of milk for the egg nog plus 1/2 tsp of sugar.
Whichever variety of these recipes that you choose, they will turn out dark in color due to the teff, so they will have the appearance of whole grain biscuits. If a lighter appearance or flavor is desired substitute millet for the teff flour.
Enjoy and Merry Christmas everyone! 🎄
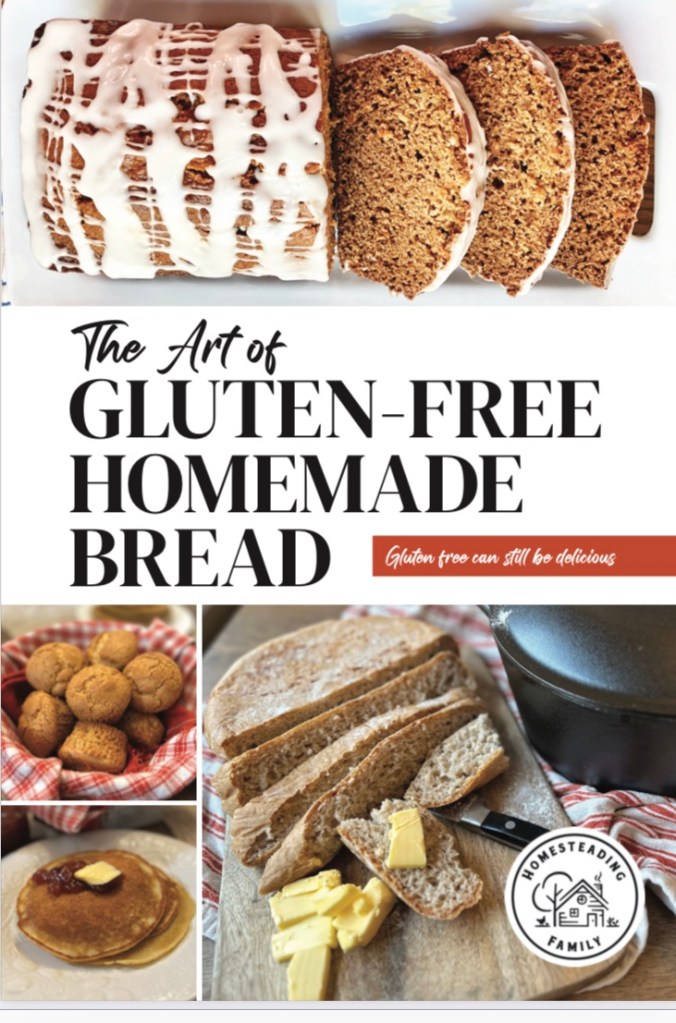
If you missed the launch of The Art of Gluten-Free Homemade Bread, this is the gluten-free book that I wrote for Homesteading Family. It was so popular that it sold out in less than a week but you can get the digital copy or sign up for the wait list for a physical copy at the link above.
For those of you that have made my fermented lemon cranberry relish, pull out whatever you have left from Thanksgiving and use for it for your Christmas parties. 🎄
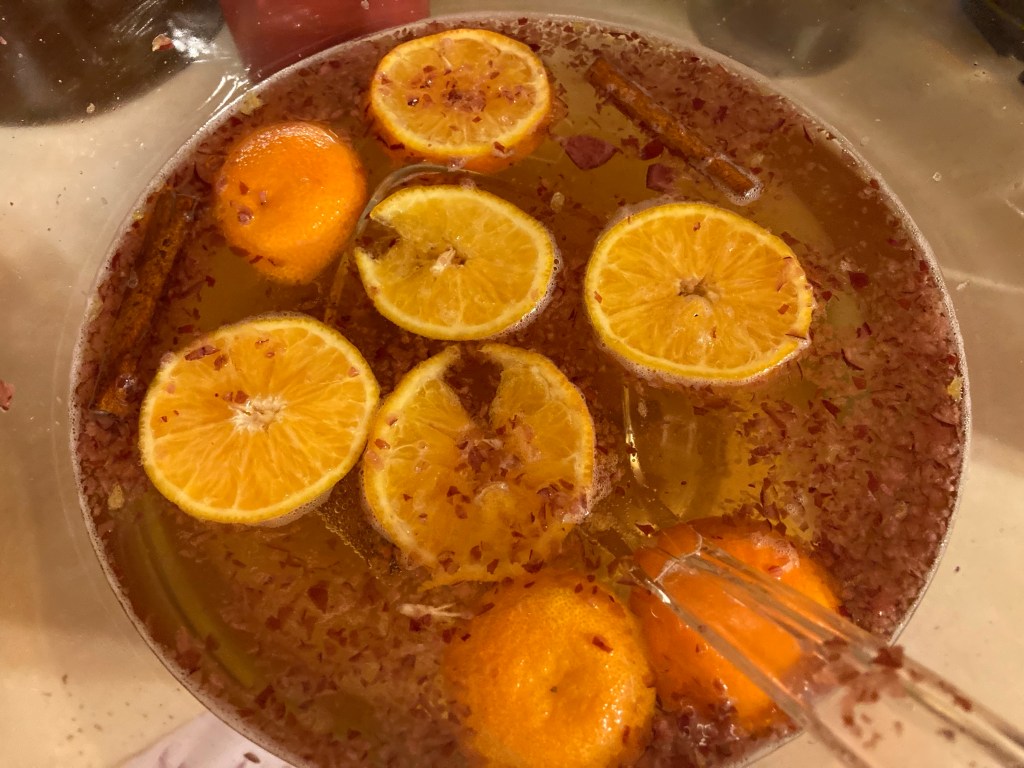
I improvised this yummy Christmas punch for my daughter’s Christmas party. It was super easy and delicious too!
Cranberry Orange Cinnamon Christmas Punch Recipe:
1 bottle of apple juice 1 – 2 liter bottle of Sprite 3 heaping spoonfuls of cranberry relish 3-4 cinnamon sticks Slices of 1 large or 2 small oranges
This punch is delicious! It’s best if you add everything but the sprite and let it chill overnight and then add the Sprite right before serving. It’s also super quick to mix up more when your bowl runs low. Just combine everything together again and you’ve got another bowl ready to go.
And if you need to avoid refined sugar, try this sugar-free modification…
If you need to omit refined sugar, simply follow the recipe above, but instead double the amount of lemon cranberry honey relish that you add, and use orange flavored seltzer water instead of Sprite and you’ll have a yummy holiday punch with no refined sugar.
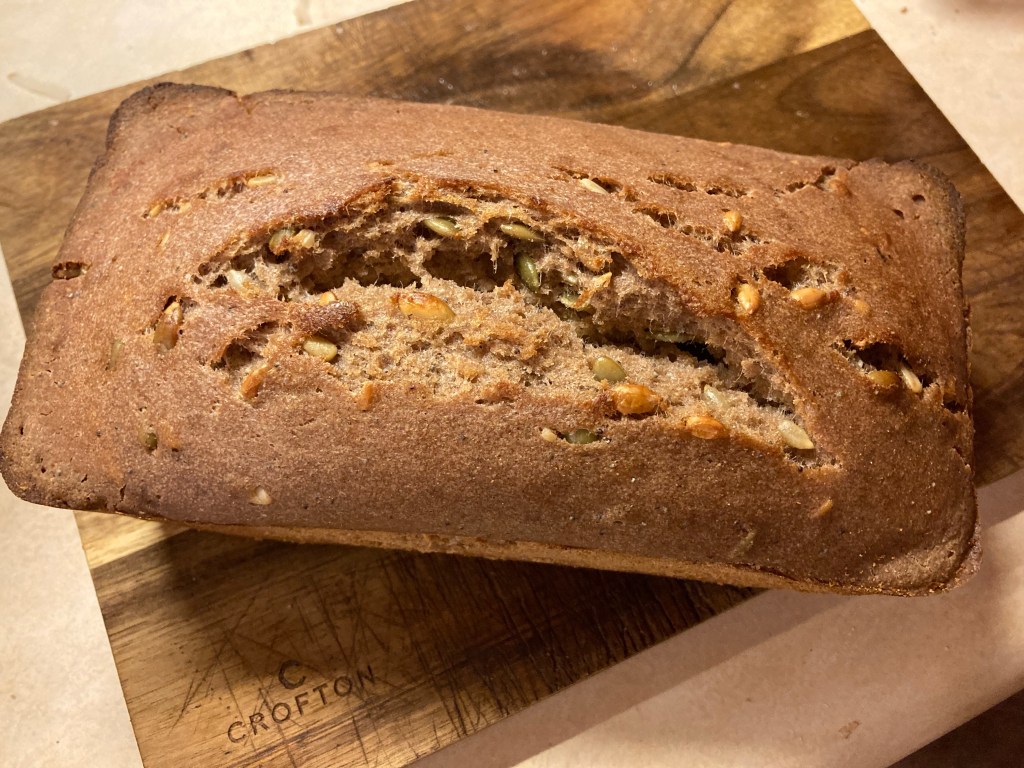
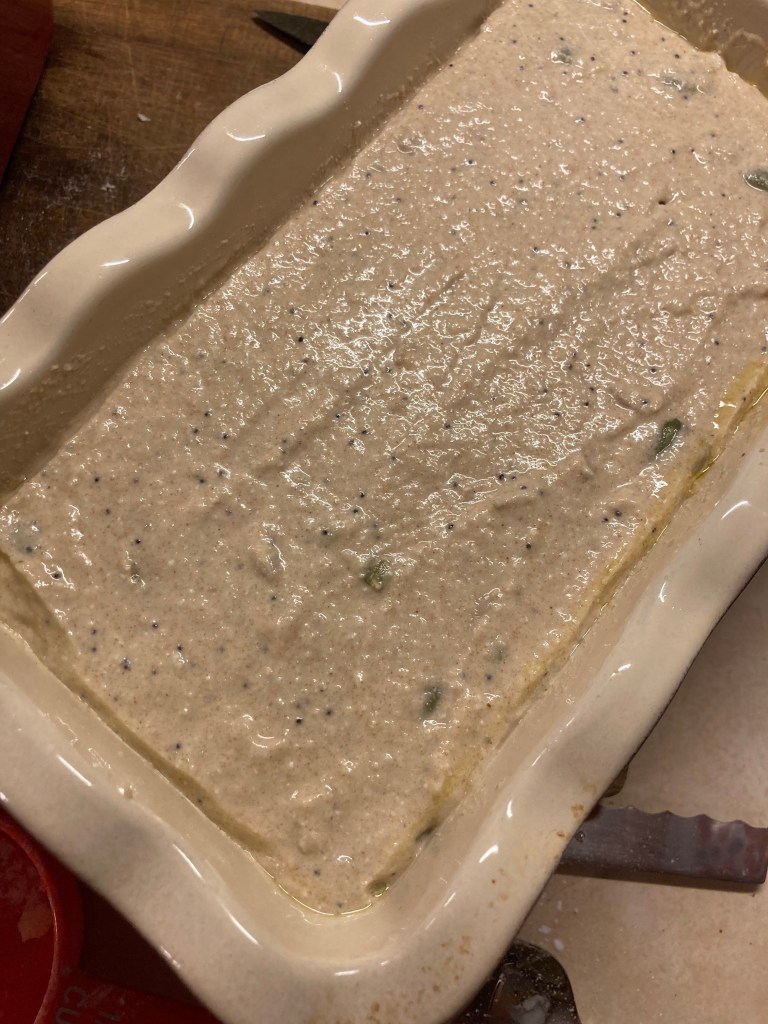
I developed this sourdough bread recipe for a friend who requested a “Seedy Loaf.” I’d never tried this with gluten-free before, but it turned out quite nicely and she requests one every week.
Gluten-Free “Seedy” Loaf Recipe:
Whisk the following in a small mixing bowl:
1 cup of gluten-free sourdough starter
2 tsp salt
2 tbsp oil
2 tbsp honey
2 1/2 tbsp psyllium husk
2 cups water
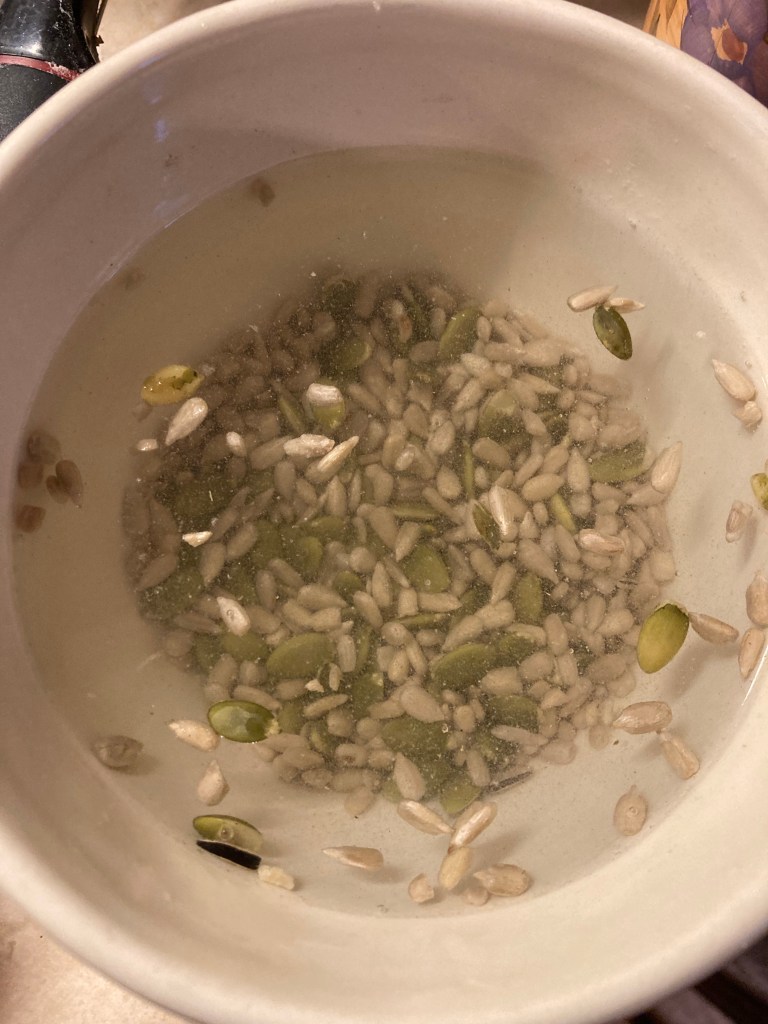
Whisk together and let the mixture sit for 15 minutes to thicken. While your mixture is resting, collect the rest of your seeds for soaking. In a small bowl measure out…
1/3 cup pumpkin seeds
3 tbsp of hulled sunflower seeds
Cover the seeds in the bowl with water and let them soak until just before your bread is ready to go into the oven the next day.
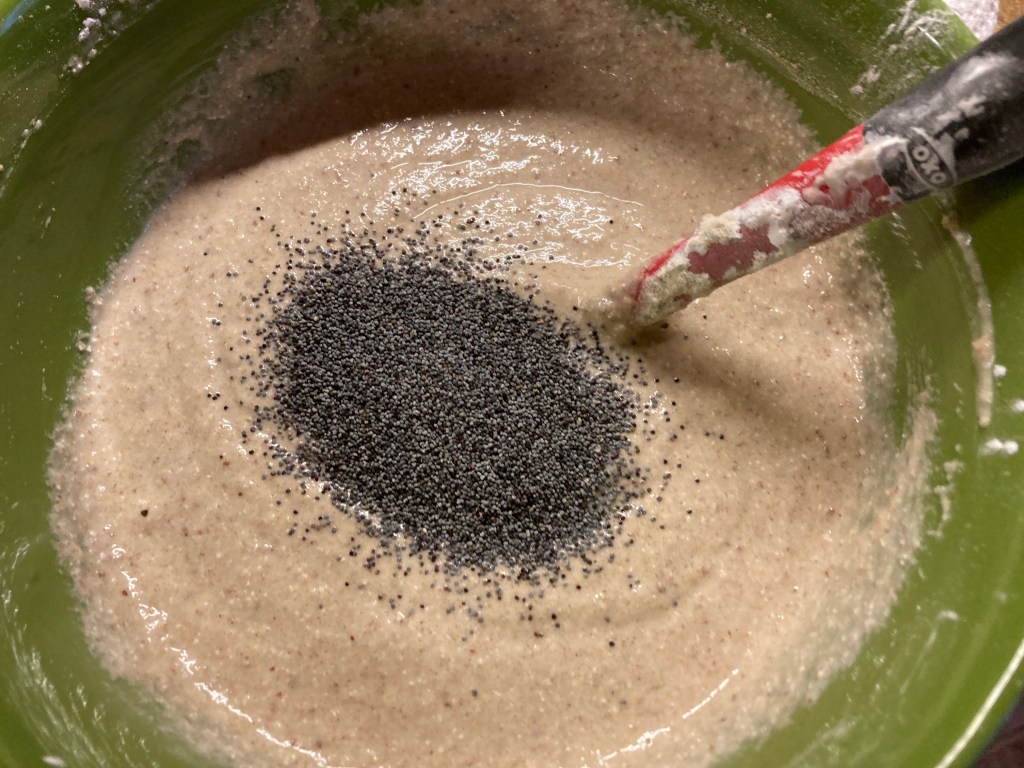
Now back to your mixing bowl. To the liquid mixture add…
1/4 cup quinoa flour
1/3 cup brown rice flour
1/3 cup arrowroot powder (or tapioca starch)
1/3 cup potato starch (or cassava flour)
1/3 cup sorghum flour (or chickpea flour or oat)
1/4 cup millet (or sorghum)
1/4 cup teff (or buckwheat)
1 tsp poppy seeds
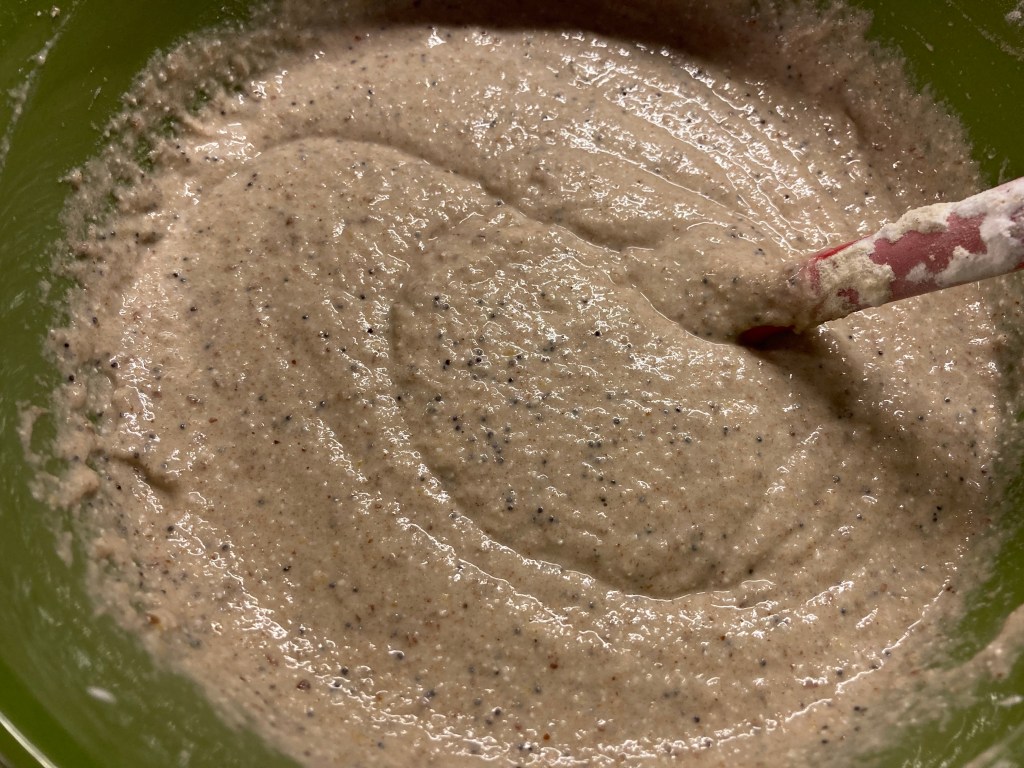
Mix together until there are no more lumps. Batter should be the texture of a very thick pancake batter or thick oatmeal. If it is too thin add a little more of one of the flours until the correct texture is achieved.
Cover your bowl with a damp tea towel or lid and refrigerate for 24 hours.
On Bake Day:
Preheat the oven to 450 degrees. Drain the water from your soaked seeds. Remove your bowl from the fridge and add your seeds to the batter. Mix well until they are all distributed. Then pour your batter into a greased loaf pan.
Next, with a rubber spatula, gently press down around all the edges about 1/4” pulling the batter at the top just away from the edge of the pan. This will help with the rise.
Immediately transfer to the hot oven. Bake for 1 hour. Internal temp when done should read 210 degrees on a digital thermometer. If it is not done, bake for 10 more minutes. Cool overnight or for 12 hours before slicing so that the texture of the bread can set.
The Art of Gluten-Free Homemade Bread Book by Homesteading Family:
It’s finally available! I created these recipe for Homesteading Family and the book is available just in time for Christmas. Order your copy from Homesteading Family!
And if you want a wheat based bread class that covers it all – yeast, sourdough, fresh milled flour, sprouting, and ancient grains, check out Homesteading Family’s The Art of Homemade Bread Course. Carolyn taught me how to make bread and sprout my grains. It’s the most comprehensive course I know of.
The book I wrote for Homesteading Family is now available. The Art of Gluten-Free Homemade Bread is available now. The ordering window for the book is only available once a year so get yours early while they are available! The fort run sold out in a week, so grab yours now. They won’t last long.
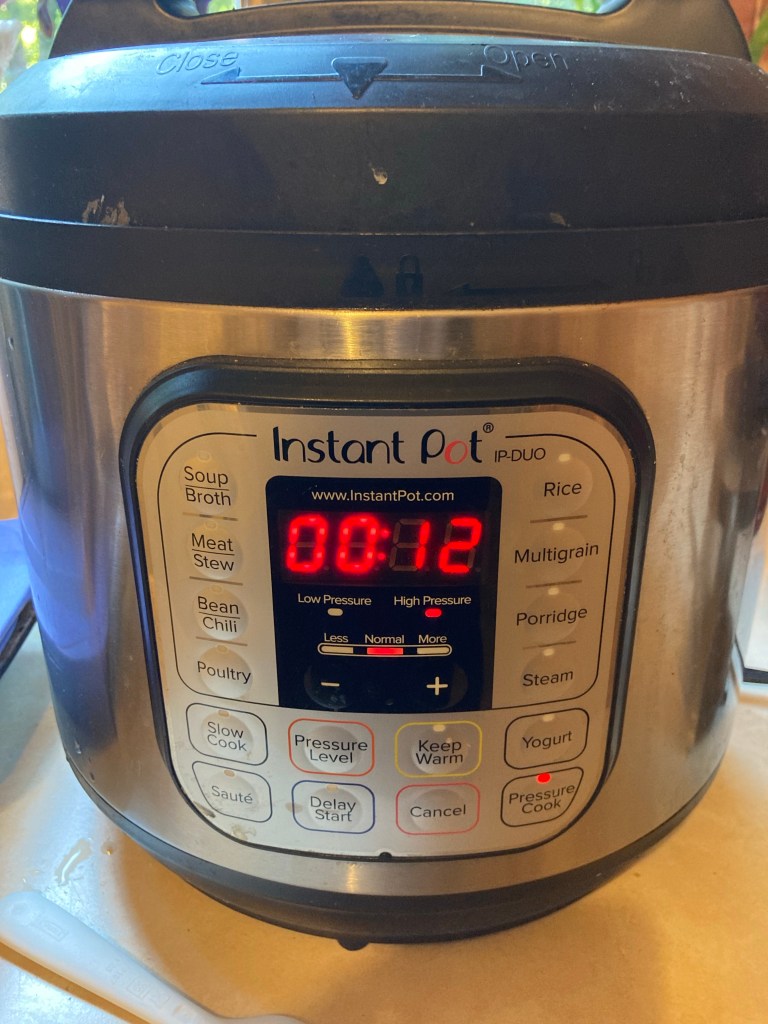
This is such an easy way to make baked potatoes. I hardly ever heat up my oven to cook baked potatoes anymore. It’s especially nice in the summer when you don’t want to heat up the kitchen. And around the holidays when 5 other dishes need to be in the oven at the same time, it’s a lifesaver. Pull out your IP and free up your oven this week for that Thanksgiving Turkey. 🦃 But, it’s truly a time and energy saver as it cooks 3 times faster than the oven.
Instant Pot Baked Potato Recipe:
I feel like I can hardly even call this a recipe. Just wash your potatoes, set them on top of a metal trivet in the liner of your Instant Pot Add 2 cups of water to the liner (this is the minimum water needed for an 8 quart Instant Pot). Seal the vent and cook on High Pressure using the following times based on the size of your potatoes:
Potato Cook Times based on Size:
X-Large Potatoes: 15 minutes
Large Potatoes: 12 minutes
Medium Potatoes: 10 minutes
Small Potatoes: 8 minutes
Tiny Potatoes: 6 minutes
It takes about 10 minutes for the water to heat up so that the pot will come to pressure.
10 minutes + cook time = much faster than the oven!
When the cooking time is complete, depressurize immediately or let the pressure reduce naturally. It doesn’t really matter either way for this recipe.
Holiday and Sunday afternoon time saver:
This is really a great way to cook baked potatoes for a holiday meals when your oven may be otherwise occupied with other dishes. Or set this up in advance as early as the night before using the Delay Start feature on the IP and you’ll have hot baked potatoes ready for lunch when you come home from church on Sunday morning! 😊
Pro Tip: Try to use potatoes that are the same size to promote even cooking. If you use a mix of tiny potatoes and really big ones, the little ones may turn to mush, or the big ones will not be cooked all the way through.
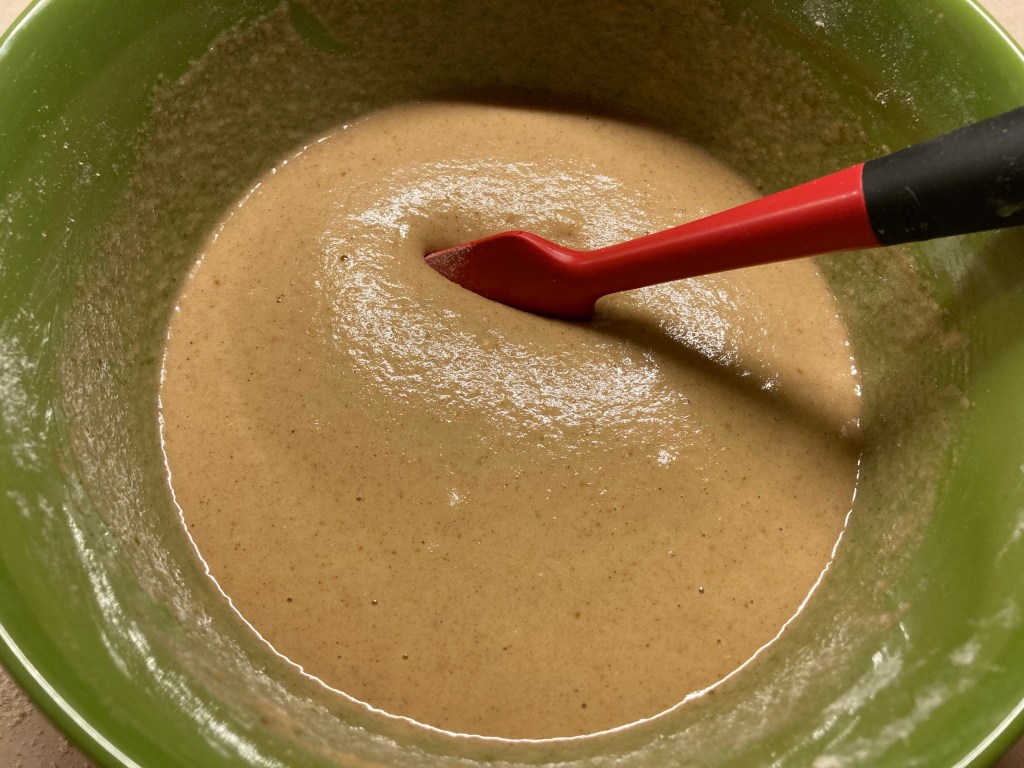
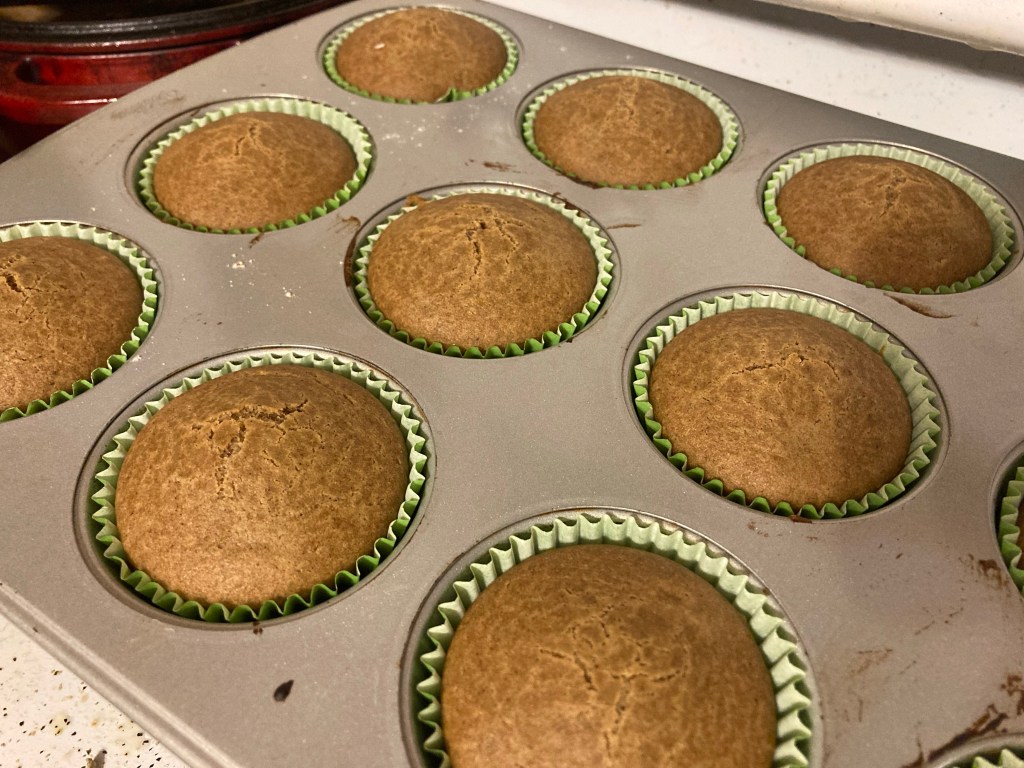
We make egg free cakes all the time since my son can’t have egg whites. I have my favorite wheat based version of this (search for “cake pan cake” in the search box if you are interested in those. Here’s a gluten-free pumpkin spice version that is also egg-free, and dairy free that we made into cupcakes. Consider making these as an allergy-friendly dessert option for your Thanksgiving guests. And if you are looking for more good, reliable, healthy gluten-free recipes, scroll to the end. I have news on Homesteading Family’s new gluten-free book.
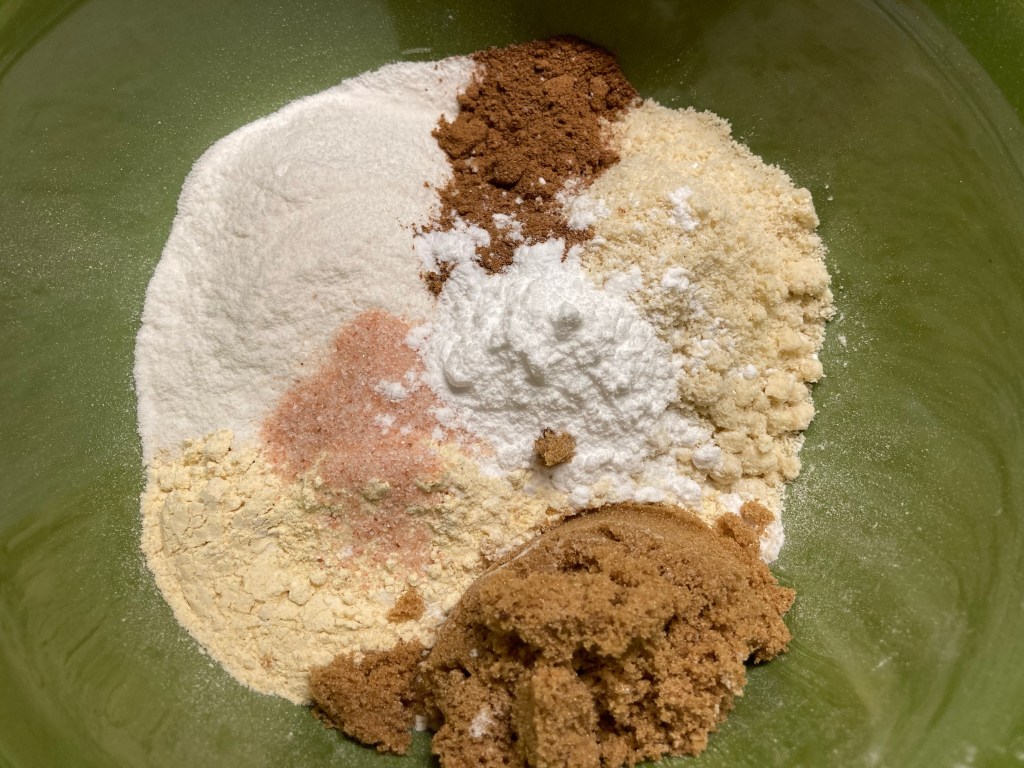
Gluten-Free Pumpkin Spice Cupcake Recipe:
Add the following into a medium mixing bowl:
1/2 cup potato starch (sub arrowroot or tapioca starch)
1/2 cup chickpea flour (sub sorghum, oat or other legume flour)
1/2 cup white rice flour (sun brown rice flour)
1/2 cup almond flour (sub other not flour)
1 tsp salt
2 tsp pumpkin pie spice
1.5 tbsp psyllium husk
1/3 cup brown sugar
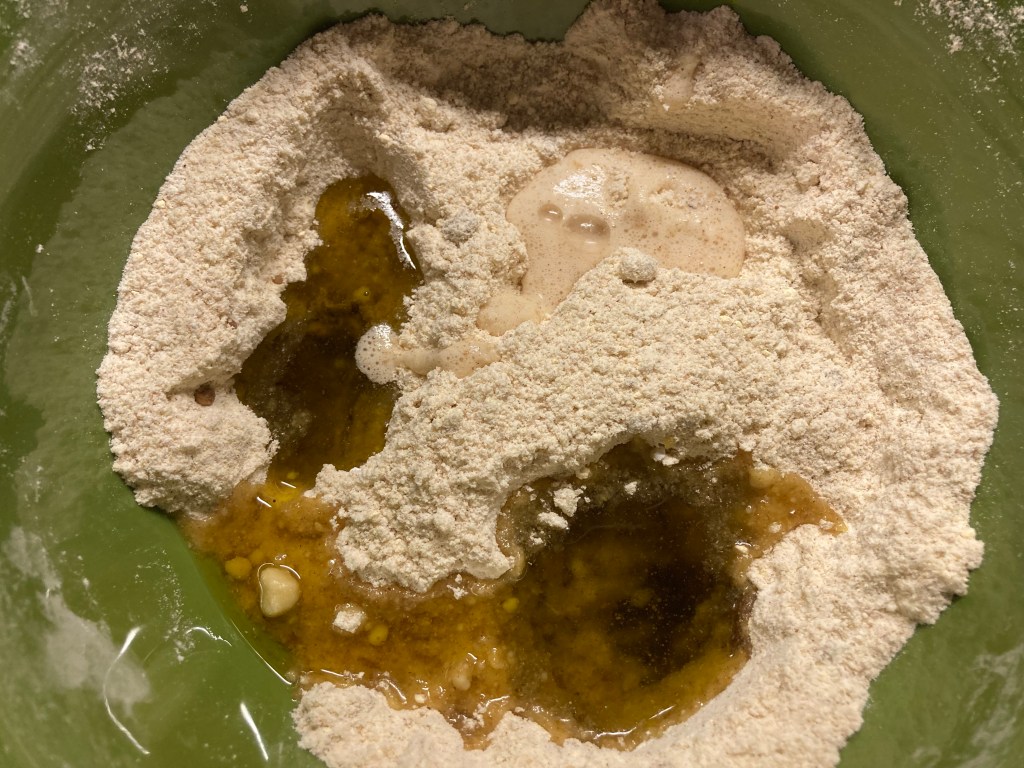
Stir to combine. Make 3 small wells or depressions in the flour and add the following….
1/3 cup olive oil
1 tsp vanilla
1 tbsp apple cider vinegar
Over all that pour 1 cup cold water.
Whisk it all together until smooth. Cover the bowl and let it sit for 15 minutes.
After the rest evaluate the texture. It should be like a thin cake batter. It should be thick and not watery but thin enough to fall off your spatula. When I came back to my batter after the rest period it was thicker than it should have been so I added 1/4 cup more water 2 tbsp at a time until the texture was correct.
Spoon into muffin cups. Bake at 375 degrees for 15-18 minutes until browned. Cool completely before icing or serving.
Add some homemade pumpkin frosting and they are delish! 🎃
So, did you know that Homesteading Family is coming out with a new Gluten-Free book? The Art of Gluten-Free Homemade Bread should be released to the public some time this winter, unless you are a member of Homestead Kitchen that is, in which case you have early access to the e-book already. But Carolyn is offering a FREE bread webinar.