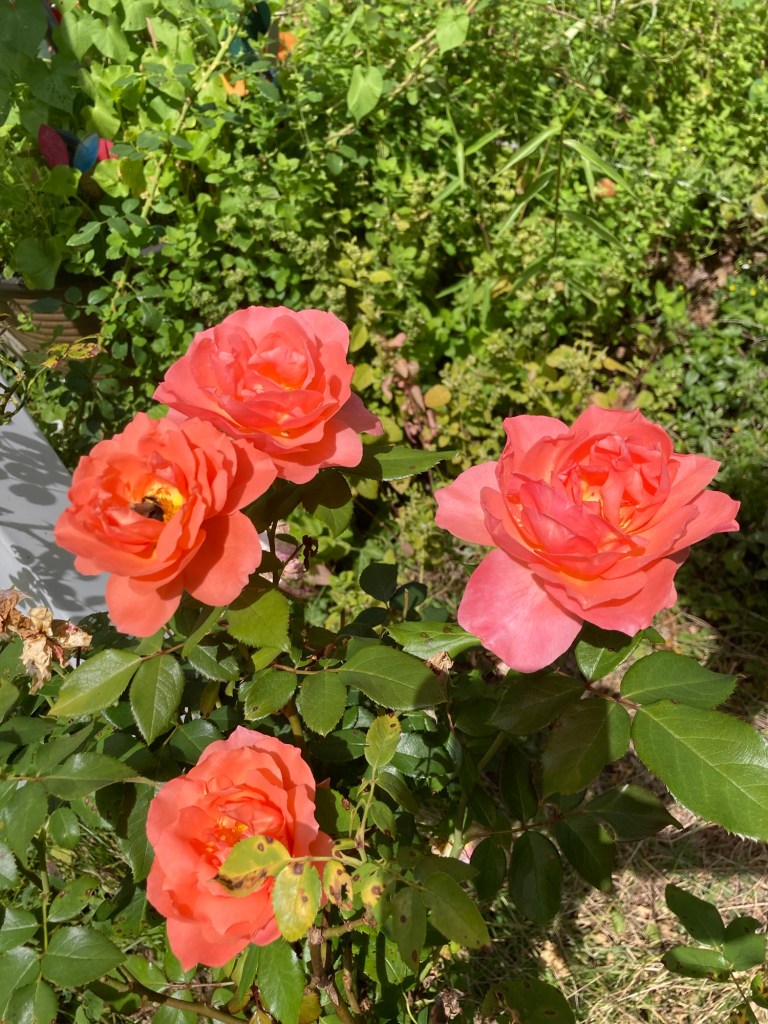
This is infused Rose oil is one my favorite things to make. I use it on my face and hands daily. 🥀
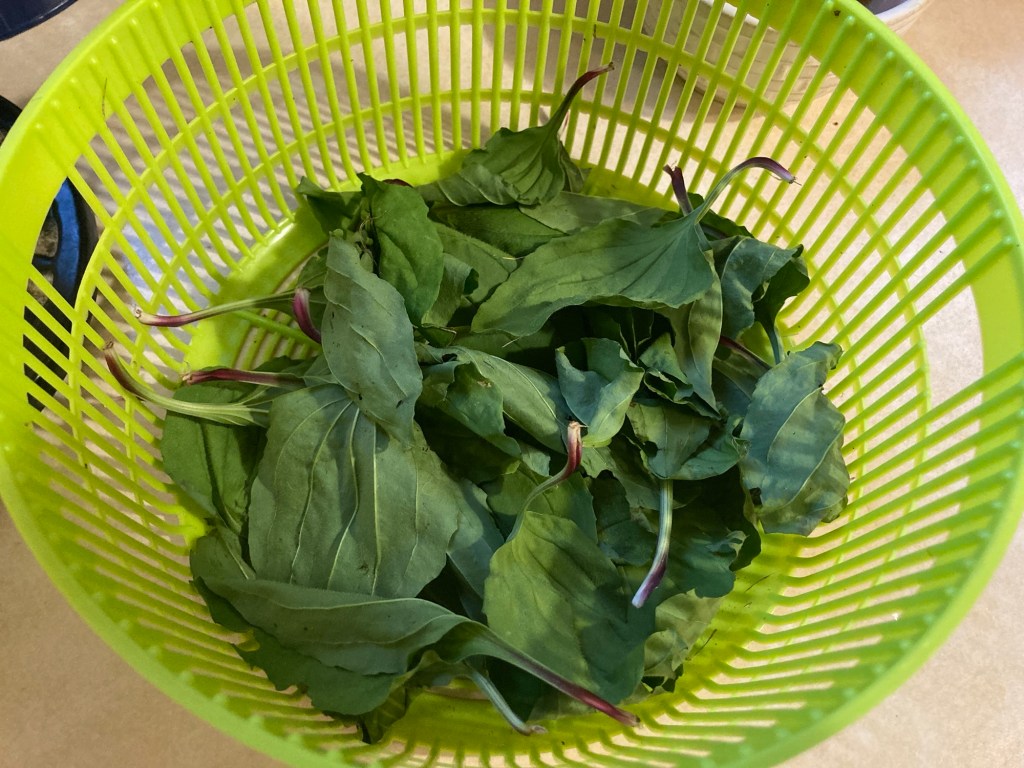
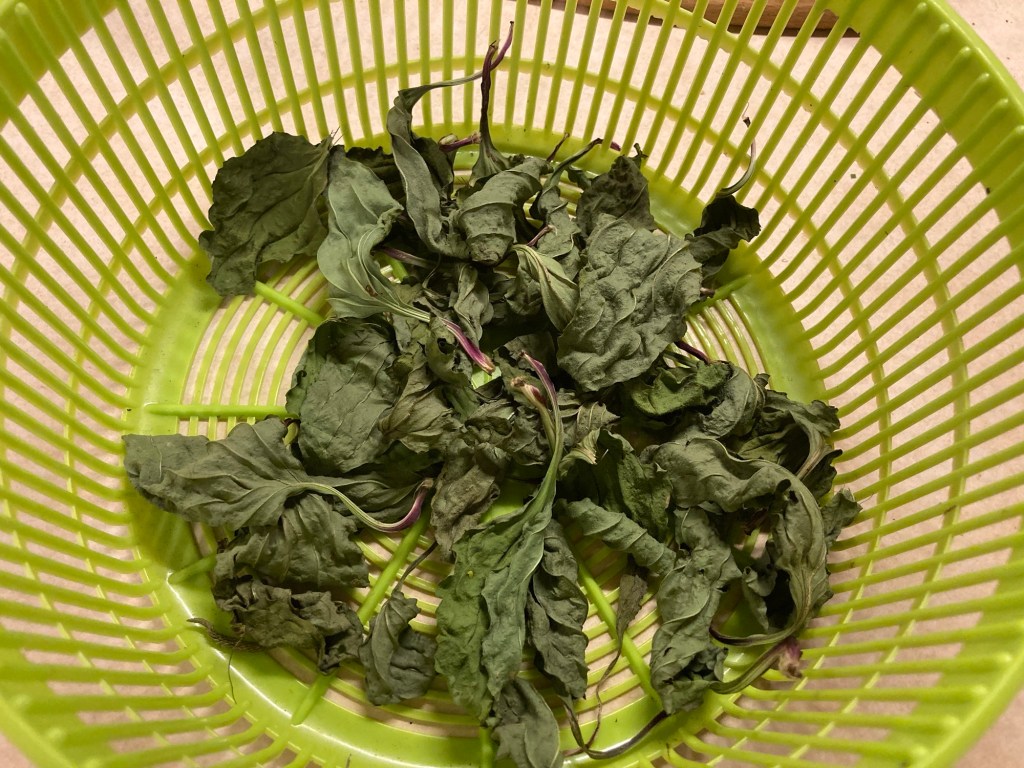
🥀 I harvest my rose petals, air dry them inside a pretty tea towel until crunchy, and store them in a clear glass jar in a dark cabinet where I can check back often to watch for condensation (a sign that they aren’t fully dry).
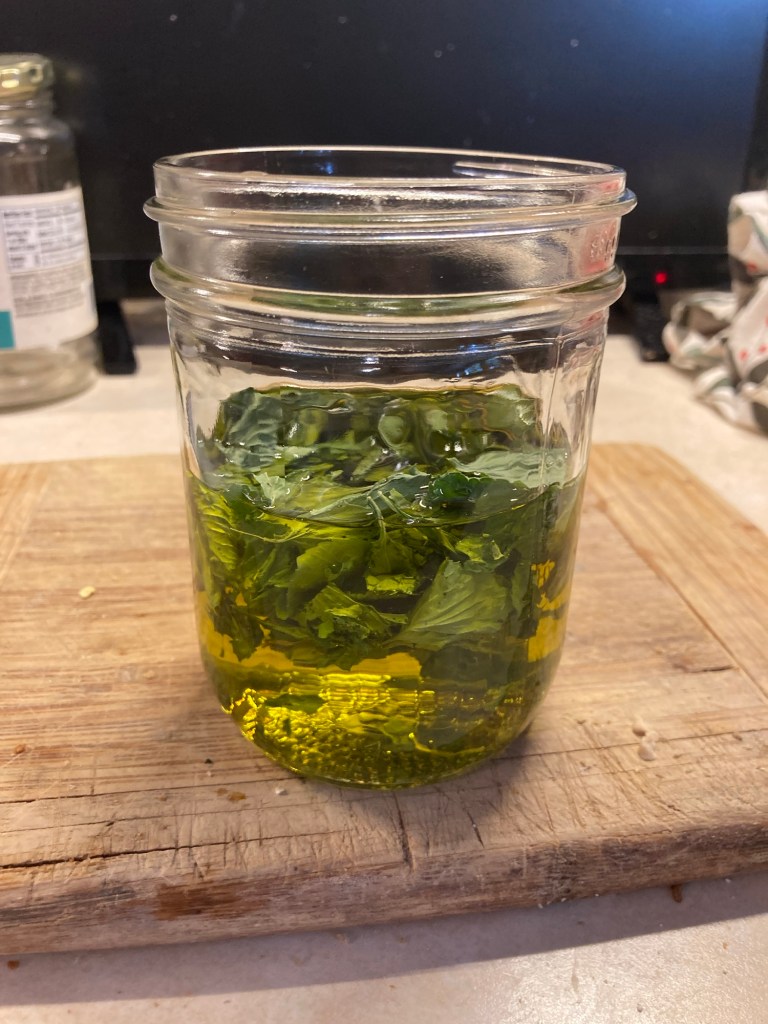
When I need to make more Rose oil I simply put some of my dried petals in a jar, cover them with my favorite oil (I use olive, but almond is lovely, or you can use any oil you would cook with that is liquid at room temperature), and then I sit the jar in a sunny window to add some gentle warmth.
When I need more Rose 🥀 oil, I strain the petals and pour some into a 2 ounce spray bottle for easy application.
Hint: You wouldn’t think it, but the 2 ounce travel bottles from Walmart work best. Then I can take my oil with me on the go. I have a bottle in my bag right now actually. 😊
Once strained, I store extra oil in glass jelly jars labeled with masking tape with the name and date.
🥀 Who would have thought that something so lovely and useable would come out of such a simple flower?
When my hands get dry this time of year I just take some out and squirt some into my palm. It sprays out in a nice, neat stream. Because Rose 🥀 Family plants are all astringent, Rose oil not only moisturizes, but tones my skin. And it smells as good as your Roses 🥀 do in your garden in the summer. There’s nothing like the aroma of Roses to lift your spirits when winter days are dreary.
It’s the simple ways you use your plants that make them that much more special. 🥀
Subscribe or follow on Facebook to learn how to recognize and use the plants that grow around you.
Visit our sister site, http://www.botanyinanhour.com, to learn more about your botany basics, plant recognition, and how to put your knowledge to use so that you can garden better, forage safely, harvest more, preserve easily, heal locally, and teach your kids plant skills for life.
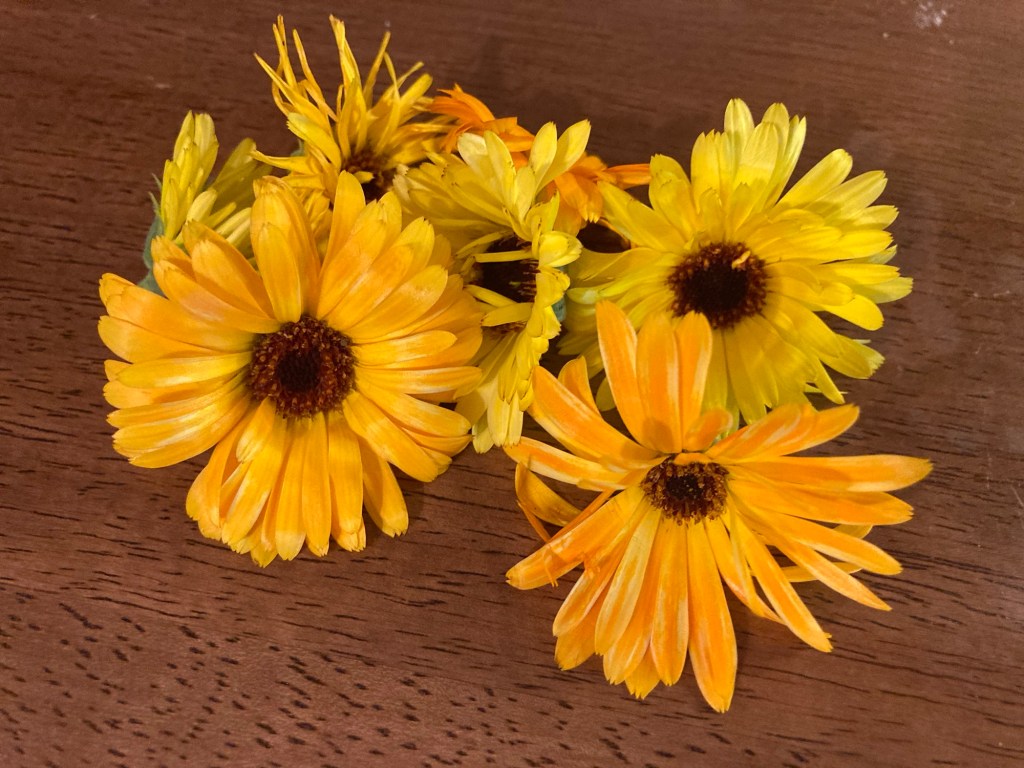
Calendula is one of the few plants in the Aster family that we use as my son has a allergy to ragweed which makes him sensitive to many of the plants in that same plant family.
I’ve grown Calendula for years and thought I’d share how I air dry them without a dehydrator. It is often recommended that you dry calendula with a dehydrator since the centers are so thick and resinous that they can be hard to air dry, and if not completely dry, they can mold in storage.
Why this method of air drying Calendula works. Two reasons:
Good air flow.
Long drying time.
Because my calendula is grown in containers, I usually have small harvests, meaning I’m not harvesting basketfuls at a time. I might harvest 2-3 flower heads per day. This is certainly not enough to warrant pulling out the dehydrator in order to dry them.
So mine sit and wait for me, and as they wait, they dry.
Here’s what I do…
Each flower that I pick goes into a little linen bag. This is in fact a little bag for sprouting micro greens, but since I use a different method for that, I’ve never used that bag for sprouting so I turned it into my calendula drying bag. Now, let’s stop here. You don’t need a bag for this. Any airy, piece of fabric, linen, muslin, flannel, burlap, or scrap of cheesecloth that is large enough to lay the flowers on and fold over on top of them will do. The purpose of the fabric is to keep your flowers clean and free of dust while drying.
Tiny harvest. These Calendula blossoms have been drying for a few weeks.
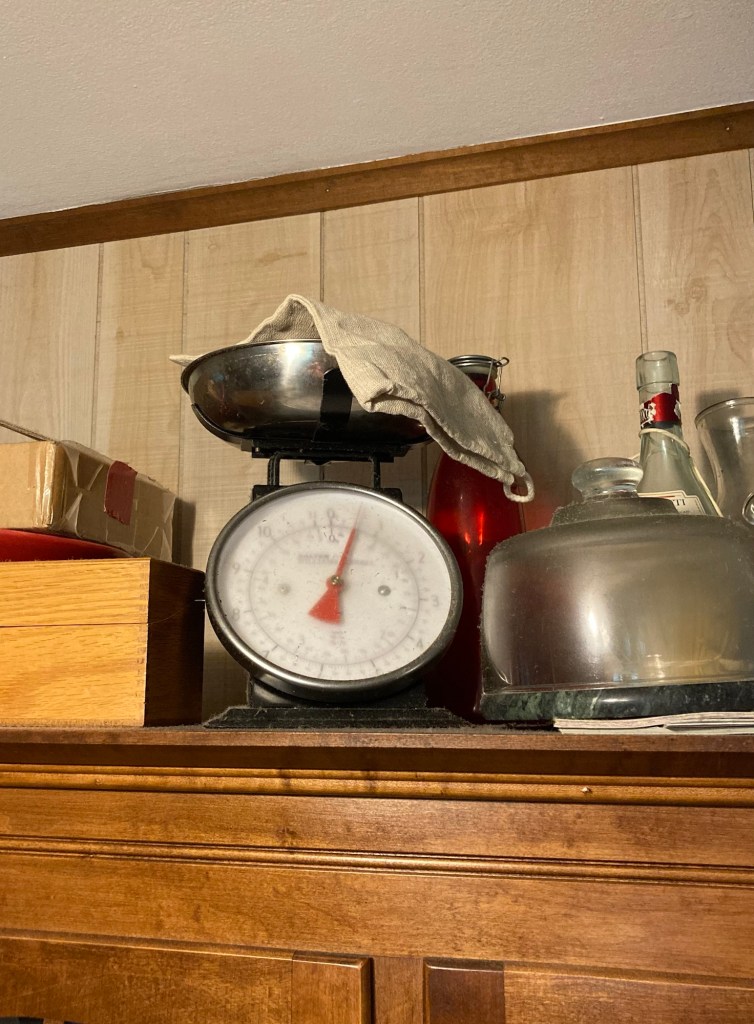
Next I lay this little bag on top of my hutch where the air is warm. I usually lay it in the bowl of my old fashioned kitchen scale which lives up here, but anywhere high and warm that is open to the air will do. On top of the fridge would work quite nicely. (Do not place anything inside an upper cupboard though. There would not be enough air flow in there.)
As I pick new flowers, I add them to the bag. Each time I take it down to add more I shuffle them around to ensure they are all getting moved around so that all the parts dry well.
New flowers added to the bag.
When I have new blooms to pick, I add the new flowers to the bag and it goes back up on the hutch. Sometime in the fall when they are all good and dry, I’ll take them down, ensure that they are all dry and can be crushed, and I’ll store them in a glass jar until I need them to make more infused oil or Calendula salve. They wait quite happily for me, and by the time I’m ready to use them in winter, they are dry and ready to use. In fact, most years, they just sit there until I remember to take them down sometime in December.
Growing, harvesting, and drying herbs doesn’t have to be a fussy process. Find a method that works and feels easy to you and go with it. What’s stopping you?
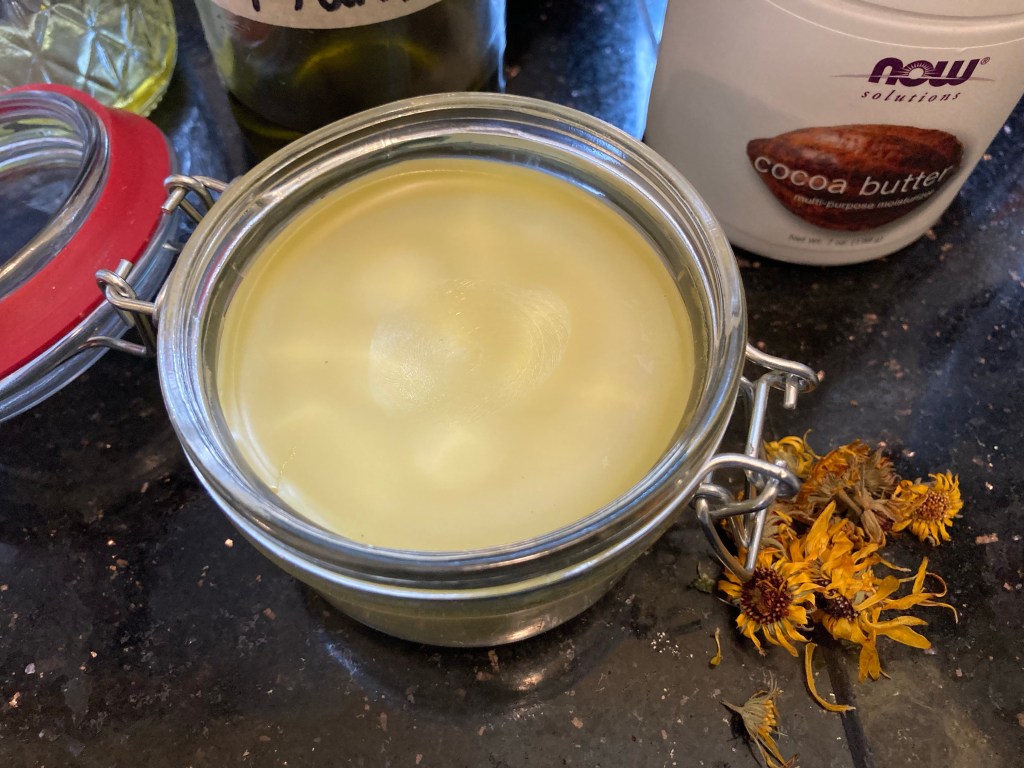
And once you have a homemade infused oil, you’re only one step away from making your own salve. You might want to check out my Healing Salve which is made with Calendula. (See the little dried up Calendula flowers laying there?) 😊
And if you really want to wrap your head around making all your own infused oils and slaves, let Carolyn with Homesteading Family hold your hand through the process. She recently came out with a Herbal Oils class that is quite nice which covers the basics of making culinary oils, infused medicinal oils, and using essential oils for your own handmade salves, balms, lip balms, and more. You can get access to it as part of their Homestead Kitchen Membership.
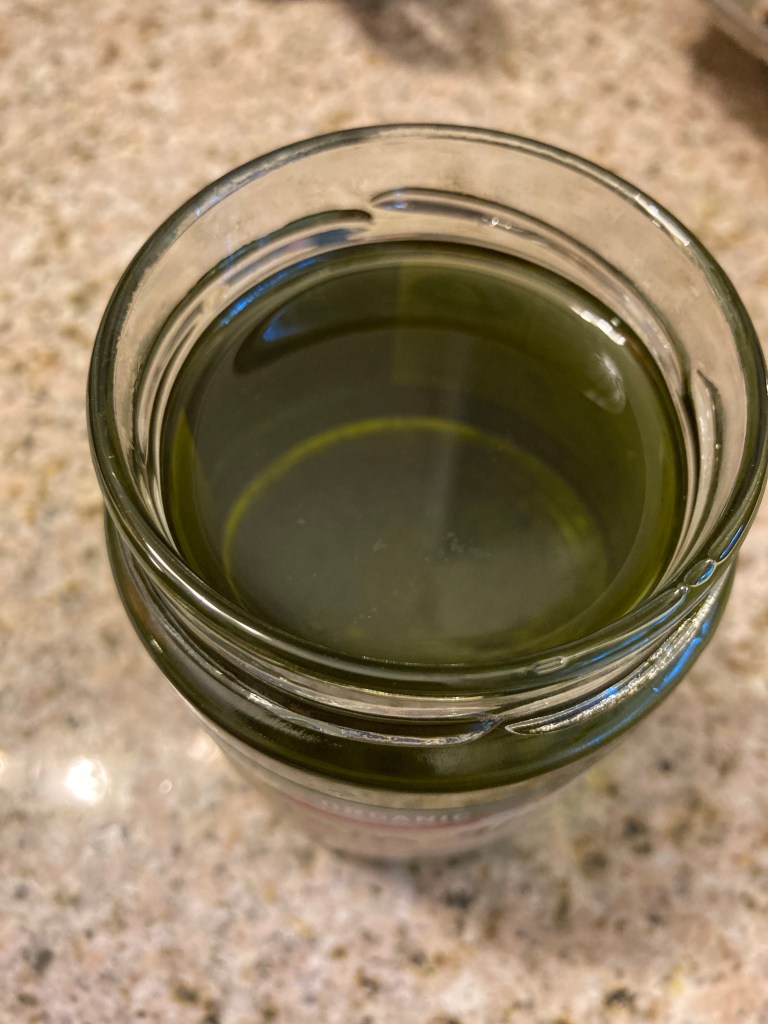
Look at that color!!! Have you ever seen a prettier dark green. Did you know that the deepness of color, indicates the potency of the oil. The deeper the color, the more potent the oil.
Note: This recipe is written for plantain but this method can be used with any plant. You could make rose, mullein, borage, Hawthorne, calendula…. The sky is the limit.
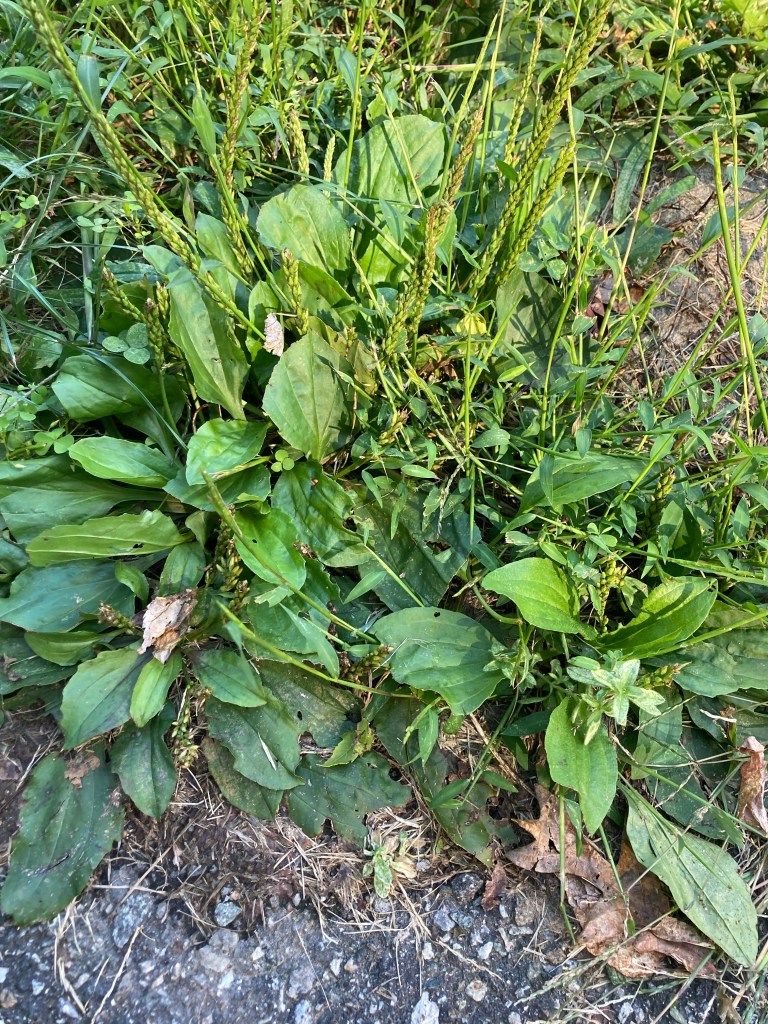
Anyone have this little plant in their back yard?
Plantain (Plantago major) is one of the most common “weeds” found in lawns. Many homeowners spend thousands of dollars every year trying to get rid of this little weed. It is a tough one to eradicate since it forms in low-growing rosettes. The fact that it hugs the ground means lawn mowers often pass right over it without doing any damage.
The other trait of plantain that makes it difficult to get rid of are all these little seed stalks that it sends up in the late summer to early fall. The seeds spread easily which means new little clusters will always pop up.
The fact that this little plant is so common and determined to survive means that it has a whole host of medicinal properties. So go find a lawn that you know is not sprayed with any weed killers, pick some leaves, and let’s make a batch of plantain oil.
Plantain leaves can be gathered any time of year when the plant is growing. The leaves will be most potent when gathered before the plant goes to seed. (Note: Do not harvest the seeds. They contain contraindications for some health conditions.)
Let’s make some oil!
Infused Plantain Oil Recipe:
Gather your leaves. Choose whole, unblemished leaves if possible. Do not pull up the whole plant. Pinch from the bottom of the leaf stalk to pick each leaf individually. This will ensure more harvests later in the season.
Fill a bowl with cool water to rinse the leaves of any dirt or bugs. I actually like to use my salad spinner for this step. The mesh basket makes it easy to wash, drain, and dry. See step #3 below.
The next step is to let the leaves dry and wilt. They don’t have to dry completely, but the drier they are, the longer the shelf life of your oil will be. Using the mesh liner from your salad spinner by removing the strainer from the outer bowl so that the leaves can get good air flow works well for me. I like to fluff them up occasionally as I walk past them on the kitchen counter to keep them moving to ensure they dry evenly. Or if you don’t have a salad spinner, a pasta colander with larger holes will work as well. You can also lay the leaves out on a tea towel on top of a cookie cooling rack to air dry and wilt. Now, here, you could choose to let them air dry completely for winter storage in a glass jar, or you can wilt for 2-3 days or until dry before moving on to making your infused oil. A dehydrator could also be used in low heat if you don’t want to wait for them to air dry.
When sufficiently wilted or dried, take your leaves and roughly tear or crush them into a glass jar. Fill the jar half full with plant material.
Cover the plant material with olive oil or any oil of your choice that you have in your kitchen.
Put a lid on your jar and loosely tighten.
Set a clean dish rag or cloth in the bottom of a sauce pan that is half full of water. (Note: the dish rag prevents the glass from being too close to the heating element which could cause it to break.)
Set the jar in the sauce pan on top of the dish cloth.
Turn on the heat to medium high. (Set a timer for 10-15 minutes so you don’t forget your oil.)
Watch the oil, as soon as the water starts simmering, turn the heat off. We don’t want to cook the plant material. Just infuse it with a little warmth.
Let the jar sit until it is cold.
Strain your oil using a handheld mesh strainer (often the dollar store or grocery store will have these) into a clean, completely dry, glass jar.
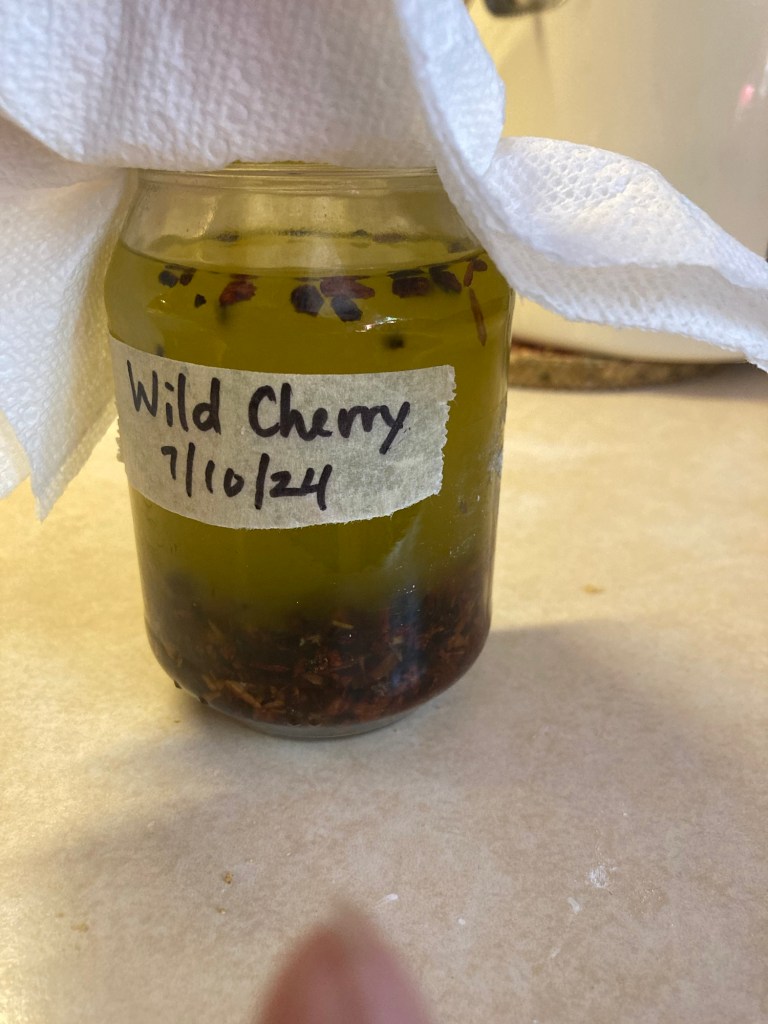
Label your jar with the name of the oil and date. Masking tape and a sharpie works well for this. I keep a masking tape dispenser like this on my kitchen counter specifically for labeling things.
And you did it! You made your own Plantain oil! Well done!
And now that you have the skill of making an infused oil under your belt, you can do it with any medicinal herb. Be creative. Some of my favorite plants to make oil with are mullein, rose, calendula, Pansy, violet, echinacea, pine, wild cherry, and yarrow. I use my infused oils every day.
Want to see a photo log of these steps? Scroll to the bottom of the page.
Infused Oil FAQ Section:
What is infused plantain oil good for?
Plantain is an excellent remedy for any type of bite, sting, or skin irritation. It is especially useful for anything that needs pulling or drawing out. It is a mild astringent and good for any skin or issue with any angry or inflamed membranes.
How long will my infused oil last?
Homemade infused oils are good indefinitely if made with dry plant material, and if stored in a cool, dry location. If fresh or wilted plant material is used, extra steps will need to be taken to ensure that your oil doesn’t mold.
What are the signs of moisture in my oil?
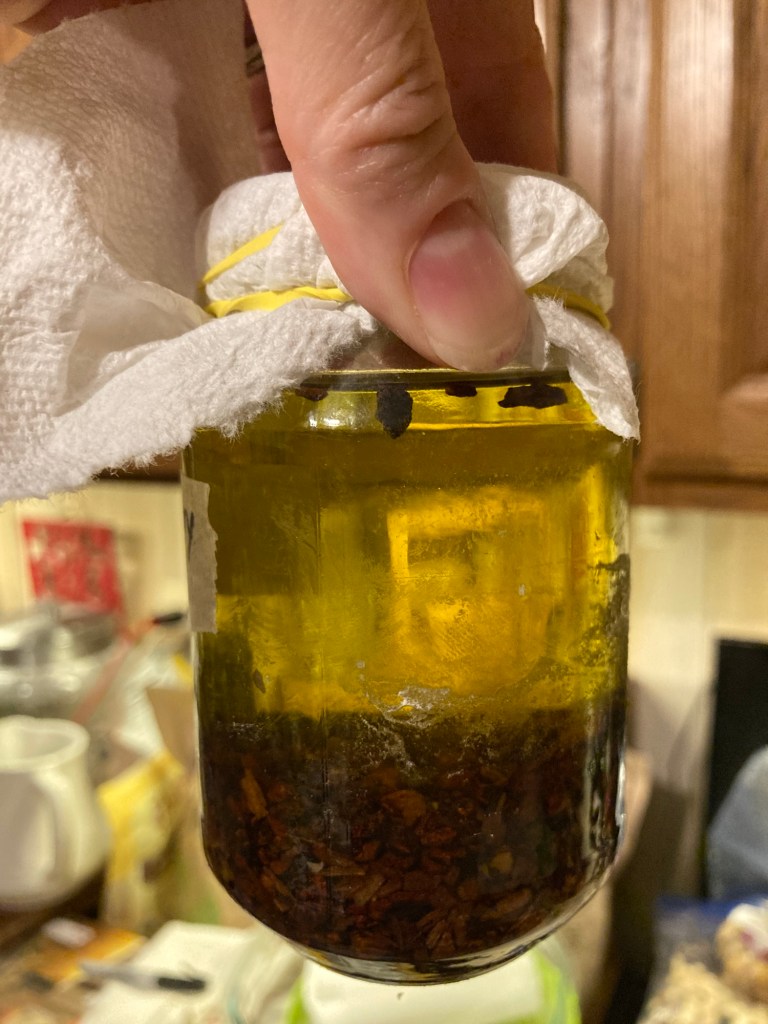
Condensation or cloudiness on the inside of the jar after straining is an indication of moisture. This is easy to remedy. Simply take the lid off of your jar and cover with a paper towel or coffee filter and secure with a rubber band. Let the jar sit until the oil is clear and all the moisture has evaporated. Then you can replace the lid and store in a cool, dry place.
Do you see the cloudiness in this jar of oil?Same jar of oil as above after 2-3 days sitting with a paper towel cover to allow the oil to evaporate. Can you see how much more clear the oil has become?
How do I know if my oil is moldy?
When an infused oil grows mold, it often does not grow on the surface like what we are used to seeing on food in our fridge. It grows down inside the oil and looks like dark fuzzy spots floating in the bottom of your jar. For this reason, I like to store my oils in clear, glass jars so that I can easily see if anything begins to grow or look amiss. An off smelling oil would be another indicator. However, be sure that you smell your oils right after making them to be sure that you know the scent of that plant. Not every plant has a pleasant smell, and you don’t want to throw out a perfectly good batch of oil simply because you aren’t familiar with the scent of that particular plant. So train your nose to know what your oil smells like right after you make it.
How to know if my oil has gone bad?
Visible mold on the surface, dark spots growing in the bottom of the jar, or rancid or putrid smells are signs that your oil has spoiled and should be discarded.
Can I use this same method to make an infused oil with a different plant?
Yes! This method can be used to make an infused oil with any medicinal plant. Keep in mind that infused oils dried plant material will have the longest shelf life.
Do you feel confident to make your own infused oil now? I hope so. Enjoy your creations. Using my oils through the year and especially during the winter is one of my favorite things.
Want to make your infused plantain oil into a salve?
Make this Healing Salve using your infused plantain oil. If you don’t have infused Calendula oil, just replace it with an extra part of plantain oil and you’ll be all set.
Healing Salve
Want to take a deeper dive into the world or herbal oils?
Consider the new Herbal Oils class by Homesteading Family. It covers making your own culinary oils, medicinal infused oils, as well as your own salves and body products using essential oils. It’s a great all-in-one course for beginners. You can get access through Homesteading Family’s Homestead Kitchen Membership.
Photo Log Step-by-Step of Making an Infused Plantain Oil:
Plantain (Plantago major) – freshly picked.Washed in my salad spinner.Air dried and wilted.Completely dry and crispy. These can be stored for use later in a sealed glass jar, or you can move straight into making your infused oil.Though not plantain here (this is torn violet leaf), the next step is to roughly tear your plant and place in your jar. Cover the plant material with the oil of your choice. Place the jar on a cloth in a sauce pan half full of water. Turn on the heat.When the water starts to simmer, turn off the heat and let it sit until completely cool. Then you’re ready to strain and store.
Note: Some links on this page are affiliate links.
I taught a group of 1st-3rd graders how to make this salve yesterday. If they can do it, you can too.
This takes an otherwise silky, moisturizing salve and bumps it up a notch with the healing powers of calendula and plantain. Both are excellent for your healing everyday cuts, scratches, and scrapes, but I have found calendula to be excellent at healing infected or hard to heal wounds, and plantain to be excellent for eczema that is easily irritated by other oils and lotions.
Healing Salve Recipe:
1 part infused plantain oil
1 part infused calendula oil
2 parts beeswax
1 part cocoa or Shea butter
1/2 part lanolin
5-10 drops of essential oil for scent (optional)
Melt all the ingredients in a double boiler. Pour into a heat proof container. It’s that simple.
When I made it with my group of girls, we did some as chapsticks too, because what little girl doesn’t like her own chapstick. We also poured some in a jar to use as salve.
If you don’t know how to make an infused oil, refer to my post on making your own garlic oil, and simply sub calendula flowers and plantain for the garlic in the instructions.
You can also skip the infused oil and use plain olive or almond oil if you prefer to have the moisturizing properties for everyday use without the healing powers of calendula and plantain.
Want to take your knowledge ofherbs and home remedies up a notch?
This book is newer to me. It includes some herbs that my other books do not have listed that I wanted to study. I haven’t delved too deeply into it but it is a lovely book.
Technical Resources:
These are more technical and get into the more medical side is using herbs.
This is a link to my online Botany class which includes learning to ID plants by plant family.
Last but not least, write your own book…
Keep your own notes on each herb and ailment you study by creating your own book. I use an old address book that has alphabetical sections. I write the name of the herb or ailment alphabetically and make notes of what I learn about it.
Not sure where to go from to increase your knowledge of herbs and home remedies?
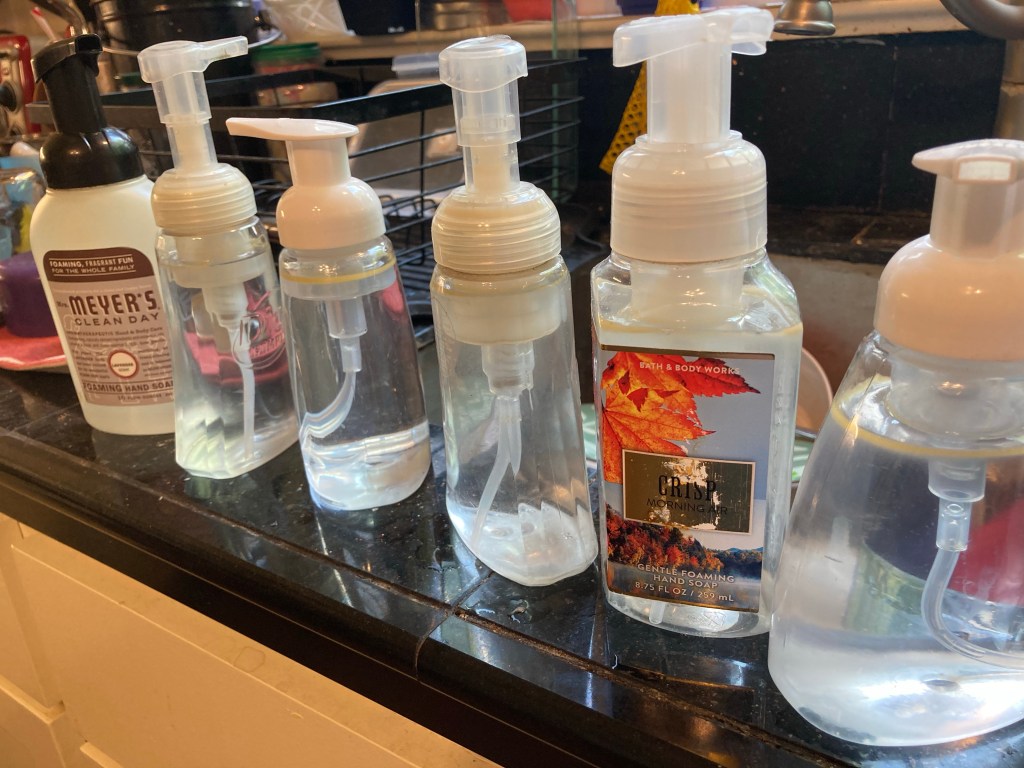
Anyone else going through hand soap like there is no tomorrow? Between doing more as things recipe from COVID, and getting dirty playing outside it seems like we are running out of hand soap every time I turn around. I’m glad it only costs me pennies to make more rather than $3 a bottle. We’ve saved thousands over the years by making our own soap. It works great, and feels like the expensive brands you buy at the mall.
DIY Foaming Hand Soap:
In a foaming soap pump, add the following:
1 tbsp of your favorite dish soap
8-15 drops of your favorite essential oils
1 tbsp aloe gel (optional but makes it feel silky smooth)
Fill with water, and shake!
And you’re done! And it cost you about .03 to make rather than $3.
On another money saving note, you can buy empty foaming soap pumps on Amazon, but in my experience, those don’t last and stop working after a couple of months. The best I’ve found are the Dial foaming soaps at the grocery store. I buy the pumps, use the soap in them, and fill them up again. I’ve had some of them for years. They really work great.
Want to makemore of your own homemade products?
Homesteading Family’s Handmade Home course covers soapmaking with recipes for dish soap and a myriad of different bar soaps, as well as making your own herbal oils and salves. You can get access it through the Homestead Kitchen Community. To see all the classes that Homesteading Family has to offer, click here and then click on the Homesteading Family logo at the bottom of the page.
I took this photo 9 years ago when I started reusing my foaming soap bottles and making my own hand soap. I made a batch of 8 bottles today. My ingredients have changed over the years, but the basics are the same.
Your favorite dish soap + your favorite essential oils + water = soap for pennies!
You can see my original post if you visit the Kitchen Sink page.
Lately I’ve also started adding 1 tbls of aloe gel to each bottle which helps keep your hands soft and makes the soap feel silky like the fancy soaps you buy at the mall. I vary the oils I use. Lately it’s Tea Tree and Grapefruit. I also like lemon and lavender, orange and clove (just one drop), geranium and pine. Be creative and experiment with your own favorite scents.
The essential oils you use also add disinfecting properties. Many people think that soap disinfects. This is a misconception. Soap actually does not disinfect inasmuch as it changes the pH of your hands. Soap on it’s own is a solvent. It lifts the dirt, grease, and germs and allows them to be washed away with the water. This is why hand washing is so important for fighting COVID-19. But soap, in and of itself, does not kill germs. If you want to add anti-microbial properties to tour soap, this is where the essential oils come in. Oils like tea tree, clove, and lemon are anti-bacterial, and anti-viral. Grapefruit is anti-microbial. So choose yours oils based on their properties and the smells you like.
Have any of you tried the Magnesium Oil recipe from Wellness Mama? I’ve been using it for several years now and recently loaned my friend a bottle to use on her husband’s sore back.
She started using it and found that really helps the muscle cramps that she gets during pregnancy. She says that it’s magic. As soon as she sprays it on she says that the muscle releases. I’ve also used it during pregnancy and though I don’t typically get muscle cramps, I struggle with restless legs and sore ligaments. I’ve found to be especially helpful with my sore muscles with my last pregnancy and in terms of mobility – the aches and pains disappeared and I didn’t even feel like I was pregnant. So, make up your own magic potion for sore muscles. Why suffer? Give your muscles what they need – extra magnesium! (Note: magnesium oil can sting when first applied. Do not use on broken or cut skin or apply after shaving.)
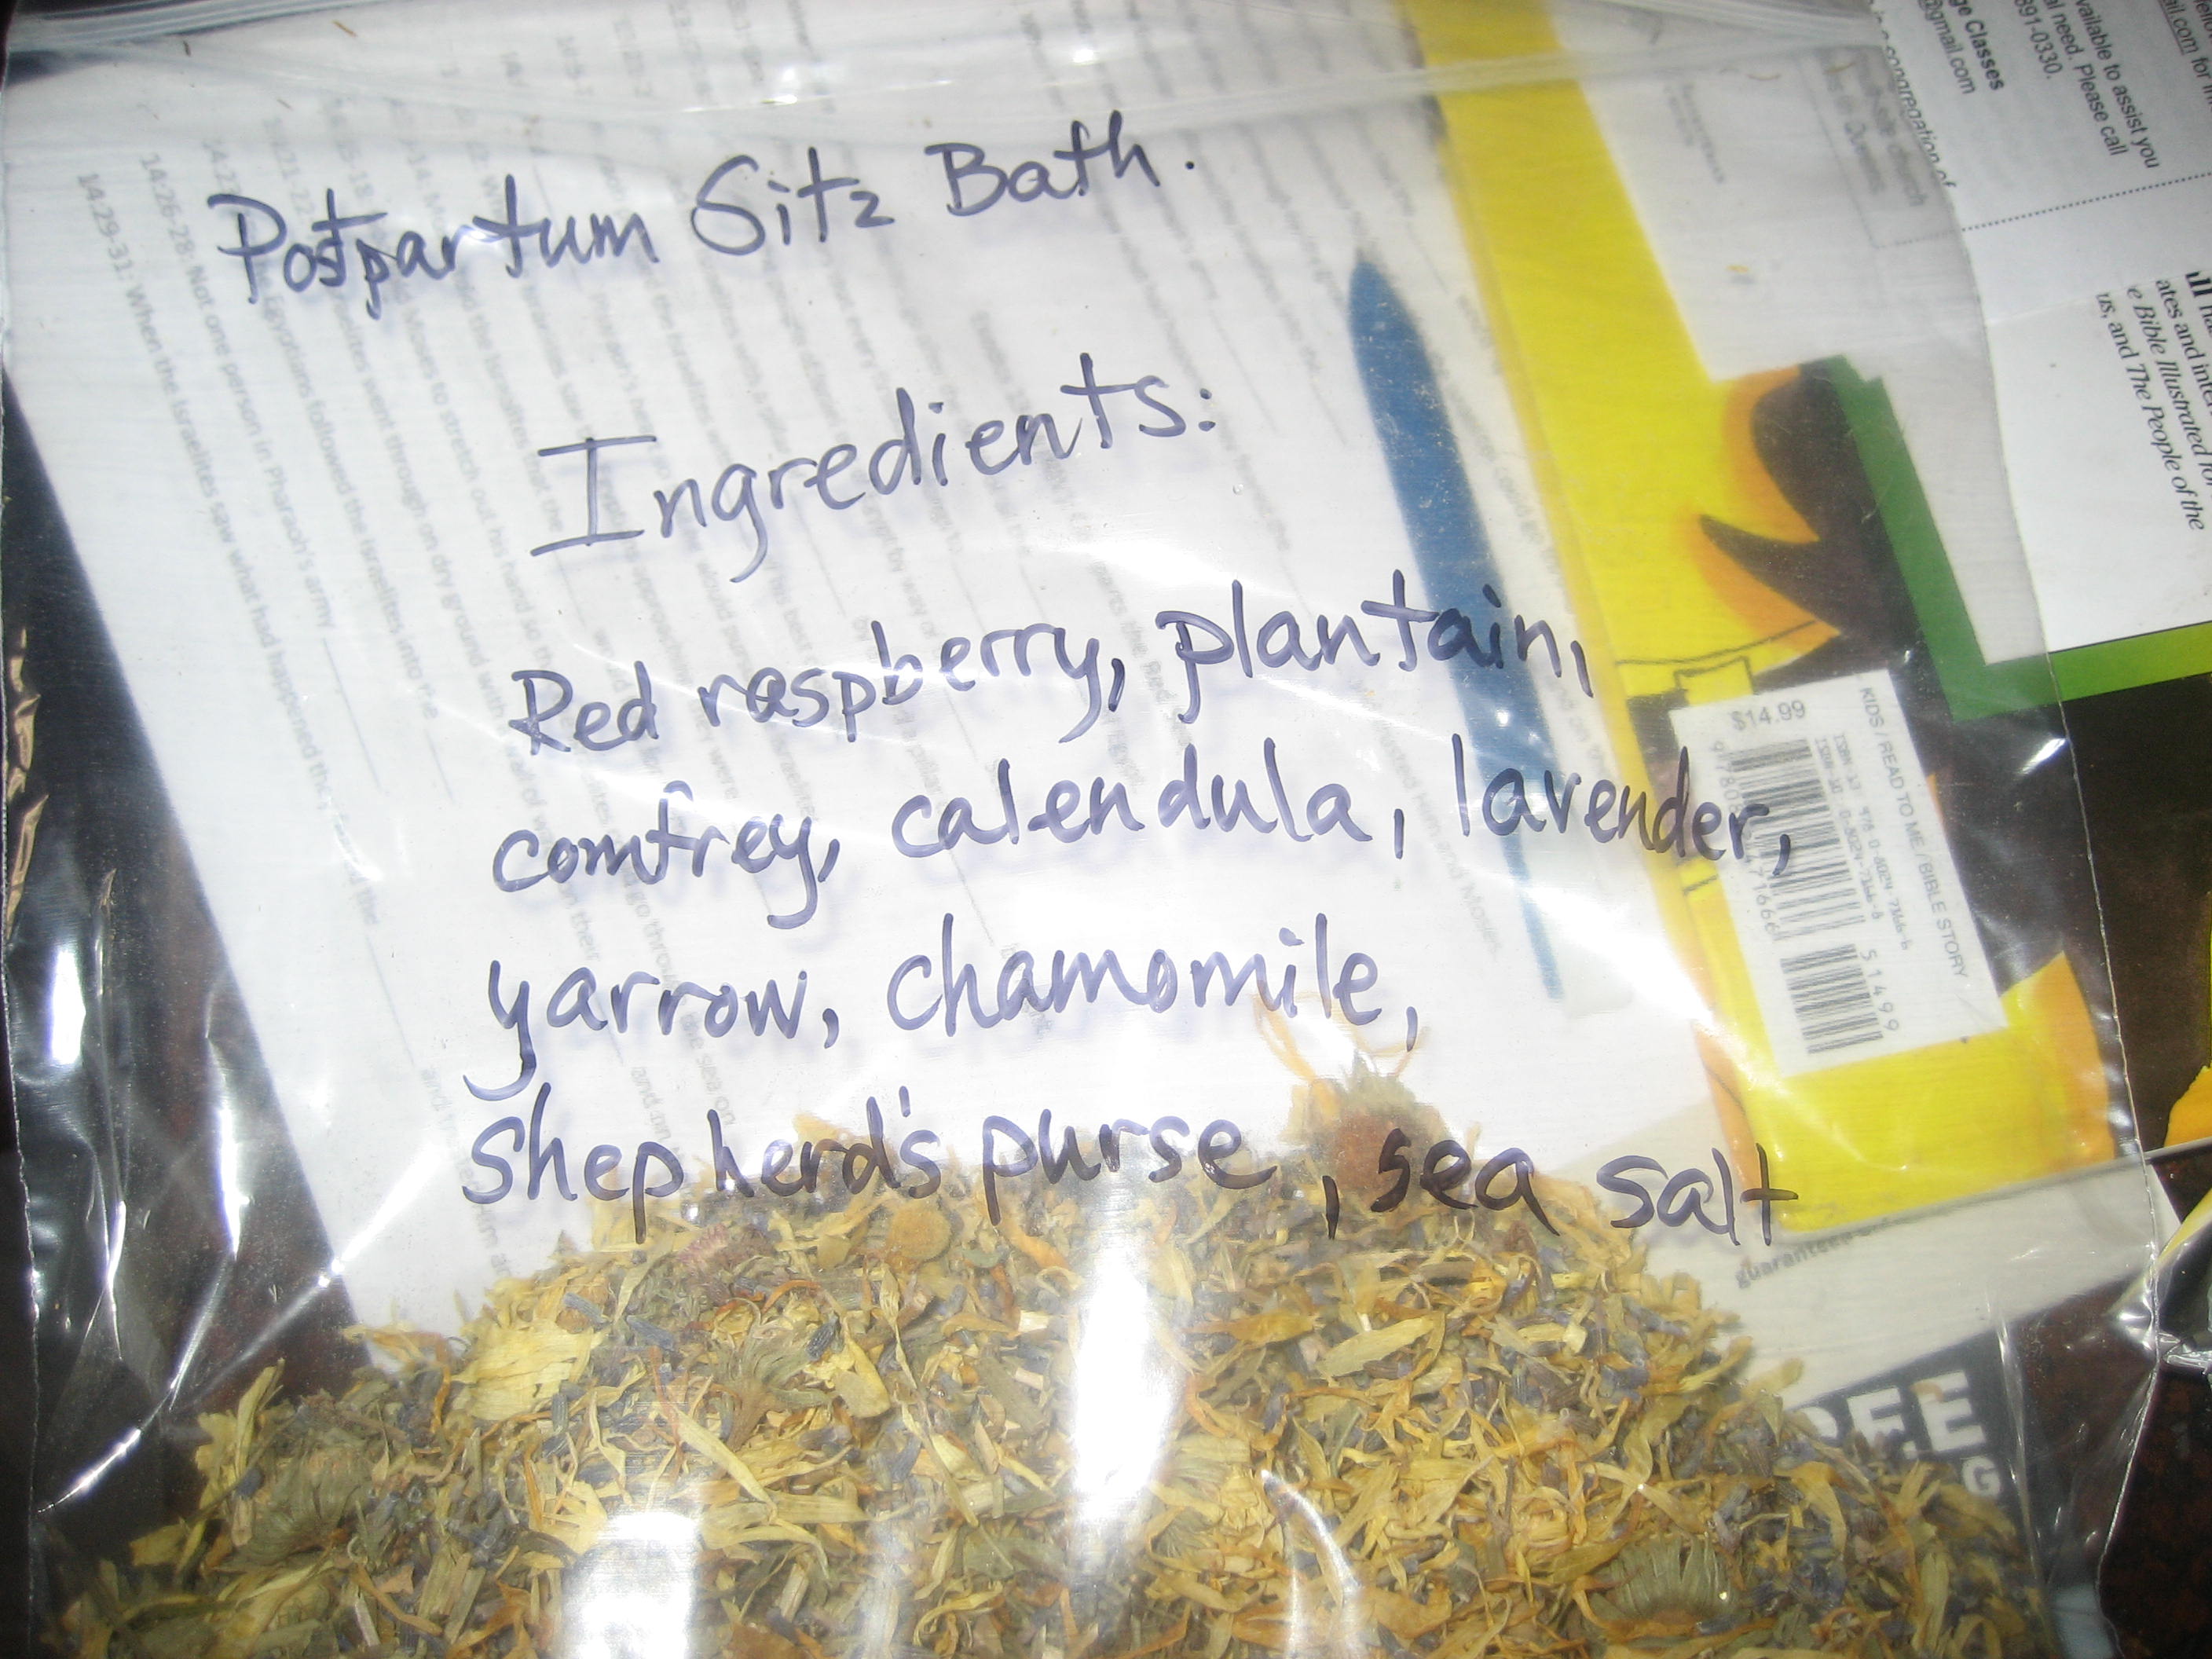
I’ve been mixing this up a lot lately. Three friends have had babies in the last few weeks. I didn’t discover herbal sitz baths for postpartum use until my second child. This is one of my favorite remedies. It makes a great gift for a new mom. It really helps speed and facilitate postpartum healing. Be sure to bathe the baby too. This mix will help disinfect and heal the baby’s cord stump.
All of these herbs are helpful in some way. Opinions may vary, but I think the most important to postpartum healing are shepherd’s purse, yarrow and red raspberry. But, if you don’t have one of the herbs below, that’s okay. They are all beneficial in some way. Just omit the ones you are missing and substitute more of one of the others in the list. Keep in mind though that lavender, yarrow and shepherd’s purse are fairly potent and should not be used in excess. Use the others as the base herbs and add lavender, yarrow and shepherd’s purse in moderation. A little of those goes a long way. Also, chamomile and yarrow should be avoided if you have an allergy to sunflower, safflower or dandelion.
4 parts Red Raspberry Leaf
2 parts Plantain
2 parts Comfrey
2 parts Calendula
2 parts Shepherd’s Purse
1 part Lavender
1 part Yarrow
1 part Chamomile
1/2 -1 tsp. Sea Salt
To use, steep one cup of the herb mix in four cups of water to make a strong tea. Strain the herbs an add the tea to your bath water. You can also add this to your peri-bottle and apply after you go to the bathroom to disinfect and heal.
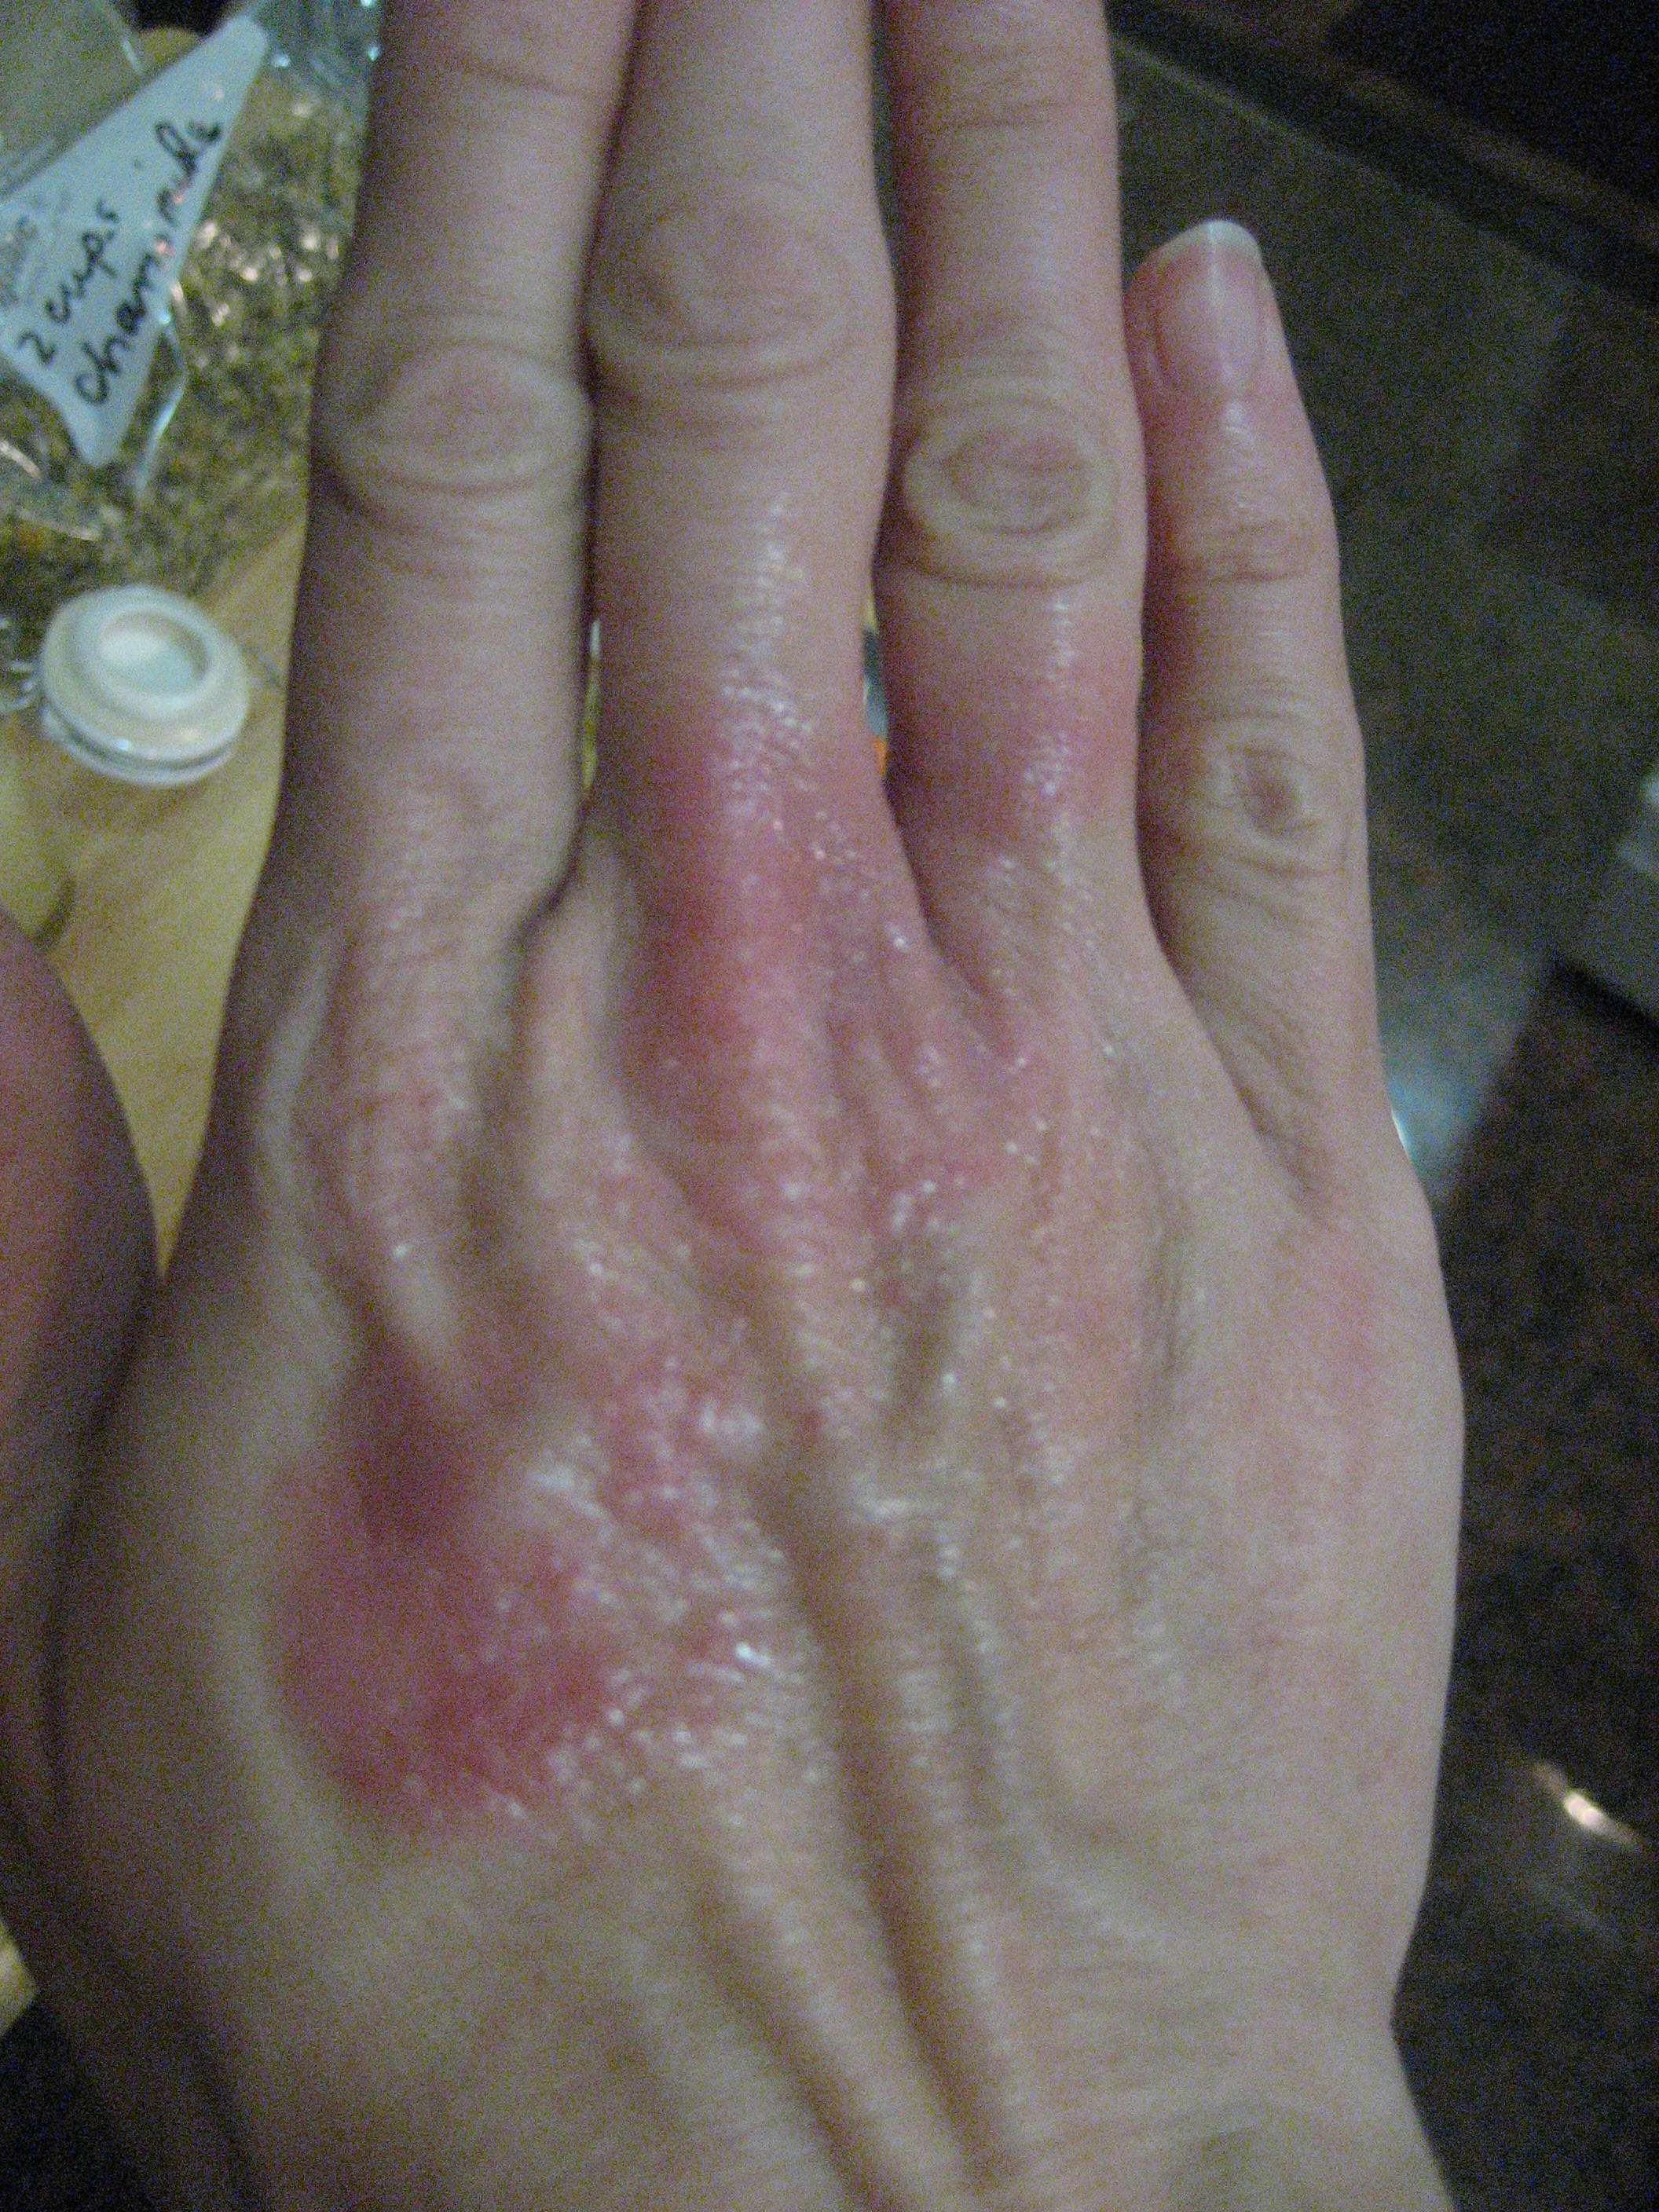
I have some pretty bad eczema that flares up during times of stress. It’s been a problem on and off for the past year. If didn’t know it was eczema at first. Actually, I thought based on my symptoms that I might have an auto-immune disease. I had coin shaped red patches that flared up on my legs, arms and hands. I struggled and struggled for a long time to find a remedy that would help it and found nothing. That’s when I broke down and finally went to the dermatologist. They identified it as “numular eczema” and gave me a prescription for a low-level steroid cream to use when it flares up. I used it initially to get a handle on it as it was getting out of control and the spots were spreading to new places. Since then I’ve tried to only use it during particularly bad flare ups but I’ve still been at a loss to find a remedy that actually helps it besides the steroid cream the doctor gave me. Most natural remedies I’ve tried have actually inflamed it and made it worse. Particularly oils. Any type of oil or oil based remedy makes it worse and not better. This is particularly true of essential oils but also of very basic oils like olive oil, almond oil, coconut oil, etc.
In the past year I’ve tried pretty much everything you can think of to help improve this eczema from topical remedies to diet changes to traditional medicine. My particular form of eczema is stressed based. I admit – it’s been a stressful year. So, my eczema comes and goes and waves but since this ailment began it has never completely disappeared. It’s gotten better for periods of time and then worse again. I eliminated various foods (sugar, caffeine, etc.) to see if that made a difference. It didn’t. In fact, the doctor told me that this particular form is not related to diet like many forms of eczema is, but instead is the body’s direct response to stress.
While it was relieving that my condition was only eczema, it was not particularly encouraging that it was related to stress since I can’t exactly eliminate that from my life. Life is life right? It’s stressful sometimes and you can’t always remove those stressors. I also suspect that my flare ups are related to hormone fluctuations. Also I thing that I can minimally control. So, I kept trying things and I think I’ve finally landed on a couple of things that are causing my eczema to actually heal and improve.
As I started researching further I looked specifically for herbs that have steroid-like actions and properties. I found three. Then I started experimenting with a medium that I could use to apply these herbs that wouldn’t aggravate my eczema. I found two. Here are my solutions that seem to be helping my eczema.
1. Powdered Herbal Paste: yarrow flower powder, lavender flower powder, turmeric powder, bentonite clay. Yarrow is a very powerful healing herb. Lavender has anti-histamine and healing properties. Turmeric has strong anti-inflammatory properties. Bentonite clay is cleansing and toning to the skin. Mix all the powdered herbs and the clay. Store the combined powder in a glass jar. When ready to apply, remove a small amount of powder and mix with a small amount of water in a glass container to make a medium textured paste (not watery, but not like mud). Apply with a popcsicle stick to affected areas of eczema and leave until it dries. Gently remove with a washcloth and warm water. If this paste feels too drying to your skin, remove the bentonite clay and make a paste with just the powdered herbs. This paste can calm a flare up that is dry and scaly. Note: Turmeric stains clothing yellow so avoid getting the paste on your clothes.
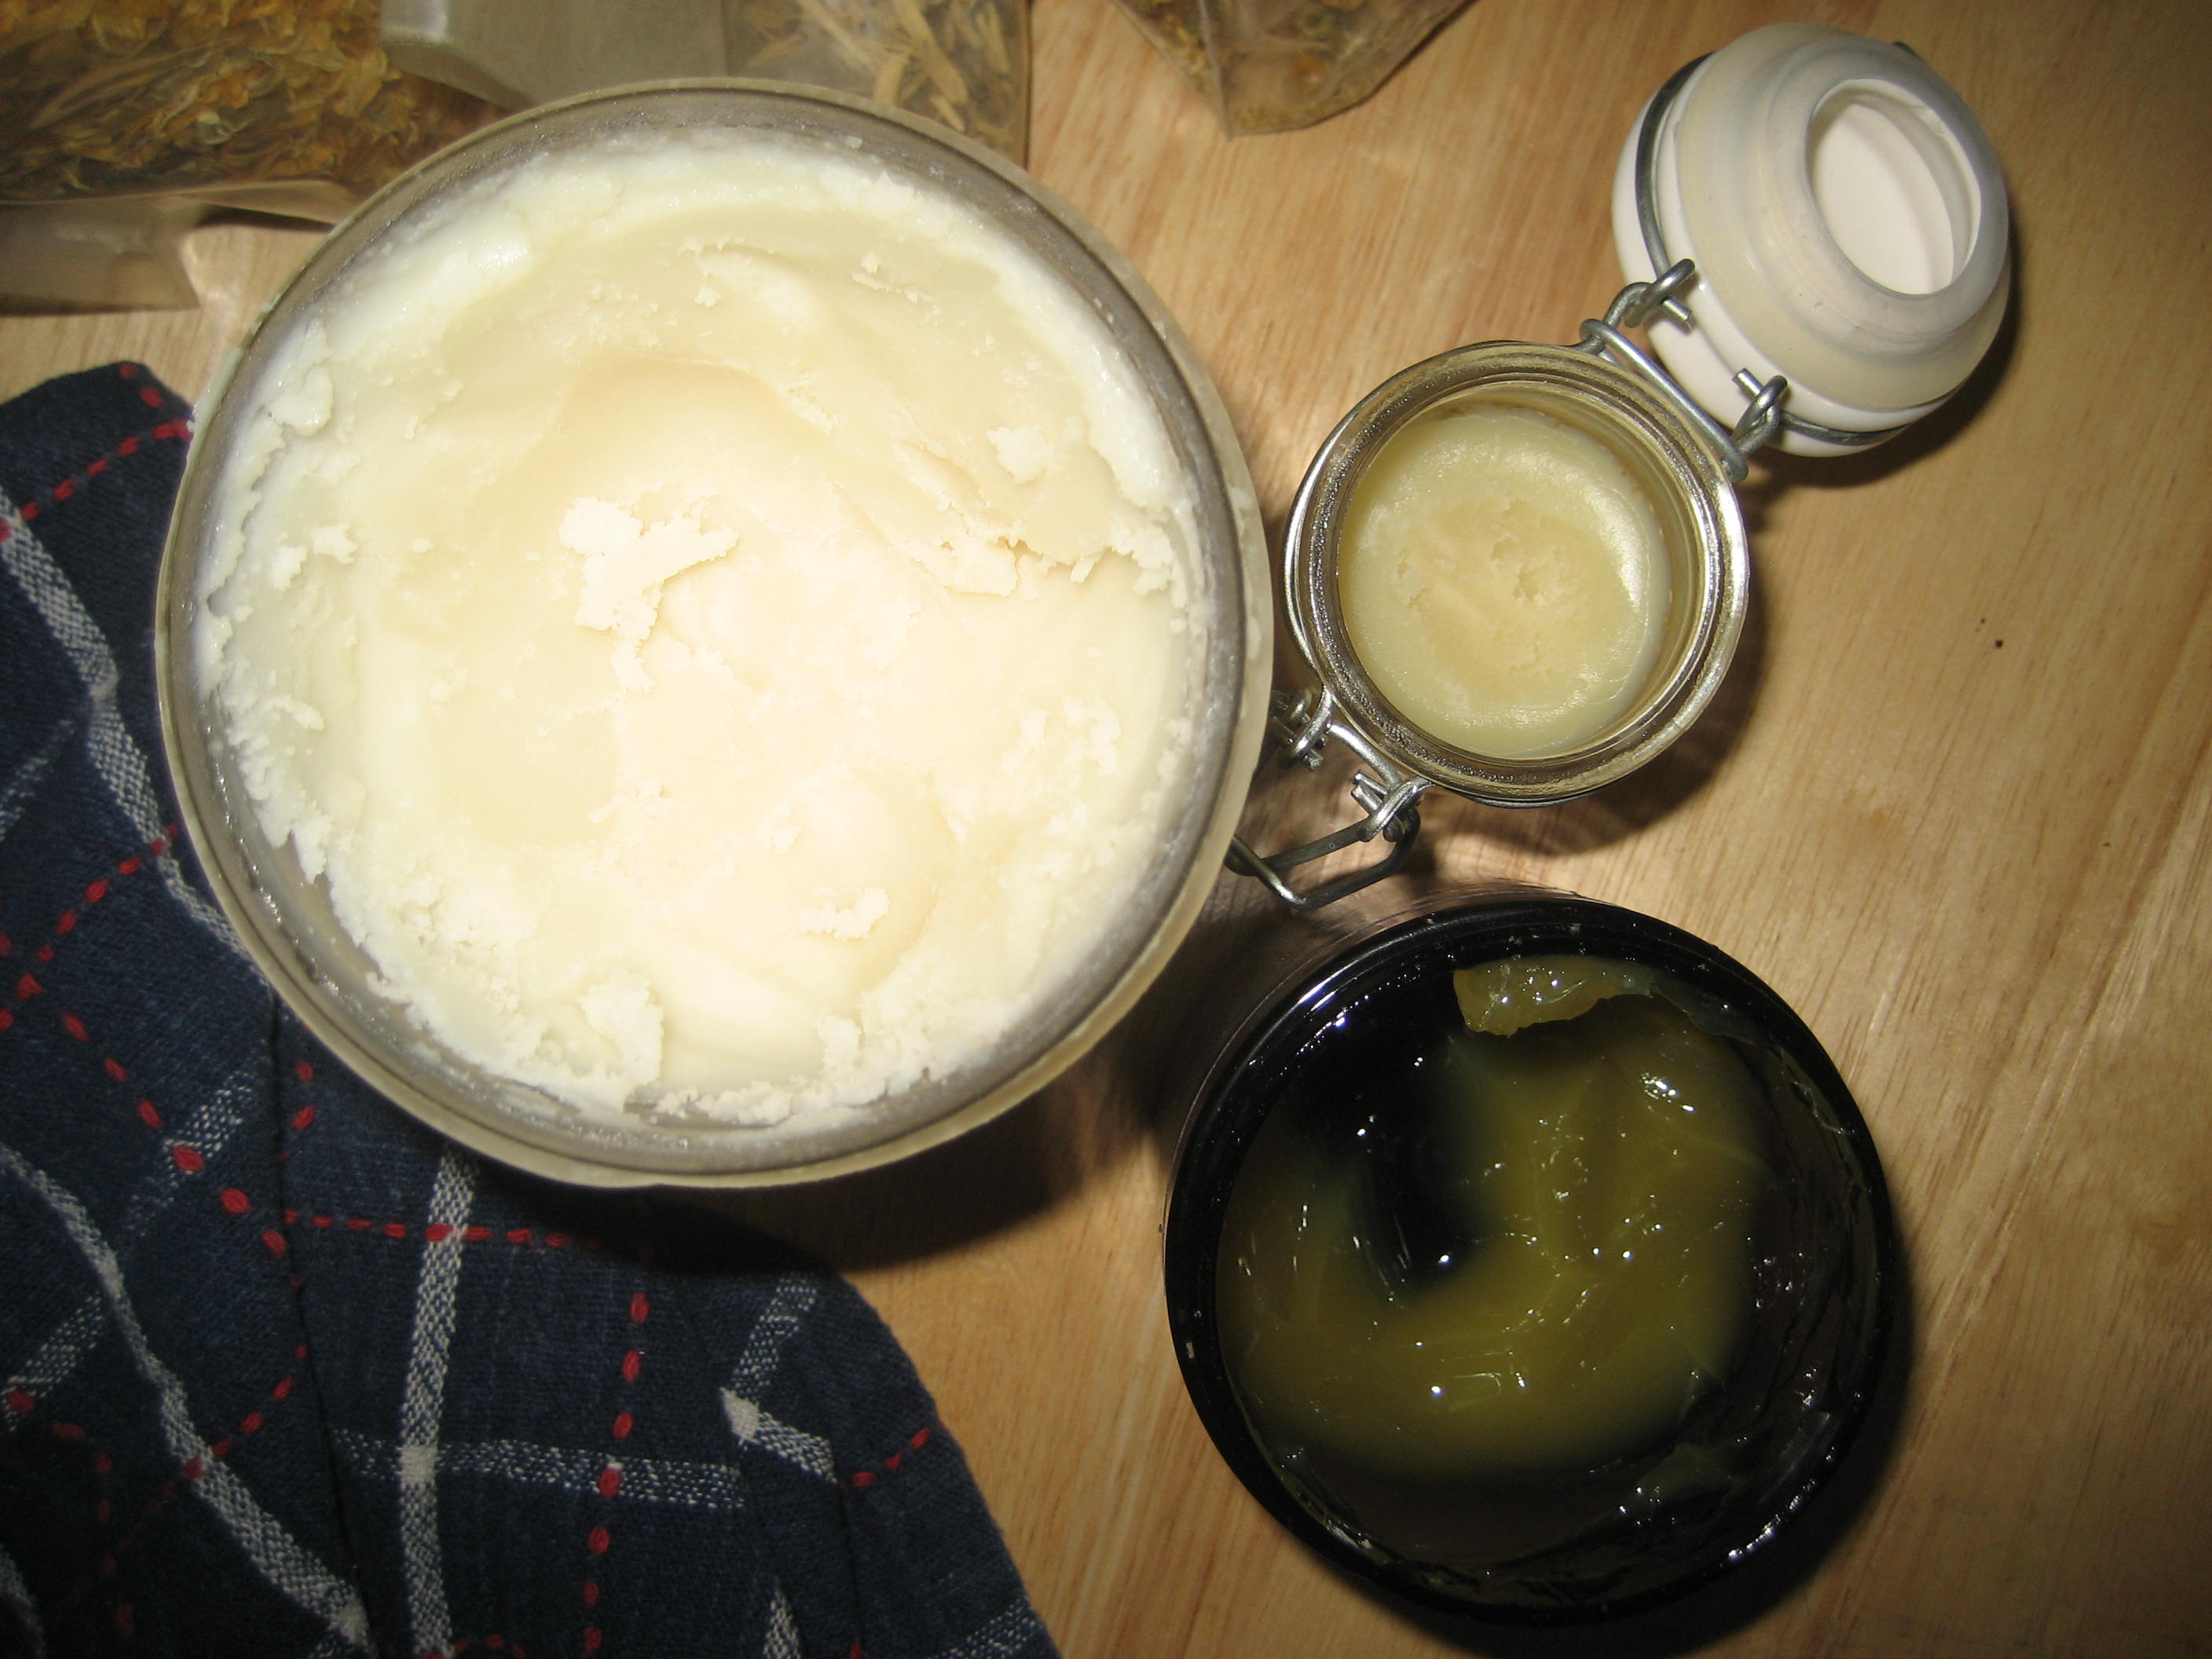
2. Natural “Hydrocortizone” Cream: I know, I know…. Combining the words “hydrocortizone” and “natural” in the same sentence is an oxymoron right? Well, here we will combine the three herbs that have naturally occurring “steroid-like” properties with the two mediums that did not aggravate my eczema – tallow and lanolin. Tallow is the rendered fat of beef. It is a fat that is solid at room temperature and has historically been used for skin ailments. I had heard and read that it was good for eczema but had never had an occasion to try it. Well, I finally was able to get my hands on some grass-fed soup bones and I made some. I was pleased to see that it did not aggravate my eczema like all the other oils and fats did. However, alone it did not particularly improve it either. I also found that lanolin was not aggravating. I saw some improvement from applying lanolin overnight on the worst spots and putting a cotton glove on my hand so that the lanolin didn’t rub off while I slept. I was always better in the morning but then would flare up during the day from washing my hands, heat from cooking ,washing dishes, etc. So, for this remedy a combination of lanolin and tallow will be the medium in which we are going to infuse the steroid-like herbs. Those are chamomile, licorice root and calendula flowers. To make this cream, put your lanolin, tallow, chamomile, calendula and licorice root in a jar and loosely cover with the lid. Use 1 part lanolin to 3 parts tallow. For the herbs use a 1:2 ration of dried herbs to fat/lanolin. Set the jar in a sauce pan on top of a washcloth and fill with about 2-3 inches of water. Simmer until the tallow and lanolin have melted. Swirl the herbs around in the jar to cover them all. The herbs should be fully immersed in the tallow/lanolin mixture. If they aren’t add some more tallow and lanolin. When everything is melted, simmer for about 5 minutes more. Turn off the heat. You how have infused the herbal properties of the chamomile, calendula and licorice root into the tallow and lanolin. Strain immediately while hot through a wire mesh strainer into a glass storage container. For convenience, I also poured some into some old, empty lip balm tubes so that I can easily take this with me when we are out. I find that environmental factors make my flare ups worse. We took the subway the other day and something down there made the eczema on my hand flare up from being almost completely clear to a red, itchy mess. So I plan to apply this all day even when we aren’t at home. Allergy Note: If you have allergies to ragweed, dandelion, sunflower or safflower you may want to omit chamomile as it is in the same family.
tallow and lanolin melting and herbs infusing
tallow, lanolin and my little jar of eczema salve
I hope these remedies help your eczema stay clear. It’s making mine better already.
Disclaimer: This is not medical advice. Use at your own risk. Author takes no responsibility for the results of using these remedies. Read full Disclaimer here.
Note: Some links in this post are affiliate links.
If you’ve read my blog at all then you know that I have a kid who reacts to lots of things – including sunscreen. A fun-filled day trip to Coney Island resulted 2 weeks of no sleep due to the itchy rash that he got where ever we had put sunscreen on him. What does that mean? No more sunscreen for us! So, what’s a mom to do? Make her own of course.
I immediately went to the internet and researched all the homemade sunscreen and sunblock recipes. I came away knowing that I wanted to go with a zinc oxide based sunblock since that seemed to have the best safety profile and effectiveness ratings. However, I didn’t want to spend the money on a huge bag of zinc oxide powder from Amazon. (Note: It is much more affordable now than it was when I was looking 3 years ago and available in smaller bags.) So, necessity breeds creativity here. I was in the drug store and realized that Desitin is 40% zinc oxide. Immediately I knew I had instant sunscreen here.
Now, you may be thinking, “Wait a minute. There is no way I’m rubbing that white gooey stuff all over myself and my kids. What a mess!” And you would be right. Yet, never fear. All you need is 2 minutes to turn that Desitin into a smooth, lotiony sunblock.
Most zinc oxide sunblocks with an SPF of 30 are 20% zinc oxide. Which means that if you mix equal parts Desitin and your favorite lotion, it cuts the percentage of zinc oxide in the mixture by half and you have an instant SPF 30 sunblock! It’s that easy.
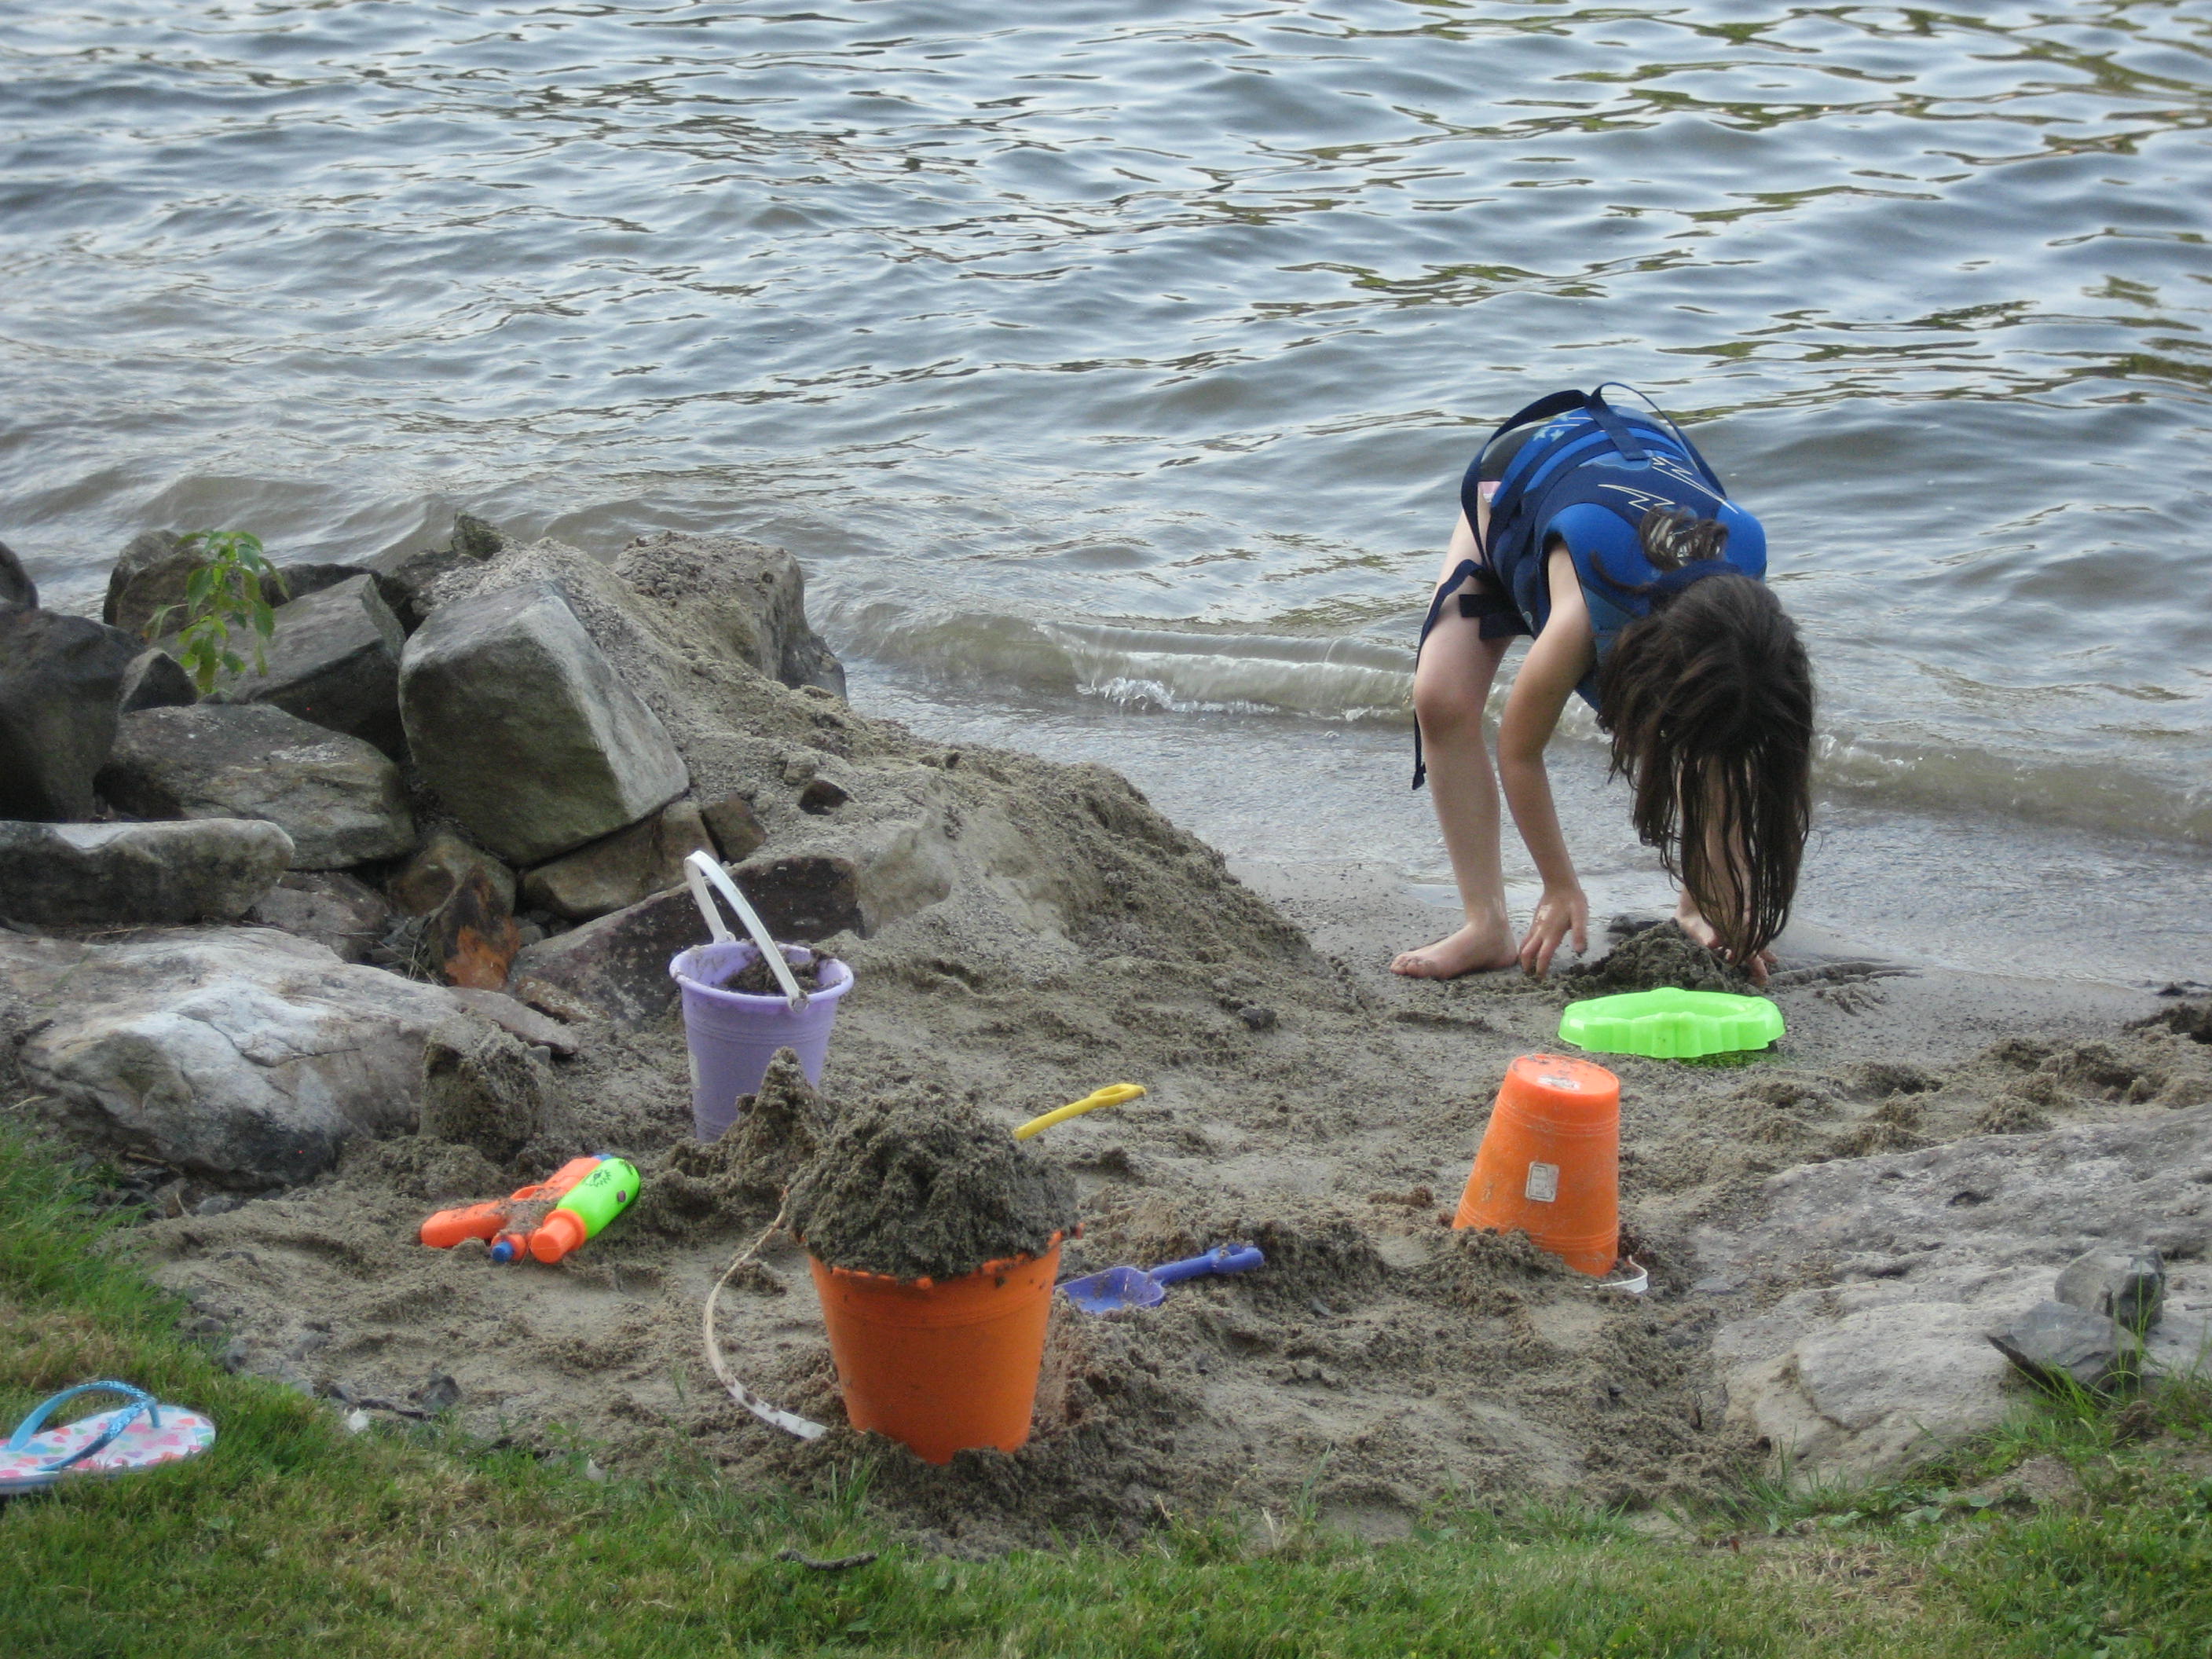
Playing at the lake. She would play there all day if we would let her.
I’ve used this Desitin sunblock with my homemade lotions for the past three years and it works great. I find that this sunblock is fairly waterproof, but if you want to improve that “waterproofness” of your mixture then add a little bit of liquid lanolin to it. Our oldest loves the water and has played for hours in the full sun without a sunburn. So, what are you waiting for? Everyone run to their medicine cabinet and pull out that tube of Desitin and start mixing!
If you want to make your own lotion first to mix the Desitin with, you can visit the Herb Shed and scroll down for directions and more sunscreen tips and recipes. If you use regular lotion and find that you can’t get the Desitin to blend well, then melt the two ingredients (lotion and Desitin) in heat proof bowl over a small saucepan (double boiler technique) until it is blended. I like to mix it with a popsicle stick so that I can just throw it out when I’m done and don’t have to worry about cleaning the mixture off of my spoons. The other nice thing about this recipe is that you can make small batches easily so that you don’t have to worry about unused sunscreen, or you can make a large batch if your family goes through a lot of sunscreen.
Here’s to a happy and sunburn free summer!
Note: Zinc oxide can stain dark clothing so take care when applying it. Also, individual results can vary so use with care and common sense. The author is not responsible for any adverse reaction or sunburns if you choose to use the recipe recommended here. Read my full Disclaimer here.
Visit the Herb Shed if you want to make a homemade lotion to mix with your Desitin.