

This has become my favorite loaf to make. It’s so big, and tall, and luscious. It’s the perfect loaf for anyone with an Emile Henry Italian loaf baker. Give it a try with the recipe below and let me know how it turns out. Post a picture of your loaf in the comments!
Sourdough Sandwich Loaf Recipe:
Begin with approximately 2 cups of activated sourdough starter. This means that the starter should have been fed within the last 2-3 hours. I don’t specifically measure. I just eyeball it.
Add the following…
1 1/2 tsp salt
2 tbls honey
1 1/2 cups water
Stir all this into the starter.

Next add your flour. If you are using an all purpose starter, add the all purpose flour first. If you have a whole wheat starter or other whole grain add the whole grain flour first. You want to be sure that the flour that your starter is used to being fed is mixed into the starter well before another type of flour is added. So….
2 cups all purpose flour
1 3/4 – 2 1/2 cups whole grain flour
The whole grain flour could be whole wheat, spelt, etc. I use freshly milled flour.
The reason I give a range here on the flour is that this can vary for you depending on how thick/thin you keep your starter. I typically use about 2 cups of whole grain flour.
The other thing to keep in mind is that this is a fairly stiff dough. For those of you used to high hydration loaves, you may feel like you are over flouring here.
After you have mixed in the flour that your starter is typically used to being fed, then mix in the other flour one cup at a time. You need to read your dough after the first cup of flour. You are going for a dough that is fairly stiff and just cleans the side of the bowl.
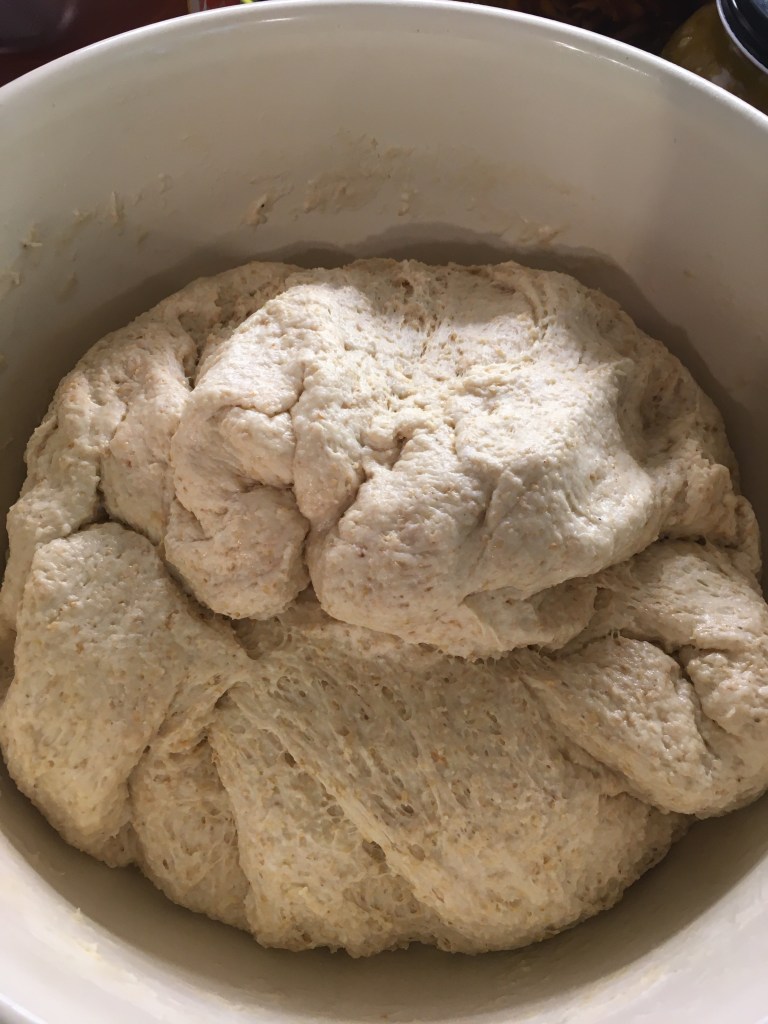
After you think you have added enough flour, covet the bowl with a wet towel and let the dough rest for 30 minutes.
After the first 30 minute rest, you want to perform 4-5 sets of stretch and folds every 20-30 minutes. To execute a stretch and fold, reach under the dough and pull a section of the dough up and fold it toward the center of the dough. Do this all the way around the circumference of the ball of dough. Let the dough rest for at least 20 minutes, and perform another stretch and fold until you have done it 4-5 times.
Now give the dough a final 20 minute rest and while you prepare your loaf pan.


I use an Emile Henry Italian Baker (affiliate link). As you can see, this is an extra-large loaf pan. You could use an oval Dutch oven to make this loaf, or divide the dough into two regular sized loaf pans. You could also cut the recipe in half if you only want to make one loaf in a regular sized loaf pan.
If using loaf pans, butter or grease your pans well.
After the dough has completed its final rest (divide it in half if using two loaf pans) and then flatten it into a rough rectangle just slightly smaller than the length of your pan. Roll it into a log shape, pinch the seam closed, and place it in the loaf pan for its final rise. If you have the EH Italian baker, cover the dough with the lid while it rises. (Note: if baking in a Dutch oven, let your dough rise in a covered, oblong banneton, and use parchment paper to line your Dutch oven with rather than greasing it.)

Let the dough rise until it reaches the top of your loaf pan or banneton.
Once it had risen to the top of the pan, preheat the oven to 400 degrees.
Once the oven is hot, place your loaf pan in the oven and bake covered for 30 minutes. Then remove the cover and bake for 15 more. If baking in regular loaf pans, you can bake uncovered, just watch the loaf for the last 15 minutes to be sure that it is not browning too quickly. If you find it browns too fast, reduce the heat to 350 for the last 15 minutes.

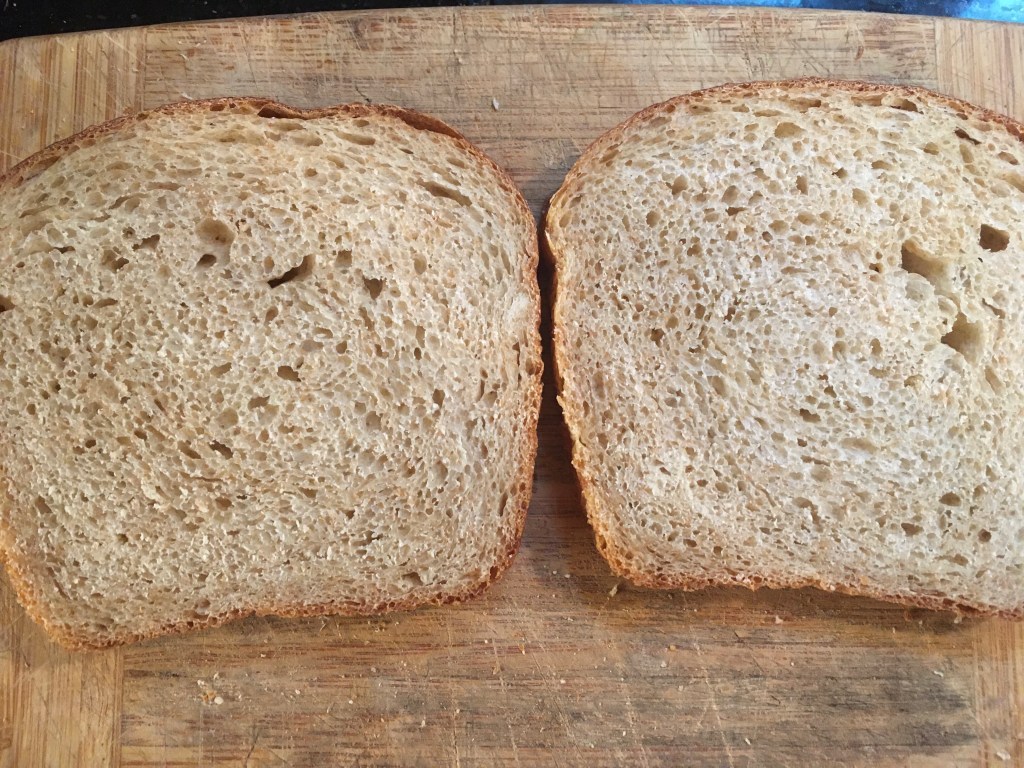
Cool completely on a wire rack and enjoy your beautiful loaf!

Printable Recipe:
2 cups sourdough starter
1/2 tsp salt
2 tbls honey
1 1/2 cups water
2 cups of flour (same as starter)
1 3/4 – 2 cups flour of choice
Mix all ingredients well. Perform 4-5 sets of stretch and folds. Shape and place in loaf pan for second rise. Preheat oven to 400 when bread reaches the top of the pan. Bake for at least 30 minutes or until golden brown.
My Favorite Loaf Pan and Grain Mill:
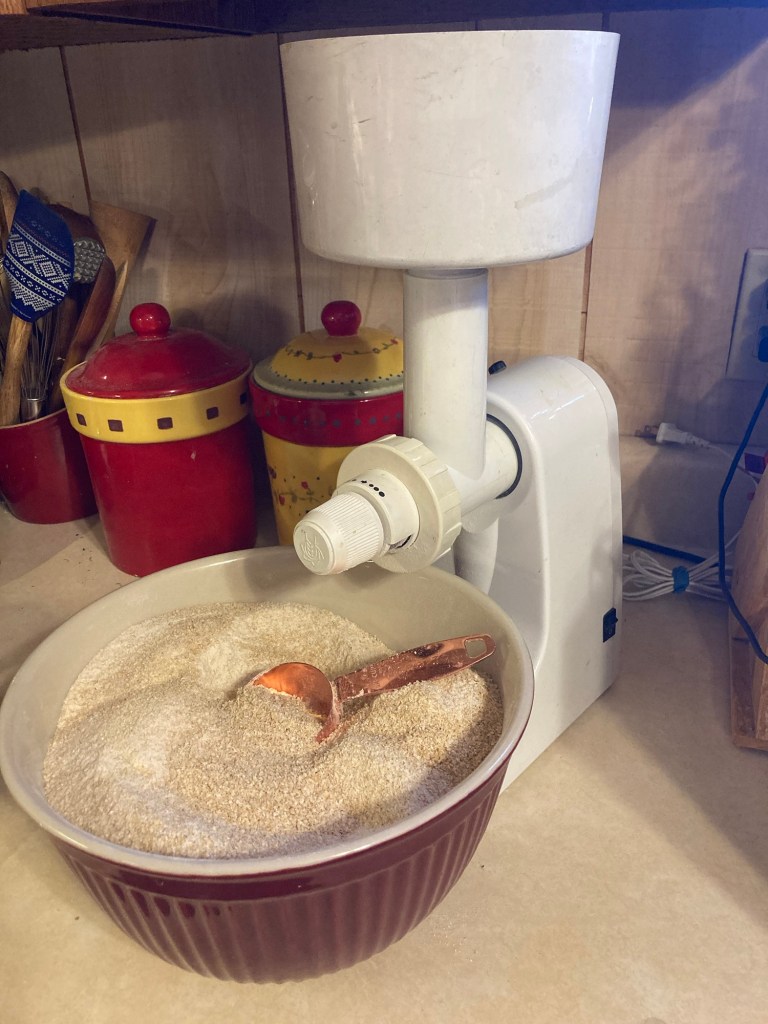
If you are new to sourdough and want to dive into milling your own grains, the Family Grain Mill is my favorite mill. It is a workhorse. Mine is a hand me down from my mom. It is 20 years old and still going strong. You can buy it with a motorized base or a hand crank which is nice if you live in an area prone to power outages. And as far as grain mills go it is one of the most inexpensive on the market. Still an investment but much cheaper than some of the fancier ones. It’s simple, strong, and will last you for decades.
And if you want you want to try the loaf pan I feature here in this recipe – it is worth every penny. The Emile Henry Italian Baker is expensive, and normally I err on the side of economy but I love this pan so much! It’s a pleasure to bake in, perfect if you have a large family, and baking the loaves with a cover really does give them beautiful rise and shape.
Need a Gluten-Free Recipe?
Try my Gluten-Free Seedy Bread. But if you really want more info on baking gluten-free yeast and sourdough bread, or the basics of ancient grains, check out the book I wrote for Homesteading Family called The Art of Gluten-Free Homemade Bread. It’s written specifically for families with multiple food sensitivities like mine. I assumes that you’ll need to tweak the recipes to match your dietary needs and it teaches you how to do it.
This post contains affiliate links.
